Many riders struggle with turning their horse accurately, often with one shoulder or the other taking over and bulging through the turn. This is usually because all of the focus is given to the destination rather than the turn. The following exercise will bring awareness to how you’re asking your horse to turn so that you ride his whole body rather than just directing his head and neck.
Figure-8 Pole
The setup for this exercise is fairly simple. You just need four poles—bonus points if they have a center stripe—and two standards (or other jump supports that are safe to use).
Start with one pole on the ground with a standard on either side, and the other poles off to the side out of the way.
After a brief warmup, pick up a trot and begin a figure-8 shape that passes over the center of the ground pole. This figure-8 should be ridden with a straight line in between the circles so that you have an opportunity to change bend, similar to two capital letter D’s back-to-back.
Make the circles medium in size, large enough that your horse isn’t having to overly exert himself, but small enough that it’s easy to feel him driving from the inside hind leg. This is where the phrase “inside leg to outside rein” comes into play, as you must be sure to keep your horse on the same track each time and prevent him from falling in, keeping him correctly between the aids.
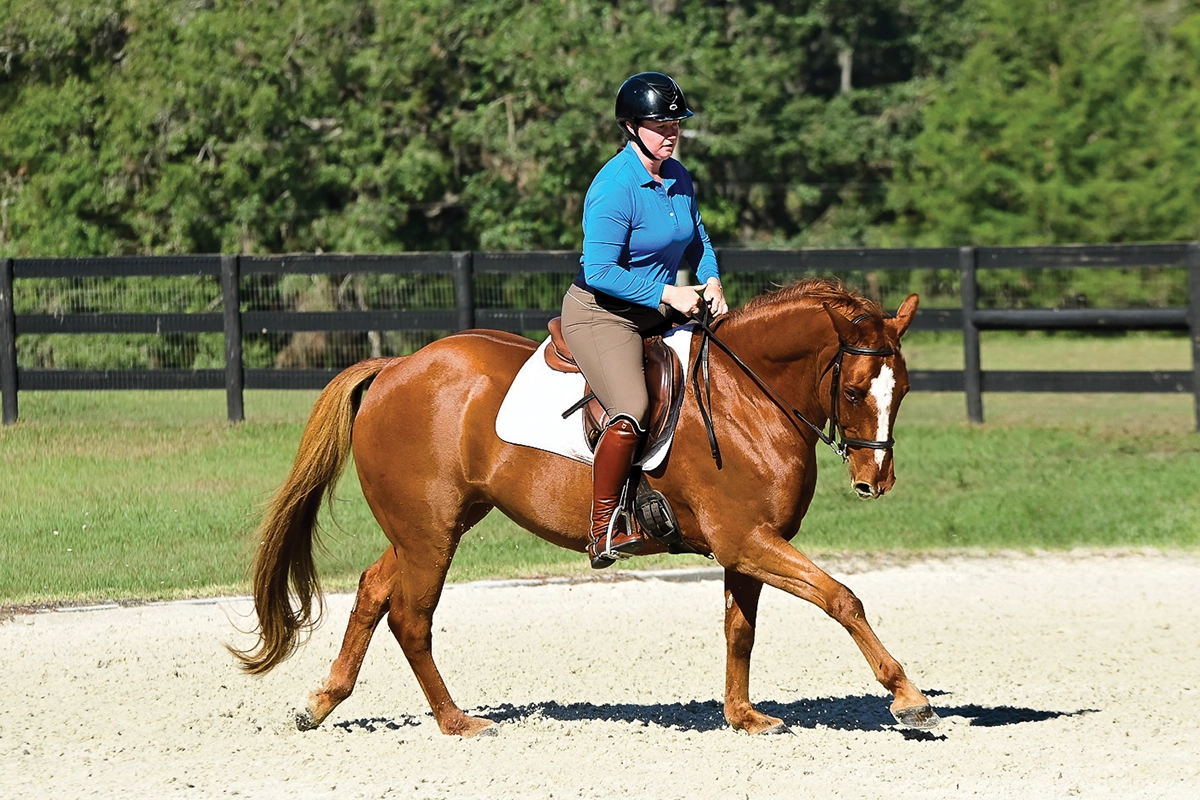
Allison demonstrates riding inside leg to outside rein. Photo by Lauren Terrell
As you change the bend, be sure to begin the new bend with your new inside leg asking your horse to bend at the ribcage. This prevents the common mistake of only riding a horse’s head and neck.
If your horse is struggling with one of the circle directions more than the other, take a moment to stay on a circle in the difficult direction until you find the amount of support he needs to keep from falling in or out. It is completely normal for one side to ride easier than the other.
Adding Canter & Cross-Rail
Once this is going well, move to a canter circle over the pole. Stick to tracking in only one direction, as we will add the need for lead changes later. This is another good test of inside leg to outside rein, as your horse will have more momentum and will need to stay balanced and rocked back onto his outside hind to avoid an accidental lead change over the pole.
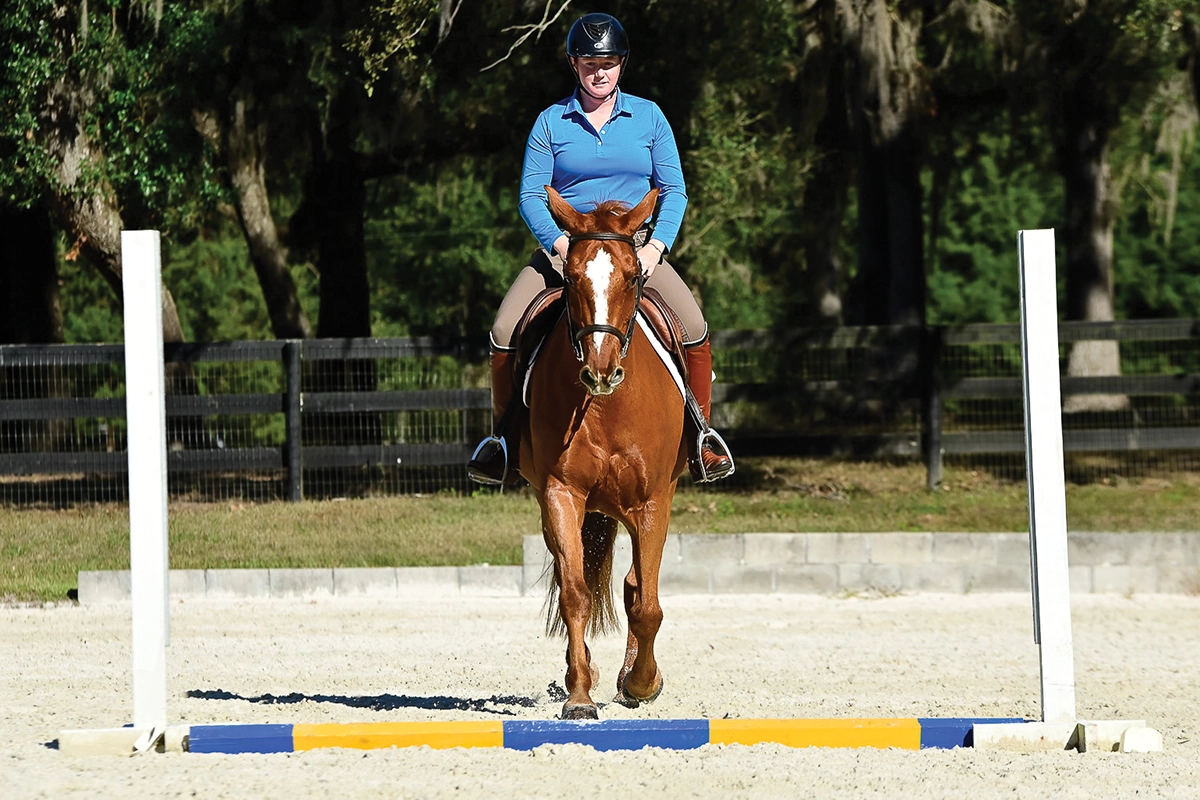
Allison keeps Oakley straight over the ground pole. Photo by Lauren Terrell
After this has been achieved for two to four continuous circles each direction, put a cross-rail where the pole was, with two poles forming a chute leading to the center of the cross-rail on the takeoff side.
Now take a small break from focusing on turning to focusing on straightness, focusing on how riding so many turns and circles has tuned you in to your horse’s natural drifts and small unbalances.
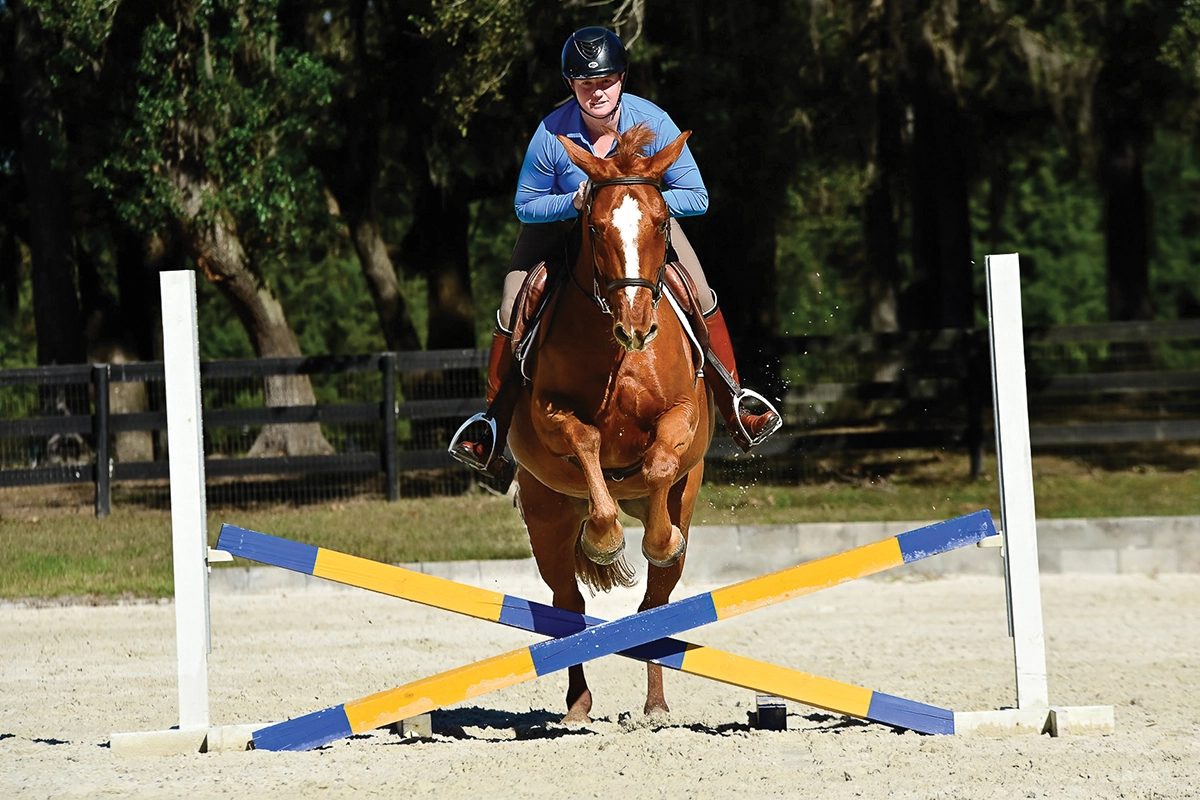
The pair stays straight and centered over the cross-rail using chute poles on the takeoff side. Photo by Lauren Terrell
Pick up a canter somewhere closer to the landing side of the jump. Canter down the long side of the area, thinking about a balanced, uphill canter. Look over your inside shoulder to find a track that will bring you to the center of the jump and allow you to be straight beforehand for about four or five strides.
Keep your horse straight for approach, takeoff, and landing. After cantering straight for four or five strides on the landing, turn in the direction of the lead your horse landed on. If your horse heavily favors one side, you may need to consciously restart the exercise tracking the other direction—but still try not to influence the landing lead.
Jumping at an Angle
If you’re looking to level up, take out the pole chute on the takeoff side and practice some jumps at an angle. It’s important to remember that when jumping at an angle, you will still be jumping the center of the jump, and that straightness is still very much a factor.
Jumping the jump at an angle will require your horse to shift to a smoother, more traditional figure-8 shape, and to land on the opposite lead from takeoff.
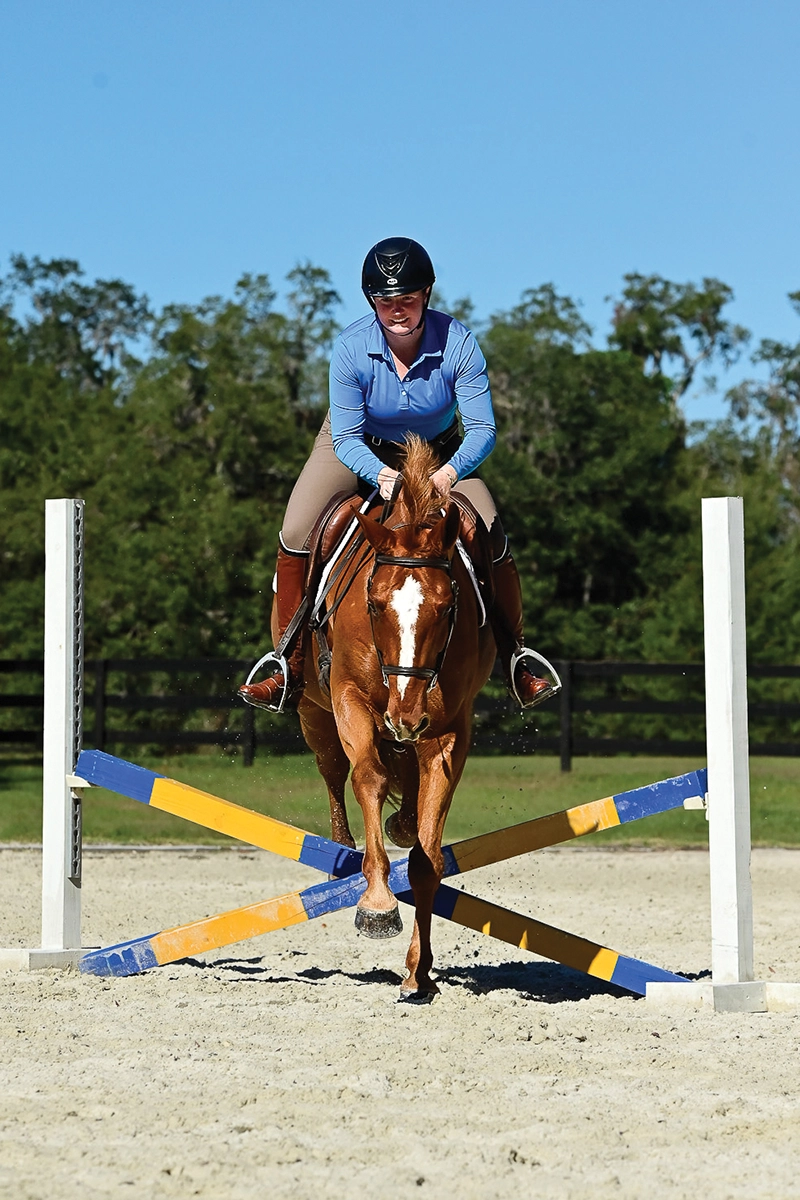
Allison asks Oakley to switch leads over the cross-rail after jumping at an angle without the chute poles. Photo by Lauren Terrell
For example, if riding a right lead canter, you will look for a track that takes off from the left of center and lands to the right of center on the left lead. You will ride slightly past the jump, create a chute with your legs and reins to achieve straightness for approach and takeoff, then look left, pull your left shoulder back, shift your hips right, and gently squeeze the left rein to encourage your horse to land on the left lead.
It’s very important not to pull your horse off balance and cause him to fall on his left shoulder and off of the figure 8-track. If for any reason you or your horse are not ready for landing leads, simply halt on a straight line and then pick up the new lead from the walk or trot.
Mastering these exercises will help your horse become more balanced at the canter and land on the desired lead throughout your jump courses.
This article about exercises to balance your horse’s turns appeared in the May/June 2025 issue of Horse Illustrated magazine. Click here to subscribe!