As equestrians, we put up with a lot of pain. But what about the type of pain that “hurts so good”? That’s how I would describe foam rolling. Most athletes have a love-hate relationship with it, but the love for foam rolling greatly outweighs the hate, especially for this Fit Rider.
What is Foam Rolling?
Foam rolling is basically like giving yourself a massage. It offers a myofascial
technique for muscles, especially in the lower body.
The foam roller is a cylinder that measures 6 inches in diameter and approximately 12 to 36 inches long (longer ones are used for the back). They can range from a soft version best for beginners to a hard, dense foam. Some have ridges or dots (recommended for more experienced users). You can purchase a foam roller at any sporting good store, Target, et cetera.
Why Foam Roll?
Foam rolling can be used for warming up the muscles before a workout or ride, and to relax them afterward. The rolling action improves circulation in your body, which is what helps muscles warm up before exercise and recover afterward. Do your foam rolling prior to stretching because of the warming action; rolling breaks down any knots that could limit range of motion.
Foam rolling offers many benefits. Over time, your muscles start to develop fascia, which are sticky fibers that start to restrict the natural range of motion in some areas of your body. It’s a maintenance exercise for overall range of motion and well-being, but it’s also a great way to relieve the tight muscles that come from riding and help you relax more in the saddle.
Get Rolling
Start on the floor, rolling the cylinder under each muscle group for about 20 seconds before moving on to the next group of muscles. When you run into a tender area, maintain light pressure on it while continuing to roll. Avoid stopping and holding on a sore area.
Here are some popular foam placements for equestrians to try.
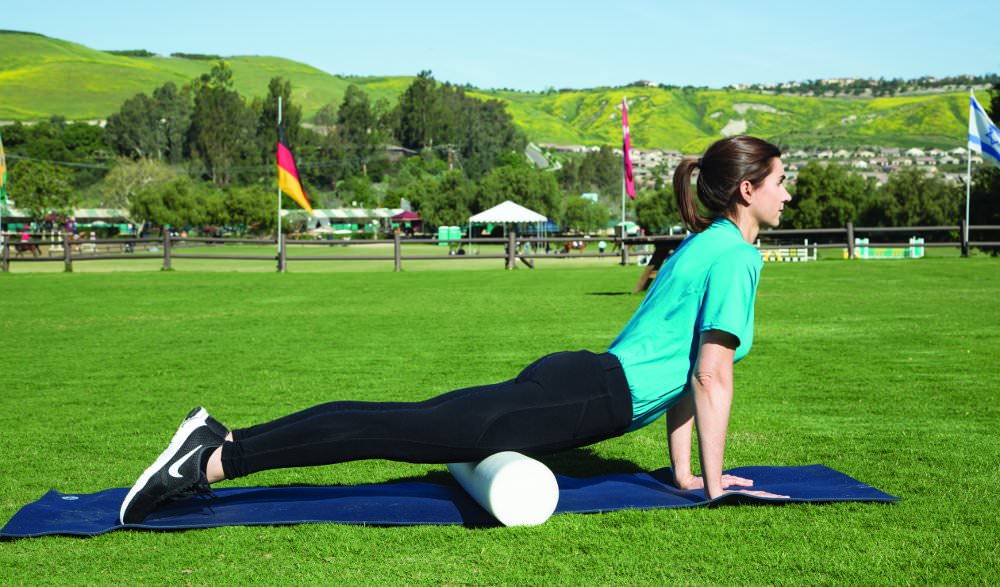
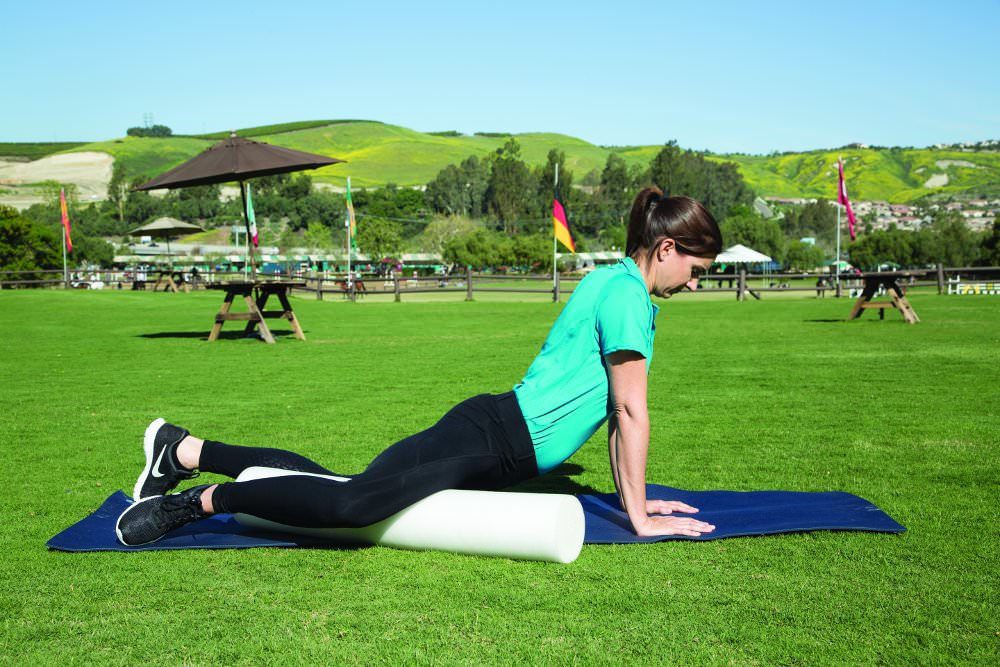
Quadriceps: Lie on your stomach with the roller placed under your thighs and roll up and down from the bottom of your hip to the top of your knee. Your arms will hold you up like a plank position. For increased pressure, you can do this one leg at a time, placing your free foot on the floor (like a spider push-up).
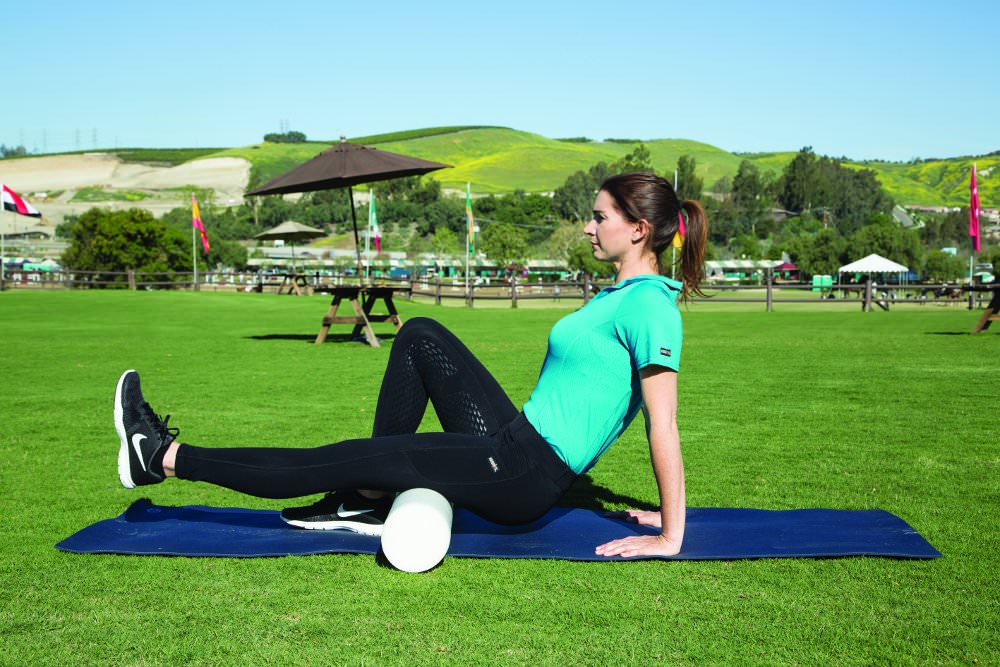
Hamstrings: Sitting on the floor with legs together, straight out in front of you, place the roller under your thighs. Roll the roller from the back of your knees to the buttocks, hands on the floor behind you.
If you want to increase the pressure, roll one leg at a time. This also allows you to turn your leg in and out for different pressure.
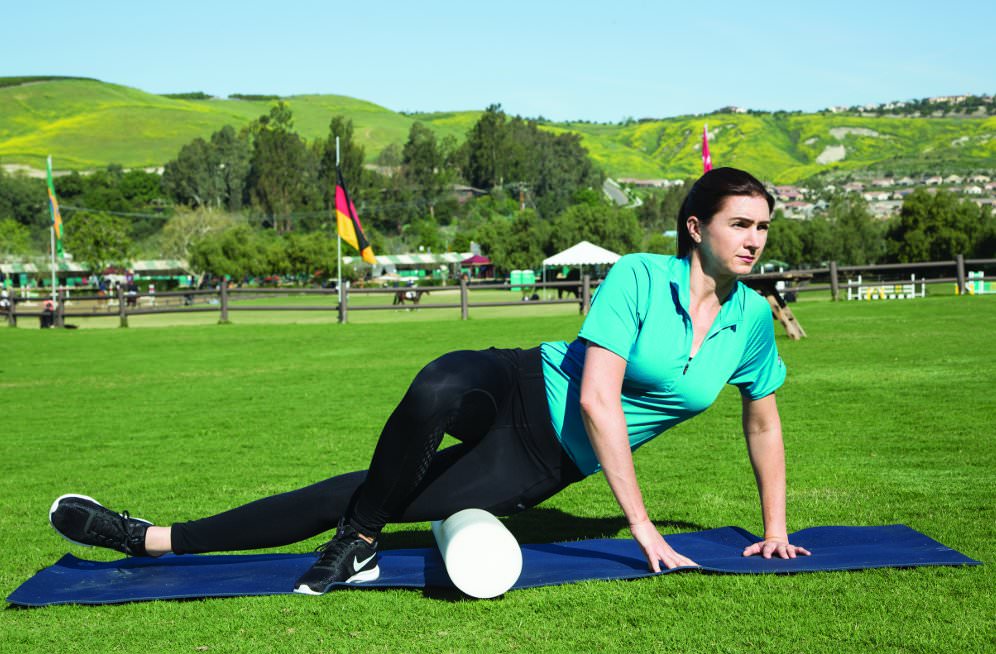
Iliotibial (IT) Band: Lying on your side on the floor, place the foam roller under you, near your hip. Rest your top foot on the floor in front of you (crossing your legs at the knees) for support and lift your upper body up with your lower arm. Move the foam roller up and down along your outer thigh from the point of your hip to the side of your knee. If you need increased pressure, stack your top foot like you’re doing a side plank.
Inner Thigh: Lie on your stomach with one leg extended slightly to the side and knee bent slightly. Place the roller vertically (parallel with your straight leg) under your inner thigh in the groin area of your extended leg, then roll side to side.
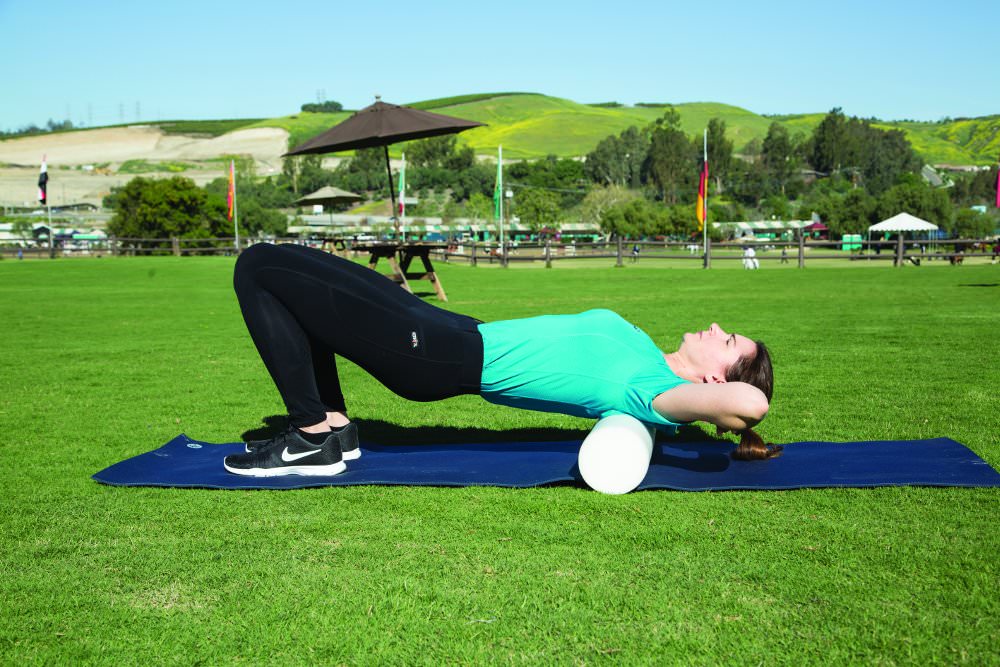
Upper Back: Lie down with the roller at your mid-back, knees bent and feet flat on floor. Interlock your fingers behind your head to support your neck, then extend your back over the roller as if you’re trying to touch your head to the ground behind you. After holding this position for a few seconds, move the roller high up on your back and repeat. This helps with thoracic extension, which is good for office workers who sit with their shoulders rounded forward all day.
Foam Rolling Tips
- Take your time. Don’t rush; instead, slowly roll each muscle group.
- More time isn’t necessarily better. Aim for 20 seconds on each tender area, and then move on.
- Remember to breathe. Stay relaxed while foam rolling. Slow your breathing, quiet your mind and listen to your body.
- Stay Hydrated. Drink plenty of water after a rolling session to help hydrate, and thus speed the recovery of your muscles.
- Stay Consistent. Just as with any exercise routine, be consistent with your foam rolling practice and you’ll see the benefits.
Get more rider fitness resources >>
This article originally appeared in the July 2017 issue of Horse Illustrated magazine. Click here to subscribe!