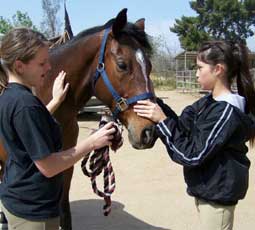
There’s something aesthetically appealing about a horse with a long, thick tail. But unless your horse is genetically blessed with such an attribute you have to work to achieve that look. Brushing a tail is one of the worst things you can do to encourage growth. Regardless of how careful you are, you’re still pulling out a few hairs with each grooming session. Instead, try a tail bag. Though they were once an accessory only for western performance horses, English riders have realized the benefits of bagging up a tail. Many hunters, jumpers and dressage horses now sport tail bags on their days off from the show ring.
Successfully bagging a tail takes a little bit of practice. Begin by purchasing a style of tail bag that works best for you and your horse. Some are easier to handle than others. For example, while a Velcro tab works quickly to secure the bag it can also snag the hair. That’s why we chose a stretchy Lycra bag with fabric ties for the photos here. Next, the actual “bag” portion should be just long enough to hold your horse’s braided tail. Too long and your horse may end up stepping on the bag and pulling it off. Finally, shampoo and condition your horse’s tail. Once it’s dry, carefully brush it one more time. Then you’re ready to start.
 1. Divide the hair evenly into three sections and braid it into a snug pigtail. It’s important that you start your braid right where the tail bone ends. Otherwise the braid will be too loose and in just a short time the bag will slip down and off. 1. Divide the hair evenly into three sections and braid it into a snug pigtail. It’s important that you start your braid right where the tail bone ends. Otherwise the braid will be too loose and in just a short time the bag will slip down and off.2. Extend your braid to the end of the tail, leaving only about one inch of unbraided hair. Ideally you should secure the braid with a covered elastic ponytail holder, like those used on human hair, but you can also use little elastics for braiding or banding. Use two or three, though, as one will not hold the braid for long. When you’re finished, snake the completed braid all the way to the bottom of the bag. |
 3. Now comes the tricky part: tying the bag onto the tail. Take one of the bag’s tabs and gently feed it through an opening between two sections of the braid. Pull it right up to the base of the tail bone. 3. Now comes the tricky part: tying the bag onto the tail. Take one of the bag’s tabs and gently feed it through an opening between two sections of the braid. Pull it right up to the base of the tail bone. |
 4. Next, wrap the other fabric tab around the top of the braid, making sure that you are not squeezing the actual tail bone. That can be irritating to the horse, and he’ll begin to rub, which is contradictory to your goals. Tie the tabs together using a simple bow, just like tying a shoelace. Or you can create a half-hitch knot, similar to half of a bow, which will also make the bag secure yet easy to un-do. 4. Next, wrap the other fabric tab around the top of the braid, making sure that you are not squeezing the actual tail bone. That can be irritating to the horse, and he’ll begin to rub, which is contradictory to your goals. Tie the tabs together using a simple bow, just like tying a shoelace. Or you can create a half-hitch knot, similar to half of a bow, which will also make the bag secure yet easy to un-do. |
 5. A tail bag that is properly attached should stay in place for up to a week or more at a time. As long as it’s secure, and the braid is not beginning to snarl at the top, leave it in place. When necessary, untie the bag’s knot, unbraid the tail, pick through it a few times with your fingers to coerce any stray hairs into compliance, and reinstall the bag. You’ll begin to notice that the braiding process alone helps your horse’s tail appear fuller and thicker. But over time the bag will act as a barrier against the environment, and deter you from repetitive tail brushing. Then your horse’s tail will be gloriously long and thick for real. 5. A tail bag that is properly attached should stay in place for up to a week or more at a time. As long as it’s secure, and the braid is not beginning to snarl at the top, leave it in place. When necessary, untie the bag’s knot, unbraid the tail, pick through it a few times with your fingers to coerce any stray hairs into compliance, and reinstall the bag. You’ll begin to notice that the braiding process alone helps your horse’s tail appear fuller and thicker. But over time the bag will act as a barrier against the environment, and deter you from repetitive tail brushing. Then your horse’s tail will be gloriously long and thick for real. |
Read on how to bang a horse’s tail >>


good article
I have ridden hunters for years and I never thought I’d see the day when our horses would wear tail bags. But they do! Good article with neat photos.
I’m fortunate that my horse’s tail is so thick that brushing out the dead hair actually makes it look better. I don’t really see how the bag helps make the tail fuller. Braiding is really what’s doing that but at least the bag keeps the tail clean.
Great tips with nice photos!
great tips! thanks
neat article
Sounds like great advice, can’t wait to try it and have his tail more beautiful than ever by Spring!
Cool idea!
Thanks this really helps! I just got a tail bag for Christmas and i can’t wait to use it:)
Another thing we use to help with grooming and not pulling the tail, leave in hair condiditioner and/or satin sheen. Both help keep the tail smooth and easy to manage/less pulling out/loosing of hair.
If you bag, is the horse still able to use it to keep off flying bugs?
I use a Weaver tail bag which has a tassle of hair on the end to swat with.
Is it okay to leave the bag in while the horse is turned out with other horses? Do you think they would bother it?