 Download a printable version of this page
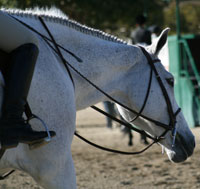
If you grew up riding hunters 20 years ago, chances are you mastered the art of braiding a hunter’s mane. It was simply part of a show horse’s turnout. But with unrated divisions B-shows allowing today’s riders to forego braiding, the ability to braid well is disappearing. A beautiful coiffure on a modern show hunter is now often left to the skillful hands of a professional groom. However, you can still make your horse look like a national champion, even if you’re competing at a schooling show. Just follow these step-by-step tips.
For an alternative braiding method for jumpers, eventing and dressage, see our step-by-step instructions for rubber band braids >>
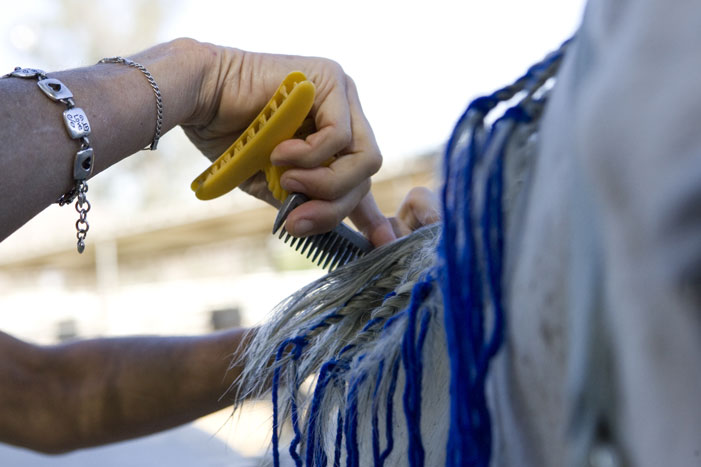
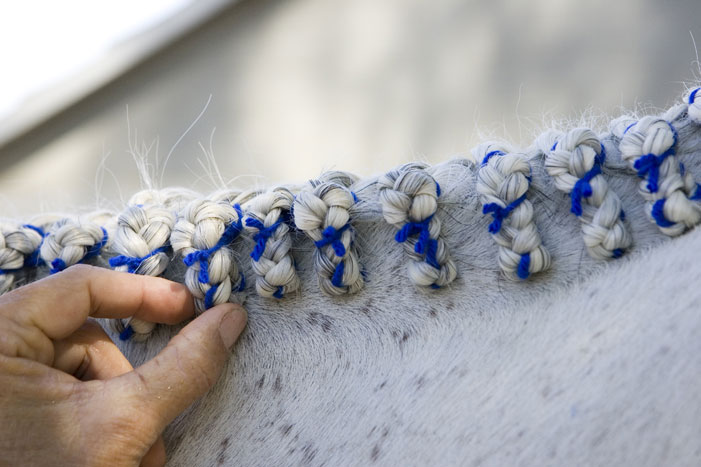
- Assemble an assortment of braiding tools: 4-ply yarn cut into strips 12-inches long (for our photographic purposes, we’re using a contrasting color), a latch hook (bought at any craft store), a plastic alligator hair clip, a mane comb, scissors and a spray bottle of water mixed with a styling gel or braiding solution.

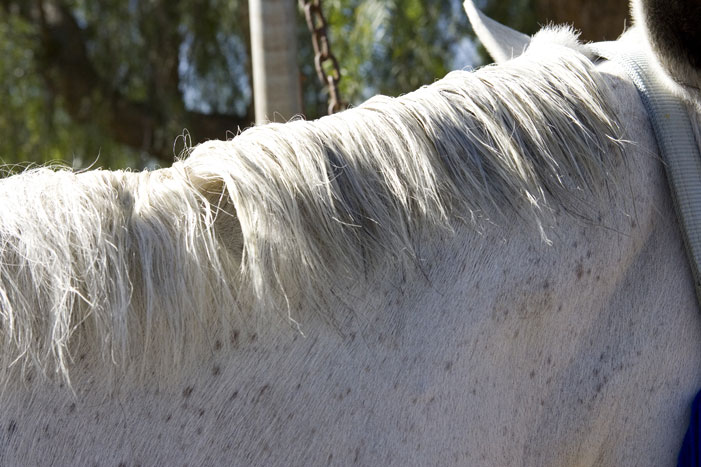
- Make sure you’re braiding a mane that’s freshly shampooed, free of coat polish—that’ll only make it slick—and pulled and thinned to about 4 inches.
- Thoroughly dampen the first third of the mane with the solution.
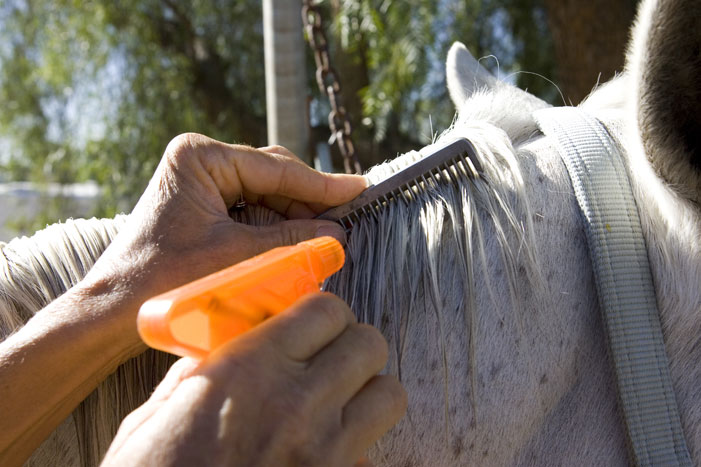
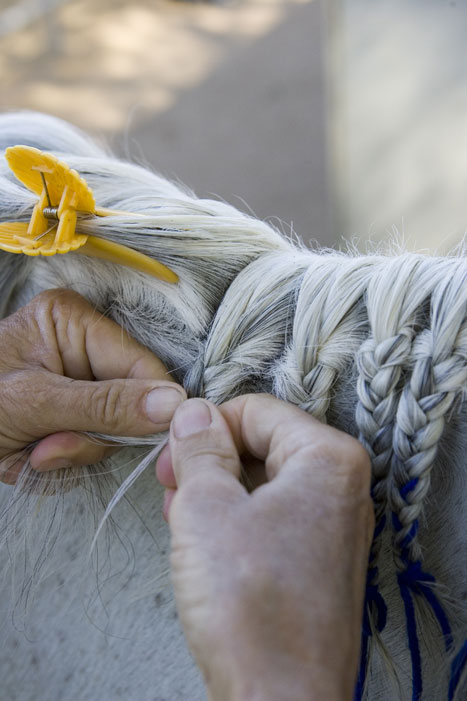
- Using the comb, make a part about one-inch wide. Each braid needs to be the same width against the top of the horse’s crest. Snap the clip on the neighboring hair to hold it out of your way.
- Begin braiding. Keep even tension on the hair, making sure that you pull down on the mane as you braid. If you pull the hair toward you, the finished braids will stand away from the horse’s neck.
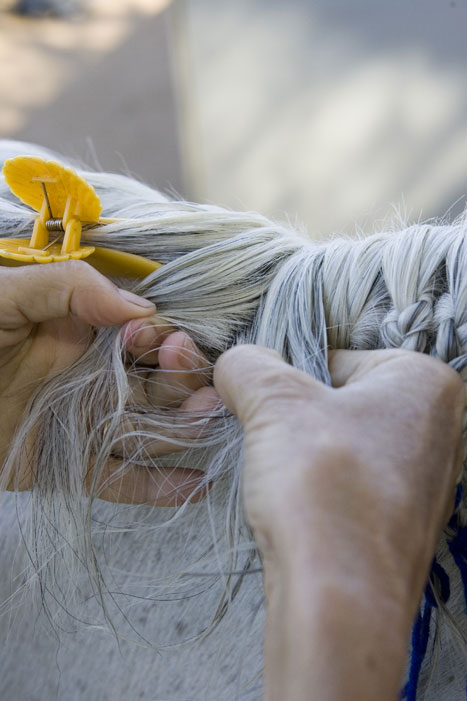
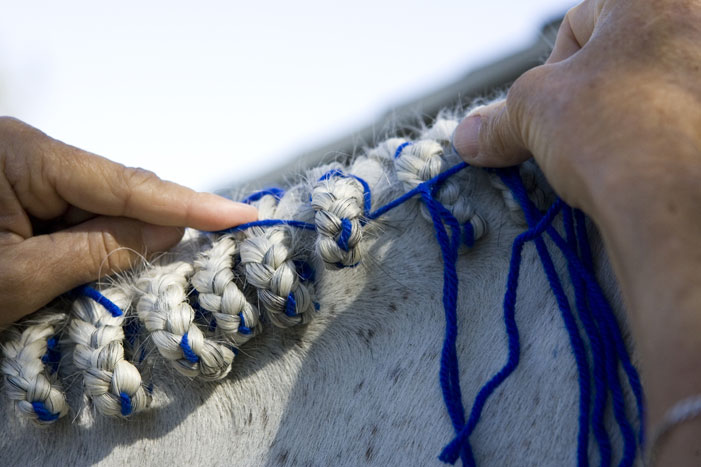
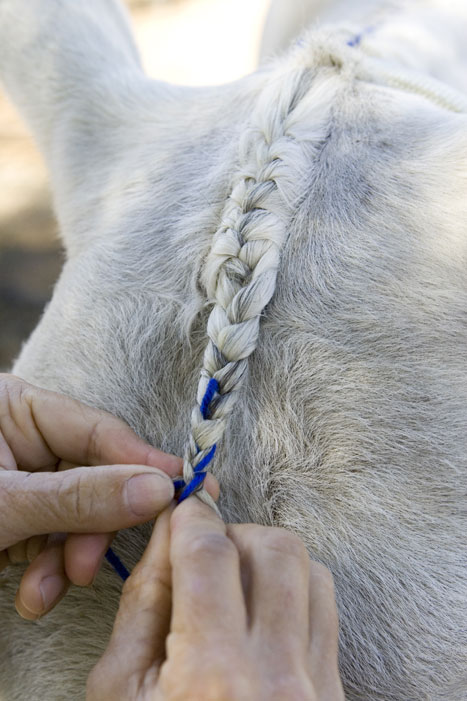
- About half-way to the end of the braid, add a piece of yarn that’s folded in half.
- Meticulous braiders make a note of how many crossovers they make in a braid before they add the yarn. This adds a consistent look to the finished job.
- Split the yarn tails so that they each go in separate sections of the braid ..
- … then braid all the way to the end of the hair.

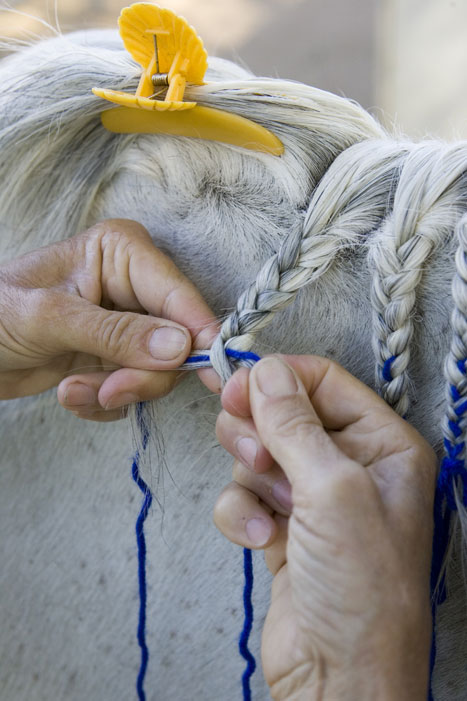
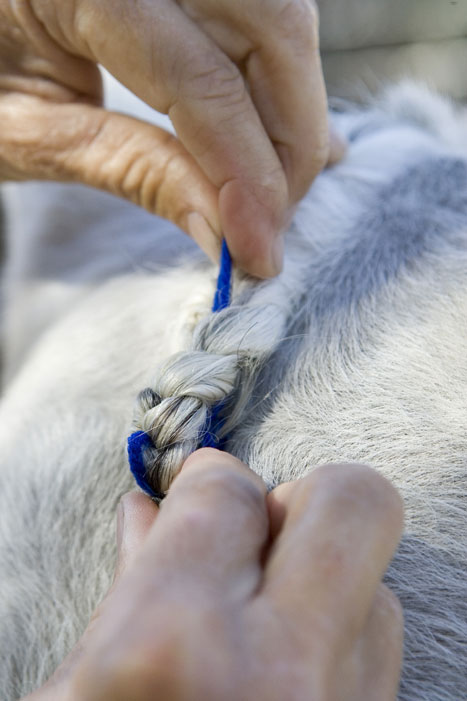
- Wrap both yarn tails around the braid and knot once. Make sure you pinch the end of the braid with the fingers of one hand while you knot with the other. This will prevent the braid from unraveling.
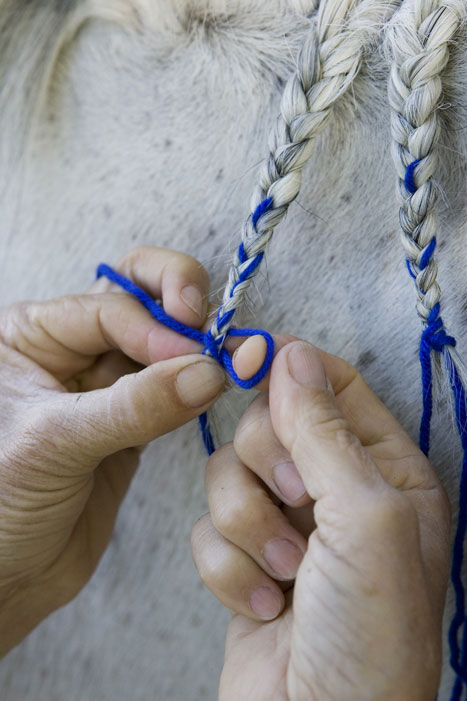
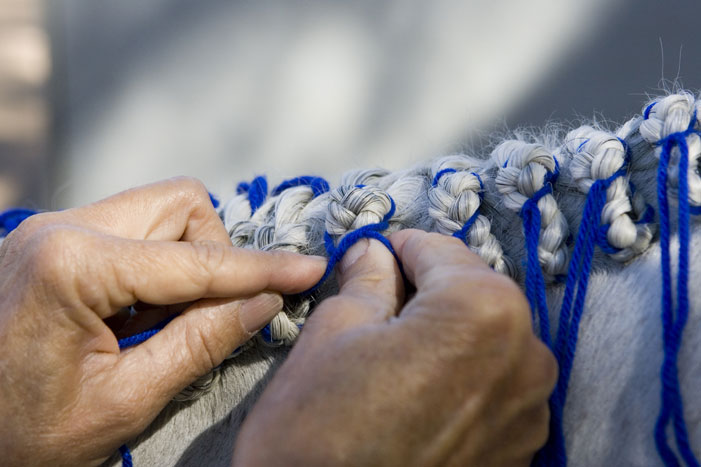
- Tying the Knot
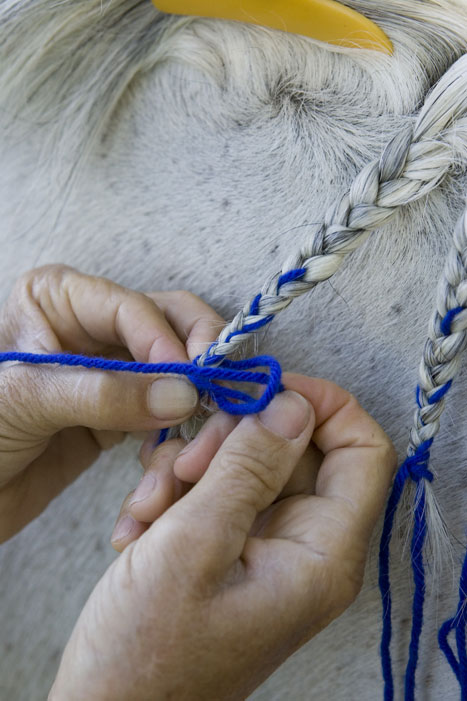 | 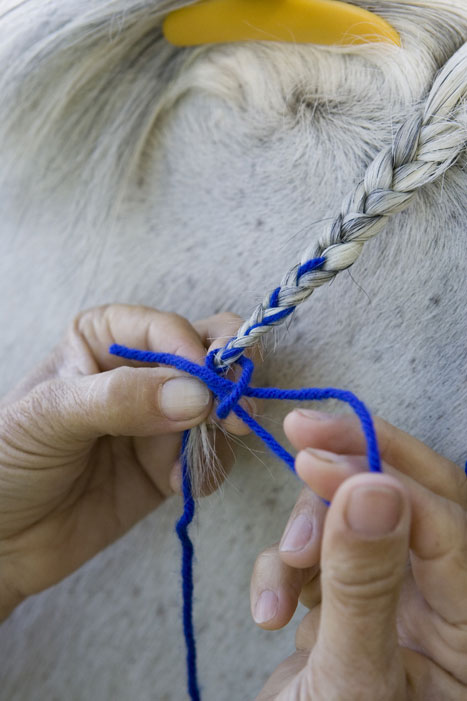 | 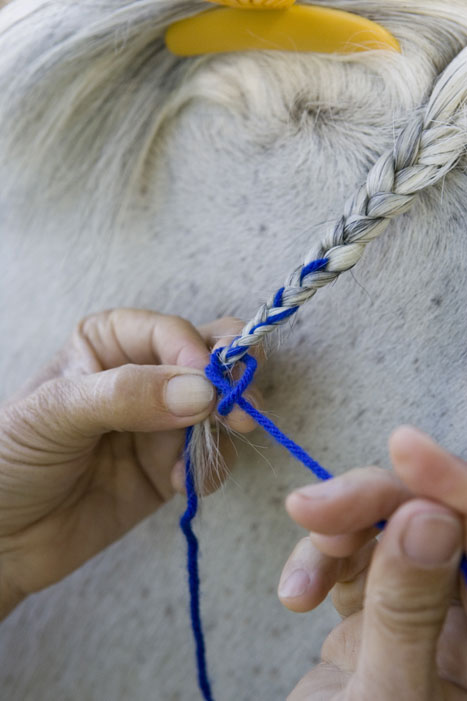 |
| For a secure knot, wrap both pieces of yarn around the bottom of the pigtail while forming a small loop with your index finger. | Then feed the yarn ends back through. | Pull taut, in a sort of half-hitch knot. |
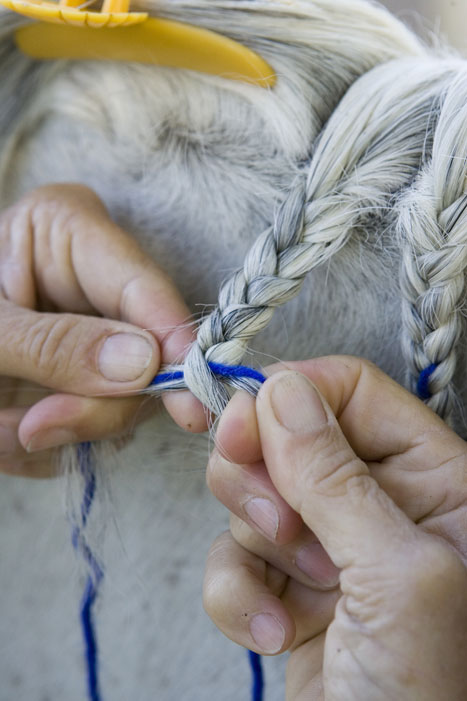
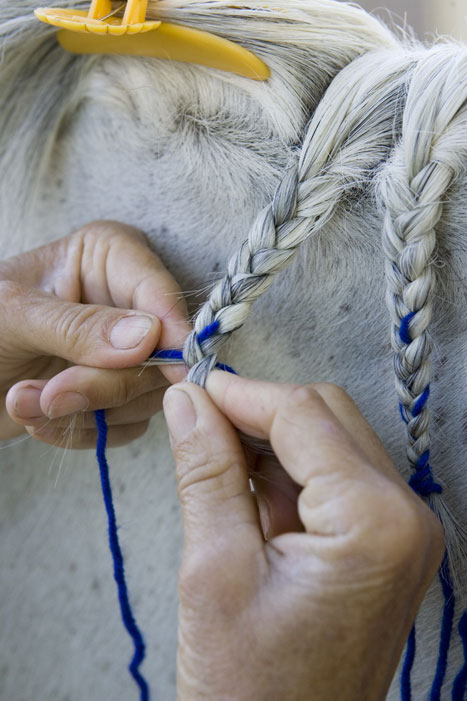
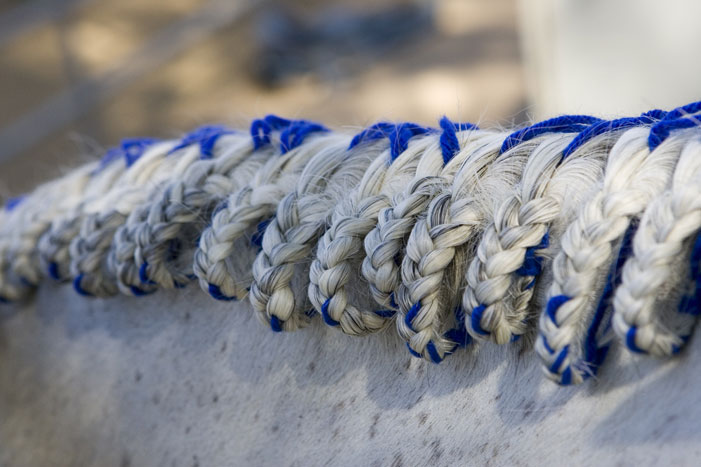
- This is what the braids will look like at this stage.

- Finish the entire mane in the same manner. There isn’t any hard and fast rule about how many braids are required in a mane, but generally speaking, the more, the merrier. And the fancier.
- Now pull-through by inserting the end of the latch hook through the top of the braid.

- Once your tool has hold of the yarn tails, gently pull on the end of the braid until it butts up against the horse’s crest.
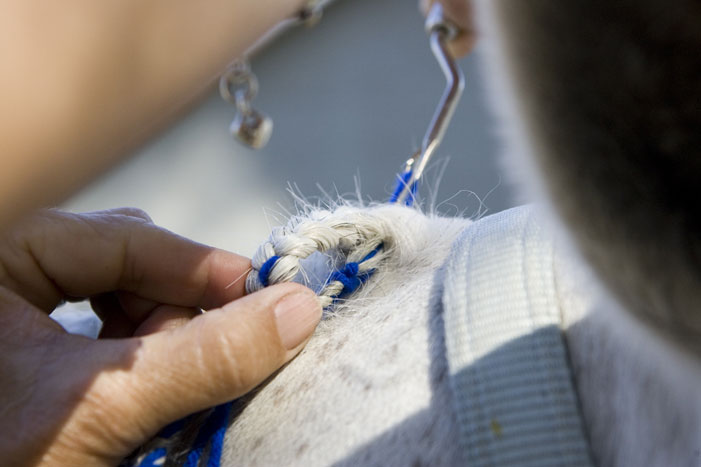
- Be careful not to pull so hard that the end pokes up through the top of the braid!

- Continue with your pull-through down the rest of the braids.

- This is what the mane will look like at this second stage. Now you are ready to knot the braids off.
- To knot your braid off, grasp the yarn tails you just pulled through.
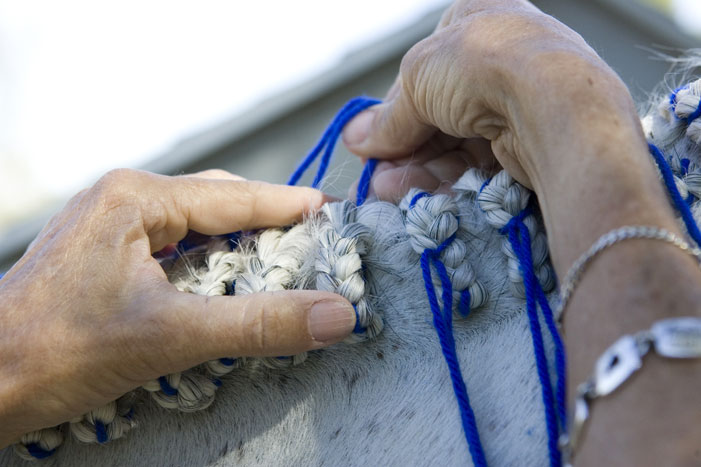
- Take one yarn tail in each hand …

- Cross the yarn ends under the braid once, then bring the ends back to the top side of the braid about halfway down, where you’ll finish off with a double knot.
- As you prepare to knot the braid, here’s a little trick to make the braid lie flat against your horse’s neck. Tie the first part of your double knot, but before you snug it up, slip your thumb underneath. Press the braid against the crest with your thumb …
- Then push upward slightly, enough to form a little bump in the braid. Slide your thumb out from underneath as you snug up the knot.

- Doubleknot (using a basic square knot) to secure the braid.
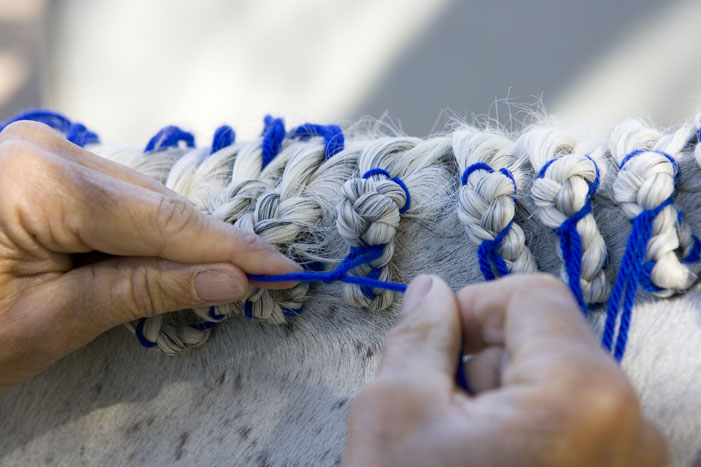
- All knots must be dead center or your braids will slant to the side.

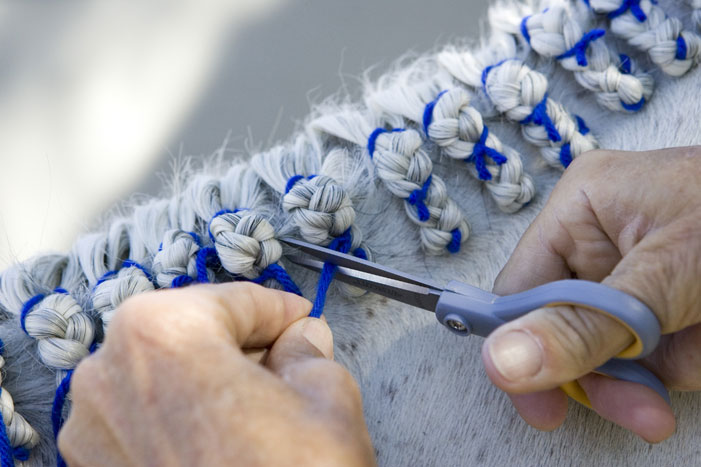
- Snip off excess yarn, leaving about ¼ inch.
- Braiding the Forelock
 |  |  |
| To finish the mane, braid the forelock. You can simplify things and braid the forelock like the rest of the mane, but if you want to be extra fancy, create a French braid. | Tie off the French braid, pull through, | and knot. |

Now, wasn’t that easy? If your horse tends to rub at night or between classes, you will need to protect your beautiful braids. Pull a stretchy hood over your horse’s head and neck. Wearing some funky pajamas is a small price to pay for looking lovely.
Need help with the tail? Check out our guide in Top Tails for Show Hunters >>


Wow this article is GREAT! Thanks a lot!
How about running an auxillary article on tail braiding &/or mud knots for hunting. Thanks
I thought it was great!!!!!!!!!
This was the best explanation of mane braiding that I have seen. Great job!
What an excellent article! Braiding a mane is very well explained in step-by-step phases with very good photographs to guide you through the process.
Thansk for the tips. I still think I’m all thumbs and would not do a very good job. But I’ll try now that I”ve read this.
Good to know.
These tips were so easy to follow! I actually feel like I know how to braid now. I’m going to print this off and use it for my next show! Thanks!
This is the best “how-to” article on braiding I’ve ever seen! I’ve braided for YEARS, but picked up a tip to make mine look even better. I’m going to let my 4-H kids know where to find this article. Thanks!
Very thorough and easy to understand instructions. Better than some of the books on braiding.
Thank you.
Tying of the braid befor you loop it up was kind-of confusing but otherwise very good info!
Excellent how-to articles with great pictures that really do a good job of illustrating. I am going to direct my 4-H kids here for instructions!
Thanks so much!!!! This helped me so much. I am showing and i have a hard time braiding their mane. Thanks you guys!!
Well I’ll have to work on it alot more, but I understand it ALOT more!
I AM HAVING TROUBLE GETTING MY 3 YEAR OLD GUILDINGS WINTER COAT OFF. WHAT TOOL OR PRODUCT IS GOOD OR RECOMENDED TO SLICK OFF HIS WINTER COAT
Great piece on hunter braids. Can you post one one a 3 and 4 strand running braid for those baroque breeds doing dressage? thanks
this website is awesome!! it been a long time since I’ve had to braid a mane or tail. it has been very helpful
Nice step by step instructions.
I am one of those folks who used to show hunters 20 years ago (actually it was nearly 30), so I hve a lot of braiding experience under my belt. I never liked using the latchook; the parts often get caught in the mane hairs. Instead, get some wire and form a loop that you can stick through the top, insert the yarn tail through, and pull back up through.
You should mention yarn color in the article – i assume you’ve used blue for contrast for the illustrations, but you would want to clarify that folks should actually match yarn color to mane color.
This was a great demonstration, thanks.
this is an awesome article. I’ve been looking all over the internet for something like this that explains it in words and pictures.
Thank you!
This was a terrific article for those of us who are braiding-challenged. The other websites I looked at made me first scratch my head and then feel hopeless! But this was very clear and the pictures actually made sense. I’m off to practice. Thank you, thank you!
you gues got my anwser thank you so much
hey hey it is my again i just reread the whole thing i still love it. thank you again.
Thank you so much i’ve been looking for step by step instructions for this braid forever! Every other article i’ve read doesn’t have nearly as clear or precise instructions!
THanks again
May God bless you
Easy to follow instructions. Thanks!
Thanks for such easy to follow instructions!
Wow, this was so helpful, now I can braid my horse without haveing to pay $60.00!
Thank you so much for the great detail and pictures. I am bringing my 2 year old welsh gelding to his first show, and needed to have him braided. This was my first time braiding, and it turned out gorgeous (although took a long time since it was my first time).
Thank you!
Brenda, NJ
Thank you! I wanted to learn how to braid my horse for shows instead of paying $50-$75, and this article described the process in a simple way.
Nice guide to mane-braiding, plenty of photos; I’ll have to refer to this if I ever braid a horse’s mane 😉
And one extra tip that I’d like to add, you should probably practice braiding your horses mane/tail several times before the show, so that you have time to perfect your technique–plus, you’ll learn to do it quicker, making show prep a little easier.
Thanks for this step-by-step guide! I needed the tips. I’ve never braided manes before, and I always thought it was going to be such a hassal! Hopefully, at the end of the summer, I will be taking my 9 year old ex-racer to and eventing competition. And we will need those braiding tips for dressage!
Thanks, that was great! The contrasting color of the yarn helped a lot. Maybe you could have one for button braids. . .
Thanks that helps ALOT! From a mom of an 11yo girl that jumps and loves to braid!! Now she can do it herself the RIGHT way, thank you very much.
This is so very helpful! I have never tried braiding my horses mane like this and I’m just starting English riding! its VERY very helpful for a 15 year old!
I’ve been looking everywehre for CLEAR instructions on braiding. This is the first helpful source I’ve found!!! I am just getting ready to start my first pony in the Jumpers and Pony Jumpers and will be doing some rated shows and now I will be able to braid her mane the proper way! Thanks so much!!!!
This is the most explicit instructions I have found in years! I will be sending this too all my horsey friends because trying to explain it myself was much too difficult. Now I can send them this and they will be all set! Very well writen, thank you!
Thank you for the great instructions and tips on braiding manes.
wow sweet instructions. ive always done button braids but could never figure out how they did the hunter type. thanks ALOT
Excellent instructions and photos!!! Thanks.
I will use this to learn braiding
Awesome tutorial, it was hard to find one that included such clear pictures and succinct explanations. One problem I have is that it doesn’t go into how to avoid the tail end of the braids poking out through the top…it’s hard to avoid.
I have seen a lot of people in the stock seat ring use the same bands we use for banding to braid by braiding the hair, banding it in place, then flipping it under and banding in place. It does look quite nice and does not require quite as much time.
OMG!! I haven’t been able to find anything good, and that is just wonderful! Im going to my states state fair for english on my horse and that will help me soooo much.
amazing! i’m definately trying it. i haven’t done english that long, and my braids always look terrible. hopefully this helps, so that at my state’s state fair i don’t look like too much of a beginner! first year at it!
This is great! I can braid just fine, but get very fed-up with it when my braids aren’t perfect. Thanks! This helps a ton!
it was very easy to do the braids with these directions.
OMG! This is a LIFE SAVER!!! I’ve been in sooo many sites trying to find out how to braid my horses mane and forelock but nothing has this simple of instructions!!! And the PICTURES!!! They were crystal clear!! Thank you sooo much for this!! Maybe an ad like this on how to braid the tail and put the tail in a bun would be good, too.
I love it! Thanks so much! I thought the forlock is supposed to be pulled al the way through?
Anyway, thanks! I finally mastered my tail, and now mane with your help!
Just braided my pony’s mane for the first time ever and found it a snap thanks to your great instructions and pictures! Thanks for making this available!
Howcome when I try to do this, it never quite works out…?
Well written article. I showed extensively as teenager on the A hunter circuit and having to braid was expected. We braided even for the little shows so I got lots of practice.
WOW! That’s great detail, and wonderful photos for those of us who depend on visual learning. Thanks so much for taking the time to do this!
I love this article, as well as the tail braiding one.
Old school. The braids shown are no longer in style. Check current show results to see smaller, tighter braids that are currently expected.
Would have liked in-depth instructions for the french braid for the forlock.
This “how to” was well written in a step by step format that was easy to follow and understand.
Thank you very much this will really help in turnout this ou year
This looks great and it is way easier and simpler than thread or wire:) It looks great on my bay gelding!!
The best instructions I have seen out there. It helps if you have braiding experience. I have been practicing doing a five strand braid on his tail but can’t convince my daughter to let him wear it for a show
Thank you for such a wonderful view of how to tie manes and tails like professional show hunters should look. I have found several Barbie horses tossed away at Goodwill. The horses are modeled after the real horse, the same horse that carried armour during the Crusades. After much scrubbing of child’s markers, I have nice collectibles worth finishing in the correct braids.The chestnut horse is the prettiest of the bunch.
I loved it! It helped a ton now i know how to braid!!!
Thanks for the tips– need a horse that will stand still while I practice.
I am doing a talk for 4-H on horse manes and tails; and I need some interesting stuff to fill it out. Any ideas?
That’s just beautiful! I can’t wait to try it!
That was good. Will be printing this out and hanging in the barn for easy- reference!
So normally you would use a yarn that matches the horse’s mane color so the yarn isn’t so visible? Great tutorial by the way!
I hope it will be as easy as this video “makes” braiding look. Beautiful by the way.
Great Tutorial!!