We all have that pair of beloved boots that is too worn for practical purposes, but too treasured to coldly throw away. Try using one of these fun artistic treatments to make them into something cool to display and show off your passion for horses this holiday season. It also makes the perfect gift for that horsewoman in your life who already has everything.
Reboot Project Supplies
- nail polish remover (acetone)
- sand paper
- terry cloth rags
- 1 roll painter’s tape
- acrylic paint (formulated for leather)
- assorted paint brushes
- boot trees or rolled up magazines
- various design elements
- E6000 or Hypo Cement adhesive
- 1 block floral foam
Directions:
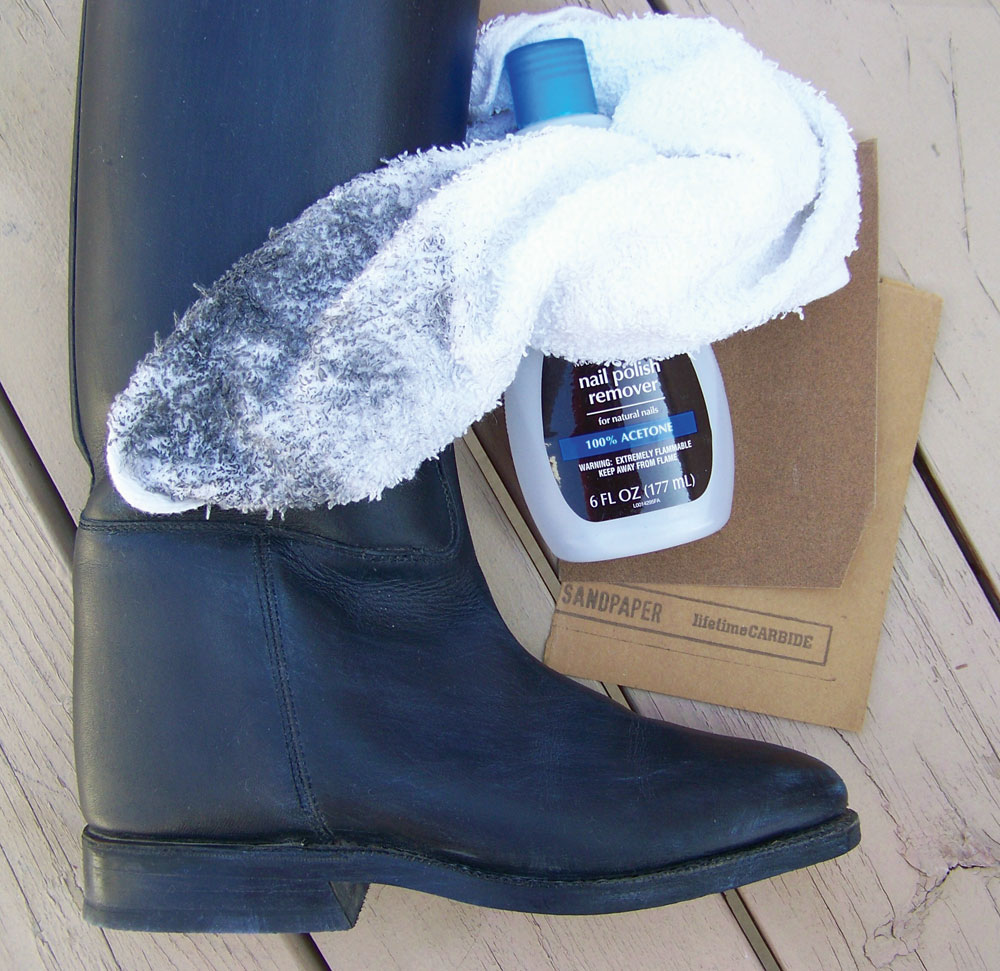
Acetone not only removes nail polish, it also strips away layers of waxy boot polish. This important preparatory step allows the leather to absorb your paint.
- First, you’ll need to strip the layers of wax, polish and dye from the leather.Due to fumes from the acetone, work outside or in a ventilated craft room. Wet a terry cloth rag with nail polish remover. Rub it vigorously over the entire boot. If you meet resistance, scuff the area with sandpaper and rub again. Eventually, layers of wax, polish and dye will be wiped away. Now your paint can penetrate the leather and provide rich, permanent color.
- To smooth out deep creases and make the boot easier to paint, place a boot tree or several rolled up magazines inside the shaft. To help you paint within the lines, use painter’s tape to protect sections of the boot you’ll paint later.
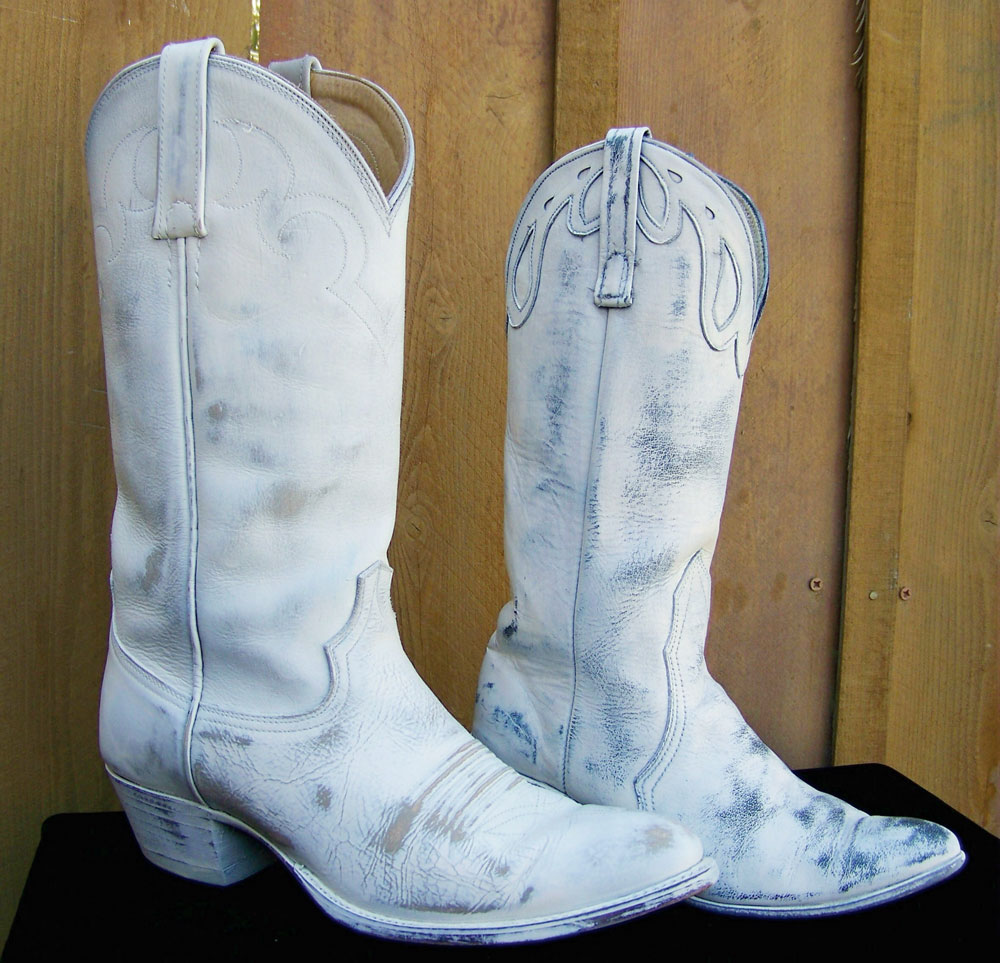
The local drill team spray painted their boots white. Months later, they opted for a darker color palette, and I found their cast-offs at the thrift store. Although it took me half a day and several bottles of nail polish remover, I finally uncovered the boots’ quality leather.
- Begin painting with the palest color. When it dries, check for blotches and uneven coverage. If necessary, add a second coat. Remove the tape as you continue painting other sections with complementary colors. Don’t neglect your boot’s heel and outsole. Those areas surely need some attention, too.
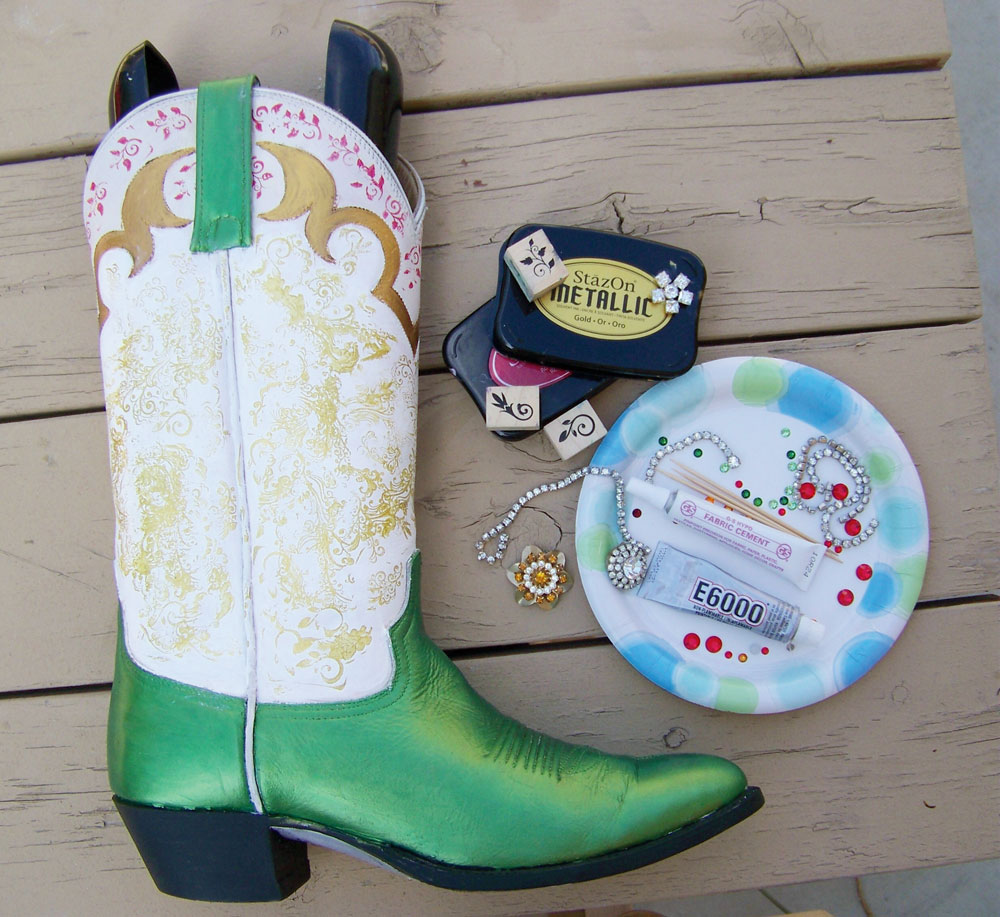
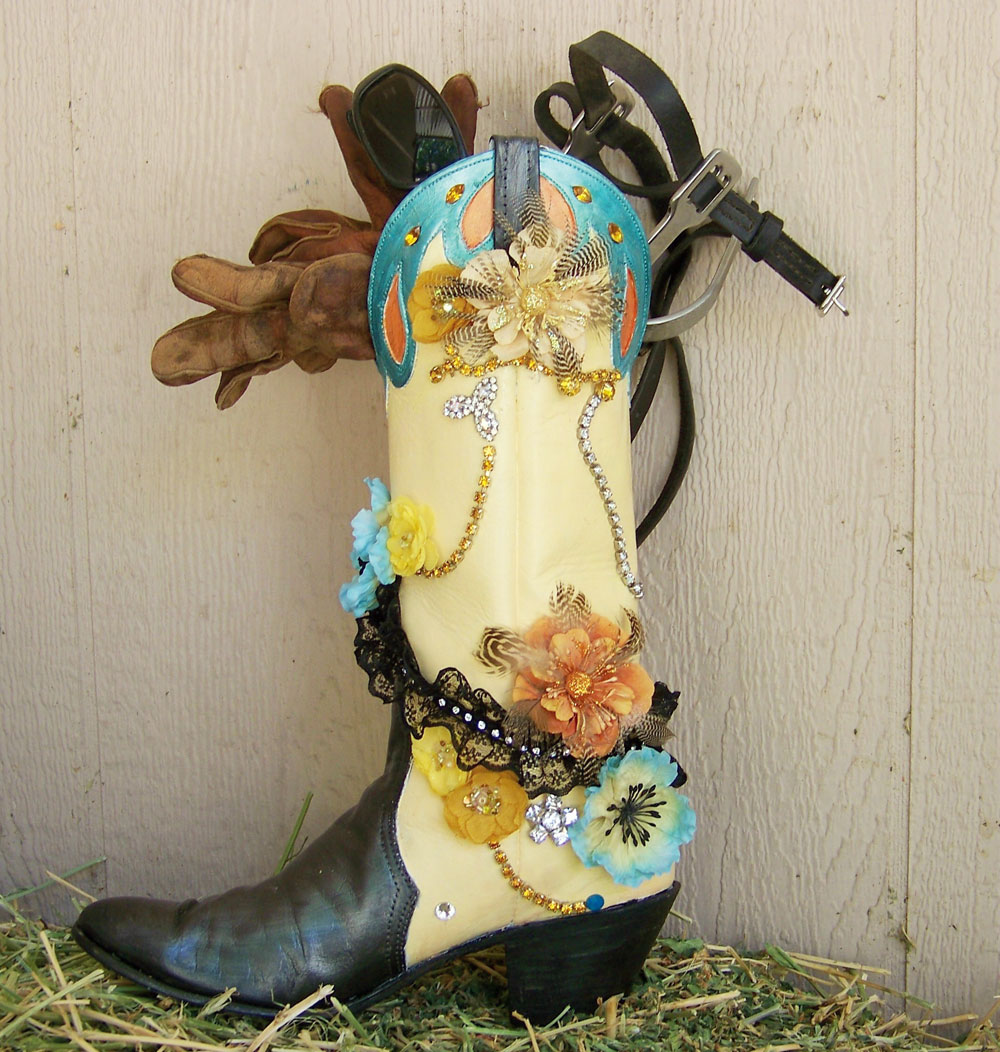
Jewel-toned crystals will really “pop” against a background of white or ivory paint. For additional pizzazz, create a free form pattern of flourishes by pairing a stylish rubber stamp with gold or silver ink. Just be sure to use a solvent-based ink like Staz-On, which is permanent and suitable for use on leather.
- The paint should be completely dry in several hours. If your boot has large areas of solid color, consider adding some visual interest with a background pattern. For example, select a rubber stamp with a paisley or floral pattern, and repeatedly apply it using permanent (solvent based) metallic ink. You can also dab contrasting paint colors inside the framework of a stencil.
- Now add your fancier embellishments. These can include flat-backed crystals, old holiday jewelry, strands of vintage rhinestone necklaces and small silk or fabric flowers. Just be sure to use the appropriate glue (see Art Lessons, below) or your decorations won’t survive much past New Year’s Day. Since it sets up quickly, squeeze out small portions at a time onto a paper plate, and use a toothpick as an applicator.
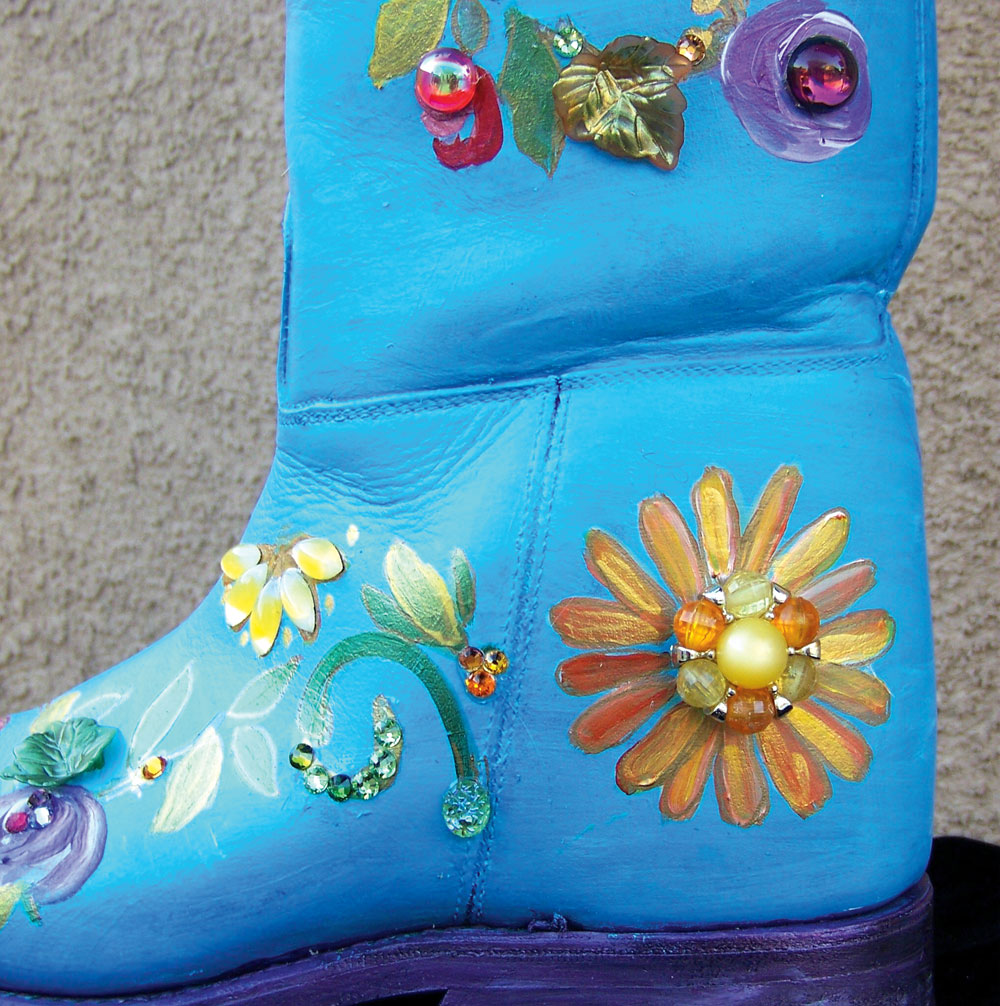
Vintage jewelry, like this clip-on earring, add dimension to your design and also emphasize the boot’s one-of-a-kind appeal. Use such baubles sparingly, though, or they’ll detract from the novelty and charm of your transformed boot.
- Let the glue set overnight. The next day, remove the boot tree or magazines. As replacements, crumple up several pages of newspaper and press it into the boot’s toe and foot. Then use a kitchen knife to shape a rectangle of floral foam so it’ll slip into the boot’s shaft. The floral foam can be used multiple times, ensuring that your rebooted project will be a delight for many, many holidays.
Art Lessons
It isn’t a lack of creative talent that ruins most craft projects. It’s the lack of the proper supplies. That’s especially true when working with leather. By nature, leather is pliable. After all, it once covered the curves of a cow. Thus any glue that hardens into a rigid state won’t work for this project. Unless you’re layering a fabric flower or silk bow atop another embellishment, unplug your glue gun and ignore the allure of all-purpose craft glues. The tried-and-true best adhesives for affixing solid decorations to flexible materials are E6000 and Hypo Cement.
Also be wary when selecting paint. While any acrylic craft paint will initially do the job, it’ll soon crack and peel off. Worse, it might melt if accidentally splashed with water. Fortunately, most large craft and hobby stores carry familiar brands of acrylic paint specially labeled as “multi-use” or “multi-surface.” They’ll generally adhere to the leather, but they tend to lack luster. If you’re willing to spend a little more, acrylic paint specifically formulated for use on leather is also readily available. Brands such as Jaquard come in rich, vivid hues; Lumiere paints are further enhanced with pearlescent and metallic sheens. These professional quality products can also transform any boots you’re currently wearing. A few extra dollars is worth making a fashion statement at the next barn party, right?
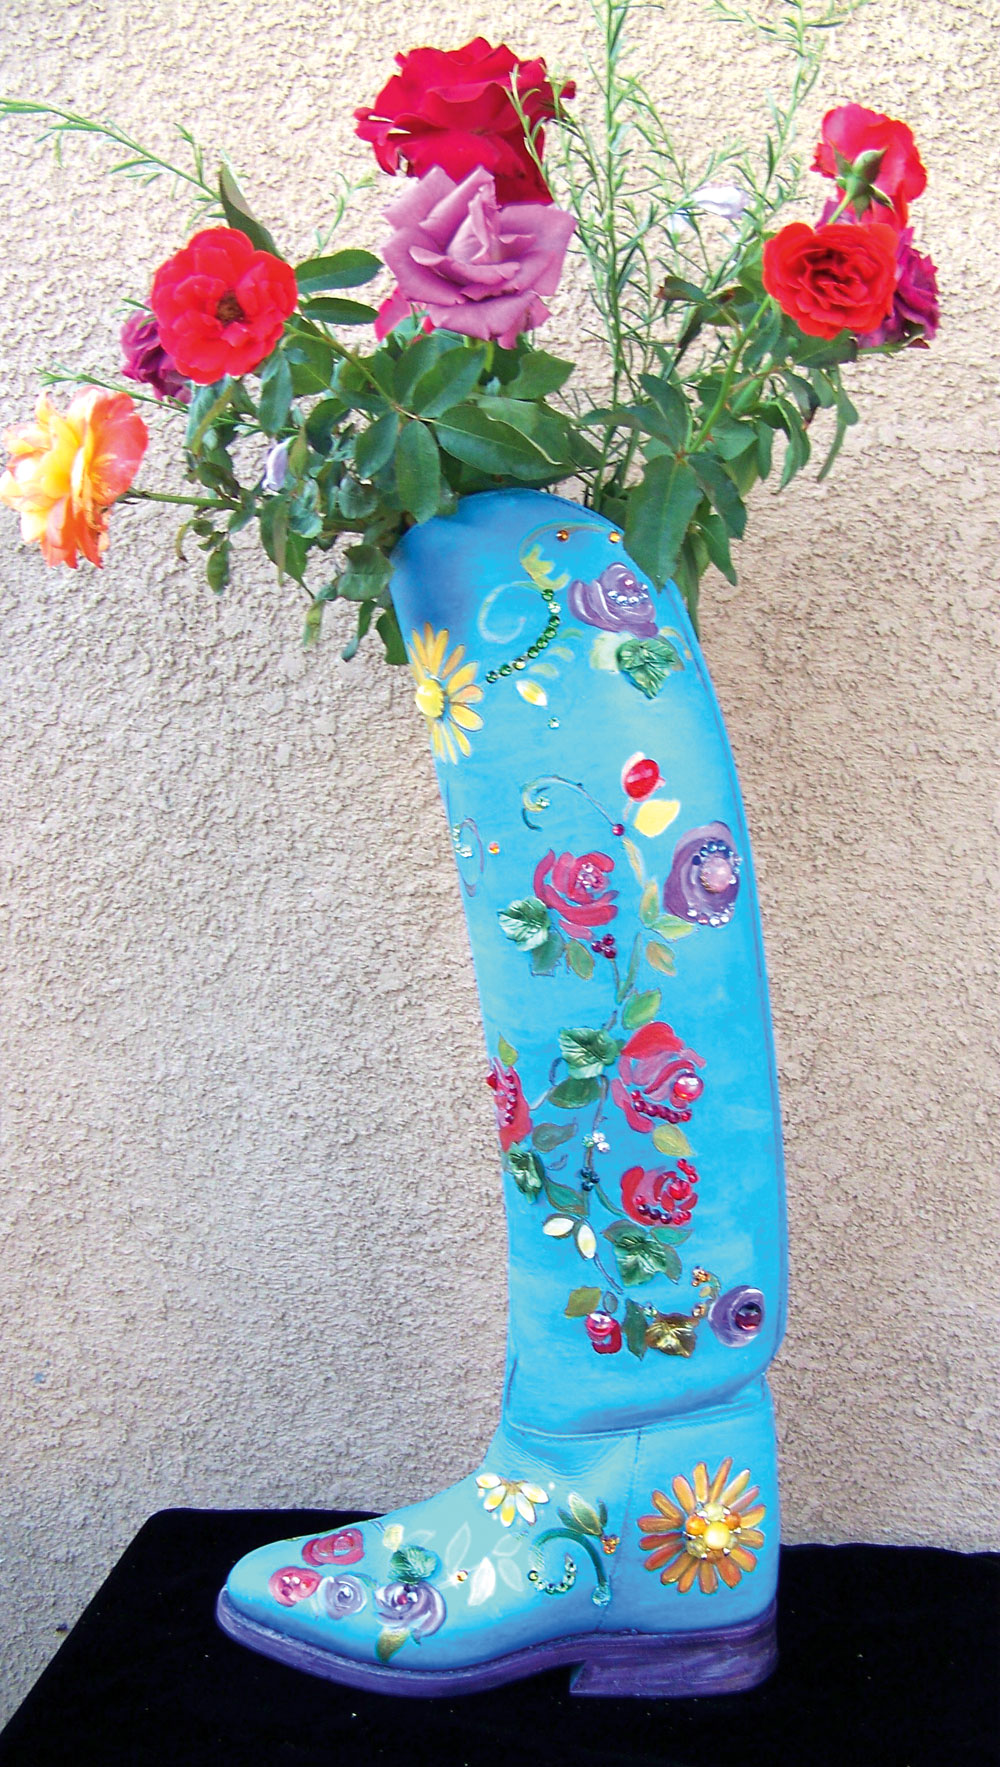
To function as a sturdy flower vase or decorative container, your reboot project will require some additional steps, a few more supplies and plenty of patience. Yet it’ll be worth the extra effort.
Solid Footing
Your rebooting project will definitely be used more frequently if it’s stabilized with a combination of sand and plaster of Paris. The process is a bit tedious and potentially messy, but the reward is a one-of-a-kind flower vase or decorative container. It also makes the perfect gift for that horsewoman in your life who already has everything.
You’ll need some additional items:
- 1 small bag of screened sand
- plaster of Paris
- 1 kitchen-sized waste basket bag (13 gallon)
- 1 inexpensive glass vase (sized for boot)
- 1 paper or plastic cup
- 1 piece foam board
- scissors
- E6000 adhesive
A few inches of sand and plaster made this reboot project sturdy enough to serve as an eye-catching container. Indoors, it can add cowgirl decor to the boudoir. In the tack room or barn office, it can hold a small bundle of a rider’s favorite things.
Pour the sand into the empty boot, one cup at a time. Tilt the boot toe down so the sand fills the entire toe box. Then set the boot on a flat, solid surface. Continue adding sand past the ankle seam.
Mix up the plaster of Paris according to directions. Pour several cups of wet plaster into the trash bag; squeeze it into one corner of the bag. Rely on guesswork and experimentation until you end up with several inches of plaster (contained in the trash bag) resting on top of the sand.
At this point, test to make sure the glass vase fits inside the boot without being visible to an observer. If necessary, remove sand or add more plaster of Paris.
Now measure and trim the foam board. It must fit snugly against the sides of the boot, yet also sit flat on top of the plaster. Set it aside.
Flatten and compress the bag of plaster by pressing it firmly against the sand. Use the scissors to trim off most of the excess trash bag; leave just enough to criss-cross the edges over the plaster.
Pick up the piece of foam board and apply a moderate amount of E6000 around the edges and in the center. Carefully slide it, glue side down, into the boot. Press it firmly on top of the trash bag remnants that are covering the plaster. Keep pressing for 60 seconds.
Set your vase inside the boot, on top of the foam board. Since it’s a removable container, it should not be glued in place. Instead, it will now safely and reliably hold a bundle of freshly cut flowers or an assortment of other treasures.
Want more? Check out these other horsey holiday crafts >>
Cindy Hale is a local horse show judge and equine artist in California.
This article originally appeared in the December 2015 issue of Horse Illustrated magazine. Click here to subscribe!