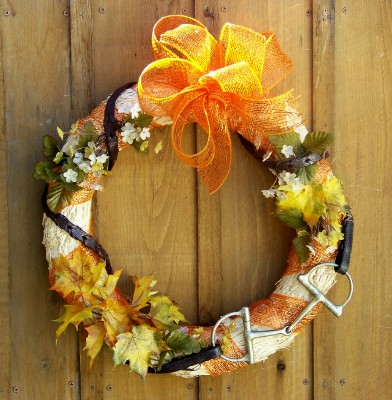
Wreaths have been popular decorations for centuries. According to tradition, their circular shape symbolizes the cyclical nature of life. Contemporary wreaths often include personalized themes and stylish elements. That means horse lovers like us are welcome to create wreaths that reflect our unique lifestyle. Since the harvest season is upon us, here’s how to make a festive autumn wreath that includes some equestrian flair. Let’s start with what you’ll need.
Items From Your Local Craft Store:
- 18” straw wreath
- 2” wide wire-edged ribbon (30-32’ roll)
- 2 rolls 20-gauge craft wire (color should match ribbon)
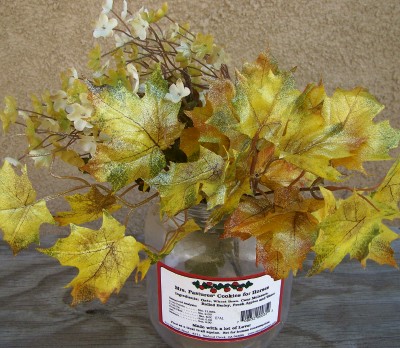
- 2 stems (“picks”) of artificial autumn foliage
- gold glitter spray
- white permanent marker
- small tube E6000 adhesive
You’ll Also Need:
- wire nippers
- heavy-duty scissors
- leather punch
- 2-feet twine or leather cording
- snaffle bit (any size or type)*
- 1 pair damaged reins (preferably laced English reins)*
* The snaffle and reins will be altered and cannot be used with horses again. Re-purpose an unwanted bit and a tattered pair of reins.
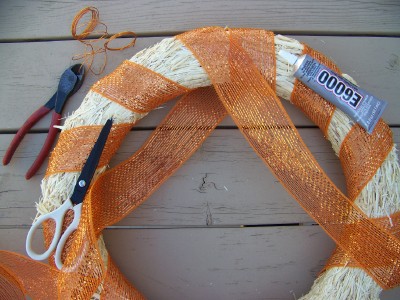
Step 1: Remove the plastic covering from the straw wreath. Unroll the spool of ribbon and cut it in half for easier handling. Select one half of the ribbon and wrap the wreath, starting on the backside. Wrap on a slight diagonal slant. Leave 2-3” of space between each successive loop so the straw is still visible.
When finished, the last loop of ribbon will form an “X” on the backside. Apply a line of E6000 onto the straw, beneath the “X” of ribbon. Add more E6000 between each layer of ribbon. Apply pressure upon these layers for about one minute until the adhesive gets tacky. For more security, wrap a piece of craft wire around the wreath twice, directly over the glued “X.” Twist the ends of the wire together and nip off all but ½” of the excess. Bend the sharp wire ends downward with the nippers. Trim off the ribbon tails with your scissors.
Step 2: Turn the wreath face up. Use what remains from the first half of ribbon, slip it beneath the wreath over the top of the “X” and tie it in place with half of a square knot.
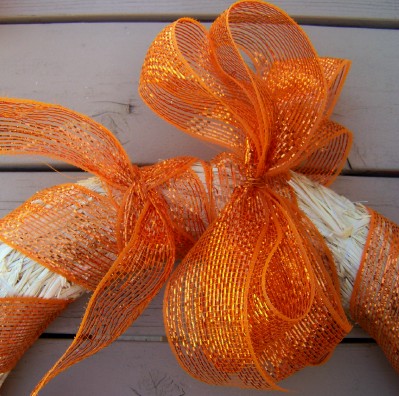
Make an easy bow with the other half of the ribbon. Simply loop it back and forth in several layers. Pinch it in the center and then snugly wrap about 6” of craft wire several times around that pinched center. Twist the wire together on the backside of the loops and you now have a bow! Set it on top of the half-knot, and complete the knot, tying the entire bow in place. The wire edge of the ribbon will allow you to rotate the bow and spread the loops apart as necessary. Trim the ribbon tails so they’re an acceptable length.
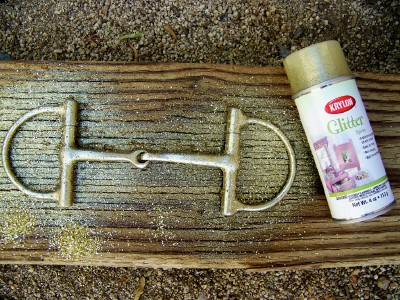
Step 3: Read the label directions on the glitter spray. Lay the reins and bit on an old piece of wood or cardboard, and set the foliage in a recycled plastic jar. Apply the glitter spray until you achieve a shimmering effect. Note: If you stand too close to the items, and get too carried away, you’ll end up with a glitzy disco ball effect.
Step 4: Practice your wreath’s design. Both the bow and the bit are focal pieces. Place them clearly apart so they don’t visually compete. When you’re satisfied, cut the reins into sections. Flex the snaffle so it conforms to the curve of the wreath. Use several pieces of craft wire to first wrap around and through parts of the snaffle, including the jointed mouthpiece. Then wrap each piece of wire around the wreath, ultimately twisting the ends together on the backside.

Step 5: Affixing the reins to the wreath is awkward, but it’s a dependable method. You’ll make button holes and hand sew the reins onto the wreath with craft wire. Use your white marker to dab a pair of dots onto the leather in just the right place. With your leather punch, create the holes. Once again, twist the wire ends together and then turn the nipped sharp edges downward. Repeat this tactic with each end of every section of rein. The leather is heavy, so don’t worry if the rein sections aren’t hugging the wreath tightly.

Step 6: Embellish your wreath with fall foliage. Most of it needs to be tied onto the wreath with craft wire. Since there’s some slack in the sections of rein, tuck the ends of stems, and any loops of wire, underneath the leather. Also, the core of the straw wreath is foam, and some of your foliage probably has wire stems. Snip some stems in half, dab them with some E6000 and stick them directly into the foam core.
Step 7: Now for the final touch: the hanger. If your wreath’s bow will be at the top (like mine), there’s a trick to make the wreath hang straight. Cut about 24” of twine or leather cord. Wrap around the wreath on one side of the bow, and then make the next wrap on the opposite side of the bow. Knot the two ends together and dab some E6000 on top of the knot for security. Now your wreath will be balanced. Otherwise, if you designed your wreath so the bow is purposely offset, simply wrap the twine or leather cord around the wreath twice, knot it in back, and add a drop of E6000 for permanency. Either way, you’ll have a beautiful, one-of-a-kind wreath that embraces the new season and your personal passion for horses.
Liked this article? Here are others you’ll love:
Interior Design with an Equine Twist
Safe Holiday Decorating at the Barn


cute idea
I can see the same decorations being used in a “horseshoe” shaped wreath.
coll
I made a decoration from a bucket and fall leaves, plus a riding crop, and spurs and a bit.
Cute.
cool gifts too
cool