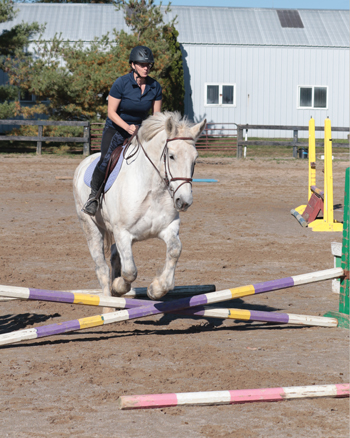
Photo by Leslie Potter
Like many equestrians, you may dream of jumping your horse. The sensation of piloting your horse while he takes flight is like none other in riding. Simply put, it’s fun. Plus, the ability to calmly and safely hop over low obstacles can be part of a well-rounded horse’s schooling. Unfortunately, too many horses are rushed into jumping, and as a result, they become tense and resistant. By starting slowly as you introduce your horse to jumping and establishing a solid foundation, your horse can learn to develop confidence in his own abilities and become a reliable partner over jumps.
Step 1: Finesse Your Flatwork Before You Introduce Your Horse to Jumping
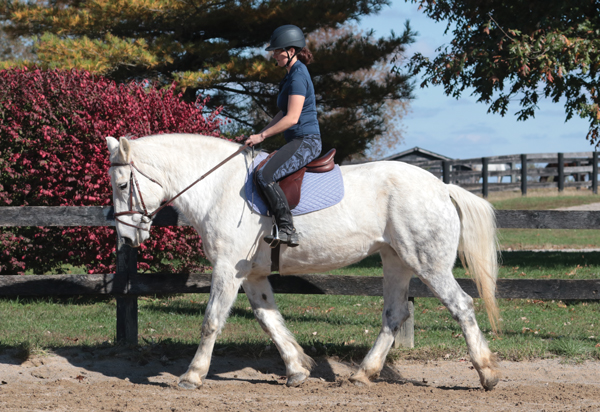
Before jumping, make sure your horse is well-schooled on the flat, able to lengthen and shorten his stride smoothly. Photo by Leslie Potter
Before you consider jumping, be sure that your horse is fully schooled in the principles of flatwork. First, he must walk, trot and canter at a consistent pace. Occasional half-halts are fine, but you shouldn’t feel compelled to hang on the reins to keep his speed in check. There’s a certain amount of “letting go” that’s necessary in jumping, and your horse should not surge forward the moment you soften the reins.
Next, your horse should willingly lengthen and shorten his stride in response to gentle aids. Remember that collection doesn’t simply mean going slower; your horse should become rounder through his body and noticeably shorten his stride. Conversely, lengthening equates to your horse stretching his entire frame so that he covers the ground in a longer stride. He won’t necessarily go faster. Both of these traits give you the ability to make subtle adjustments on your approach to a jump.
Third, your horse must understand the difference between leg pressure that means “go faster” and leg pressure that means “move over.” Once your horse moves laterally away from leg pressure applied behind the girth, it’ll be easier to ride a straight track to the center of each jump. Otherwise you’ll be forced to pull him to the center using a direct rein, and invariably that creates a crooked horse that is more likely to run out at the base of a jump.
Finally, check your horse’s power steering and brakes. Rudimentary patterns, such as circles, serpentine loops and figure-8s, reinforce your aids and help your horse develop his natural sense of balance. They also simulate the lines and turns found on most courses. By practicing these patterns on the flat, you can evaluate how easily you might navigate your horse around an actual jump course.
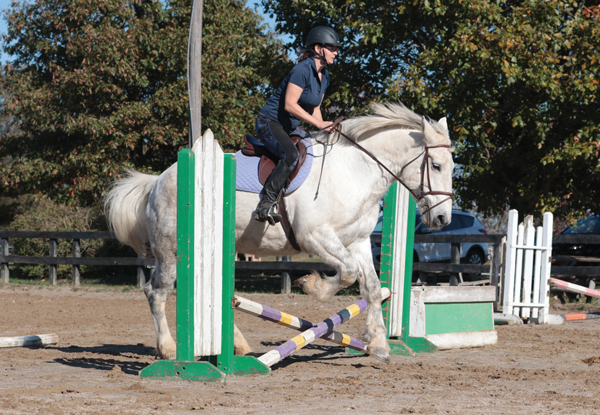
Step 2: Practice Over Poles
Start out over single poles, walking, trotting, and eventually cantering. Stay in a constant rhythm so that your horse doesn’t take a big leap over the pole. Photo by Leslie Potter
Ground poles are the foundation of future jumping exercises. Although they appear simple, ground poles can teach your horse invaluable lessons about pace, balance, length of stride and straightness before you ever introduce him to jumping.
To begin, gather a half-dozen or more brightly painted ground poles and scatter them around your arena. Set most of them perpendicular to the arena rail, about 10 feet inward, so you have the option of foregoing them. Don’t worry about measuring distances from pole to pole. Just leave plenty of room so you can work on your horse’s adjustability and vary the number of strides he puts between them. Also set one pole on an angle in the center of your arena so you can ride a long approach across the diagonal.
Gradually incorporate the ground poles into your flatwork. Walk over a few poles so your horse gets the idea. Then progress to a posting trot. Guide your horse over several poles, then circle or reverse direction before trotting over a few more.
Ride toward each pole with a sense of purpose but without driving your horse to the poles with your leg aids. Keep your horse on a straight track to, over and away from each ground pole. If he clunks a pole here and there, stay calm and continue on to the next one.
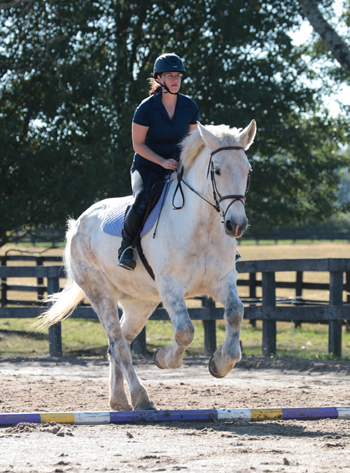
Scatter individual poles around the ring, not placing any particular striding distance between them. Photo by Leslie Potter
Eventually try cantering over them, which is more challenging than it appears. Ideally, your horse should maintain his canter rhythm as he goes over the poles. He shouldn’t make sudden leaps, break to a trot or switch leads.
Small adjustments as you approach the poles are fine, such as steadying his pace or collecting or lengthening his stride. However, grossly altering your horse’s stride to reach a pre-determined take-off spot is a bad habit to avoid. Cantering over ground poles is where your horse learns to trust his own judgement and develop an eye for a takeoff spot.
Step 3: Cross-Rails and Placement Poles
Once you and your horse are comfortable working over ground poles, it’s time to move up to cross-rails as you introduce him to jumping. The configuration of cross-rails invites your horse to seek the center of the jump.
Begin by stacking several ground poles between a set of standards. Then trot back and forth over this miniature obstacle, being sure to start and stop on a straight line. Resist the urge to make your horse jump the stacked poles. Focus on maintaining a steady trot from start to finish. When you remain calm and consistent, it allows your horse to comprehend the task before him.
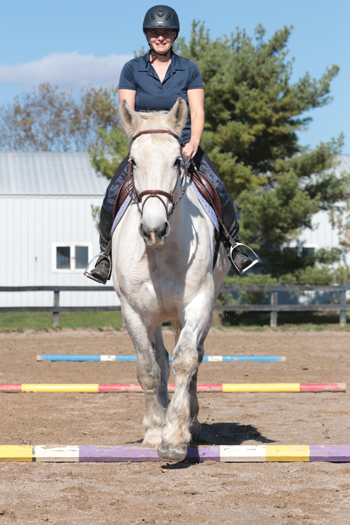
Use ground poles 9′ before and after a cross-rail to help ensure success. Photo by Leslie Potter
Next, set a small cross-rail (about 12-14″ high in the center) between your standards. Again, just trot over it in a straight line with a crisp halt afterwards. Your horse may hop over it or haphazardly trot over it, one leg at a time. Either effort is fine; don’t rush him. When he seems confident with that task, it’s time to encourage him to actually jump.
Raise your cross-rail to about 18″ and then set a ground pole on each side, about 9 feet away from the cross-rail. These act as placement poles, which help ensure success. Placement poles regulate your horse’s pace and length of stride, and help your horse put his feet in the correct spot for leaving the ground.
Approach this little exercise at a steady trot. Your horse should step over the first placement pole, jump over the cross-rail, and then regain his balance so he can step over the placement pole on the landing side. Encourage him to canter away to reinforce forward momentum, and then stop in a straight line.
Despite the sense of accomplishment that comes from jumping, don’t be in a hurry to try more advanced exercises. Even more important, adhere to the old adage: “Trot first, canter later.” The trot’s slower speed gives your horse a chance to think about the process of jumping.
This means you’ll spend weeks—perhaps even a month or more—trotting cross-rails and low (up to 2’3″) verticals with the aid of placement poles before attempting to canter a single jump as you introduce him to jumping. Yet, with a successful foundation, you and your horse will be jumping with joy for years to come.
Get DecorativeGet creative by adding elements to your cross-rails and low verticals. Lay pine boughs or cut tree limbs at the base of the jump, or staple inexpensive silk flowers to ground rails (not placement poles). You can also partially fill plastic plant pots with plaster of Paris and stick faux greenery in place. Then set these next to your standards for added interest. Your goal should be to make your horse braver, not scare him, so keep the jumps low and simple whenever you add something new. |
This article on how to introduce a horse to jumping appeared in the January 2020 issue of Horse Illustrated magazine. Click here to subscribe!


I like how you believe you should have patience with the horse instead of just rushing and putting yourself and your horse in danger.