Most horses can be trained to jump. But many need help learning to jump well. A horse that jumps in the correct style is not only a safer mount, but he also drops fewer rails and earns higher scores in competition.
If you’d like to finesse your horse’s jumping style, here are three basic exercises. Before trying them, be sure your horse is adequately schooled on the flat. He should maintain a steady trot and canter with minimal half-halts and corrections. Also, when setting up these exercises, adjust the fence heights according to your horse’s level of training. Remember that the goal isn’t for your horse to jump higher, it’s for him to jump better.
Exercise 1: The Simple Gymnastic
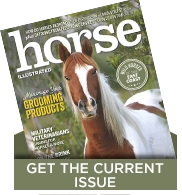
This exercise is an example of a jumping gymnastic (also known as a grid), and is a fairly common one used by hunter, jumper and eventing riders. The objective is to teach the horse to regulate his pace and length of stride from start to finish while also encouraging him to use his hocks as he springs up and over the jumps, creating a bascule.
Lay a ground pole about 9 feet in front of a cross-rail. The ground pole serves as a placement rail to help set the horse up for a proper hop over the cross-rail. Then measure about 18 feet and make a low vertical, and then another 21 feet to another, slightly higher vertical.
Due to the distances between elements, always trot into this exercise in a light half-seat with soft contact on your horse’s mouth. He’ll trot over the placement pole, hop over the cross-rail, and then take one easy canter stride before each of the verticals.
Although you may guide your horse with subtle aids so he stays on a straight track, don’t try to push him faster or hold him to a shorter stride. Allow him to figure out how to use his body and adjust his sense of balance to negotiate each aspect of the exercise. As his confidence grows, you can raise the heights of the vertical jumps up to 3 feet.
Exercise 2: Trot Large Cross-Rails
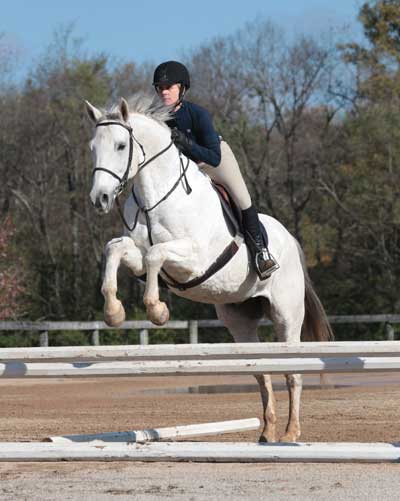
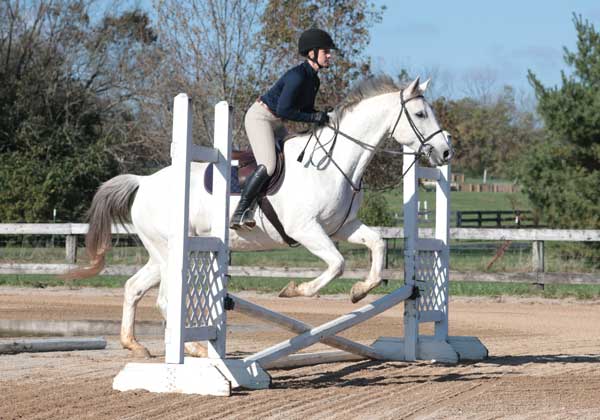
Cross-rails may seem like the most elementary level jump, reserved for kids and very green horses. Yet they serve an important purpose in helping a horse to jump in good style. The angle of the crossed rails, as they ascend on either side of the horse, act as reminders to keep his body straight and his front legs tightly folded.
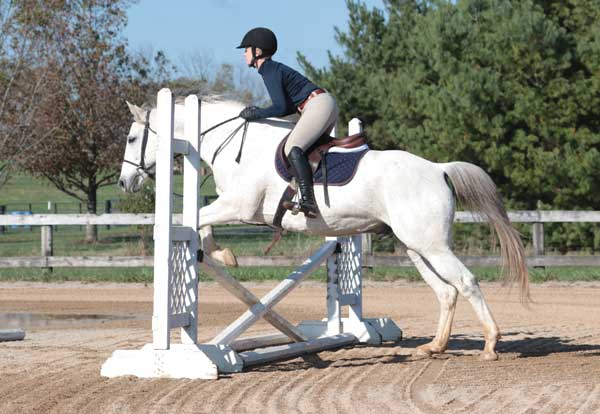
Set several moderately sized cross-rails around your arena. Add ground poles, which will act as placement poles, on both the take-off and landing sides of each cross-rail. Be sure to roll them about 9 feet away from the base of the cross-rails.
At the trot, approach each cross-rail at a steady pace, with light contact on your horse’s mouth. Focus on riding a straight track directly through the center of the cross-rail. Resist the urge to send your horse forward or make him leap over the placement pole.
Again, let him figure out the rhythm and balance necessary to step over the pole, jump over the cross-rail and then rebalance himself to hop over the placement pole on the landing side. His forward momentum should have him cantering away from the exercise until you bring him back to a working trot and head toward your next cross-rail exercise.
Exercise 3: Canter Ramped and Square Oxers
Oxers are the quintessential jump for teaching a horse to lift his front end and develop a bascule through the air. Created from two sets of standards, the rails of an oxer can be either ramped (the back rail several inches higher than the front rail) or square (both rails set at the same height).
Ramped oxers give the horse more time, and a clearer visual cue, to raise his front legs. Square oxers are arguably more challenging for the horse because he has little room for miscalculation. If he doesn’t snap his front legs up in a tidy effort, he’ll bump his knees on the front rail. That’s why it’s best to start cantering ramped oxers, with the back rail set at about 2’6″, before progressing to square oxers at the same height.
Although oxers don’t require placement poles, you do need to have an accurate eye for a take-off distance. That means you’ll ride to each oxer on a consistent canter stride without micromanaging where your horse will leave the ground.
Oxers are ubiquitous in all sorts of competition over jumps. Once you and your horse can sail over them in a relaxed, confident manner, you’ll both be jumping—and showing—in style.
Pro Tip for Jumping in StyleCreate an alley or chute with ground poles, set about 8 feet apart, to help keep your horse straight and eliminate drifting through exercises. These can be placed before and after single jumps and in between elements of gymnastic exercises. |
This article about jumping in style appeared in the April 2020 issue of Horse Illustrated magazine. Click here to subscribe!