Enter our 12 Days of Christmas Giveaways here!
0 ITEMS
  • My Account
  • Holiday Gift Guide
  • Podcast
  • Webinar
Subscribe Combo
Enable cache13
Home Blog Page 1047

The Barefoot Life

9
Farrier Rasp


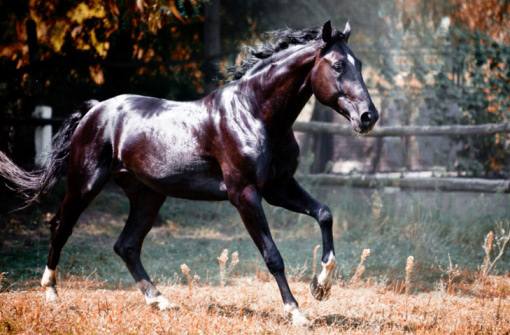
You’ve decided to let your horse go barefoot but are receiving conflicting advice on how to best manage him. You thought you could just have the shoes pulled and let your horse go, save for the occasional trimming.  

But some friends have given you a big, fairly complicated Must-Do list, culled from various sources, and now you’re not sure what to do—which is no surprise to Walt Taylor, certified farrier, Albuquerque, N.M. Taylor knows a thing or two about hoof care: He’s been a farrier since 1948, is the founder, former president and current secretary of the American Farrier’s Association (AFA), and creator of the World Farriers Association. He says, “I am a bit nonplussed by all the fuss over this subject. It seems that we are making the proverbial mountain out of a molehill, in the worst possible way. When we intellectualize and extrapolate some of the most simple subjects, they become much more than they actually are.”


To help you skirt those unnecessary mountains, Taylor, along with Lisa Simons Lancaster, who is a DVM and farrier, and Jeff Ridley, a certified journeyman farrier, give you practical advice you can use. Dr. Lancaster, of Eden Prairie, Minn., is the author of The Sound Hoof: Horse Health From the Ground Up. She has also collaborated with Robert M. Bowker, VMD, director of Michigan State University’s famed Equine Foot Laboratory. Ridley, of Leighton, Iowa, has earned the AFA’s Therapeutic Endorsement, a program that addresses strategies for horses with specific lameness problems.

Barefoot or Not
The most important issue is, can your horse go unshod? If health and conditions are such that hoof wear does not exceed hoof growth, the answer is yes. If the hoof wears down faster than it grows, then you’re either going to have to shoe your horse or alter the conditions that lead to excess hoof wear.

Good candidates for going barefoot are horses that:

  • have sound, healthy, normal hooves
  • have reasonably good conformation
  • live and work on the same surfaces: If a barefoot horse lives on soft bedding 23 hours a day and is then expected to work one hour a day on hard terrain, he’s probably not going to do well. But he might be fine if he works only in soft, even footing.

Dr. Lancaster explains the benefits of working and living on the same surfaces: “In the dry rocky terrain of Colorado, I had many clients whose barefoot horses were living in hard-packed dirt paddocks, and they were sound on the most rugged terrain.”

In general, unlikely barefoot candidates are horses that:

  • have poor conformation: Taylor cites conformation examples including severe to extreme anterior or posterior and/or medial or lateral imbalance, angular limb deformities affecting fetlocks, knees or hocks, et cetera.
  • work extensively and/or primarily on hard, abrasive surfaces
  • work on a surface that’s different than their housing surface

There are exceptions to these rules, of course. Due to genetics or other unknown factors, some horses just cannot seem to tolerate going barefoot, even under ideal circumstances. And then there is the opposite: A few years ago, the late Emil Carre, former AFA president and certified journeymen farrier, recalled a Quarter Horse endurance mount he once owned. “By the time [the horse] was 23, he’d gone on eight 100-mile rides, and over 3,000 miles in National Trail Ride Association competitions, and that horse practically lived barefoot. We trained him four to six months a year barefoot. He had thick walls and thick soles. It was through genetics and breeding.”

“There is no sure way to know ahead of time if the horse will do well barefoot,” Dr. Lancaster explains. “Generally, owners curious about barefoot just go ahead and try it!” That said, prior to pulling the shoes, have your farrier or veterinarian examine your horse, as they might notice something questionable that you were unaware of. 

If you can, wait until the off-season before removing your horse’s shoes, Dr. Lancaster advises. “That way the horse has some time to adjust before being asked to perform,” she says. “For horses that perform year-round give it a try any time, but be prepared to reduce the workload for a while.”

Note that while some horses have no problem adjusting to being unshod (usually those that work only on soft ground), other newly barefoot horses can become lame. “Sometimes a perfectly sound horse becomes quite lame when the shoes first come off if the owner rides on hard-packed terrain; these horses will need a period of adjustment with a slow-riding, easy workload before the feet toughen up,” Dr. Lancaster says. “How long that adjustment takes is difficult to predict and depends on many factors—how much work they are getting, how different the terrain is from their living surface, in what condition their feet are in to start off with, whether the owner wants to do light pleasure riding or compete in a hard-terrain 100-mile endurance race. But keep in mind that some horses never adapt to hard surfaces. The feet look good, the horse is sound on soft surfaces, but [the hooves] just never get tough on the dirt roads or rocks.” 

Maintaining the Unshod Horse
Numerous variables dictate how you will manage your barefoot horse, but here’s what you can expect.

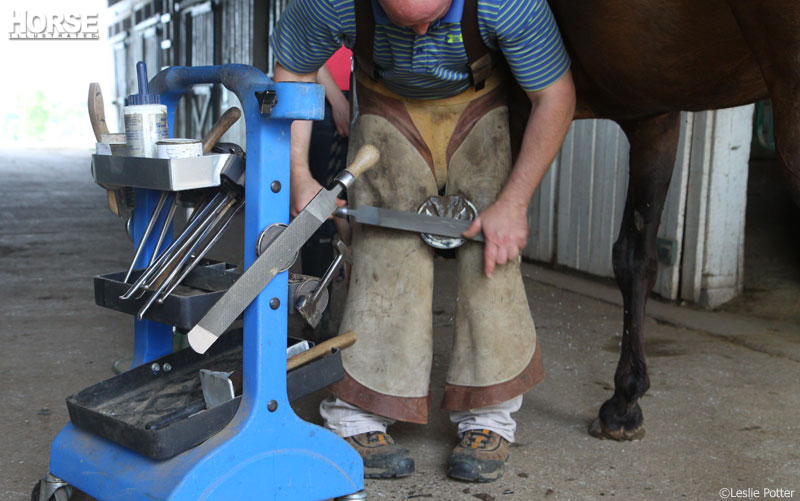
Altered farrier schedule. “Frequency of farrier appointments for the barefoot horse depends on how the foot wears,” Dr. Lancaster says. “Some horses need to be trimmed more often (as frequently as every three to five weeks) because you can’t take as much hoof off; they become sore post-trim if more than 1/8 inch is removed.”

On the other hand, some barefoot horses do best with a longer interval of eight to 10 weeks between trimmings, according to Ridley. “Many barefoot horses can go a little longer because they are wearing off foot daily.”

“I have not found any need for different angles or other trim parameters in horses to be shod compared to those left barefoot,” Dr. Lancaster says.

Taylor agrees, as does Ridley. “Angles will remain the same, but the foot should be left a little a longer as it must maintain concavity, and vertical depth will be more conducive to staying barefoot,” Ridley says.

“Trimming the foot that is to be left without shoes should be more conservative than if the horse will be shod,” Taylor adds. “Extra length of wall, less frog paring and removal of less dead sole are all indicated. The hoof-pastern axis must be kept straight or slightly broken forward.” 

Seasonal adaptation. Your horse’s trimming schedule—and even his ability to go barefoot—could change with the seasons. For starters, hoof growth varies under different weather conditions. Seasonal changes can also alter the terrain, thus affecting the feet.

This can be challenging if the horse has a tendency to be sore on variable terrain,” Dr. Lancaster states. “Many horses have trouble in the winter on uneven frozen ground, and may need shoes if they are expected to work on such ground. The wet spring and dry summers can also cause horses some foot pain if they work on ground much different than what they live on.”

Then, too, Ridley points out, a change in season sometimes brings a change in the work schedule, which, in turn, could affect hoof wear, trimming schedule, or the need for shoes. If hoof wear exceeds growth, it’s clear that the horse needs hoof protection and that may mean shoes.

A different work schedule. “Sessions may need to be altered when you first start a horse barefoot,” Lancaster says. “You have to give the feet a chance to adjust and to get used to the new demands. Keep in mind that it is not practical to remove shoes during the middle of competition season and expect the horse to continue the same level of performance.”

Living conditions and hoof growth are important factors when considering whether your horse can go barefoot
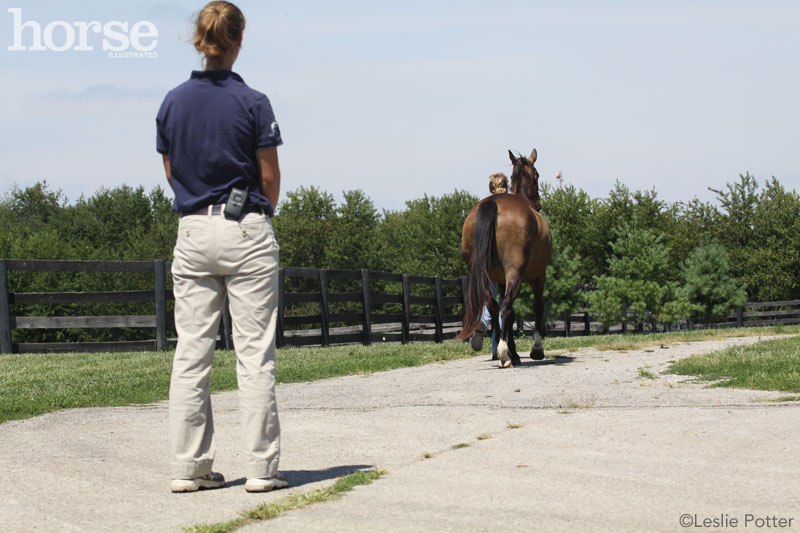
Before you decide to pull your horse’s shoes for good, consider his living and working conditions.

Even after a horse adjusts, you may sometimes have to back off your schedule if hoof wear exceeds growth; reducing the horse’s work or training allows the hoof capsule to regrow to a comfortable length, important for protecting interior sensitive structures, Taylor says.

Monitoring your horse’s hooves. “Wear on the hoof wall is the critical factor, in my opinion,” Taylor says. Watch for signs that your horse is beginning to react to too much wear or ground injury; signs include an unwillingness to move out, tender-footed or lameness, changes in his way of going, et cetera.  

“Bare feet should be examined or trimmed by a competent farrier to determine if the hoof capsule is withstanding the wear that it is being subjected to,” Taylor suggests. “Look for collapsed or underrun heels, a broken wall that threatens sensitive structures, corns or sole bruises, or a torn or injured frog.”

Good Advice
So can your horse go barefoot? Perhaps the only way you’ll know for sure is to give it a try. “Put the horse in the best conditions that you can provide, and evaluate whether or not he can be maintained barefoot,” Ridley says. “It is great if your horse can stay barefoot—some can, some cannot.”

Liked this article? Here’s more on hoof care:
Expert Opinions on Care of the Barefoot Horse
8 Hoof Care Myths

Marcia King is an award-winning freelance writer based in Ohio.


This article originally appeared in the November 2006 issue of Horse Illustrated. Click here to subscribe.

The Tevis Cup

6

Stories of settling the West are filled with images of resilient horses crossing the desert plains. It was these legends that began to spur discussion among 59-year-old Wendell Robie and some friends. In the 1950s, few people believed that modern-day horses still had the kind of endurance it took to cover 100 miles in a single day. Wendell and his friends decided they would put that doubt to rest.


On Aug. 7, 1955, Wendell and four friends set out from Lake Tahoe, near the northern California-Nevada border. In less than 24 hours, Wendell and his Arabian stallion, Bandos, reached the 100-mile destination of Auburn, Calif. Three of his friends followed and a tradition was born. Twenty riders participated in the second-annual Western States Trail Ride, with 15 finishers. Wendell went on to be the first finisher four years in a row.


By 1959, the Western States Trail Ride caught the attention of California businessman, Will Tevis. Intrigued by the event, Will donated a trophy cup to be awarded to the person who completed the one-day endurance ride in the shortest amount of time and whose horse was in sound condition and “fit to continue.” The cup was titled the Tevis Cup in honor of Will’s late grandfather, Lloyd Tevis.


To this day the Western States Trail Ride, commonly called the Tevis Cup Ride, remains the oldest modern-day endurance ride and caps off at 250 participants each year. It is generally scheduled the July weekend closest to the full moon. As part of the Tevis Cup Ride regulation, all horses must be vet-checked at regular intervals throughout the ride. Any horse showing signs of compromised health is not allowed to continue on the trail.


It was this vet-check regulation that inspired H. Gordy Ainsleigh to take action. In 1973, Gordy was attempting his third Tevis Cup finish when his horse was pulled at the 29-mile checkpoint for lameness. The next year, Gordy decided to forgo the horse and instead run the entire 100 miles on foot. With eight minutes left in the day, Gordy crossed the finish line and became the first of many to complete the trail without a horse.


The fastest win at the Western States Trail Ride was 10 hours and 46 minutes. The slowest win took 16 hours and 23 minutes, and the average win time is 13 hours and 36 minutes, or a rate of 7.48 miles per hour.


The Tevis Cup Ride is unarguably challenging, but 1990 marked the toughest ride in the event’s history. Route changes that year left many unknowns and the temperatures were the hottest ever recorded for the ride. It took 15 hours and 56 minutes for the first rider to cross the finish line.  


While many new riders have swept in to steal records over the years, the pioneers of the Western States Trail Ride, Wendell Robie and his horse Bandos, still remain record holders. At the age of 74, Wendell was the oldest rider to ever finish. At 16 years old, his horse Bandos became the oldest horse to win the cup.

For more information:
teviscup.org

Extinguish the Threat of Barn Fires

11
Barn Fire

Whenever we hear about someone’s barn going up in flames, we tend to soothe ourselves with thoughts that it is improbable that our property would suffer the same fate. Someone was probably smoking, we might think, or their electrical wiring was old and unsafe. It will never happen to me. 

It’s easy to feel complacent, even in the face of someone else’s disaster. The awful truth is that a fire can occur in any barn because the ordinary, run-of-the mill stable is a fire waiting to happen. “There is no such thing as a fireproof barn,” says Robert Barnard, vice president of the National Equine Safety Association (NESA) and co-author of the Humane Society of the United States booklet, Making Your Horse Barn Fire Safe. Robert conducts seminars on disaster planning for farms and ranches throughout America, and he has seen first hand the devastation that fire can cause. “A barn fire is likely to happen anywhere because of the nature of the building’s use. But you can lower the likelihood of a fire.”

How Fire Works

Fire is a chemical reaction that needs three things to get going and to survive: oxygen, fuel and heat (referred to as the “fire triangle” by fire experts). And horse barns have these things in spades. Barns have good ventilation to allow influx of healthy air (oxygen), they are wired with electricity for lighting and heating equipment, and, of course, barns are filled with hay and other flammables, from medical treatments to tractor fuel. Take away any side of the triangle and a fire won’t be able to occur.

Cleanliness

Robert says everyone should keep safety at the forefront by making fire prevention a day-to-day activity, and this starts with routine cleaning. “A clean barn will lower the amount of rodents that will chew on electrical wires and will also lower the amount of combustibles,” he says.

It’s easy to accumulate loose hay, bedding and baling twine, and allow the buildup of birds’ nests and dust, but this is not just a case of untidiness; organic debris is fuel for fire. Also think about fuel sources on the outside of the barn, particularly if your barn is situated close to a road. A lit cigarette flipped carelessly out of a car window can spark a fire in dry weather. “Weed-whacking and trimming grass around the barn will make a firebreak and help stop the flames from spreading,” adds Dr. Jenifer Nadeau, DVM, equine extension specialist and member of the Connecticut Horse Council, which conducts a fire prevention program called Horse 911. Fire retardant landscaping can also be beneficial. 

Innocuous cobwebs are another fire hazard. Chains of webs can create a pathway for the fire to travel very quickly from one end of the barn to the other. Bits of flaming cobweb act as tinder and can drop into another stall and allow the fire to spread. Cobwebs can also spark a fire by touching a hot light bulb. “Keep a safety shield over light bulbs so that cobwebs and other matter cannot come up against them and start a fire,” Dr. Nadeau adds. 

It’s true that manure piles can get hot, but there has never been evidence of piles igniting, Dr. Nadeau says. The internal temperature of the pile should be around 140 degrees Fahrenheit, which means the pile is composting correctly. You can check your compost’s temperature by inserting a garden thermometer into the pile. If you think it’s getting too hot you can turn the pile with a pitchfork or a tractor.

Safe Storage

Although barns offer tempting storage space, Dr. Nadeau advises that it’s really better not to store your tractor, machinery or other gas-powered items that could ignite in with your horses. Aside from being a fire hazard, machinery creates clutter, which is a tripping hazard for fire fighters and can block exits. People often keep minerals, solvents and rags for cleaning that are other sources of fuel in the tack room. If you use an oily rag, throw it away in a metal trash can away from any storage or lay it out flat, away from the barn, to let the oil evaporate. Avoid storing non-horse related flammables such as paint, gas and oil in the barn.

Think seriously about how you manage your hay. Keeping loose hay off the floor is only one step in preventing a fire breakout. If hay is not dried (cured) correctly mold forms and the bacteria begins a powerful reaction that may result in combustion. One thing you can do to prevent this reaction is to salt your hay. “This sets up a saline environment, which eliminates or lowers the ability for mold to grow,” Robert says. “Mold is what creates spontaneous combustion because the breakdown of the hay creates heat. You can buy 50-pound bags of salt used for water softening at building supply stores. When you store your hay, sprinkle a scant cup of salt over it and repeat between each bale. This is an old process that farmers and ranchers use in the Pacific Northwest, and it doesn’t change the nutrition of the hay at all.” Much of the salt falls off before the horse eats it, and the amount the horse ingests is minimal. 

Robert says if you smell a musty or sooty odor you probably have a suspect bale of hay, and you can test your bales with your garden thermometer. One hundred and fifty degrees is cause for concern. If it is 175 degrees or higher, phone the fire department immediately. In this case, be very careful and do not pull the bales out yourself. A suspect bale will already have two legs of the fire triangle: heat and fuel. Pulling a bale out into the open will introduce the third leg: oxygen. “There have been stories from firemen where they’ve gone in to pull a hay pile apart and it almost blew up on them,” Robert says. “Once you expose the bale to oxygen you have fire. I once pulled a bale apart and it was white with mold and hot. I wasn’t that far away from a fire.” 

Hay and Bedding
Be mindful of how and where you store hay, straw, bedding and other flammable stable supplies.

Convenience seems to be the uppermost consideration when it comes to where hay will be stored. As close to the horse as possible seems easiest, so most of us either store hay in a hayloft or in a stall, or in a hay area next to the horses. But looking at the nature of hay, convenient storage may not be the safest option for horses. However, there are ways to prevent a fire if there is no other option.

Keep air on the hay so that it remains dry,” Robert says. “Stack hay in rows of two bales with a half or quarter row separating them so that there is air circulation between the bales. If you have a bad bale, you’ll smell that musty odor sooner.”

Wired for Safety

Take a look at your daily habits and ask yourself if you are inadvertently creating a fire hazard. We all know the virtues of the “No Smoking” sign, but other human actions can have terrible consequences. 

Portable space heaters can make a cold night of foal watch bearable; however, any portable heating or lighting device is dangerous. Wrap up warm instead. “I used to be on night watch in Kentucky at one of the big Thoroughbred farms and I was in a side guard shack,” Jenifer says. “I had my portable space heater on. All of a sudden a line of fire went from the cord to the wall. It was a good thing it wasn’t in the barn.” Only code-approved, permanently installed heaters should be in the barn. 

“The number one cause of barn fires is electrical,” Jenifer says. “So have your electricity inspected once a year. Don’t overload fuses by using too many extension cords. People who show horses on the winter circuit will often rig up lights overhead to stop winter coats from growing. I have a picture of a barn that had an extension cord hanging right over the horse’s stall. It would have been so easy for the horse to chew on that cord and start a fire.” 

While unplugging electrical devices when not in use, such as clippers and the radio, is a good idea, a better idea is to turn off the electricity when leaving the barn. If possible, have an outside switch that turns off all of the power to the barn. 

Coil bucket heaters are another culprit. They are a big convenience when heating up water, but this is another area where complacency can set it. Never walk away from the heater. It’s too easy to get sidetracked on another task and forget it. “I can’t tell you how many bucket heaters have started a fire,” Robert says. “People put the heater in the water and go away for four or five hours. The coil burns right through the bucket and the barn burns down.” 

Preventing rodents is very difficult in a barn, no matter how many cats you employ. Rodents not only create mess and carry diseases, but they also like to chew on the plastic around electrical cables. PVC and other plastics include salts in the production processes that are tasty to mice, so encase all wires in metal cable, ridged cable or EMT conduit. If you’re ever in doubt, get a qualified electrician’s advice.

Know the Drill

“I know a woman who owned a barn in the suburbs of Boston who had nine National Show Horses,” Robert says. “The woman was meticulous, just as clean as can be. She had an intercom in her house that linked to the barn. One evening she heard her horses in distress. She rushed to the barn and realized she had a fire. She couldn’t open the barn door, so she panicked and ran around in circles listening to her horses scream. All nine horses died, and the barn was rubble by morning. What happened is that she rushed down in a panic, and she kept trying to open the door from the hinge side.” 

This horrible story is a clear illustration that even the most ordinary habits aren’t automatic when you’re in panic mode. This is why it is so important to know what your disaster plan will be and to practice it. “You have to be on automatic in a disaster,” Robert says. “This is why the military trains, police train, fire fighters train. You need to get muscle memory so that what you are doing is automatic.” 

The first step in establishing a plan is map out the layout of your barn on paper: where the feed and hay are kept, where each horse stays and where the tack is. Next, note down exit routes that take you out of the barn and to where you will secure the horses. Simply turning them out of the barn or assuming they will leave on their own is out of the question. The notion that horses will run back or remain in a burning barn is sadly true. “Horses are used to their same stall, used to their same routine,” Robert says. “So if a stable turns into a fire scene the horse won’t leave it. He will stay in the barn and die. I’ve created a [mock] fire situation in a barn with smoke generators, and the horse went right back into the barn.” 

Finally, include how wide the driveway is, where horses can be put and where the nearest source of water is—this can be a well, pond or a river. Also include emergency phone numbers (veterinarian, your numbers at work and at home) and a list of experienced local horse people who can help evacuate horses.

Distribute a copy to everyone who has anything to do with your barn or horses. Take a copy to your local fire station and keep another in a cylinder, marked “in case of emergency,” by your mailbox. 

Post a large notice by your phone stating the location of your barn, including street names and any landmarks, which can be difficult to remember in an emergency. Also write the words boldly: In case of fire say to the operators, “I have a horse barn fire with living animals and not a storage barn fire.”

Barn Fire

Make sure you have the right equipment in your barn, such as a phone, a flashlight and fire extinguisher (have them inspected yearly) at all exits. “Everyone who spends any time at your barn should know how to work the fire extinguisher,” Jenifer says. Leather halters and cotton lead ropes won’t get hot or melt like nylon will; always have them right by the horses at all times.

Put it into Practice

Here are some hints for an effective plan and how to practice.

  • No matter what happens, never run down to the barn, always walk. Running takes blood away from the brain, and you need blood to help you keep a level head. “You also are working on a memory mode, so you must keep as calm as possible,” Robert says.
  • First off, call the fire department. Obviously you’ll pretend to do this in your drill.
  • If it is safe to do so, remove the horses. Gently coax each horse out of his stall. One at a time, the horse closest to the exit first, and safely tie them in your specified location. Remain calm and try to act as though everything is normal. If a fire is small and can be put out with a fire extinguisher, this can be your next step. However, if the fire is any bigger, or you are at all uncertain, leave it to the fire fighters. “Black smoke is full of arsenic and cyanide,” Robert says. “You only need three of four breaths of that and you will die. People and horses don’t die from fire, they die from smoke inhalation.” Leave everything up to the fire department as much as possible.
  • Practice your drill. Time it and then study what you could have done more effectively. Run it where you have one person doing everything, then two people, then more.

You can ask your local fire department to come out and inspect your barn and advise ways to make your disaster program work better. And ask them if they will lead your horses out of the barns dressed in their fire gear as part of your practice drill. “We’ve gone to barns where horses have never seen fire trucks or fire fighters, and it didn’t take long for the horses to get used to that big old Martian coming at them. It’s good practice,” Robert says. 

Fire prevention all goes back to neatness and awareness. Evaluate your barn and your habits, and note where you think a fire might start. Remove those fire hazards immediately, and make sure everyone who enters your barn understands that you are serious about fire.

More information on barn fire safety:
Fire Safety Equipment
Be Prepared for a Barn Fire
Stop a Barn Fire Before it Starts


Sharon Biggs is a dressage instructor and the author of In One Arena (Half Halt Press) and Advanced English Horsemanship (BowTie Press).

30 Time and Money Saving Tips

19
    Horse Barn
  1. Buy in bulk. If you’ll use it before it expires, refill bottles are cheaper.
  2. Arrange routine vet visits with nearby neighbors or fellow boarders to split the field call.
  3. Use a sheen spray after you bathe your horse to help repel dust and detangle manes and tails, cutting down on future grooming time.
  4. Keep your tack room neat and tidy so that you don’t waste time searching for tack and supplies.
  5. Organize! Use separate containers to hold grooming tools, a first-aid kit, wash-rack essentials and so on.
  6. Edit horse care lotions, potions and meds regularly—toss what’s expired, dried up, gone gunky, leaky or no longer needed.
  7. Give your tack a once-over with a clean rag after every ride to make deep cleaning before a big event easier.
  8. Keep up on grooming tasks like pulling manes and clipping so that you don’t have to do an extreme makeover before show day.
  9. On your day off, prepare a week’s worth of supplement servings to cut down on feed preparation time.
  10. Buy your hay from a reputable dealer—you’ll get more bang for your buck with high-quality hay, and you won’t waste time haggling over returns.
  11. Most horses are quite happy to live out in the pasture as much as possible—and that means less stall bedding cost for you.
  12. If you find someone who can make use of your manure pile, it’s a win-win situation: You get free manure removal, they get compost, and we all save the planet.
  13. To avoid untangling a snarled mess, rewrap polos or wraps after every use.
  14. Wash your wraps in a mesh laundry bag, so they don’t get knotted up.
  15. Recycle your supplement tubs. They make handy buckets or storage containers.
  16. Convert clutter to cash. Sell tack that you no longer use, blankets that don’t fit, outgrown show clothes, and the like.
  17. With a little creativity, odds and ends can become jumps, dressage letters, trail obstacles and so on.
  18. For a intensive training session, have a plan and focus on what you and your horse are doing.
  19. If you board at a busy facility and can be flexible with your schedule, ride at off-peak hours when arenas are less crowded, turnouts and wash racks are more available.
  20. Save a shoe that is in fairly good condition after your farrier’s visit. If you lose a shoe at a show, you can have the show farrier tack on your spare.
  21. Get friends together to have a “barn” sale for apparel, tack and stable equipment that you no longer use or need.
  22. Don’t throw away old stall mats—if they’re textured you can recycle them to your wash rack area.
  23. Update your show wardrobe with one key piece, instead of buying a whole new outfit.
  24. Find a local friend to exchange “farm-sitting” duties with, instead of paying for professional help.
  25. After your horse’s bath, go over his body with a medium brush. It works to groom him and remove water at the same time.
  26. An old clipper blade can be recycled to shorten manes effectively.
  27. Detanglers in manes and tails can also help prevent shavings from embedding.
  28. Save water—have a spray attachment connected to your wash rack hose.
  29. Metal closet organizing systems work well in tack rooms, especially for storing wraps, bottles and small items.
  30. Invest in a multi-use tool and keep it in your grooming box—saves you from having to keep several tools at the barn and is always at the ready.

Have you found a creative way to save time or money at the barn? Click “Submit a Comment” below and share your thoughts!

Read on for more tips on cutting horse costs.

Get some advice on saving time at the barn.


This article originally appeared in the August 2006 issue of Horse Illustrated. Click here to subscribe!

Getting Your Barrel Horse Through the In Gate

10


Go to any barrel racing or pole bending competition, and you’re bound to see at least a few horses spinning in circles, out of control or refusing to enter the in-gate. Their worried riders may try to back the misbehaving horses into the pen, whip or spur them in, or have another horse and rider usher them to the gate. What’s the problem? Why are these horses acting this way, and if your horse is one of them, what can you do to improve things?

We talked to two experienced speed-event competitors—a vet who offers suggestions for evaluating your horse’s health, and a barrel-racing champion with advice for re-schooling your horse for better performance. Michele Burgard, DVM, started competing in gymkhanas when she was a teenager and currently competes in Women’s Professional Rodeo Association (WPRA) barrel racing competitions. She also treats a number of barrel racing horses in her Southern California veterinary practice. Linda Vick has been a card-holding member of the WPRA for 20 years and has won professional rodeo barrel racing events all over the country, including being crowned WPRA Reserve World Champion Barrel Racer in 2005. In addition, she has started and trained a number of her barrel racing horses.

Using a three-pronged approach—health, feed and training—you and your horse will be well on your way to entering the in-gate and handling competitions without a fuss.

Hot Tip!
Some of the natural calming supplements on the market can be effective according to barrel racer and veterinarian Michele Burgard. However, horses respond differently, so consult your vet ahead of time, and try the supplement before competition day. Make sure the ingredients in the calming supplement are legal with the association governing your event.


Is Pain the Problem?

Dr. Burgard explains that first and foremost, recognize that getting a bit jazzed up at competition is a natural thing for a speed horse, just as a person might get nervous before a public speaking engagement. However, some horses cross the line between behavior that is reasonable before a race and behavior that is unacceptable. “Certainly it does go over the top when the horse spins, tries to dump you, rub you off on the fences or run backward,” Dr. Burgard says. While a horse may get excited, he must always remain under control.

Out-of-control behavior, including refusal to enter the in-gate, may simply be a sign a particular horse can’t handle the anxiety of speed competition, but according to Dr. Burgard, these behaviors are more often related to some sort of physical pain. Pinpointing the source of the pain, however, can be quite difficult. “The horse may appear completely sound,” she says. “It really takes a comprehensive, complete exam. If you have a horse that’s not performing to potential or doing all of these agitating things, he needs a whole workover.”

“But wait a minute!” you might say. “My horse is fine when we ride at home. If he had a physical problem, wouldn’t he act up every time we practice, not just at shows?” Not necessarily. Keep in mind that a horse doesn’t usually run full speed at home. This level of exertion may only happen at shows, and when your horse arrives at the showgrounds or is asked to enter the competition pen, he knows what is going to happen next, and what’s going to happen next may be painful for him.

Dr. Burgard points out that stifle problems and suspensory ligament injuries are quite common for barrel racing horses. Back pain from an ill-fitting saddle or a rider that is too heavy for the horse may also be to blame for behavior problems.
“A very common barrel racing injury is to the sacroiliac, or the SI joint, which is where the backbone is in place with the pelvis, and it’s held together with ligaments that can tear, stretch or strain,” Dr. Burgard explains. She says many people wouldn’t even know an injury had occurred in this area until the horse is palpated by a veterinarian.

But in Dr. Burgard’s opinion, hock problems are the most common of all. “If I were to give a percentage it would be greater than 50 percent [of performance horses] need treatment for their hocks,” she says. Treatment can include injecting hyaluronic acid and/or cortisone directly into the joints, or intravenous injections such as Legend IV or intramuscular injections such as Adequan.

Linda agrees that behavior problems are often caused by pain, and reminds riders to make sure their saddles and tack fit correctly. “You want to check all of your equipment and make sure everything’s fitting right and that the horse doesn’t have any pain,” she says.

As for complementary therapies, such as chiropractic and acupuncture, Dr. Burgard believes they can help but, unfortunately, some horse owners use them to treat the symptoms rather than getting to the cause of the problem. So before deciding on a complementary therapy for your horse, consult your veterinarian.

Feed Findings

Wrong Horse or Rider?


What if you’ve tried everything—had your horse’s health and feed evaluated and worked to re-school him—and he’s still out of control at competitions? “Not all horses are speed event horses,” champion barrel racer Linda Vick explains. “There’s a personality that goes with the event. Some horses just can’t handle that kind of pressure. A horse will let you know if he likes what he’s doing.” If your horse is getting so stressed out that he’s unable to perform well despite your best efforts, it’s probably a sign that he needs a career change.


On the other hand, some horses perform just fine for one rider and not another. “The horse and rider have to be properly matched,” Linda says. “The horse might be more horse than the rider can control. Horses are very smart animals, and they know what a rider can or can’t do. Put a person on a horse that’s more than they can handle, and the horse will take advantage of them.” If this might be the case with you and your horse, consider finding a mount more suited to your skill level or personality.


If your horse gets a clean bill of health from your veterinarian, your search for behavior solutions can then turn to his diet. Remember, we are what we eat, and just as sugar and caffeine may have us darting about the home or office, the wrong diet can make your horse high as a kite. “You might be overfeeding your horse a grain mix, and some horses can’t handle this,” Linda says. “Maybe they don’t need the grain, or you can change your rations to something different. There are [certain] feeds that tend to make a horse higher than other feeds.”

Dr. Burgard agrees and finds that often when a horse is very excitable, he has a diet too high in carbohydrates, such as a horse getting too much grain and rich alfalfa hay. “I’m not a fan of feeding horses straight alfalfa hay,” she says. “I think a combination of alfalfa with either a three-way mix grain hay, Bermuda or coastal grass hay is really good.

“There’s a lot of research being done right now on horse feed,” Dr. Burgard continues. She says that much of the research points to the benefits of fat in a horse’s diet, especially fat balanced in Omega-3 and Omega-6 fatty acids.  Beneficial ingredients in supplements, such as Omegas and antioxidants, can have a positive impact on a horse’s behavior, she says. Dr. Burgard points out that instead of giving horses a lot of expendable energy, a diet higher in Omegas and antioxidants helps horses be “more focused mentally and physically.”

Because a horse’s dietary needs are different based on his health and activity level, it’s best to consult your veterinarian to develop a feeding plan ideal for your horse. If you have concerns about your horse’s behavior, discuss them with your veterinarian so that he or she can take them into account when making recommendations.

Schooling Solutions

If yourhorse is still acting up after you’ve carefully evaluated his health and diet, you can focus on schooling at home and at competitions to improve his performance behavior.

At Home
“In my opinion horses get [speed event behavior problems] from being run too much and out of control—where the rider just likes to run them,” Linda says. Instead of running the horse during her practice sessions, Linda concentrates on slow work and keeps training fun and enjoyable for the horse. Here are a few things to try at home:

  • If your horse has problems entering the gate at competitions, you can teach him the gate is a place of rest and relaxation. “Walk into the arena, stop and let the horse relax at the gate,” Linda advises.
  • Don’t overdo the pattern at home, and don’t run the pattern full speed at home. “I don’t believe in running [the pattern] every day, and I don’t believe in overtraining horses—sometimes less is more,” Linda says.“You can do slow work every day. I take my horse around the barrels slow quite often, but I don’t run him,” Linda explains. “I don’t run him at all on the barrels unless I have a problem, something I need to have corrected.“Always be under control,” she adds. “If you’re out there going fast, and you’re not under control, you’re not teaching the horse anything.” Linda says she may walk, jog, lope or even gallop a pattern during practice, but she concentrates on doing it correctly rather than fast. “I don’t just go full speed around the barrels. I try to make my practice perfect,” she says.
  • When you do practice the pattern at home, do something different afterward. “Work the horse on the barrels, and then do something after, like go for a trail ride,” Linda suggests. “Keep it fun for him. Don’t always get on and run him because that just gets the horse more hyped up and gets him so that he doesn’t like his job.”

At the Competition

As explained earlier, it’s somewhat natural for horses to get excited at competition, as long as that excitement doesn’t go too far. “There’s nothing wrong with getting wound up in competition,” Linda says. “It doesn’t hurt for them to know it’s their turn, but it’s got to be under control.”

To help your horse stay under control at competitions, Linda has a number of suggestions:

  • Every horse needs a different type of warmup for optimum performance, so find a workout that doesn’t overly stimulate your sensitive horse. “For horses who are hotter, I do slow work—long trotting and slow loping, loping in circles,” Linda explains. “You don’t want to get a really hot horse’s adrenaline going.”
  • For horses that refuse to enter the in-gate or get wound up approaching the gate, it can be helpful to practice hanging out and relaxing by the gate; however, make sure to stay clear of riders entering and exiting the competition arena. “I sit on my horse sometimes by the gate and just let him relax and watch,” Linda says. “If your horse won’t stand, you can get off and hold him by the gate where he can learn to relax and get comfortable.”She suggests you warm your horse up first, and then go up and stand quietly with him before it’s your turn to go into the arena.
  • Remember that horses pick up on how you’re feeling, so try to stay relaxed and focused. “As riders we ‘telegraph’ to the horse that it’s our turn,” Linda explains. “You could be sitting there, and your horse is really quiet, and you hear your name called, and the next thing you know he’s all excited. It’s because you telegraphed it.”Linda suggests riders visualize a successful performance. “Don’t think, ‘Oh, no, my horse isn’t going to do this,’ ” Linda explains. “I believe in thinking positive and keeping calm and cool. Know, ‘This is what you’re going to do’—there are no ifs ands or buts about it.
  • “When it’s your turn to go, don’t dilly dally,” Linda says. Instead, concentrate on keeping the horse moving forward, in and through the in-gate.
    Linda explains that anything in the way as you go to enter the gate, such as another horse and rider, can disrupt your smooth entry and cause a nervous horse to begin fretting or refusing. “Make sure the gate is clear, and you can go right in,” Linda says.

With these schooling strategies for the speed-event performer, and a careful evaluation of your horse’s health and diet, the two of you will soon be ready to perform to the best of your abilities.

Further Reading
Barrel Essentials

Micaela Myers competed in gymkhanas throughout her youth and is currently a freelance writer in California.


This article originally appeared in the August 2006 issue of Horse Illustrated. Click here to subscribe.

Western Pleasure Perception

30

We’ve all heard the jokes and the ridicule. We’ve heard western pleasure horses called peanut rollers, zombies and creepers. It’s been claimed that time-elapsed photography is the best way to determine if they are actually moving around the arena, and that watching paint dry is more exciting than watching a western pleasure class. Because much of the criticism is justified, western pleasure has endured one of the longest running negative public images of any showing discipline.

Western pleasure

What, exactly, is the problem with western pleasure? Those within the discipline’s inner circle—trainers, exhibitors, breeders and the stock horse breed associations—know that how the class is judged has been a problem. The general horse-loving public, however, just sees horses moving painfully slow with their too-low heads flopping languidly about their knees.

The solution to the problem is obvious. Change the way the class is judged, and you change the class. And this is just what associations like the American Quarter Horse Association (AQHA), the American Paint Horse Association (APHA) and the National Snaffle Bit Association (NSBA) have done.

The Beginning of the Bad Rap

Former AQHA President Bill Englund, of Cashion, Ariz., has been judging American Paints and Quarter Horses for 35 years. He can date the origins of western pleasure’s problems back more than two decades.

“Back in the 1970s, the horses had a lot of natural movement,” Bill recalls. “Their gaits were true, they moved out faster, their heads were elevated about an inch or two above level, and they seemed brighter.”

According to Bill, the trouble began when trainers and exhibitors started slowing their horses down in order to win.

“By the 1980s we began to see the trend in which slower horses were winning, so everybody tried to get their horses to go slower,” Bill says. “And when they went slower, their heads started dropping, and their gaits became manufactured. The horses started going so slow that they couldn’t move properly.”

Rules to Live by

In recent years, the American Paint Horse Association (APHA), American Quarter Horse Association (AQHA) and National Snaffle Bit Association (NSBA) have refined the standard for the western pleasure show horse and how the class is to be judged. The rules offer a vivid description of how the ideal western pleasure horse should look and perform.

The AQHA’s Official Handbook of Rules and Regulations describes a good pleasure horse as having a free-flowing stride of reasonable length in keeping with his conformation. It says that the horse should carry his head and neck in a relaxed, natural position, with his poll level with or slightly above the level of the withers. Judging calls for maximum credit to be given to the flowing, balanced and willing horse that gives the appearance of being a pleasure to ride. Faults include excessive slowness at any gait, loss of forward momentum resulting in an animated and/or artificial gait at the lope, carrying the head too low (tip of the ears below the withers) and being overly canted at the lope.

The 2006 Official APHA Rule Book describes the jog trot as a smooth, ground-covering, two-beat diagonal gait and the lope with forward motion as an easy, rhythmical, and clean, three-beat gait. The rule book specifies that the horse should lope straight with a natural stride and appear relaxed and smooth, and that loping with haunches in must be penalized. The ideal position for the horse’s head is not lower than level, and horses carrying their heads with the point of the ear lower than the withers should be penalized.

The Official Handbook of NSBA states that the western pleasure horse should be what the name emphasizes: a pleasure to ride. The handbook notes that, as long as horses with naturally longer strides are performing the gaits correctly, they should not be penalized for passing other horses.

The associations’ rules governing western pleasure can be reviewed in their entirety by visiting the following websites:
www.aqha.com
www.apha.com
www.nsba.com

The trend didn’t happen suddenly. Rather, it became the fashion because of who was winning. If the best horse in the class just happened to be going slow, then everyone saw that and started slowing their horses down. They got slower and slower gradually. It’s similar to someone coming into the show-ring wearing a giant bow in her hair and winning the class because even though the judges hated the bow they thought she had the best horse. The other exhibitors see this and the next thing you know, everyone is wearing giant bows in their hair. Every time a judge pins a horse that is moving improperly, that judge is reinforcing the trend.

Prior to this period, judges considered conformation and condition for 20 percent of the horse’s overall score. This part of the class was eliminated for about 10 years, and western pleasure hit rock bottom when the horses began coming into the ring looking underweight and intimidated.

“[Trainers] were holding back horses’ feed so that they didn’t have the energy to go fast,” Bill says. They also left horses in their stalls with their heads tied up for extended periods of time, until they were too tired to hold them up on their own.
The AQHA made some initial efforts to counteract the trend, including reinstating the rule that condition and conformation be considered as part of a horse’s total score toward the end of the 1980s. The association also began hosting judging seminars to better educate judges about the western pleasure standards and to encourage more consistent judging. But by the early 1990s, the problem was still so bad that the association passed a rule that called for the disqualification of horses whose heads were too low.

“This didn’t really work,” Bill says. “Some judges disqualified horses; others didn’t, so it was inconsistent.”

Bill has been judging AQHA shows since 1971 and APHA shows since 1974. He also holds judging cards with the NSBA, the National Reining Horse Association and the Appaloosa Horse Club. He judges an average of 20 shows each year, has judged the AQHA World Championship Show five times, APHA’s World Championship Show 11 times and has judged western pleasure classes all over the world. He admits he sometimes finds it difficult to disqualify a horse.

“People have traveled a long way, they’ve paid their entry fees and they want to be judged,” he says. “So instead of disqualifying them, I wouldn’t place them, or I would knock them down to the bottom of the class.”

Just when it seemed like the class couldn’t have any more problems, it did. Despite the efforts of the associations, judging remained inconsistent with the standards of the class and the rules. Then, another new trend started catching on.

“Horses started traveling canted toward the rail,” Bill says. “In other words, with their heads toward the rail and their hips toward the center of the arena, so they weren’t moving down the rail straight. [Trainers] started doing this so that they could slow the horses down even more. This gives the appearance that the horse is reaching underneath itself further with its hind legs, so he looks like he moves better than he actually does.”

The Turning Point

In 1993, the AQHA initiated a new judge monitoring program. The program places field representatives at shows to watch how judges place the classes. The role of the field representative is to also help out at the show any way he or she can, including assisting the show manager, conducting registration inspections and answering questions exhibitors have regarding rules and the association. In 2005, the APHA started a similar program.

Three years ago, AQHA Executive Director of Judges Alex Ross, along with Dale Livingston, who teaches many of AQHA’s judging seminars, produced a video that exemplified in detail the ideal western pleasure horse. The AQHA’s five-member executive committee sent the video and a letter to every one of its judges.

“The purpose of the tape and the letter was to address how the executive committee wanted to see the class change for the better,” Alex says. “In it, the executive committee addressed a couple of points, particularly horses not displaying self-carriage and the lack of forward motion at both the jog and the lope.”

The letter stated, “Effective immediately, the lope described as slightly increasing forward motion would become the only gait recognized as a lope in AQHA-approved competition.” The letter also stated that it was mandatory, effective immediately, that the jog be extended in at least one direction, and described the extended jog as a definite two-beat lengthening of stride with an increase in pace. The letter and video drove the point home.

The Educated Judge

AQHA, APHA and NSBA currently hold regular judging seminars and academies for their judges. Trainers and exhibitors can also attend these seminars to get insight into the standards of the classes and how the associations want the horses to be judged.

“At the [AQHA] World Shows, the judges meet before every class,” Alex says. “We review tapes and discuss each class’s rules. The intention is to get the judges on track as far as following the rules and judging positively.” APHA judges follow a similar protocol.

The rules governing western pleasure classes for all three associations have evolved to the degree that they now state specifically how the class should be judged and what faults are to be penalized. In 2005, the APHA’s Show and Contest Committee appointed a task force to submit a revised rule that will give an even more specific description. If approved, the new rule will go into effect in 2007.

APHA Director of Shows Tina Anderson says that exhibitors will show their horses however the judges want them to. Alex Ross says the exhibitor attitude is, “Tell me how I’ll be judged, and I’ll tell you how I’ll perform.”

Western Pleasure Popularity

In terms of number of entries, western pleasure is the most popular class at both American Paint and Quarter Horse shows. The Quarter Horse Congress, held annually in Columbus, Ohio, is the world’s largest single-breed horse show. A total of 22 western pleasure classesare offered in Youth, Amateur, Novice, Open, Team Tournament, Futurity and Maturity divisions.

Road Map to a Rule Change

Many individuals assume that those who work at the various stock horse breed associations determine the rules and regulations that members must follow. The fact is that the members themselves actually make and change the rules.

Except in emergency situations, proposed new rules (and changes to existing rules) must originate with a member of the association. Each proposal is reviewed by its appropriate committee, which can recommend it or deny it. If the committee recommends the proposed rule, it is then sent out to the general membership for comment. Members can contact their national directors elected to represent them and tell them how they feel about the proposed rule. The national directors then vote on the proposal and, if approved, it either becomes a new rule or passes to the executive committee for final approval, depending on the association.

This entire process can take a year from the time it is initially proposed to when it goes into effect as a new rule, which is why it can take several years to effect change through association rules.

“Traditionally, the western pleasure classes have been the largest classes at the Congress for many years, with entries from more than 100 to 300 for nearly each division,” says Connie Lechleitner of the Ohio Quarter Horse Association, which puts on the show.

“Twenty-nine percent of all our show entries are in western pleasure and hunter under saddle,” Tina Anderson adds, noting that the APHA combines entry statistics of these two rail classes. “In the novice and open divisions, it is even higher.”

While serving as chairman of the judges committee for the AQHA in 2003, Alex Ross tracked the total number of entries in western pleasure classes at AQHA shows in five-year increments from 1985 to 2000. “The numbers were declining,” he says. “Then, last year, the numbers were up. I think that because of the rule changes and the way the horses are now being exhibited, the class is appealing to a greater number of people again. Judges have done an excellent job of changing the standards, and as a result the exhibitors are doing an excellent job of changing the way they show their horses.”

One of the reasons for the popularity of the western pleasure class is that it is a platform for all other western classes, such as western riding, horsemanship and trail. And, because of its popularity, it is considered very prestigious to win a world championship in the class.

“What happens at the World Shows sets the standards for the rest of the year,” Bill Englund says. “People see who wins the World Championship and then they try to emulate that horse. For this reason, it’s very important that the judges do a good job at the World Shows.”

New Standard Realized

In the 2-year-old western pleasure finals at the 2005 APHA World Championship Show, a horse came into the ring that Bill describes as the best western pleasure horse he’s ever judged. The horse was Docs Jet Settin Gal, a bay overo mare owned by Leonard Farms of Gibson City, Ill., and shown by her trainer, Wade Spell of St. Louis, Mo.

“She was a great horse,” Bill says. “She moved on the rail well, her gaits were good, and her ears were pricked. She looked like a pleasure to ride. I placed her first.” All five judges placed Docs Jet Settin Gal on their cards, and she easily won the World Championship.

Wade Spell, who has been showing and training Paints and Quarter Horses for about 20 years, says western pleasure is headed in the right direction. “For a while, the horses were really bobbing their heads, moving slowly and were [canted] to the inside,” Wade says. “Now, judges are looking for a lot of self-carriage—more of a natural show horse than a manufactured one.”

Wade says that this change in judging has changed the way he trains and shows his horses. “They want a natural-balanced horse, so it suits me better,” he says. “I was never into having them [canted] to the inside and moving real slow. This is helping me out a lot.”

For Wade and other trainers like him, the decisions the judges make in the show pen dictate how successful he will be in his profession. The same is true for breeders like Ann Myers of Ashland, Ohio, who owns AQHA world champion western pleasure horse Zips Chocolate Chip and specializes in breeding champion pleasure horses.

“Asking for the horses to move forward has allowed them to exhibit their natural movement better than they have in recent years,” Ann says. “The slowest horse is not always the best horse.”

This change enables the get of Zips Chocolate Chip, who has sired 30 world champions to date, to better showcase the movement they were bred for.

“A real western pleasure horse is good minded and wants to go slow on his own,” Ann says. “The great ones have both of these attributes combined with graceful, beautiful and effortless movements that everyone can recognize whether they know what they are looking at or not.”

Alex Ross says that anyone coming to watch the western pleasure class at one of the AQHA’s World Shows will see a really good group of horses. “The horses are fat and slick, and their expressions are good. There has been a dramatic difference in how horses are being presented by their trainers and exhibitors. How they are being shown now is much more positive. They have a lot of forward motion and self-carriage, and their toplines and expressions are better.”

“The industry has finally dictated that we want them moving forward and straight, looking bright and alert with their heads at least level,” Tina Anderson says. “I believe we are seeing horses moving in this manner today and winning.”

Further Reading
Video: AQHA Western Pleasure Judging
Guide to the Slow Jog
Western Pleasure Riding Topiclist


This article originally appeared in the June 2006 issue of Horse Illustrated. Click here to subscribe.

Help for Headshy Horses

8

He’s tough to bridle, skittish about having his face handled, and forget clipping his ears or bridlepath. Even with a twitch, you’re in for a fight. The headshy horse can pose a danger to himself and to his handler.

If you raise a foal and handle him properly from day one, you should never have any problems with headshyness. Many owners, however, will encounter a horse with headshyness problems at some point. The good news is that headshyness can be overcome. The bad news is there’s no overnight fix to this common dilemma.

Horse shaking his head

Finding the Cause

True, some cases of headshyness can be caused by physical problems, such as ear infections, mites, ear warts, jaw or tooth pain, poor eyesight or blindness in one eye, even a poorly fitting bridle. But these are not the usual culprits.

“I think the majority of headshyness is caused by sudden and aggressive movement on the human’s part toward the horse’s head,” says trainer and clinician Ken McNabb.

“Bad handling is the most obvious cause,” agrees longtime dressage competitor, trainer and coach Lendon Gray, “whether handlers lose their tempers and become abusive, or through ignorance do things that frighten and/or injure the horse.”

When headshyness is caused by a physical problem, overcoming it is easier than when it is caused by abuse or bad handling. The first step is to consult with your veterinarian to identify and treat the problem. You will still need to handle the horse with care, but once the physical symptoms are gone, the headshyness often disappears as well.

If the headshyness is caused by bad handling, you’re in for a longer journey.

Time & Patience

To overcome headshyness, your job is to regain the horse’s trust, and this can take a long time. “Time and patience are the biggest healers,” Lendon Gray says. “So much of it is spending time with the horse and using common sense when you handle him.”

Lendon has had great success working with headshy horses when they are distracted by something that gives them pleasure, such as eating. She spends time in the stall while the horse is eating and quietly begins rubbing his head. While she’s rubbing the areas where the horse is sensitive, Lendon likes to talk. “I use my voice all the time; I’m convinced it helps. It isn’t what you say, but the way you say it. You can recite the Constitution if you want; it’s the tone and your voice level that matter. You should always sound soothing, pleasant and reassuring.” It may take numerous sessions for the horse to accept this touching without trying to move his head away. (This method is not recommended with horses that are protective of their food.)

Lendon often uses massage techniques, such as those recommended by Linda Tellington-Jones, to encourage the horse to lower his head. Pressure on the hollow spot of the horse’s belly (midline) just in front of the girth area can also prompt a horse to lower his head. Often a bag of carrots and plenty of time are effective in teaching the horse to put his head down and allowing you to touch him.

“Nothing is going to work if the horse doesn’t have confidence, and thattakes time,” Lendon emphasizes. “You want the problem to go away because the horse gains confidence, not because he develops a fear that something else is going to happen to him.”

As you are building the horse’s confidence, you still have to halter and bridle him, so you need to take care not to damage what progress you’ve made. You may need to take the headstall apart for a while to bridle him until you can slip it over his ears without difficulty. If slipping the halter over his head causes a negative reaction, cup your hand over his eye until he doesn’t react. If you can’t easily reach the horse’s head, stand on something solid, such as a sturdy mounting block, until he gains enough trust and confidence to willingly lower his head.

Training for Success

Anything that forcibly restricts the horse’s movement is not a solution for overcoming headshyness and will not improve the situation. For example, if you are trying to clip the horse’s ears and he keeps moving, jerking on the lead rope will only make him more afraid of what you’re doing. The goal is to teach the horse to restrict his own movement.

“Instead of pulling on the rope, pick a part of the horse’s body and ask him to move it,” Ken McNabb says. “I may move his body forward and ask him to longe several circles around me. While he’s doing this, he’s not concentrating on the clippers or the fear of something attacking his head. Now he’s thinking, ‘How can I stop working?’ ”

Remember that you’re dealing with an animal that has the mentality of a 5-year-old child,” trainer and clinician Ken McNabb says. “When you have a frightened 5-year-old child, yelling at him and telling him to ‘quit being scared’ doesn’t do one thing to help comfort him or help him control his fear. It only raises his anxiety level. Likewise, if you start jerking on the lead rope or reins, the horse has no concept of why you are doing that.”

After a few minutes, offer the horse the opportunity to stand still for clipping. If he still reacts negatively, go back to longeing in circles. You are setting up a scenario for the horse to learn and accept what you’re doing, not an opportunity to become more afraid and just “survive” what you’re doing. You want to remove the desire to jerk his head away and instill a desire to stand there while you work with him. You do this by continually setting up a situation where you ask the horse to move his body and focus on a training exercise. However, take care not to longe the horse to the point of exhaustion.

Fjord horse in a flash bridle

Head Handling Exercise

When it comes to handling the headshy horse, Ken uses a simple, but effective technique. With the horse in a halter, begin rubbing all over his head to discover where he is most sensitive. Once you discover the problem area, you want to focus on being able to handle that area.

Don’t tie the horse. Just hold the lead rope in one hand, and with your free hand begin rubbing and petting. Start in an area he is comfortable with and move gradually toward the sensitive area, often theears or poll. The secret is to retreat every time you make a little progress. This will build the horse’s trust and confidence.

Even if your goal is to be able to easily handle the ears, you can’t start there. Begin rubbing his lower face and gradually work upward. Every time you are able to move your hand closer to the ears, move your hand away for a moment before continuing. This keeps the horse’s anxiety from building as it would with constant touching.

“Each time I raise my hand I want to approach a little closer to his ears,” Ken notes. “I keep backing off and then moving forward until I can finally pet him all the way up to the base of his ears without him moving his head away. I then begin going past his ears, rubbing from his forehead to poll, passing over his ears and lightly touching them on the way. This motion should be rapid. I don’t want my hand to ‘stall out’ on his ears because I want to move from his ears before he has time to become afraid. I then continue this motion, but start slowing my hand down until I can slowly run my hand over his ears and move them back and forth without him becoming fearful.”

Once the horse willingly lets you handle his ears this way, you can teach him to lower his head. With your left hand on the bridge of his nose to steady his head, place your right forearm on the top of his neck so that your right hand is resting on his poll.

Exert gentle pressure with both hands until the horse begins to lower his head. Without removing your hands, immediately release this pressure once the horse drops his head at all, even if it is not much. This immediate release of pressure teaches him he’s safe and is not going to be forced to put his head down.

Continue exerting pressure and releasing until the horse learns to “give” to the pressure and lowers his head to around your waist level. At this point you can introduce the bridle, but for the first several times you should do this without a bit. You don’t want anything to bump his mouth or teeth. Your goal is simply to be able to move the headstall back and forth over his ears. Don’t attach the bit until the horse is totally comfortable with “bitless” bridling.

The amount of time it takes to achieve this varies from horse to horse. You can break this exercise into two or three sessions, but Ken prefers to do it all in one session, providing the horse is accepting each step well. Your goal is always to have the horse acting better when you stop than when you started the session. If you are running out of time and need to stop for the day, be sure to quit at a point where the horse is improving.

It helps to talk to your horse in an even, pleasant voice throughout the session.  Horses are experts at reading emotions and intent. If they pick up on your frustration, they will immediately become afraid, so stay calm and always end on a positive note, Ken urges.

Getting in a hurry is the kiss of death, Lendon Gray adds. “If you don’t have enough time, don’t work with your horse that day, or you’ll regret it in the long run.” If you get careless or in a hurry even after making some progress, the situation will regress. As prey animals, horses tend to remember the bad over the good; the survival instinct remains strong, even in the domesticated horse.

What Doesn’t Work

Both Gray and McNabb agree there are a variety of things that don’t help a horse overcome headshyness, even though many owners resort to such methods. Here’s what doesn’t work:

  • Jerking or pulling down on the lead rope or reins.
  • Yelling at the horse. >
  • Any form of punishment.
  • Losing your temper or becoming frustrated.
  • Being in a hurry.
  • Tying the horse close to a post to bridle him. This will only teach the horse to become more frightened and pull back.
  • Closely restricting the horse’s movement when he is frightened so that he can’t get away.

Avoiding Headshyness

If your horse doesn’t have a problem with headshyness, keep this from becoming an issue by always handling him with care and sensitivity.

“We’re supposed to be smarter than our horses, so we need to be aware and consciously think of what could happen,” Lendon notes. “Don’t put your horse in a situation where he’s going to become startled and bang his head. I see this all too often during trailer loading when the horse starts to back out, and the handler pulls down hard on the lead rope. The horse lifts his lead to avoid it and bangs his head on the trailer.”

Common horse handling routines, such as tying and bridling, can contribute to headshyness, so make sure you’re doing them properly.

“When you’re tying a horse, always put him in a place with plenty of room and tie with a quick release so that if something does happen and he pulls back, you can get him loose without injury,” Lendon advises.

Many headshyness problems are caused by careless, quick unbridling in which the bit hits the horse’s teeth. Always take care when removing the bridle. Slip the crownpiece over the ears slowly and hold the bridle until the horse drops or “spits out” the bit. Then remove the bridle completely.

Ideal bridling and unbridling is when the horse holds his muzzle at the level of your waist and calmly allows you to slip the headstall over his ears. If at any time he doesn’t willingly accept this, you should back up and repeat the above head-handling exercises until he does.

“The incredible thing about the horse is that he learns to forgive all past transgressions, as soon as we show him the situation is no longer dangerous,” Ken McNabb says.

Even extremely headshy horses can overcome this problem with time, patience and proper handling.


This article was featured in Horse Illustrated – July 2006 Subscribe today!


Equine Tendon and Ligament Injuries

17
Bandaged Leg


After his long winter off, you’ve put your horse through a springtime conditioning regimen, and he’s ready for competitions, weekend camping trips or plenty of pleasure riding on the local trails. You’ve been slowly putting him through his paces, and all is well except an unusual swelling on one of his forelegs that popped up after a romp in the pasture with his buddies. Your one-two punch of icing, bute and standing wraps is helping, but he’s off. So you call out the vet—and get the bad news. Your horse has a tendon injury, and you won’t be doing much riding this summer.

Every breed and riding discipline has its own set of tendon and ligament injuries, but across the board there are four major structures in the forelimbs that are most commonly injured. Here’s a look at those injuries and the prognosis for each, which in many cases is quite good thanks to veterinary advancements. 

Anatomy and Physiology of Tendons and Ligaments

Tendons and ligaments are made from the same basic tissue and have the same basic structure. The tissue is a very strong fibrous material that groups together in bundles, forming long cords. 

Tendons join muscle to bone and as a result, when the muscle contracts, the bone moves. Most tendons are designated as either flexor or extensor. Flexor tendons allow a joint to bend inward, toward the body (joint closes), and extensor tendons allow a joint to extend (joint opens).

Ligaments join bone to bone. They are stabilizing structures that essentially hold bones together and stop them from overextending, overflexing or overrotating.

There are four main tendons and ligaments at the back of the horse’s leg that do the majority of the work: suspensory ligament, inferior check ligament, deep digital flexor tendon and the superficial digital flexor tendon. In a horse’s forelegs, these four structures are the most commonly injured tendons and ligaments. When injury does occur in these structures, the infamous “bowing out” along the back of the leg is visible—in layman’s terms, the horse has a bow.

When Injuries Happen

Medically speaking, a bow can be different “types” of injuries involving tendons and ligaments: Strains that cause tendons and ligaments to stretch are described as type I lesions. They result in swelling of the tendon or ligament. Depending on the location and amount of swelling, the horse’s leg is usually only slightly enlarged, warm and painful, and lameness may or may not be present.

Fiber tearing is more serious and often results in increased swelling, more heat and often, but not always, lameness.  Mild tearing is classified as a type II lesion. Severe tearing, classified as a type III lesion, causes increased signs of heat, swelling and pain; often, these horses are lame. The worst injury is massive tearing, classified as a type IV lesion; the damage causes severe lameness, with very obvious heat, pain and swelling.

In general, strains are better than tears, small tears are better than large ones, and damage that occurs away from bone is better than damage right at the bone. 

The location of these injuries is classified into different zones along the back of the leg, but the general layman terms classify the injury into high, middle or low “bows,” corresponding with high, middle or low along the back of the cannon bone.

Most of these injuries occur in the forelimbs since they bear 60 percent of the horse’s weight and are therefore most prone to being overloaded. Of all the tendon and ligament injuries that can occur, the inferior check ligament is the least severe. The role of this ligament is to help stabilize the leg during weight bearing. Inferior check ligament injuries often cause a large swelling, but little pain or lameness. 

The superficial digital flexor tendon is responsible for stability and flexion of the lower leg. When this tendon is injured, there is generally some lameness, but even severe damage may not be career ending.

The deep digital flexor tendon is a workhorse of a tendon: It not only stabilizes the leg during maximum load (full weight bearing), but also flexes all of the lower leg joints during hoof flight. If it’s significantly damaged, there is lameness, heat, pain and swelling, and it could be career ending.

Suspensory ligament in-juries are the most serious and can be the hardest to treat. Like the deep digital flexor tendon, an injury here causes lameness and swelling. The job of this ligament is to stabilize the leg during maximum load; it stops the fetlock from dropping to the ground.

With all of these structures, one thing is certain: The more severe the injury, the more lameness there is. 

Lameness Exam
Depending on the tendon or ligament affected, and the type of injury that has occurred, a horse can have varying degrees of lameness, from mild to severe.


Signs of Trouble
Being familiar with what is normal in your horse’s legs, along with his normal way of going, will help you know when something isn’t right. The more severe or recent the injury, the more heat, pain and swelling that occur. Sometimes there is an enlargement in the area without lameness or obvious pain. When these enlargements occur though, it is still cause for concern. A veterinarian can palpate (feel) the leg and tell which tendon or ligament is involved, but a confirmed diagnosis comes from ultrasounding the affected area.

Ultrasound is the most basic and useful tool to evaluate these soft tissue injuries. From these images we can see which structure is damaged, the extent of damage, the location, and we can measure the damage. MRI is also used to diagnose soft tissue injury, as well as scintigraphy (scan).

The Healing Process

In the old days many horses were simply “turned out” for six months to heal a tendon/ligament injury and then rechecked. Certainly our minds have changed in this area over the last five years. If your horse is unlucky enough to get one of these injuries, today there are many options to help him recover.

The current thinking is to decrease inflammation and rest the horse to prevent any further damage. Icing and cold hosing are very effective for reducing inflammation within the first 48 to 72 hours after injury. The leg is wrapped for support and may be poulticed in an effort to decrease the inflammation further. I often use a gelcast, which is a special bandage that has magnesium salts in it that act like a poultice. It is combined with four other layers of wrapping and looks like a soft cast. It supports the fetlock and minimizes the pull on the back of tendons and ligaments, essentially resting the damaged area.

Anti-inflammatory drugs can be useful to keep pain and swelling down. If the injury is mild enough that it can be managed without these medications, sometimes the pain keeps the horse off the leg, which allows for rest and healing.

Depending on the severity of damage, the horse is usually stall rested for a length of time, then hand walked, and then put back to modified work until the area is healed. This process can be very subjective and variable depending on the horse, owner, environment and veterinarian. The current theory and practice is to start the horse back to modified work earlier in an effort to strengthen the tissues and help them realign as close as possible back to their original fiber pattern. However, under-saddle work is typically limited to a walk only within the first few months of injury.

Treatment Advances
Aside from rest, we now have many new treatments that are clinically proven to help tendons and ligaments heal stronger and get horses back to their performance lives. For some horses this means returning back to the level of previous workload, while others may need to step down to less demanding careers.

Extracorporeal shock wave therapy (ESWT) has become a very valid therapy for these types of injuries with a good deal of success. At this time it is unknown exactly how ESWT works, but it is thought that it increases blood flow, stimulates healing and possibly numbs pain.

Another treatment proven to be successful is bone marrow transplant. Bone marrow from the horse’s sternum is extracted and then transplanted into the area of damage. Here again, the full mechanism of how this works is unknown, but it is believed that within the bone marrow are chemical and cell mediators that stimulate healing, including stem cells.

This leads us into another area of exciting treatment options: stem cell therapy. It is now possible to extract stem cells from a horse’s own fat, and then use those cells for healing. Stem cells are those that haven’t differentiated into any specific type ofcell yet: They still have the potential to become skin, bone, tendon, ligament, et cetera. It’s an exciting concept because it means these cells can be placed in damaged tissue, allowing the tissue to then  regenerate. 

Another therapy is IRAP (interleukin-1 receptor antagonist protein). IRAP is a chemical mediator in the blood that stops the bad chemical mediators in the blood produced by inflammation from being able to do damage, and allows the good chemical mediators to work more effectively. Blood from the horse is taken and incubated on special glass beads which grow the IRAP. The IRAP is then harvested and injected into the injury site. Unfortunately, this therapy is not widely available yet, but that may change.

With the exception of stem cell therapy from fat, I have personally used all of these therapies on tendon and ligament injuries and have seen great success to the point of horses returning to their former level of competition or life. They are all exciting wonderful treatments that have opened the door for many horses and owners.

Our ability to diagnose, treat and prevent tendon/ligament injuries has improved tremendously over the last few years. Although these injuries are still extremely serious, they’re not as overwhelming as they once were. With good care and treatment, many tendon and ligament injuries can now be overcome.

Learn about updated diagnostic tools: Miracles of MRI.

Tendon and ligament injury Causes and Prevention.

Janice Posnikoff, DVM, heads up Orange County Equine Veterinary Services in Southern California.


This article originally appeared in the June 2006 issue of Horse Illustrated. Click here to subscribe.

30 Blue Ribbon Tips

101
  1. Blue ribbonIf you haven’t already, attend a show and watch the classes you plan on entering so that you know exactly what to expect.
  2. If your horse is a greenie, take him to a show and don’t enter any classes; just evaluate how he handles the new surroundings.
  3. Make a list of everything you need to take to the show; then pack the day beforehand, checking each item off your list.
  4. Have a friend or family member on hand at the show to help with last minute grooming, giving your boots a wipe before you enter the ring or just providing moral support.
  5. Before each class, visualize how you want your ride to be—professionals find this technique helpful.
  6. If you don’t have a lot of money to spend on show clothes, stick to classic colors and avoid flamboyant trends.
  7. Dress up your everyday tack by using a special pad or blanket reserved only for show.
  8. Teach your horse to trailer load confidently, well before an event. Show morning is no time to discover that your horse hates straight loads or won’t travel alone.
  9. If your discipline calls for show-day braiding or banding, start practicing well ahead of time, or hire an expert to do the job for you.
  10. Bathe your horse for the show, and then cover him up for the night with a sheet/blanket; add a stretchy hood if you’ve braided or banded. If he has white stockings, protect his legs in standing wraps, too.
  11. School one level higher than you show. That way you can compete with confidence, even when nerves and distractions might get in the way.
  12. Give yourself—and your horse—plenty of time before your classes start to get accustomed to the showgrounds.
  13. Know how your horse behaves in the company of others. If he is unruly, it’s probably not time to show yet.
  14. Warm your horse up, but don’t burn him out. Save his best energy for the actual class.
  15. Don’t school your horse in gadgets and then expect him to perform in the show-ring without them.
  16. Clean your tack the day before the show: Make sure it’s in tip-top shape, and polish any silver.
  17. Know what the show-ring turnout requirements are, and make sure you comply. Poor turnout shows lack of respect to the judge.
  18. If your horse is having a meltdown in a rail class, head to the center of the ring and just stand quietly. Better to chalk it up to experience than create a dangerous situation.
  19. Some disciplines have strict rules and regulations about equipment. Study your rulebook closely to be sure that your tack is “legal.”
  20. Warm-up ring etiquette: Pass left shoulder to left shoulder; if you’re working at a faster pace, stay well to the inside. Keep your eyes on horses that are circling or changing direction.
  21. Hunters and jumpers: In the warm-up ring, call “heads up” on the fence you’re jumping.
  22. Hunt-seat riders: Attach your entry number on your back by threading a black shoelace through the number, then through your coat’s last buttonhole; tie off and hide the bow under your coat.
  23. Western riders: Affix your number to your blanket with safety pins, decorative blanket conchos or a number holder.
  24. At home, practice any special tests that you think might be added to your classes, such as riding without stirrups, sitting the extended trot or executing a figure-eight.
  25. Never hold a class up; you could be disqualified. If you are making a quick tack change, or have classes running simultaneously, have someone inform the show steward immediately.
  26. If you’re new to showing, pay your trainer a rail fee to coach you for the day.
  27. Dressage riders: Memorize your tests even if you have a caller. Practice the tests in your arena on foot during the weeks leading up to the show.
  28. Your day isn’t done just because your classes are over. Attend to your horse’s needs before relaxing with friends.
  29. Ask a show steward if you can see the judge’s scorecard or sheet to gain a greater understanding on how he or she pins a class.
  30. Don’t forget to close out your check before leaving the showgrounds!

This article originally appeared in the June 2006 issue of Horse Illustrated. Click here to subscribe.

30 Grooming Tips to Transform Your Horse

49
Shiny Horse

1. Ask your vet about adding vegetable oil or an essential Omega-3 fatty acid supplement to your horse’s well-balanced diet for added shine.

2. Sponging your horse’s face clean after exercise helps prevent fungal hair loss.

3. Keep different sized sponges for different duties (face, body, dock) and remember which is used for each task.

4. Hoof picks are cheap. Always use a sharp one to remove rocks and debris, and replace the pick when it no longer does the job easily.

5. Use a tail bag to keep your horse’s tail thick, long and protected. Make sure to wash, condition, detangle and rebraid once a week, securing the tail bag below the tailbone.

6. Spend two minutes every two weeks running your clippers over your horse’s bridlepath and under his jawline.

7. Hoof oils and dressings for health or show are available. If you have a particular concern in mind, such as hooves that crack easily, ask your farrier for product suggestions.

8. Use a detangler and a wide-toothed comb (or your fingers) to gently remove any large snarls from mane and tail.

9. Dark coats often fade or bleach in the sunlight, so provide plenty of shade and consider adding a lightweight fly sheet. Sweat in the coat accelerates the fade, so rinse a sweaty horse before allowing him to bask in the sunshine.

10. Bathe your horse but don’t overdo it—frequent shampooing may actually dull his coat.

11. An equine squeegee, rather than a hard sweat scraper, makes removing water from your horse’s legs and hips easier and kinder.

12. For extra shine on special occasions, spritz your horse’s coat with a sheen product.

13. Regular use of coat polish sprays right after bathing has the added bonus of deterring dust—it slides right off.

14. Horses with pink skin need extra sun protection—use sunscreen on susceptible pink noses!

15. To help protect against skin infections, regularly disinfect grooming brushes and combs.

16. Keep brushes clean as you go: After every few strokes with your body brush, clean the bristles on a metal or rubber curry held in your other hand.

17. Brush from front to back, top to bottom, for the most efficient effort.

18. Curry first in a circular motion to loosen dirt and hair; then use your stiff dandy brush to remove it. A flick of the wrist at the end of your long flat brush stroke helps lift the dust off.

19. Multi-task: use a brush in each hand!

20. Show ring veterans have long known that grooming wipes are ever so handy.

21. If you have a gray horse or one with a lot of chrome, keep some spray-on equine stain remover—created to deal with manure and grass stains—at the ready.

22. As you groom, inspect your horse for injuries, skin irritations or areas of sensitivity. Run your bare hands down his legs to check for heat or swelling.

23. Keep up with routine grooming chores, such as mane pulling, trimming fetlocks, et cetera. That way you’re not overwhelmed with last minute clean-up before a show.

24. If your horse objects to having his mane pulled, try doing a little each day after exercise.

25. Check your horse’s stall or paddock fencing for protruding objects: Wounds lead to blemishes and worse.

26. Let sweat and mud dry before attempting to brush it out. Or, hose your horse off.

27. When braiding, banding, or even training a mane over to one side, use a mane mousse to help get wayward hairs under control.

28. Color enhancing shampoos accentuate your horse’s natural tones and bring out the highlights of his coat.

29. Using oil specifically designed for your horse’s face, rather than baby oil, will collect less dust at the show.

30. Let your horse roll—dirt isn’t permanent.

Read on for more grooming advice.

This article originally appeared in the May 2006 issue of Horse Illustrated. Click here to subscribe.

0FansLike
0SubscribersSubscribe
We use cookies to help personalize content, tailor and measure ads, and provide a safer experience. By navigating the site, you agree to the use of cookies to collect information. Read our Cookie Policy.
OK