Enter our 12 Days of Christmas Giveaways here!
0 ITEMS
  • My Account
  • Holiday Gift Guide
  • Podcast
  • Webinar
Subscribe Combo
Enable cache13
Home Blog Page 1051

Mosquito-Borne Diseases

7

Because a number of factors can affect the risks of falling victim to potentially deadly brain-swelling diseases carried by mosquitoes, Purdue University experts recommend that all horses be vaccinated and that people take precautions to avoid mosquito bites. The number of cases of West Nile virus, and Eastern and Western equine encephalitis, can vary due to temperatures, rainfall, regional seasonal differences and bird migratory patterns, according to veterinarians and entomologists. Encephalitic diseases are spread when mosquitoes suck blood from infected birds and then bite people, horses or other mammals. In addition, areas that don’t experience insect-killing frost have a threat of these illnesses almost year-round. In the Midwest, West Nile virus is the most common mosquito-transmitted disease, but outbreaks of the other diseases are possible.

“Because of these variable factors, the chance of contracting one of the mosquito-borne diseases in different parts of the country can change every year,” says William Hope, Purdue equine community practice clinician. “So, we advise that all horses in North America be vaccinated against Western and Eastern equine encephalitis and for West Nile virus.”

Hope says horses must have inoculations early enough in the spring and fall to provide immunity throughout mosquito season. There is no indication that the West Nile shots are harmful to pregnant mares. However, it is best to vaccinate mares before breeding season, Hope says.

The disease now occurs in almost every area of North America.

Further Reading
Vaccination Strategies
What to Expect When Vaccinating

Face up to Flies

0

Flies around a horse

We all know how annoying it is to have a horse flipping his head around to get rid of the flies that swarm around his eyes and ears. In this fact-filled article, Young Rider will give you hints on how to help keep flies away from the delicate parts of your horse’s face.

There are many forms of fly repellent that you can use, such as sprays, lotions and bands.

One of the longest-acting forms are spot-on repellents. These are liquids that you apply to your horse’s body in certain areas and they help to keep bugs away for up to two weeks. Make sure you read the instructions on the packaging to make sure you are applying the repellent properly.

Never spray fly spray directly on a horse’s face. Dampen a soft towel with fly spray and wipe it under his eyes and on his ears, being careful not to get it in his eyes. You can also put a roll-on fly repellent on his face. Roll it under his eyes only so that when he sweats it will not drip into his eyes accidentally.

You can also go to the store and get a bingo blotter to use as a home-made fly spray roller. You can buy pre-moistened towelettes that provide easy-to-apply fly repellent in a ready-to-use form.

By using these methods you can be sure that your horse is getting the proper amount of fly repellent at a time. You’ll want to massage a fly cream into his ears if you are riding without a fly bonnet. This will help keep flies from biting the sensitive tissue in his ears.

A fly bonnet totally covers a horse’s ears and has fringe on the end to keep flies away from his eyes.

You could also use specially- treated bands or collars that fasten around your horse’s neck, just behind his ears. These bands have been treated with fly repellent and help to keep flies off of your horse’s ears and face. The manufacturers claim that these bands keep flies away for up to two months.

Always apply fly repellent to your horse before riding or turning him out in buggy weather.

When turning out your horse, use a properly-fitted fly mask to keep flies away from his face while he grazes.

You can buy masks that include ear and nosepieces as well as eye protection to cover as much of his face as possible. Be sure to wash the mask when it gets caked with dirt so your horse can see out of it.

Always put a fly mask on under a halter if you use one for turnout (leather, please) so that pesky flies can’t get under the mask and annoy him.

If you’re using a mask that covers only a portion of his face, be sure to protect the rest of his face, ears and nose with fly repellent.

Even if you’re not going to ride, be sure to take off your horse’s mask every day to make sure that nothing has gotten underneath it and irritated his eyes.

There are fly masks you can buy that you can ride in. They are slightly thinner than regular fly masks so your horse can see through them more easily.

Stick to quiet trail rides while your horse is wearing one of these masks. Horses don’t have the best eyesight in the world, so it’s probably not a great idea to gallop around or jump while your horse is wearing a mask.

If your horse doesn’t like to have things covering his ears, you could turn him out with a fly fringe. A fringe is a browband with thin ropes hanging off it, that fastens tothe headstall of his halter and keeps flies out of his eyes.

You can make a homemade fly fringe using the browband of a bridle. Simply thread the ends of the browband through the halter’s crownpiece and tie foot-long sections of baling twine to the band. This will allow about ten inches of twine to hang down, preventing flies from landing on his face and in his eyes. Do not ride with this fringe on, as it might poke him in the eye if he’s moving quickly.

Did you know that there are fly masks for humans? They fasten to your helmet and cover your face and neck. Look for them where helmets are sold.

This article first appeared in the May/June 2005 issue of Young Rider. Subscribe today!

Riding School Rules

0

Does your riding instructor scream and run into her office when she sees you hop out of the car?


Do all of the lesson horses head for the hills when they see you walking towards the field with a halter?


If your instructor had to grade you as a riding school pupil what would it be–an A or an F?


Here at Young Rider, we know that lots of our readers take lessons at riding schools. Lesson barns are great places to learn a lot about horse care and if you work hard, your riding skills are bound to improve. But are you the best student you can be?


In order to get the most out of your riding school experience, here are a few rules to follow!


  • Wear the correct clothes. If you’re serious about riding English style, ask your parents if you can buy a pair of jodhpurs or breeches. Riding in jeans can rub your legs and make them sore.
  • Whether you ride English or western, invest in a pair of riding boots with a small heel. It’s not safe to ride in sneakers because your foot could slip out of the stirrup.
  • A pair of gloves is a good idea too because they prevent blisters.
  • If you think that you’re going to keep on riding, buy a safety helmet of your own.


If you show up at the barn looking professional, your instructor will know that you mean business!


Be honest about your riding ability so the instructor can put you in the correct group lesson. Don’t tell her you know how to jump if you don’t.

It’s a good idea to have a private first lesson so the instructor can assess your skills and put you in a suitable class.


Arrive before your lesson time. Offer to help groom and tack up your lesson horse or help others tack up. Be ready to hop on your lesson horse when the lesson is supposed to start.


It’s annoying when students show up late for group lessons. They distract the instructor and everyone in the lesson loses out.


Go to the bathroom before your lesson! The rest of the students won’t be happy if you disrupt the lesson because you’re desperate to go to the toilet.


Don’t get mad and sulk if you don’t get the lesson horse you want. Riding lots of different horses will make you a better rider.


Stand in the middle of the arena and adjust your stirrups and check that the girth is tight enough.


Make sure you are holding the reins correctly before you ask your horse to walk on.


Keep at least one and a half horse lengths between you. You don’t want your lesson horse to get kicked.


Listen to your instructor and follow her instructions.


Don’t canter when everyone else is walking and upset the other horses in the arena.


Parents should be seen and not heard during lessons! If your mom or dad has a problem with your lesson, they should discuss it with your instructor afterwards and in private.


But, it they think something you are doing in your lesson looks dangerous and think you might get hurt they should talk to the instructor right away.


If you feel scared about doing something, let your instructor know. If she’s a good instructor, she’ll help you work through your fear and keep all of your riding activities fun and safe.


At the end of your lesson, don’t just hop off and hand your horse over to a barn worker.


Run up the stirrups properly, loosen the girth and ask your instructor what she’d like you to do with the horse.


If she asks you to untack and groom him, jump at the chance. Doing these tasks helps you learn about caring for a horse and will prepare you for owning your own horse one day.
 

If it’s not your lesson, don’t bug your instructor by asking her lots of questions. Try not to interrupt someone else’s lesson unless it’s an emergency.


If you ride in a group lesson, encourage the other people in the group. Tell them “god job” when they do something well, or cheer them on if they are anxious about trying something new.  


Don’t talk too much in your lesson – it can be distracting to other riders. Plus, you are there to learn, not chit-chatwith buddies! You need to be able to hear what your instructor says.


Reward your session horse with treats after your session in the saddle. Horses always welcome apples and carrots! You can also feed them packaged horse treats from the tack shop.


* This article first appeared in the May/June 2005 issue of Young Rider.
Subscribe today!

The Tapeworm Threat

20

Horse grazing in the fall

Tapeworms were once considered a fairly benign parasite, unassociated with serious problems in equines. But recent studies show tapeworms are anything but harmless. Consider the statistics:

  • 81 percent of ileal impactions (a blockage at the end of the small intestine, commonly referred to as an impaction colic) are associated with tapeworms.
  • 22 percent of spasmodic (gas) colics are tapeworm-related.
  • Ileocecal intussusception (a serious, surgical form of colic where one part of the intestine telescopes into another) is almost always caused by tapeworm infection.
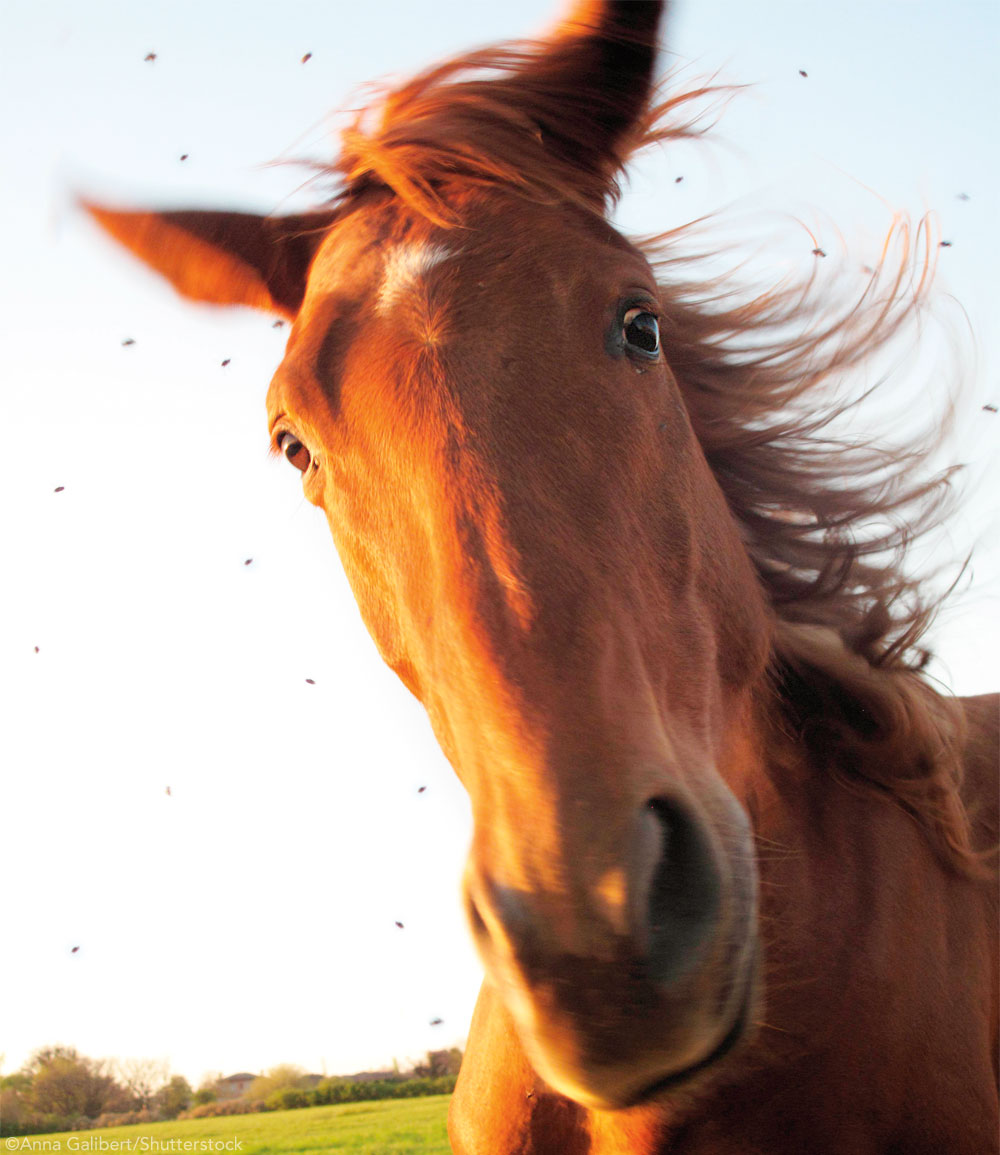
  • On average, more than 54 percent of horses in the United States have been exposed to tapeworms, including 96 percent of horses in the upper Midwest, more than 80 percent of horses in some Southern regions, and 56 percent of horses in the northern Plains and Mountain regions. Even in the lowest-risk areas of the West Coast, at least one out of every 10 horses has tapeworm exposure.

Why didn’t we know about this before?

Tapeworms Uncovered

“Tapeworms are intestinal parasites that infect horses, as well as other species, throughout the world,” explains Brady J. Bergin, DVM, assistant professor, Oregon State University. “They belong to the class of parasites known as cestodes. The three types of tapeworms that can infect horses are Anoplocephala perfoliata, Anoplocephala magna and Paranoplocephala mamillana, with A. perfoliata being by far the most common.”

Unlike other worms, horse tapeworms need an intermediate host to complete their life cycles. That host, the forage mite, becomes infective by ingesting tapeworm eggs; the horse swallows the infective mites while grazing, and the tapeworms mature in the horse’s intestine within six to 10 weeks.

Although much is unknown about the mite’s biology, they’re widespread, living in pastures, lawns and vegetation, says Craig R. Reinemeyer, DVM, Ph.D., immediate past president of the American Association of Veterinary Parasitologists, and president of East Tennessee Clinical Research Inc., the research group that identified tapeworm prevalence in the United States. The mite also seems to favor temperate climates.

“They live in the humus, the organic layer of the soil,” says Robert H. Dressler, DVM, manager of Equine Veterinary Operations at Pfizer Animal Health. “In the arid desert areas of the Southwest, there isn’t a whole lot of humus, and that’s where there is a much lower incidence of tapeworms.”

Bottom line: Any horse that grazes on pasture is at risk for ingesting infected mites.

Although studies now demonstrate that tapeworms are everywhere in the United States (albeit in varying numbers), experts had been unaware of their prevalence because of the inability to accurately diagnose tapeworm infection in the horse.

“Traditionally, we looked for tapeworm eggs in fecal exams, but that’s been very ineffective,” Dr. Reinemeyer says. “With most other parasites in horses the females stay in the gut and pass out eggs, and the eggs leave the horse in the manure. With tapeworms, the eggs develop in a lower segment of the worm’s body, which separates and passes out in the fecal matter into the environment, but it’s not an ongoing process. The tapeworm body is like a freight train with a bunch of boxcars, one chained to the other. The end of the tapeworm matures faster than the rest of it, so every once in a while the caboose (which is like a bag of eggs) drops off. That bag may not rupture until it gets outside the horse or gets farther down the track, we don’t know.”

Consequently, detecting tapeworm eggs in the manure is a hit-or-mostly-miss procedure. And because veterinarians weren’t seeing tapeworm eggs in fecal exams, they assumed there was no tapeworm problem.

Further, although tapeworms were detected during surgery or postmortem, they weren’t associated with any disease process.

That all changed in the mid-1990s when a British researcher developed a test that could detect an immune response to a specific protein exuded by tapeworms into the horse’s blood. Although this test only determines exposure to tapeworms as opposed to an active infection (much like horses that have been exposed to equine protozoal myeloencephalitis, or EPM, don’t necessarily have the active disease), it was a step in the right direction and enabled researchers to discover just how widespread tapeworms are.

Since then, researchers learned that tapeworms cause degrees of intestinal damage and disease. Dr. Bergin says, “This damage occurs when large numbers of tapeworms firmly attach to certain areas of the digestive tract, such as the small intestine or, more specifically, the ileocecal junction (the common opening of the ileum, colon and cecum). Their attachment can lead to inflammation, irritation and ulceration at this site, impairing normal function. This intestinal malfunction can also adversely affect the digestive tract, leading to three common types of colic associated with tapeworm infestation: ileocecal intussusception, ileocecal impaction and spasmodic colic.”

Those are the recognized problems caused by tapeworms. Undetermined are the problems a “typical” or low-grade tapeworm infection causes. “Does it cause low-grade diarrhea, low-grade colic, weight loss?” Dr. Reinemeyer ponders. “We don’t know. But anecdotal evidence suggests tapeworms may cause low-grade colic after intense exercise.”

Dealing With It

Even though prevention of tapeworms isn’t truly possible, you can successfully treat these parasites in a horse and prevent the onset of colic and other complications that may be related to tapeworm infection, notes Tom Kennedy, Ph.D., vice president of research and development, Farnam Companies Inc.

In the past, equine tapeworms were controlled with double or triple doses of pyrantel pamoate. “That did a fairly good job but was not 100 percent effective,” says Kevin Hankins, DVM, field veterinary consultant for Fort Dodge Animal Health. “It was costly plus it was sometimes a nightmare to get two or three tubes of dewormer into a horse.”

But the recent development of praziquantel in paste and gel formulations for horses offers an affordable, easier, and, to date, more effective alternative. “Praziquantel has been around for a long time, and has been used extensively in dogs and cats,” Dr. Hankins states. “It kills the tapeworms in the horse by destroying the worm’s protective, tough outer layer, thus making the parasite vulnerable to the horse’s immune system, which takes care of it from there.”

Explains Frank Hurtig, DVM, manager, Veterinary Professional Services at Merial Inc., “The addition of praziquantel to horse parasite control medicines containing macrocyclic lactone drugs (i.e. moxidectin and ivermectin) has been an advance in treatment and control of tapeworms in horses. Praziquantel has a wide margin of safety in horses.” Thus with one dose, praziquantel/macrocyclic lactone formulations offer treatment of tapeworms as well as broad-spectrum activity against strongyles, ascarids, pinworms, bots and other common horse parasites.

Currently, there are four praziquantel/macrocyclic lactone products available: ComboCare (Farnam), Equimax (Pfizer), Quest Plus (Fort Dodge) and Zimectrin Gold (Merial).

The only precaution is treating a horse infected with a lot of parasites or one that is clinically ill, Dr. Hankins says. “If they have a very high parasite load, you could end up causing an impaction from all of the parasites killed off in the gut. Also, when parasites die off, they can produce a toxin, and that can make your horse sick. If your horse is already ill or heavily parasitized, his immune system is likely suppressed and would react differently to a normal deworming schedule; that is why dewormers are labeled as only for use in healthy animals.”

Some veterinarians treat at-risk horses by either administering a reduced dose and/or administering mineral oil 24 hours prior to deworming to help with the passage of the dead parasites.

Currently, praziquantel is labeled only for treatment, not prevention. But Dr. Hurtig notes, “Since tapeworms are extremely difficult to definitively diagnose in the live horse, it is best to simply treat for tapeworms on a frequent basis.” This will benefit horses, since using praziquantel products routinely at labeled dosage recommendations removes tapeworms before they become a problem instead of after a problem (i.e. colic) is apparent.

Work with your veterinarian to develop a program that’s specific for your horse and climate. Dr. Bergin says that there is not a single catch-all recipe for controlling parasites that works for every horse in every area—it’s based on a number of factors that need to be evaluated, and from there your veterinarian can create a plan.

Although praziquantel is safe, don’t overuse it as parasites likely will build resistance to it. Dr. Reinemeyer explains, “Frequent use of dewormers puts tremendous pressure on the parasites to adapt to survive this continuous onslaught, so they select for resistance. We’re seeing that now with ascarids and ivermectin.”

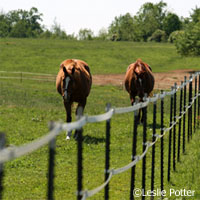
Include management techniques in your deworming program. “Good pasture hygiene is a critical management technique for the control of tapeworms as well as other parasites,” Dr. Bergin says.

To reduce the spread of parasites, remove manure from stalls daily, dispose of fecal material away from pastures and feed/water supplies, and chain drag or harrow pastures to break up manure piles. Don’t feed your horses directly on the ground; this increases the risk of ingesting forage mites since it is where they typically reside. Avoid overcrowding or overgrazing pastures (rotate if possible). Finally, quarantine all new additions to the herd and perform fecal exams to determine parasite status in general and to avoid the introduction of parasites.

Expert Opinions on Tapeworm Treatment

WhoWhenWhy
Craig R. Reinemeyer, East Tennessee Clinical Research Inc.Once or twice a year. Spring, possible second dose in mid- summer.Spring prevention decreases the entire transmission on the farm because there are no eggs being passed out for the mites to eat, consequently, no infected mites for the horse to ingest. “Concentrate your treatments earlier in the grazing season to prevent build-up in the fall.”
Brady J. Bergin, Oregon State UniversityOne to two times yearly.“Timing depends on the area. Spring is usually a good time since it follows the wet season when the climate supports parasite maturation.” Horses considered at high risk (a history of a tapeworm infection or colic associated with tapeworms) should be dosed every six months. Horses at low risk (those living in a dry climate with limited access to pasture) can be dosed yearly.
Tom Kennedy, Farnam CompaniesFall and spring.“Usual treatment periods are in the fall after the infection season with a second treatment in spring to prevent pasture contamination and re-infection of the mite population.”
Robert H. Dressler, Pfizer Animal HealthFall and spring.“Depends entirely on the part of the country that you’re in and the climate that year. Program can vary from year to year with changes in the climate—wet year, dry year, et cetera.”
Frank Hurtig, MerialTwo to six times annually. Minimally spring and fall, better with the addition of summer and winter treatments.“Safety margins support use of tapeworm control products in treatment schedules that follow traditional timing for deworming horses—two to six times per year depending on risk of exposure.”
Kevin Hankins, Fort Dodge Animal HealthOnce or twice a year; spring and fall.In areas of reduced prevalence, once yearly in the fall.


Down the Line

While differentiating between tapeworm exposure and an active infection is still a guessing game, researchers hope to soon change that. Stephen Kania, Ph.D., associate professor, University of Tennessee College of Veterinary Medicine, has developed a test, with the support of the American Quarter Horse Association, that detects proteins released by the tapeworm parasite into fecal material. “This test differs from antibody detection in that a positive result is likely to indicate an active parasite infection,” Dr. Kania says. “We are currently at the stage of validating the test with samples from a large number of horses.” If all goes well, it’s possible this diagnostic test will be available in two or three years and could be a great aid in advancing knowledge on tapeworm infection.

Fortunately, you have the tools now to avoid tapeworm problems in your horse. Discuss the risks of infection in your area with your veterinarian and work out a responsible deworming program appropriate for your horse.

Marcia King is an award-winning freelance writer.


This article originally appeared in the May 2005 issue of Horse Illustrated. Click here to subscribe.

Bodybuilding for the Western Horse

4
Western Dressage


A systematic training approach addresses your horse’s fitness from head to tail. Whether you run barrels or trail ride, regular use of basic dressage movements can improve your horse’s athleticism, achieve a deeper level of communication and responsiveness and enhance his overall well-being—a fit, flexible horse has greater endurance and resistance to injury. Don’t fear the formal term “dressage”—translated, it simply means “training.” Just do it, and reap the benefits in enhanced performance.

Exercises that ask your horse to bend and move sideways, such as leg-yielding (known in the western world as two-tracking) and shoulder in, will improve your horse’s balance by enhancing his ability to use his hind end. A horse that travels in balance, with the stride of his hind legs equal to or surpassing the reach of his front legs, will be more agile and quicker to respond to the rider’s cues. Other advantages are smoother more efficient gaits, with reduced knee and hock action, and improved cadence. Dressage also promotes self-carriage, which means the horse will be able to do his job with less assistance from the rider.

Begin With a Bend

Bending teaches your horse how to be soft in the bridle and pliable throughout the length of his body. Lateral movements take your horse in a new direction, quite literally. They include any of a series of exercises that move either your entire horse and/or an isolated section of his body to the left or the right of a path on which he’s traveling. They are excellent for developing the muscles of the topline and hindquarters, which your horse needs for slow, collected gaits. In preparation for tasks such as lope transitions, pivots on the front and hind ends, and lead changes, they are indispensable.

The bend is the foundation for all other suppleness exercises. It’s essential that your horse bends correctly at every gait with his body perfectly aligned from head to tail, mirroring the shape of the arc, arena corner or any other curving path that he travels. Help your horse execute beautiful bends by sitting squarely in the saddle with your hips relaxed and your weight evenly distributed between your left and right stirrups. Your rein length and contact should be even, but your inside rein needs to be short enough to create the right amount of bend in your horse’s head and neck. The inside rein determines the degree of bend and establishes the inner boundary of the path your horse is following. Your outside rein prevents your horse from overbending by creating the outer boundary. Both reins form a tunnel of sorts, and your horse moves down the middle of its borders. Ride with a snaffle bridle, and make sure that your hands are level and square with each other. Hold the reins as softly and quietly as you can so that the bend is as consistent as possible. Use your legs to ensure that your horse is traveling with a long and even stride by driving him forward whenever he reduces the rhythm or speed of his gait.

The ultimate goal is to have a horse that is capable of bending his body evenly in both directions with relative ease on both very small and very large circles. To transform your stiff steed into a pliable pretzel, try riding him on a figure-eight. For this exercise, a figure-eight looks like two circles connected in the middle by a straight line. At the walk or jog, send your horse down the middle of the figure-eight with his head, neck, and shoulders centered between your reins. Your hands should be about 10 inches apart. Start the left bend by shortening up your left rein first then adding light and steady contact with your right rein so that your horse’s body is equally supported from both sides. The supportive outside rein will encourage him to shift his weight rearward and help his body stay in alignment.

Your horse’s inside nostril should lead the rest of his body into the turn. If he doesn’t bring his nose to the inside, nudge him gently with your left heel. If he drifts to the outside of the turn or slows down, press or nudge him with both legs. Once he gets through the left-hand turn, even up your reins and allow him to take several steps down the straightaway. Next, shorten your right rein to bend your horse into the right-hand arc.

Western Dressage

Whether or not your horse is bending correctly on the arcs will be apparent as soon as he’s traveling straight along the centerline. A horse that bends correctly is carrying himself in balance, so he’ll be able to straighten up without changing his pace or drifting left or right. However, if your horse was stiff or unbalanced in the turn, you’ll notice that he’ll wander, stall out, or speed up when you guide him on a straight line.

Practice figure-eights of various sizes and at varying speeds to stretch and tone your horse’s muscles for greater suppleness and flexibility—key ingredients for optimum performance.

Once he’s got the bending work down pat, it’s time to take him to the next step … sideways.

Two Tracking/Leg-Yielding

The leg-yield offers multiple benefits. It challenges the horse to move forward and sideways simultaneously, like a sidepass on the go. The forelegs and hind legs cross over one another as your horse continues to move forward. Your horse will make use of the muscles of his hips, buttocks and topline to perform this maneuver. As his legs move laterally, he will also reach through his shoulders, and he’ll be lighter on his front end. The exercise strengthens your horse’s hind end and back, and loosens up his shoulders and hips, improving balance and creating a longer, more cadenced stride.

Once you’re ready to tackle a leg-yield, outfit your horse in a smooth snaffle and walk him in a straight line parallel to, and about 20 feet away from, an arena rail. Be certain that your reins are even, your arms are relaxed, and your hips are soft and moving in rhythm with your horse. Hold your hands evenly and level with or slightly behind the saddle horn.

If you are leg-yielding your horse to the left, away from your right leg, ask him to bend his head and neck ever so slightly to the right, away from the direction of travel. If you can see more than the eyelashes of his right eye, he’s bending too much. Soft contact with your left rein will support your horse’s neck position and prevent overbending. Throughout the maneuver, your horse’s neck should be part of a continuous unbroken line that begins at his withers and follows the entire length of the neck to his poll. Your job is to create a consistent and even bend down that line. Keep an eye on the topline of you horse’s neck for signs that his neck has shifted out of alignment and adjust your reins as needed to bring it back to center.

To get started, shift your hips slightly left in the saddle to stay over his ribcage when it moves laterally, and pull your shoulders back over your hips to keep your weight off your horse’s front end. Press your entire right leg against your horse’s side in the middle of his ribcage. If he doesn’t move over, nudge him over with your calf or heel, and then go back to steady pressure. Remember that your horse has to continue to travel forward as he is moving to the side.

Don’t be surprised if your horse’s front end moves over and his back end doesn’t. Just make sure his neck is nearly straight, and slide your right leg farther back to connect more with his hind. Whenever your horse gets crooked in his body, abandon the leg-yield until you re-establish correct alignment in his body on a straight line. Reverse the process for a leg-yield to the right, and use the same sequence of events when you’re ready to try it at the trot, which is easier because your horse will have more forward motion.

Reverse Arc

After your horse has mastered the leg-yield, give the reverse arc (counter-bend) a try. It is exactly what it sounds like: Your horse moves on an arc, let’s say to the left, but his body is bending to the right. It’s great for strengthening the hind end, improving cadence and loosening up the shoulders for flatter-knee gaits with more reach.

Ride your horse on a circle to the left with his body conforming to the circle’s arc. Then, with your left leg about an inch behind the cinch and your right leg completely off his side, push your horse away from that circle and onto a circle to the right. You will be changing the direction of your circle without changing the direction of your horse’s bend.

During this exercise you’ll maintain the original bend with a shorter left rein and supportive contact on your right rein. As you push your horse over with your left leg, keep your hands about 10 inches apart and simultaneously move them one or two inches to the right. That will bring your horse’s head, neck and shoulders into the new direction in a reversed arc. This exercise can be performed at any gait, but stick with the walk until he feels comfortable, then give him time to master it at the jog before trying it at the lope. In the beginning, ask for just a few steps at a time and keep your counter-bent circles and turns large and sweeping to give your horse a chance to become accustomed to the work.

If your horse slows down or tries to quit, immediately return to a normal arc and re-establish his momentum before trying the counter-bend again. Reverse the procedure for a counter-bend to the left. Make sure he has plenty of forward energy before you try it again. He has to maintain a steady pace to reap the benefits of the exercise. However, until your horse develops the strength and flexibility to maintain it for longer periods of time, only ask for a couple steps in the reversed arc before allowing him to go straight or returning to a regular bend.

Shoulder-In

If you are looking to improve self-carriage and help your horse develop the strength and flexibility he needs for collected work, the shoulder-in will get the job done. If you stand directly behind or in front of a horse performing a shoulder-in you will see that his shoulders quite literally move to the inside of the track of his hindquarters. It’s a subtle shift that brings the outside foreleg in line with the inside hind leg as the horse continues to travel on a straight line.

You’ll ask your horse to do a shoulder-in on the rail. Shorten your inside rein to bend his head and neck away from the rail. Hold your inside hand next to his withers without crossing over the top. Bring your outside hand toward his withers on the other side, keeping both reins parallel with each other. Put a slight twist in your upper body so that you are turning away from the rail and into the direction of your horse’s bend, but keep your hips square with the saddle. Apply steady pressure with your inside leg at the cinch. Bring your outside leg back and maintain light contact with the middle of your horse’s ribcage. Keep it passive, but if your horse loses impulsion from his hind end apply pressure to encourage him to keep his stride strong and even. You are trying to support your horse’s front end with your inside leg and get him to bend his shoulder around it, so be careful not to bump him or push so hard with your leg that he wants to move away from it.

From the saddle you’ll want see your horse’s withers, neck, and head curve to the inside of the rail as his shoulders shift to the inside of the track. Through your seat bones feel whether or not your horse’s hindquarters are tracking straight along the rail to tell if he’s performing the maneuver correctly.

Stretch It Out

Bending and lateral exercises demand a lot from your horse physically, so periodically give him a chance to stretch his hard-working muscles with a trip around the arena in a long and low frame. Lengthen your reins and see if he’ll stretch his neck down to release his neck and back. If he doesn’t do it on his own, take steady contact with your reins and hold your hands wide and even with the pommel of the saddle. The trick is to only establish contact by taking the slack out of the reins, instead of pulling back on your horse’s mouth. Maintain the pressure until he lowers his head, and then
release it. Softly bump the inside of your calves against his sides to encourage him to step under himself with his hind legs if he leans on your hands or elevates his head.

Always take into account your horse’s fitness level when you are asking him to perform difficult exercises. Be happy if he can maintain a specific bend or movement for one to four steps at first, then slowly work your way up to holding it for longer periods of time. It might be tempting to try doing everything at once, but that will put too much physical and mental pressure on your horse.

These exercises will improve your horse’s balance and help you develop a greater awareness of how he uses his body. They will also enhance communication between you and your horse, bringing your riding experience to a higher level.

Further Reading
Extend the Jog and Collect Benefits
Western Pleasure Headset


This article originally appeared in the May 2005 issue of Horse Illustrated. Click here to subscribe.

Most Performance Horses Thought to Have Ulcers

13

Research published in 2005 revealed the presence of ulcers in the colons of performance horses. According to the study, conducted by Frank Pellegrini, DVM, 63 percent of horses involved in competition sports, ranging from dressage to racing, suffered from colonic ulceration.

Pellegrini’s work confirmed the findings of earlier studies, showing that 87 percent of horses have gastric ulcers (ulcers of the stomach). When combined with his findings on the lesser-understood issue of colonic ulcers, however, his study demonstrated two startling facts. He found that 54 percent of performance horses suffered from both gastric and colonic ulcers. Further, Pellegrini’s study showed that 97 percent of performance horses had some type of ulceration.

“This research suggests that ulceration in the colon may be to blame for the low grade anemia, colic and other conditions seen frequently in high performance horses,” Pellegrini says. “Most importantly, it brings into focus the need for further research on the direct causes of colonic ulcers and how exactly they affect the horse.”

Pellegrini’s research proves that colonic ulcers exist prevalently within the performance horse population. Unfortunately, no treatment now available can cure them. Omeprazole, used for gastric ulcers, was formulated for the specific conditions found inside the stomach and will not positively affect the delicate colonic environment.

“Given that more than 60 percent of all performance horses may be suffering from colonic ulceration, which cannot be treated with traditional ulcer medications, it may be time for equine caregivers to consider other options,” Pellegrini says. “A dietary supplement intended to maintain optimum digestive tract health may be the best solution to preventing colonic ulcers before they negatively affect performance and attitude in the horse.”

One approach to promoting overall digestive tract health involves the use of non-testable, natural foodstuffs to heal the intestinal tract and support good health throughout this critical system. Among the ingredients of such a diet is the sort of natural fiber found in oats and barley. To be certain, more information on a natural approach to preventing ulcers in performance horses is on the horizon.

Further Reading
More than half of horses tested found to have stomach ulcers

Safe Trailering

4

It’s easy to get complacent when hauling horses. Months or years of incident-free trips can give any driver a false sense of security. And while it’s true that confidence is a good thing, a little bit of caution can go a long way, too. While you may have control over your driving, horses and vehicles, there is little you can do about bad drivers, traffic situations, road conditions and just plain bad luck. Therefore defensive driving, planning and preparation are key to safe hauling, no matter how long the journey.

Horse Trailer

“We believe you can never over-prepare for a trailering trip with your horse,” says Mark Cole, managing member of the USRider Equestrian Motor Plan, the first nationwide roadside assistance program created especially for equestrians. “Even if you are only going to travel a short distance to a local event, an accident could occur ahead of you, leaving you and your horse unprepared and stranded in traffic for many hours.”

Vehicle Maintenance

Your trip preparation should begin with proper maintenance on both vehicles. This is easy to remember with your towing vehicle, but not so easy to remember with your trailer. And according to Mark, this is where many people make their first mistake. “For the most part, trailers are used on an irregular basis. Therefore, maintenance issues can easily be forgotten and/or neglected.” Have a qualified mechanic service your trailer at least once a year, whether you use it or not. There are so many components on a trailer that can decay as it sits. Rodents can chew through wiring, and floorboards can rot in places you can’t see.

During the maintenance, ask the mechanic to examine the trailer lights, the emergency brake battery on the trailer tongue and the trailer brakes. Mark says that the ball bearings should be serviced every 12,000 miles or every 12 months. “Even if the trailer is not moved, moisture builds up in hubs and can cause bearing failure. The majority of disablements result from both flat tires and wheel bearing failure.” Also have the suspension checked; check for corrosion under any rubber mats, whether the floor is metal or wood.

Replace tires that are five years or older, regardless of the condition. The majority of trailer tires rot before needing rotation, but if you travel a great deal, rotate your tires every 4,000 to 6,000 miles. Make sure that the tires you choose are trailer tires with proper ratings. Check with your trailer manufacturer if you are unsure. “Take care of your new tires by storing the trailer out of direct sunlight,” Mark suggests. Always keep tires properly inflated. Incorrect pressure can and will cause a tire to blow.

24-Hour Countdown

Start by fueling up and checking the fluid levels in your towing vehicle the night before a trip. If it has been a few weeks since you last used your trailer, take a look at it and make sure that it is in good working order and that none of the light bulbs or electrical wires have broken. Inspect the tires, hitch, coupler, breakaway brake or kit battery and safety chains. Check to see if any bees or wasps have made their home inside the trailer. If you are borrowing or using a new trailer for the first time, make sure your hitch ball will be the right size for the trailer. Hitch the tow vehicle up and have a friend watch to make sure all the lights (turn signals, brakes and tail) turn on properly. Next, take a short drive around the block to test your brakes.

Essential Trailering Gear

  • A mobile phone and charger
  • Information for emergency responders
  • Spare tire, properly inflated
  • Lug wrench
  • Trailer jack
  • Chocks
  • Reflective vest
  • Flares or emergency triangles
  • Flashlight
  • Water
  • Buckets and sponge
  • Pocket knife (to cut tangled lead ropes or hay nets)
  • A copy of the Nationwide Overnight Stabling Directory
  • A copy of The Next Exit,a guidebook that includes available services at each exit throughout America
  • Membership to a roadside assistance organization that will assist motorists with horse trailers
  • First-aid kit for horses

Loading Up

To make your hitching up and loading run smoothly, do things in the same order every time (do them in reverse order upon your return). For example:

  1. Hitch the trailer.
  2. Lock the hitch.
  3. Connect the safety chains or cable to the towing vehicle.
  4. Connect the battery cable on the tongue to the trailer hitch on the towing vehicle.
  5. Connect the electrical plug.

This system will give you a mental checklist so that you won’t have that sneaking feeling that you forgot something. Many people even carry a checklist in their tow vehicle that they can run through before they leave and when theyunhitch.

Tomas Gimenez, DVM, is an expert in large-animal rescue and a professor at Clemson,University in Clemson, S.C. He says the best thing you can do for your horse to prevent injury is to always put shipping boots on him, even for short trips. “Nowadays there is no excuse not to use shipping boots,” he says. “They are cheap, and it takes only two minutes to put them on. By far the most common type of injuries during trailer accidents are lower leg injuries.” In addition to shipping boots, Mark Cole also suggests equipping your horse with a head bumper.


Dr. Gimenez says that if a horse does not have to be tied in the trailer, you should not tie him. “It is better for both safety and health reasons to allow the horse to move his head up and down,” he says. Hay bags are not a good idea because they can act as leg traps, Dr. Gimenez says. “If you want to give your horses hay, put it on the floor [non-manger type/walk-through designs] or in the manger. You can also soak the hay to dampen down loose particles, which helps keep the inside of the trailer dust free.”

If your horse is traveling with a companion, Mark Cole suggests keeping the offloaded horse within the loaded horse’s view when loading and unloading. This will keep both animals’ anxiety levels down and may prevent the loaded horse from bolting out of the trailer.

If your horse is traveling alone in a two-horse straight-load trailer he must be on the left side of the trailer. “By doing this, the weight of the horse will help keep the trailer toward the center of the road,” Dr. Gimenez says. “If the horse is on the right side of the trailer, it will help move the trailer off the road if you happen to lose control of it.” Mark Cole says there are increased incidents of trailer turnovers resulting from a single horse loaded on the right-hand side of a straight load.

Once you’ve loaded the horses, check your hitch setup again, make sure all doors are shut and that nothing has been left on top of the wheel wells.

On the Road

Defensive driving is the best policy, particularly when towing a trailer. Anticipate the unexpected, and do everything you can to avoid an accident. Mark suggests driving with your lights on, day and night, and driving at or slightly under the speed limit.

Because the horse cannot see in front of the trailer, he can’t anticipate and brace himself for any sudden changes. Aside from making sure you have a towing vehicle that can stop the trailer, Dr. Gimenez recommends always maintaining a safe distance between you and the vehicle in front of you. “Even if other drivers keep cutting in front of you—which they will—keep maintaining a safe distance.”

“Remember it takes longer for you to stop,” Mark adds. “A simple rule of thumb is to allow a minimum of one vehicle length [the length of your truck and trailer combined] for every 10 miles per hour you are traveling. If using the two-second rule, double that to four seconds. In the hurried world we live in this is sometimes difficult to do, but this extra cushion could save your life or your horse’s life in the event of a sudden stop.” Pay close attention to all road signs, and stop and cross carefully at all railroad crossings. Know how tall your trailer is, and take heed of high-profile-vehicle notices on low bridges, fast-food drive-thrus, et cetera.

If the Unexpected Happens

In the event of an emergency, get to the side of the road as quickly as possible. Get as far off the road as you can, even on to the grass verge. “The most common cause of deaths on the road is being run over by passing traffic,” Dr. Gimenez says, so carefully put out flares or warning triangles to alert other drivers, and turn on your hazard lights. Leave your horses on the trailer and never offload them onto the side of the road—a potential disaster if one should break loose and run out into traffic. Mark Cole also warns against unhitching the truck from the trailer—a dangerous situation, even on level ground. The trailer is uncontrollable and unsteady when separated from its tow vehicle.

If a flat tire has caused the emergency, maintain a safe speed as best you can. “In other words, don’t create an accident by making a sudden stop or reducing your speed too quickly,” Mark says. Sacrifice the tire and wheel, and continue driving until you can leave the motorway and find a service station or safe place to stop. “The safety of you and your horse is more important than a wheel or tire,” he says. “We also don’t recommend changing the tire yourself unless you are qualified. Changing the tire on a trailer is a potentially lethal situation. A loaded trailer is extremely heavy. The weight shift can cause the trailer to fall off the jack. Also, the lug nuts need to be torqued to a proper sequence because otherwise the tire can come off in transit.” If you have no other alternative, a trailer jack that allows you to drive the trailer up onto it and off the ground will be the safest alternative. Try to get someone who is experienced with changing tires to do this. If you have to do it yourself, have a qualified mechanic properly torque the wheel immediately.

Although your mind may be on the competition or destination ahead of you, try to make an effort to concentrate on getting to the event safely. “It is very easy to get caught up in the moment of an event or competition,” Mark says. Trailering requires a different, or at least enhanced, state of mind from that of simply driving a car. So plan ahead, be aware, hang up the cell phone and pay attention.

Further Reading
30 Trailering Tips

Sharon Biggs is a dressage instructor based in England and the author of In One Arena.


This article originally appeared in the April 2005 issue of Horse Illustrated. Click here to subscribe.

Horse Grooming Kit

0

Grooming means keeping your horse clean. It is very important that you take the time to clean your horse before and after you ride. If you leave mud and dirt on him, it can make him sore and itchy. You should groom him when you are done riding to get rid of sweat and dirt. Grooming is like a massage for a horse. Just be sure to be careful around sensitive areas like his face, belly and legs.


Remember to disinfect your grooming tools a few times a year in warm, soapy water so you don’t spread germs. If fact, if you are riding more than one horse, it is a good idea to have a grooming kit for each one to keep them healthy. Be sure to rinse your brushes after soaking. Leftover soap can make your horse itchy!


Grooming Box: You’re going to need something to hold all your tools. It can be something as simple as a bucket, or more complex like a wooden grooming box or cloth bucket. Most people use plastic carryalls to hold their brushes—you can pick one up at the local store.


Currycomb or Rubber Mitt: This flexible plastic or rubber brush helps remove dried mud that is caked on your horse’s coat. Be careful when using this tool on a horse’s face and legs, it might be too harsh! Use your hand or another brush to knock the dirt from the bristles or nubs.


Dandy Brush: This is a brush with stiff bristles. Use this brush with short strokes, flicking your wrist, to remove the mud the currycomb loosened. Make sure you rub this brush with your hand or another brush to get the dust out of the bristles.

Body brush: A body brush is a soft brush that can be used everywhere on a horses body. It removes surface dirt the dandy brush left behind. It makes a horse shiny by bringing up natural oils in his coat.


Hoofpick: This is the most important grooming item you can use on your horse. It is a metal or plastic tool with a hook on one end used to remove dirt and pebbles trapped in your horse hooves. You need to pick out your horses feet everyday, even if you are not going to ride. This is to make sure that nothing is stuck in his hoof and hurting him.


Mane Comb:
A small metal or plastic comb, this tool is used to get knots out of a horse’s mane. You should also get a people hairbrush to get knots out of the tail. Always start at the bottom of the tail working up so you don’t break a lot of hairs.


Sponges: You should also have two sponges in your kit. One is for the horse’s head, to wipe out his nose and eyes, and the other is for his dock area, just under his tail. Never use just one sponge, this can spread infections. Use different colored sponges so you don’t mix them up.


Hoof Oil: Oil your horse’s feet after you ride, especially in the summer. This will prevent them from cracking and flaking as the weather gets drier.


Clippers: At some point in time you will most likely have to trim your pony, whether it is to make a place for his halter or headstall, to get rid of some excess whiskers or to give him a full body clip in the winter. There are lots of different sizes and styles of clippers out there, each one meant to do a specific job. You won’t need body clippers if you are only trimming his ears, but you will need heavy duty clippers if you’re going to get thru his winter coat! You might want to borrow clippers for a little while to see which kind you really need. You can get small, handheld clippers for as little as 20 dollars!


Bath Time: When your pony is really dirty, you will need to give him a deep-down cleaning with soap and water. There are many types of shampoos available; you just need to find the one that suits your pony’s needs! There are soaps for sensitive skin, soaps made with only natural ingredients and soaps that are specially made for relaxing muscles after a hard work out.


You can use different tools to really work the soap into his coat. You can use a regular curry, a curry that attaches to the end of your hose or even scrubby mitts like you use in the shower. Always remember to rinse him well; leftover soap can make him itchy!


Spray-on Conditioners: If the weather is too cold or you just don’t have the time to give your pony a bath, spray-on coat conditioners might be the answer. These sprays coat each hair on your horse’s body to repel dirt and dust. They are also excellent detanglers for manes and tails.


With these tools in mind, you should have everything you need to keep your pony clean and healthy. Happy grooming!


* This article first appeared in the March/April 2005 issue of Young Rider.
Subscribe today!
 

Pasture Maintenance

9

Electric tape fenceWhere your horses are concerned, it’s better to be safe than sorry. The very qualities that attract us to horses—size and strength, intelligence, playfulness, curiosity—are what necessitate a secure turnout environment. So, without fail, regular checks of your pasture and surrounding fence should be integrated into your barn chores. After all, most pasture hazards are like weeds—you can get rid of them, but that doesn’t mean they won’t come back. Here are the top 10:

1. Gates Left Open

An open gate is a horse-magnet. Never make the mistake of leaving the gate unlatched “for a moment” while you do something nearby. Don’t ride through an open gate to the barn and assume you’ll remember to shut the gate. You’ll either be chasing excited horses down the road or tearfully explaining to your friends and family what happened to cause a tragic accident.

2. Electric Fence Failure

All horse fencing should be inspected periodically; however, electric fence requires extra attention. It is a sound and inexpensive alternative to wood, PVC and non-electrified high tensile, but it easily shorts out and loses voltage. Any number of occurrences can cause an electric fence failure: fallen tree limbs, rusty wire connections that either sap the voltage or break, wet grass and weeds, or broken insulators that allow wire to come into contact with fence.

A continuous snapping noise often alerts you to a problem with your electric fence, yet voltage drainage can be silent and go undetected for quite a while if you fail to check your system. You can buy inexpensive, hand-held voltage testers for manual checks, or make this as easy as a glance with a voltage tester that permanently hangs on your electric fence.

3. Loose or Broken Boards

Many horse owners choose to install board fence rather than lower-maintenance options because of wood’s beauty, sturdiness and long history of association with fine horse farms. Unfortunately, weather wreaks havoc on wood, causing dryness and splitting, leading to popped nails and loose boards. Even without the damaging effects of weather, horses love to chew, lean on, scratch their butts against, stick their heads through and push each other into fencing, all of which results in weakened boards. Broken wood is the cause of most fence-related puncture wound injuries. Paint the wood fence to protect it from the drying effects of weather and anchor the nails to posts. Periodically walk your fence line to assess damage; carry a hammer and a few nails to avoid a trip back to the barn because invariably the section that needs repair will be in the farthest corner of your field.

4. Protrusions—Tree Limbs, Sharp Edges

Own horses long enough and you will someday be scratching your head about an injury to one of them that just seems impossible. It is a horse truism—if there’s something in the pasture your horses should stay away from, they will find that spot like a heat-seeking missile. One summer evening, my Appaloosa gelding calmly sauntered into the barn with a bloody 2-inch square flap of skin hanging over his eye. An after-hours vet call, four tranquilizers, 24 stitches and $250 later, I never did find out how he sliced open his forehead. Even so, that injury became the catalyst to reinspect and “horseproof” my pastures.

5. Toxic Plants

The easiest way to find out what toxic plants you should be looking for in your pasture is to contact your agricultural extension agent and ask about which ones thrive in your region. You can then either search the Internet to identify those plants (there are scads of websites devoted to this subject), or buy a book such as the Horse Owners Field Guide to Toxic Plants by Sandra Burger (Breakthrough, 1996).

Toxic plants and deadly pasture inhabitants are like serial killers—they often appear harmless. Investigators were stumped a few years ago when an inordinate number of Kentucky foals died mysteriously. Turns out, the culprits were tent caterpillars that eliminated a form of cyanide after eating cherry tree leaves. Other “killer bugs” are blister beetles that infest hay. And, pregnant mare owners should be aware of fescue toxicosis that causes the placenta to separate prematurely.

Louann Chaudier is a freelance writer and horse owner based in Wisconsin.

6. Objects Working Up from the Ground

Before I owned a farm, I never understood why farmers have to “pick rock” more than once. I was incredulous that items in the ground could rise to the surface without anyone digging for them. Well, now I know. It isn’t so much that items work their way up, as the elements, and our horses, work the soil down. If there’s something sharp, it may very well end up under your horse’s hoof. Unfortunately, our horses’ eyes are far away from their feet, and when they are busy running and playing, they aren’t particularly careful about where they put those hooves. Again, check your pasture periodically for anything potentially dangerous underfoot.

7. Wrong Kind of Fence

In order for your horses to be safe in their pasture, the fence needs to accommodate the specific types of horses you own. If you own a stallion, for example, he should not be pastured near a field of mares without a sturdy fence that’s tall enough to discourage him from jumping or running through it. Aside from the considerable hazards of your stallion running loose, none of your neighbors will welcome an unplanned foal either.

Mares with foals require special consideration, too. If the bottom rail of your fence is high enough for a foal to roll under, one day you may find him outside the pasture while his frantic mother paces and calls from the other side. This is another disaster in the making. You thought enough of your mare to want a foal from her, so why tempt fate? Pasture the mare and foal within a fence designed to keep them safely together such as “horseproof” no-climb wire mesh.

If you buy a farm that has unsuitable fence for horses, you must replace it. The money you spend for one vet bill caused by a horrific injury will go a long way toward paying for safe fencing. If you are new to horse-farm ownership and not sure what’s best for your particular circumstances, contact major fence manufacturers or dealers, or do your own research via magazine articles, books and the Internet. Fence manufacturers will be glad to provide information to help you make an informed choice based upon your type of operation and budget.

8. Incompatible Horses Pastured Together

Horses are similar to people in that they sometimes just don’t like their close neighbors, but unlike us they can’t simply avoid them. The conflicts created by equine personality clashes can be quite severe, so it’s never advisable to introduce a new horse to your herd by opening the pasture gate and assuming they will “sort it out.” In fact, you should initiate a gradual process to get them acquainted whereby they can’t hurt each other.

Horses can be brutal, like schoolchildren. Some will never accept a particular individual, and, if allowed, may run the poor horse ragged or right through a fence. You need to be aware that these skirmishes can crop up any time there’s a new member in the pasture whose place has yet to be established in the herd.

Age can cause a change in compatibility, too. Herd hierarchy often changes when illness or age affect a horse’s ability to maintain his position. Inevitably, there will be a horse that wants to take his place.

9. Shared Fence Lines

Even though most of us want to use every spare foot of land for pasture, it’s not advisable to share fence lines between pastures of horses that are likely to play or fight over the top. This is a judgment call: If you have adjoining pastures of geriatrics, you probably don’t need to worry; however, if you have yearling colts on one side and 2-year-olds on the other, you’d be better off with an aisle between fields. Stallions shouldn’t be able to interact over the fence, either.

Even with adjoining fields of compatible horses, it’s wise to adopt injury-preventive measures such as putting caps on t-posts, stringing electric wire or tape along the top rail, or “flagging” fence to define boundaries for new horses.

10. Gopher/Animal Holes

Many old westerns feature cowboys atop galloping horses that take spectacular tumbles after inadvertently stepping into an animal burrow. That may seem an unlikely occurrence for more urban settings; however, if you look closely, animal burrows are everywhere. On my own Wisconsin farm I have a surplus of gophers, groundhogs and chipmunks that think my pasture makes a great subdivision. Some of the holes are too small for a hoof; others are big enough to accommodate an NFL football. Holes in the pasture should be identified and filled in each spring, before they become invisible by summer grass and weeds. Similarly, if you’ve picked rock out of your pasture and left sizeable hollows in the ground, these should be filled. Check for old post-holes as well.

Eliminating pasture hazards is essential to the well-being of our horses and, for those of us who ride in our pastures, our own personal safety. The time we spend checking our pastures and fences is minimal compared to the hours we’d incur nursing an injured horse.

Read more on pasture management >>

* This article first appeared in the March 2005 issue of Horse Illustrated.
Subscribe today!

Stay Safe While Longeing

0

Sometimes we become so relaxed around our horses and so nonchalant about our daily routines, that we forget safety issues. For example, when longeing a horse it’s easy to forget that we’re in a very vulnerable position when we first begin the process of putting our horse out on a circle. Most horses are fresh when they start off on the longe line, so it’s no wonder that they suddenly buck or kick up their heels. But if you’re bending over, looking down and standing too close to your horse’s hindquarters, you could be injured by a striking hoof.
 
First, make sure that your horse is schooled to quietly walk out onto his circular path, and that he awaits your cue to trot or canter. Next, do not reach down and pick up a longe whip while your horse is within striking distance. He might perceive the whip as the cue to bolt off and buck, leaving you as an inadvertent target. Finally, don’t “shush” your horse out onto his circle. That, too, encourages a fresh horse to leap forward and perhaps kick out. Instead, slowly uncoil your longe line. By making your longeing protocol consistent, you’ll teach your horse some manners and keep yourself safe from a potential accident.

0FansLike
0SubscribersSubscribe
We use cookies to help personalize content, tailor and measure ads, and provide a safer experience. By navigating the site, you agree to the use of cookies to collect information. Read our Cookie Policy.
OK