
Photo by Leslie Potter
Have you ever tried to braid your horse’s mane for a show and gotten so frustrated that you begged a friend for help or ended up paying someone to do it for you?
Braiding a horse’s mane is not overly difficult, but one adage holds true: Practice makes perfect. If you want to have beautiful, even braids, don’t wait until the night before a show to start learning. It takes most people a few fully braided manes to develop an efficient technique.
My preference is for “hunter bump” yarn braids because I find them easier to put in and take out than round braids sewn in with thread. This type of braid is a good all-purpose style that can be used for hunter/jumper, eventing and dressage horses. Yarn also securely holds in braids without damaging the hair.
Pulling the Mane Before Braiding
Before you braid, you’ll need to pull your horse’s mane to thin out the hair and even the length. If he has very thin hair, you can probably get by using scissors (held vertically, never cutting straight across) or an old clipper blade to even out the length. For horses with thick hair, however, you need to pull the mane until it is thinned out and about 4 inches in length. Thick hair makes yarn braiding nearly impossible.
If your horse is sensitive about having his mane pulled, do just a small section of pulling every day for a week or so to keep him from getting too worked up. It also helps to pull after you’ve ridden, as body heat tends to open the pores and make the hair less painful to remove.
In extreme cases, it may be necessary to have your vet administer a small amount of tranquilizer to get the job done. Pulling should be done every four to six weeks to keep up the short, thin mane necessary for braiding.
Using Yarn to Braid a Horse’s Mane
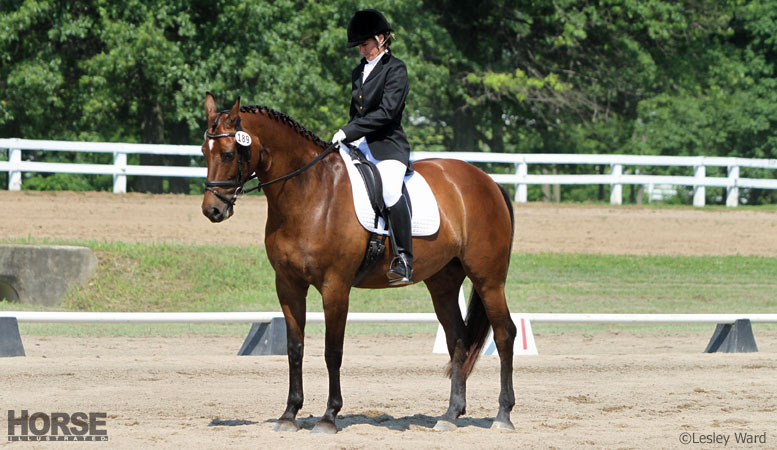
Note: In the photos, the horse’s mane lies to the left and is braided to the left. This is acceptable for eventing and dressage horses, but hunters prefer to train and braid the mane to the right.
◆ STEP 1. Assemble all of your braiding equipment. Tie your horse safely and comfortably so he can’t wander off, either on cross-ties or in his stall. Have a hay net nearby to distract him and increase his patience, if necessary. Stand on a sturdy stool or mounting block so you can easily reach your horse’s mane. NOTE: We used white yarn in our equine model’s black mane so that it would be more visible in the photos. For a show, use yarn that matches the color of your horse’s mane.
◆ STEP 2. Starting at the top of the mane, just behind the bridle path, wet down and comb a section of hair approximately two to three fingers wide, or 1 to 2 inches. You can use water, but there are grippy braiding spray products available that really make things easier. Use your comb to make a razor-sharp part, and keep the rest of the mane out of your way with a hair clip.
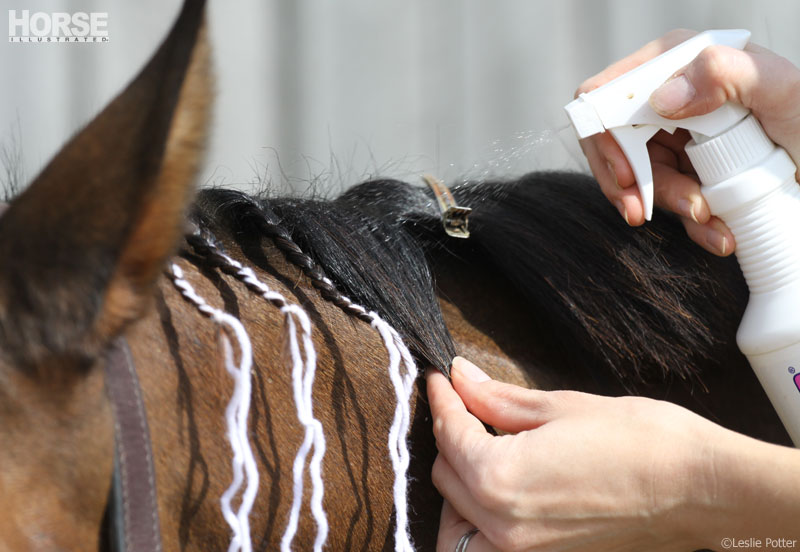
Photo by Leslie Potter
◆ STEP 3. Begin braiding downward (as opposed to out toward yourself), pulling each section of hair out to the side as you work your way down for maximum tightness. When you get about halfway down the braid, place the middle of a piece of yarn under the bottom of the braided section. Incorporate one half of the yarn into one section of the braid. Do two more crosses of the braid, then incorporate the other half of the yarn into the third of the three sections. Continue braiding as far down the hair as possible.
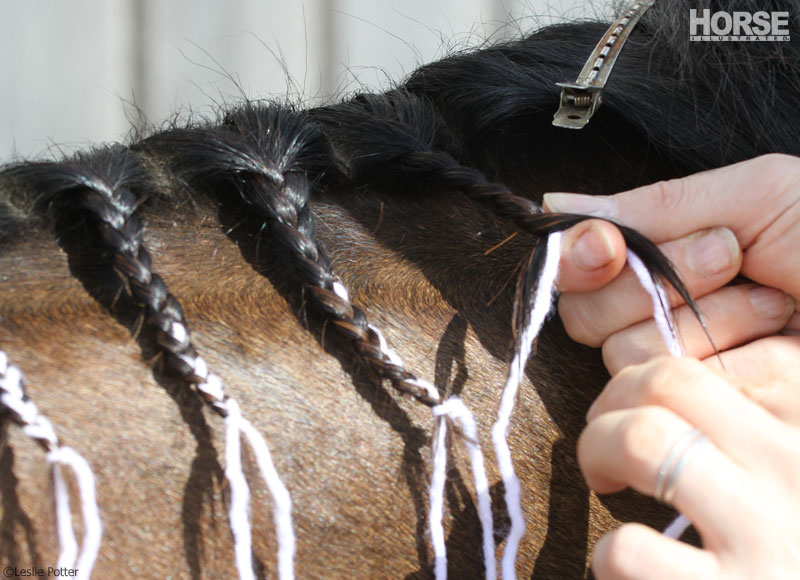
Photo by Leslie Potter
◆ STEP 4. Tie off the yarn at the bottom of the braid with a single slip knot, pulling tightly.
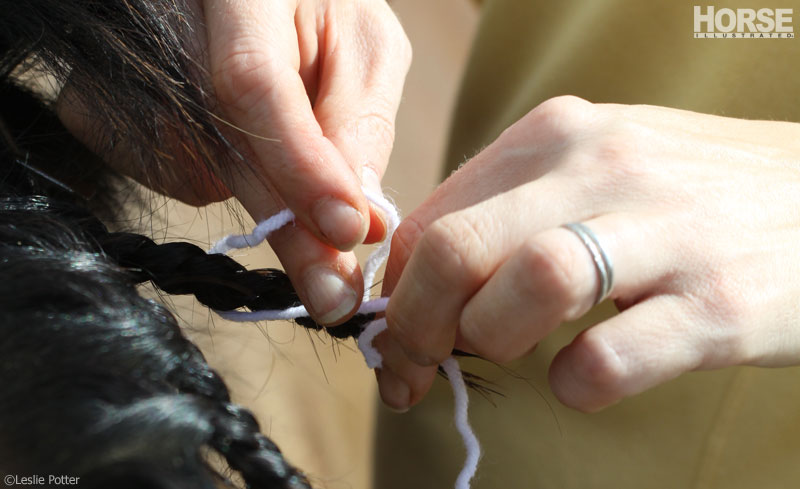
Photo by Leslie Potter
◆ STEP 5. Slide your pull-through down into the top and center of the braid at the crest; thread the free ends of the yarn through it and pull them out through the top of the mane. The braid will now be folded in half.
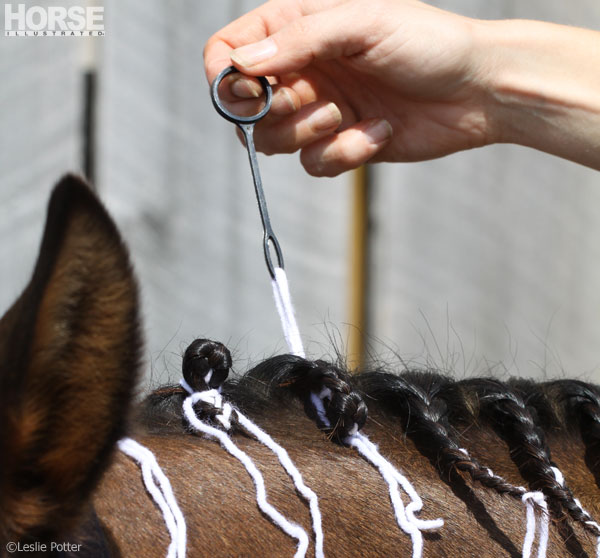
Photo by Leslie Potter
◆ STEP 6. Use the free ends of the yarn to make a simple square knot under the braid and pull tightly.

Photo by Leslie Potter
◆ STEP 7. Push up a “bump” so a knob of the braid is visible along the crest of the neck, with the rest of the braid in a small, folded loop below the bump. Tie another tight square knot on the “waist” of the braid (between the bump and the loop).
◆ STEP 8. Make another knot around the waist of the braid, this time behind it. Pull tightly, and use scissors to trim the yarn tails a couple of millimeters from the knot.

For hunters, always braid the mane on the right side of the horse’s neck. For other disciplines, it is acceptable to braid on whichever side the mane naturally falls to. Photo by Leslie Potter
I like to braid the entire mane with the braids hanging down first, then go back down the neck to pull the braids up and “bump” them, making my yarn knots. My third and final pass is to trim the yarn tails with scissors. Finally, I braid the forelock using the same method, although it may require French braiding for the first few rows if the forelock is large and unruly. I don’t like to pull or shorten forelocks, but that is certainly an option.
Don’t get discouraged if your braids don’t look perfect the first time. Keep practicing, and beautiful, even braids are sure to follow.
Tidy TailWhile French braiding down the length of the horse’s tailbone is the traditional hunter turnout, for less formal shows and other disciplines, this time-consuming task is not necessary. However, a frayed and bushy tail does not portray a tidy picture to the judge, so it’s important to take simple steps to tame flyaways. Start by running a damp sponge over the hair along the tailbone. Next, use a polo wrap or Ace bandage to lightly wind around the length of the tailbone. Make sure it’s not too tight, as it can cut off circulation to the tail. Leave the wrap on for no more than 20 minutes, and time it so you can remove it right before you head to the warm-up ring. The smoothing effect will be short-lived, but sufficient enough to get you through your class without braiding the tail. |


Great article with good pictures. HOWEVER, there is no rule that says a Hunter mane has to be braided on the right side. If the hair doesn’t naturally lay that way, the horse will not feel comfortable as possible.
cool
Great tips.