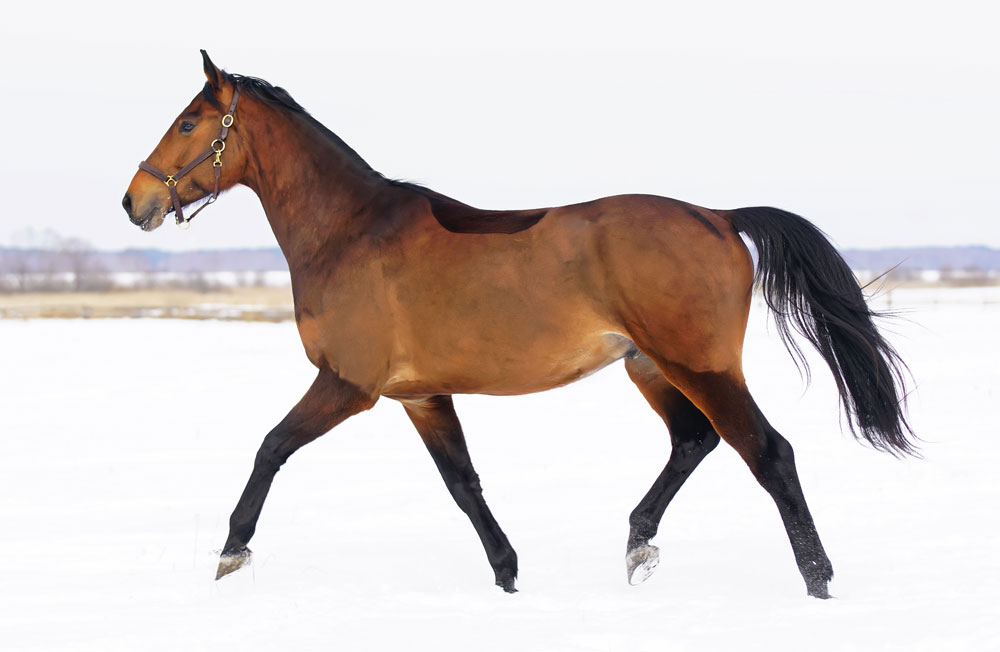
You may dread it, but it’s that time of year again: the time when your horse’s winter coat sprouts long, thick and fluffy. You pull him out for a ride and spend 40 minutes knocking the mud off every part of his body, and another 60 minutes trying to dry him out after your ride. If this situation sounds familiar, body clipping might be just the solution you need. Read on to learn more about the 10 steps to successfully body clip your horse.
Blanketing
The first commandment of horse body clipping is thou shalt blanket. If you or your boarding help aren’t available at least twice a day to switch out blankets from light to heavy or remove when needed in warmer climates, you’re better off not clipping and leaving your horse with his full coat, using a lightweight waterproof sheet as needed.
When you take away your horse’s natural protection, needless to say, you’ve got to commit to keeping him warm and dry with the right wardrobe of blankets.
Choosing the Right Clip
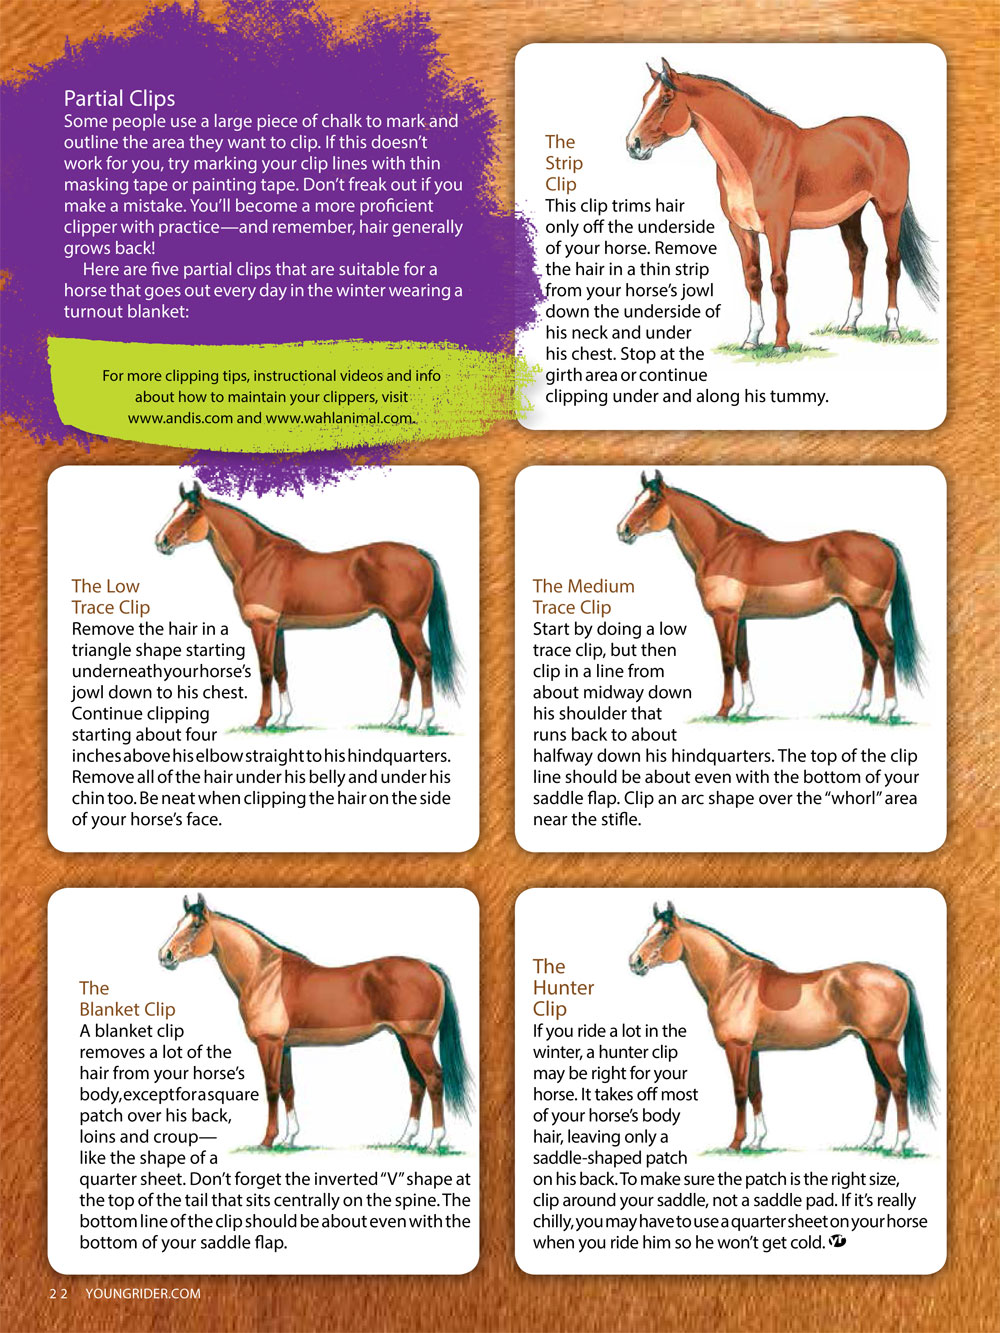
The next step is to decide how much hair to clip. This is dependent on your climate and your horse’s workload. Horses living out on pasture for the winter should generally keep their leg and face hair for protection against cold where blankets don’t reach.
If you live in a warmer climate or your horse is usually kept in a stall, you can consider a head-to-toe full body clip. These are usually reserved for horses that will be actively competing and training over the winter or in early spring before they shed, since they need to look show-ring ready.
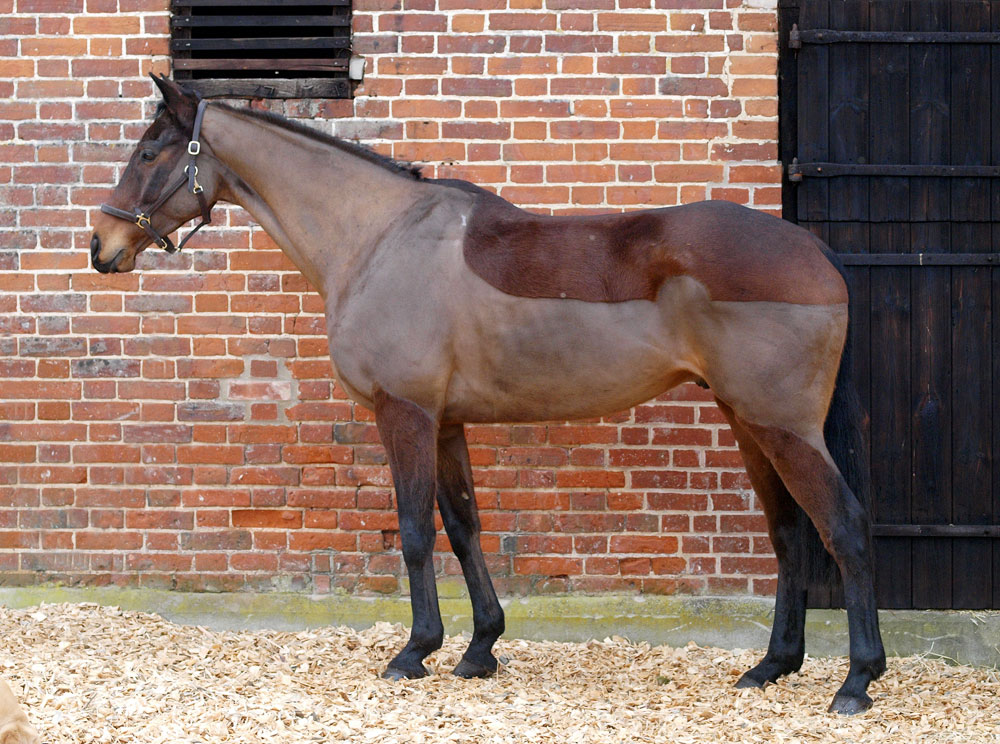
For those wanting to leave some hair on, there are three partial clips to choose from: hunter, blanket and trace. A hunter clip leaves only the face and leg hair, while the blanket clip also leaves a “quarter sheet” of hair over the back and rump. The trace clip is the most minimal, removing a strip along the bottom of the neck, belly and flanks where horses tend to sweat most heavily.
Full clip. Photo: anna Elizabeth Photography/Shutterstock
Horse Body Clip: Full Clip
A full clip takes off the hair from head to toe, and is good for horses that show during the winter. Many people leave a “saddle pad” of hair to prevent rubs under the tack.
Hunter clip. Photo: Udyptula/Shutterstock
Horse Body Clip: Hunter Clip
A hunter clip leaves the legs and usually head unclipped for protection against the elements.
Blanket clip. Photo: Eastern Light Photography/Shutterstock
Horse Body Clip: Blanket Clip
A blanket clip leaves head, legs, and “quarter sheet” of hair unclipped. This gives extra protection against those cold winds when you’re riding outdoors.

Trace clip. Photo: Elizabeth Moyer
Horse Body Clip: Trace Clip
The trace clip takes off the least hair, and is good for horses in lighter work or those that spend more time pastured outside in the winter.
Choosing a Clipper
A common mistake people make is having clippers that aren’t powerful enough for the job. I’ve seen enough friends struggling for hours to body clip with light-duty trimmers to know it’s not worth the bother.
Blade Length
The most common blade sizes for body clipping are a No. 10 or Andis T-84. These cut hair to 1/16″ and 3/32”, respectively.
Higher-numbered blades like the No. 15 and No. 30 should be strictly reserved for trimming the face and muzzle. Many people like the option of a wider blade to help body clipping go a bit faster.
Sharp Blades
One of the keys to body clipping success is to use freshly sharpened blades for every single job. You don’t necessarily have to buy new ones, but take them to a sharpening service to get them honed like new before reusing.
It’s a good idea to have a spare blade set (or two) on hand in case yours get dull and stop cutting midway through a clip.
For particularly coarse or long coats, expect to swap blades out halfway through to get the job done.
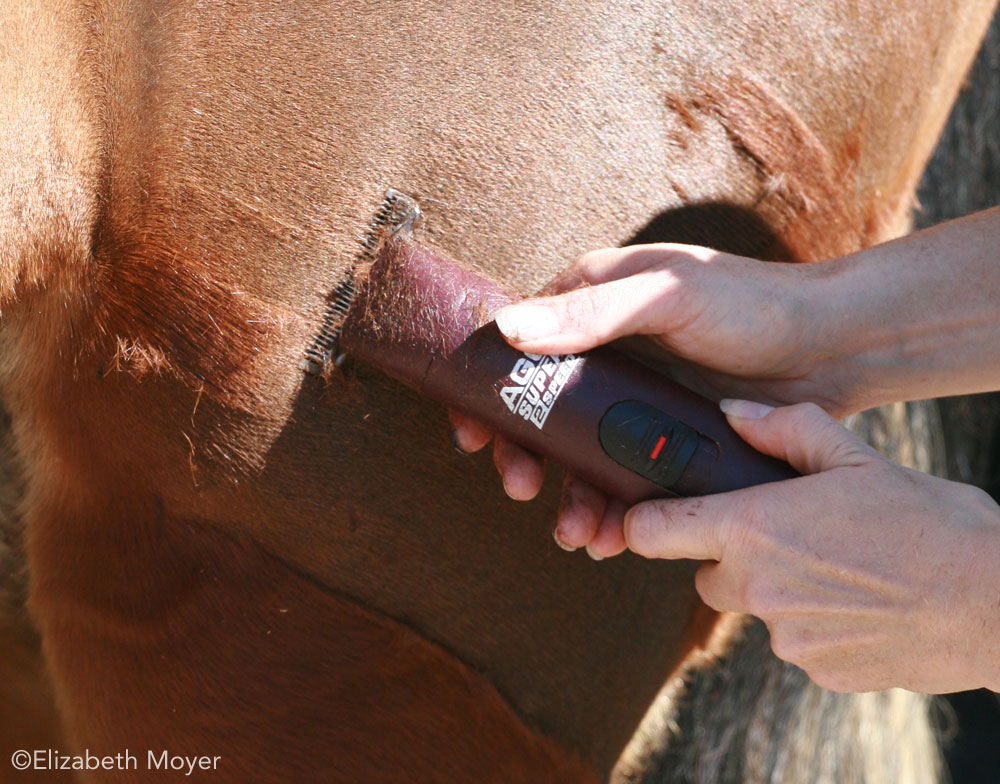
A Clean Horse
Along with sharp blades and powerful enough clippers, this is the third key to a successful clipping trifecta. Any lingering dirt or dust in your horse’s coat will quickly dull your blades so they stop cutting.
Since clipping is usually done in winter, you’ll need a warm day or heated barn and access to hot water. A heated wash rack is the ideal place to bathe, since you’ll have a hose to blast through that thick hair for extra cleaning power. Wet your horse thoroughly and scrub your favorite equine shampoo all the way down to the skin using a nubby mitt. Time spent here will be paid back in spades with a quick and easy clip.
Finally, rise thoroughly until dirt and soap are no longer coming out of the hair. Towel your horse thoroughly and put a cooler on him, then hand-graze in the sun so he dries quickly without rolling. Mist the hair with a silicone coat polish spray before clipping to help the blades glide more easily through the coat.
Accustom your Horse to the Clippers
If your horse has never been body clipped, or you’re not sure, have a practice session before the real thing. Most horses take to it well, but some—for whatever reason—strenuously object and can be impossible to clip without having your vet administer a sedative.
Begin at the horse’s left shoulder and turn on the clippers. If he doesn’t mind the sound, put your hand on his shoulder and rest the clippers against the back of your hand to see if he minds the vibration. If he remains indifferent, go ahead and clip a test patch to be sure he’s OK with the blades against his skin.
Keep Blades Flat
Always clip against the grain of the hair with the metal blades flat against the skin. Most of the time this is easy to achieve, but there are some areas of loose or ticklish skin to contend with.
If you have a helper to hold the horse’s front leg forward while you clip around the elbow, it will be much easier. Be particularly careful clipping the flanks and belly, as this can make horses twitch or even kick. Your safety is always more important than getting every last hair off the undercarriage.
Keep Blades Cool & Oiled
You will notice the blades getting hot as you clip. Periodically switch them off and feel them with your hand. If they’re like a red hot poker, most horses will express their discomfort and you’ll have an uncooperative haircut customer on your hands.
Fortunately, blade coolant spray is made just for this situation and works like a charm. You can also use a multi-purpose blade wash/dunk that will cool them down.
Every 10 to 20 minutes or as needed, the blades will also need oil to reduce friction and extend the lifespan of your sharpening job. Squeeze a thin layer of oil along the teeth and also a drop on each side where the blades meet.
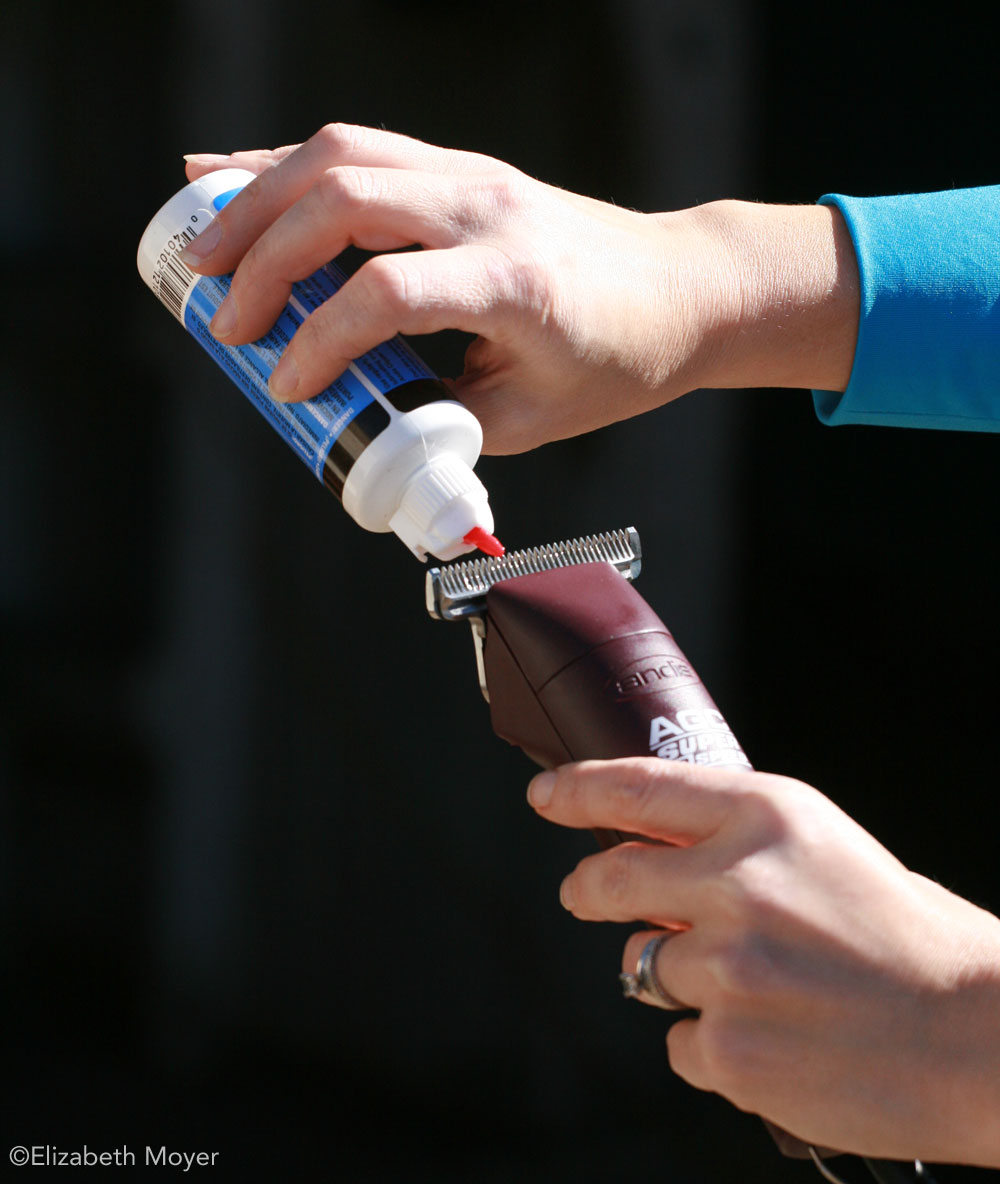
Periodically cool and oil blades so they run smoothly and are comfortable for your horse.
Finish with a Bath
When you’re done clipping, your horse will probably be itchy from the thousands of prickly hair clippings all over him. While you should run a body brush over him several times during the clip (such as any time you take a break to cool the blades down), it’s ideal if you can rinse him off before blanketing.
Many people choose to follow this step with a treatment of post-clipping grooming oil designed to moisturize the hair and skin after a fresh clip.
And finally, the unofficial 11th commandment: Don’t wear fleece or lip balm while clipping if you don’t want pokey hairs sticking to you. A slick nylon track suit helps repel those pesky microscopic shards.
Now you’re ready to conquer clipping for the winter ahead!
This article originally appeared in the November 2018 issue of Horse Illustrated magazine. Click here to subscribe!