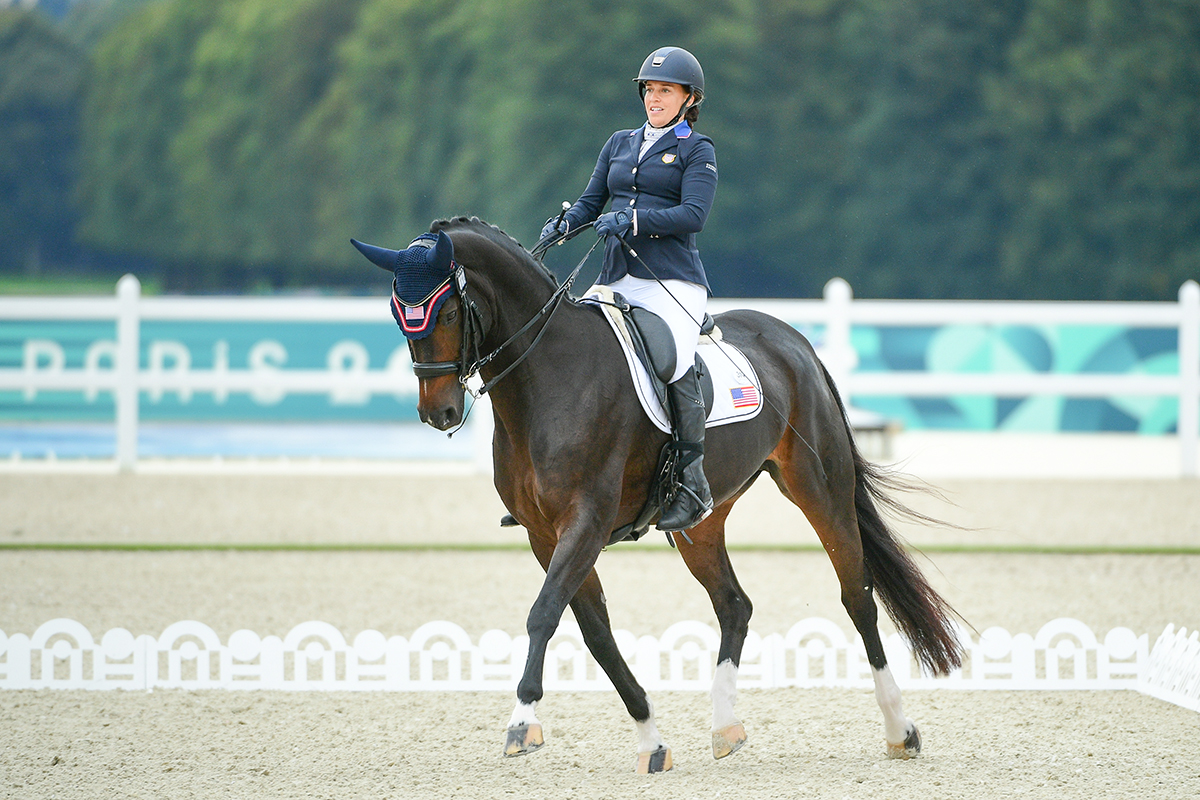
Photo by Daniela Derler
Photo Courtesy Trafalgar Square Books
To increase your horse’s lateral bend, improve his carrying capacity and correct the horse that “falls through” the outside shoulder, try using these circle and square exercises author Julia Kohl, adapted from her book Creative Dressage Schooling with permission from Trafalgar Square Books.
20, 15, 10
WHERE YOU GO: Pick up a trot on the left rein and ride a 20-meter circle at one end of the arena. Ride once around the circle. Then, starting at the middle of the short side at A, ride a second, smaller circle 15 meters in diameter. Finish with a 10-meter circle, which also begins and ends at A.
WHY YOU DO IT: This exercise increases the horse’s lateral bend and helps improve carrying capacity. Each circle prepares the horse for the increased difficulty of the next smaller circle. This exercise is especially well-suited to young or green horses since it gradually introduces them to smaller and smaller circles rather than surprising them with a single small circle at a random point in the ring.
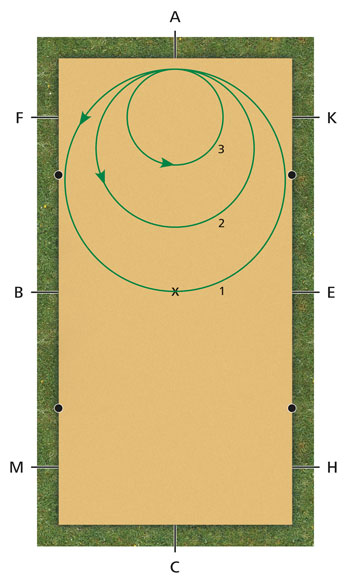
Circle (20-15-10): Start with a 20-meter circle (1) at A, and the next time you pass A, move onto a 15-meter circle (2), followed by a 10-meter circle (3). Illustration by Alexandria Hawich and Martin Kuchler
HERE’S HOW:
1. Trot a 20-meter circle, tracking left.
2. When you reach the middle of the short side at A (shown below) or C, begin a 15-meter circle. Prepare for the turn onto this smaller circle with a half-halt so that the horse steps further underneath his body with his hind legs. Use a firm inside (left) leg aid to maintain the impulsion. Your outside (right) guarding leg must come into play to ensure the horse’s hind feet directly follow the tracks made by the front feet. Create inside flexion with the inside rein, but use enough outside rein to keep your horse from drifting out.
3. Use half-halts to ensure the horse carries himself and doesn’t lean on your hand.
4. Once you have ended the 15-meter circle at A or C, ride into your 10-meter circle. To begin, use a somewhat stronger version of the aids described in Step 2 to guide the horse onto the smallest circle requiring the greatest degree of bend his training allows. If the horse willingly trots the circle without losing flexion, bend, rhythm or impulsion, minimize your aids as much as possible. It’s very important to keep only a light contact with the inside rein as much as possible!
5. Once you have ended your 10-meter circle at A or C, you have completed the exercise. Ride straight along the track at a forward pace, change directions and begin the exercise tracking the other way. This exercise can also be done at a canter by the more advanced horse and rider.
Riding a Square
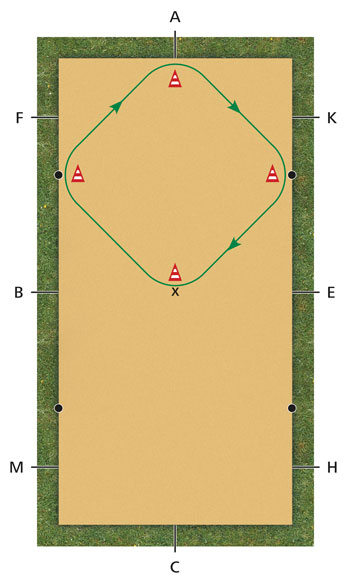
Square: Leave the rail at A and go straight to the usual circle reference point (where you’d touch the rail on a 20-meter circle). Half-halt and ride a corner at X, followed by two more. Illustrations by Alexandria Hawich and Martin Kuchler
WHERE YOU GO: Essentially, this exercise is riding a square within a 20-meter circle: Begin a corner at A, then ride a straight line to the circle point on the rail, where you ride another corner onto another straight line to X. At X, ride another corner, heading to the circle point on the opposite track, where your final corner sends you back to A. This exercise can be ridden in all gaits.
WHY YOU DO IT: This exercise helps correct the horse that “falls through” his outside shoulder (on the outside of the square). This means the horse’s weight falls to that shoulder—a problem that is usually caused either by the rider’s inadequate use of the outside rein or the horse’s inadequate response to it.
Because this exercise calls for riding straight lines without inside flexion, it clarifies the value of the outside rein for both horse and rider. The horse that tends to carry more weight on his outside foreleg will begin to bear weight more evenly on his legs after riding a square.
HERE’S HOW:
1. After riding down the track and coming onto the short side traveling in either direction, turn at A while keeping the next circle point (on the rail) in view. Make this turn by pushing your inside hip (the one closest to the center of the square) forward, drive with your inside leg at the girth, and keep your outside leg in the guarding position just behind the girth. Your outside rein should allow your inside rein to ask the horse to flex and turn.
2. As soon as your horse leaves the track at A to travel to the first circle point, ride him in a straight line: Both seat bones are equally weighted, both legs at the girth drive the horse forward and the horse’s neck is straight between both reins. A strong half-halt on the outside rein may be necessary to achieve the desired straightness.
3. Ride a half-halt as you go into the “corner” of the square at the circle point and then continue, riding to X and making the turn onto the next straight line as described above.
4. Practice this exercise in both directions.
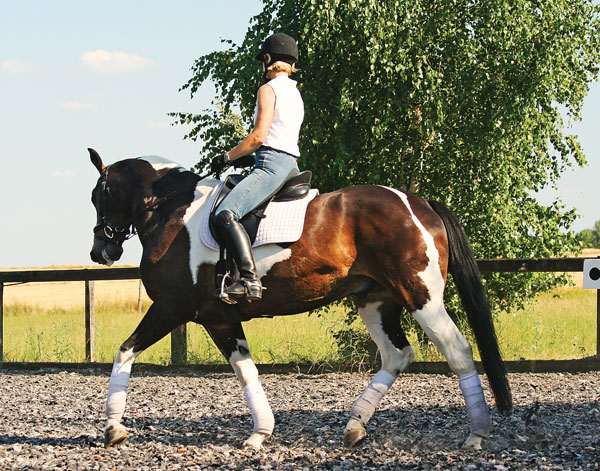
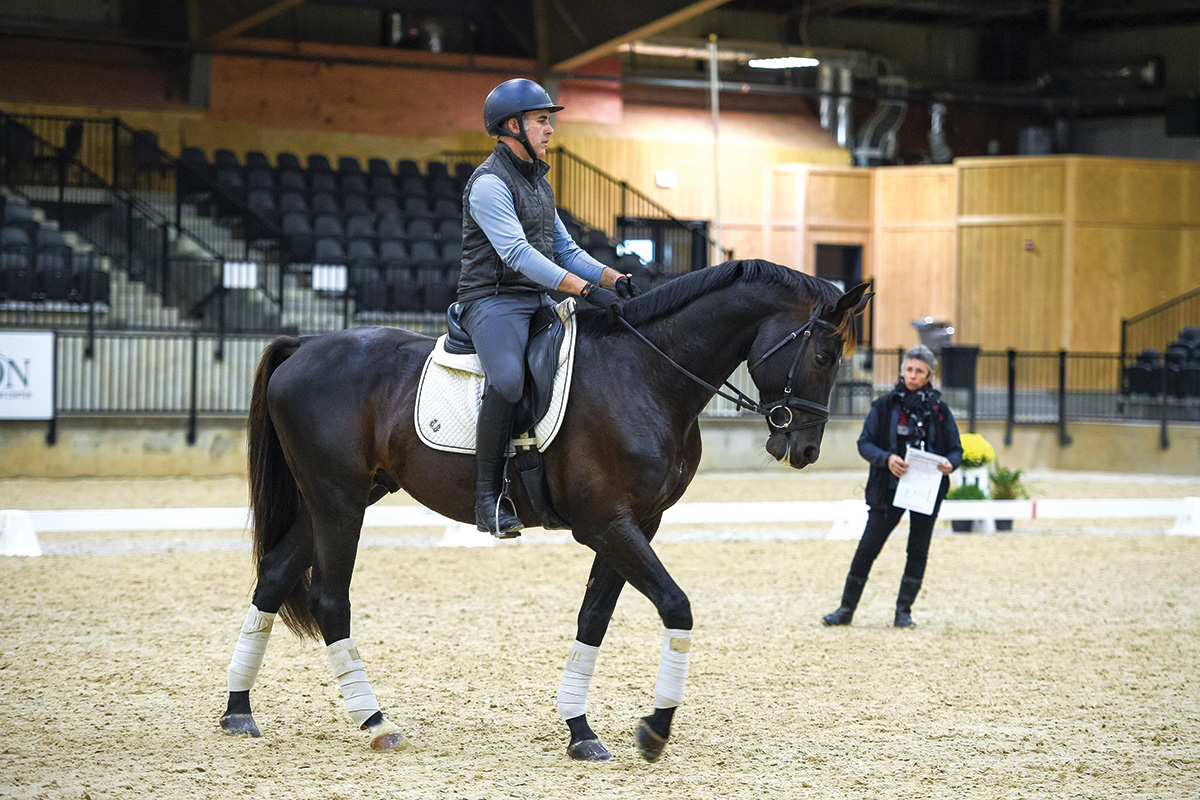
Prepare your horse for smaller circles by using half-halts and a “guarding” outside leg. Don’t forget to use the outside rein to keep the horse’s shoulder from falling out. Photo by Daniela Derler
Julia Kohl is a certified German National Federation trainer who runs a breeding and training stable in Cadolzburg, Germany.
This article on how to do dressage exercises, such as circles and squares, appeared in the February 2020 issue of Horse Illustrated magazine. Click here to subscribe!