Photo by SusanJStickle.com
Dressage seat equitation is a little different than a regular dressage test. In dressage equitation, the focus will be on you! The judge will be looking at your seat position and how effective you are in using your aids to communicate with the horse. Dressage seat equitation is a group class, so you’ll also be sharing the ring with other riders. You are not being judged on the quality of your horse’s gaits, but rather on how well you ride your horse. You will be asked to demonstrate walk, trot, and canter in the balance and frame appropriate to your level. You might also be asked to demonstrate a movement or a figure appropriate to your level.
When you’re balanced, your horse will be comfortable, and he will be able to be balanced. When you are both balanced, you can use your aids easily.
Check out these guidelines to help your balance—have a friend or coach take pictures and videos of you. Here are some position pointers to work on!
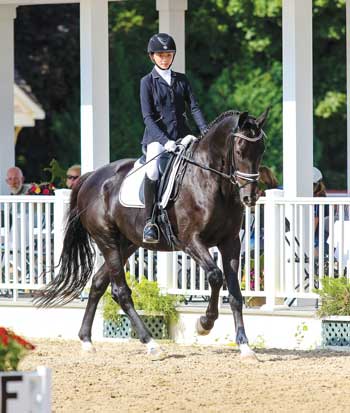
 The Basic Picture in Dressage Seat Equitation
◆ An imaginary line should run from your ear, through your shoulder, hip and heel vertically, or very slightly in front of the vertical.
◆ Sit straight so you have the same amount of weight on both sides of your horse.
◆ There should be a straight line from your elbow to the bit.
Legs
◆ Your legs are centered under you so they support your upper body.
◆ Your heels are level with or slightly lower than the ball of your foot, which rests evenly on stirrups of equal length.
◆ Your knees and toes point forward or very slightly out.
◆ Your legs hang loosely, not gripping. They invisibly follow the barrel of the horse and appear quiet. Following is important!
◆ Your thigh and knee fall close to the saddle without gripping the saddle.
◆ Your hips, knees and ankles are loose so they can be shock absorbers.
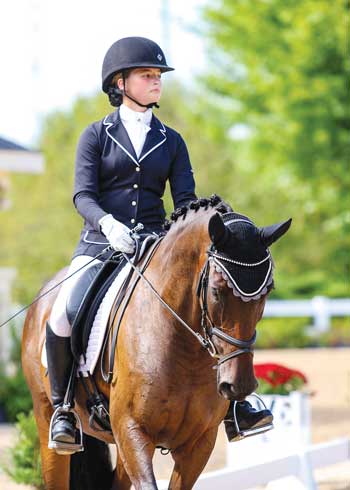
There should be a straight line from your elbow to the bit. Photo by SusanJStickle.com
Seat and Upper Body
◆ You sit centered, straight and supple.
◆ Your shoulder blades are flat.
◆ You sit in the deepest part of a well-fitted saddle.
◆ The “floor of your seat” follows the horse quietly. (Three points make up the floor of your seat: two seat bones and crotch bone.) The floor of your seat doesn’t move more than the horse moves—it follows. Remember following is important!
◆ Your core muscles stabilize your upper body so you don’t get thrown behind the motion, to the left or the right.
◆ Your head is balanced over your shoulders and hips with your chin level and your eyes looking over your horse’s ears.
Your Hands and Arms
◆ Your fist is soft and the thumb is on top. Your thumb and forefinger prevent the reins from slipping. Your other fingers are soft and free to give aids.
◆ Your hands are angled so your thumbs are slightly closer together than your pinkies.
◆ The width of your hands is so that they would fit on a large dinner plate.
◆ An imaginary line through the back of your hand over the flat of your forearm is straight.
◆ Your shoulders are low, and your upper arm hangs so that your elbow is slightly in front of your waist.
◆ Your shoulders and elbows follow the motion of the horse’s head and neck so your hands can maintain elastic contact.
Notice this about following: When your horse is trotting, his head and neck are fairly steady, so your hands should also be steady and quiet so you can keep a nice contact. When your horse is walking or cantering, he uses his neck by reaching forward and downward during part of every stride. You must learn to follow this so your horse can reach on the forward moment. Horses can understand riders who are very good at following because when you give an aid, you stop following to tell your horse something. Follow your horse unless you want to say something to him!
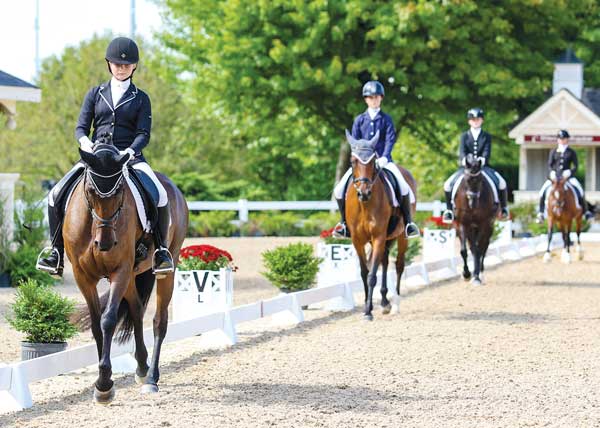
Your aids, including your leg, seat and hand, tell your horse what to do. Photo by SusanJStickle.com
Using the Aids
Some riders try very hard to show the correct position, but they forget to use the aids to communicate with their horse. Your aids tell the horse what to do. Your horse should go forward from your leg, come back from your half-halts (see “The Half-Halt” sidebar below), and turn when you ask him to.
Your legs give your horse energy and “go.” Your reins, with the support of your legs and seat, create half-halts that regulate your horse’s energy. Your seat is the director that tells your horse what to do with his energy.
Your aids also prepare your horse for what you’re planning to do. They prepare him by shaping him in bend and putting him in front of the leg. At Training Level, you only need a little bend for a 20-meter circle.
Get your bend by using a tiny bit of inside rein (so you can see your horse’s inside eye) and enough inside leg so that your horse goes to your outside rein. When your horse is bent, he can be balanced on the outside rein. A well-balanced horse is comfortable and easy to ride. When the aids put the horse “in front of the leg,” he is ready to go whenever you want.
Pay Attention to Rhythm and Straightness
When you’re on straight lines and turns, be sure your horse’s legs are following his nose. Be sure that his tail is following on the same track as his nose.
The rhythm is your horse’s language, and you must learn to “speak” his language. You move with him (follow him) in the rhythm of walk, trot or canter. Your aids also happen in the rhythm of walk, trot and canter. As your rhythmic skills improve, you and your horse will become more beautiful, more comfortable and happier.
The Half-HaltAll horses are inclined to use their front end too much, and they don’t think much about their hind end. When the front legs go faster than the hind legs, horses get a little bit long in the frame and hard in the hand. Half-halts tell the horse to slow down with his front legs and become more active with his hind legs. To half-halt, you do three things: 1. Stop following with your hands (but don’t pull!). This will slow down the front end. When you’re cantering and walking, your hands follow the natural motion of your horse’s head and neck, but when you’re trotting, the horse’s head stays still, so your hands don’t need to follow. Therefore, while trotting, you probably need to close your fingers to give the rein aid in your half-halt. Half-halts balance your horse. Use them often! |
Thanks to Dressage4Kids for sharing these tips! Dressage4Kids, Inc., is a non-profit organization that provides education, scholarships and competitive opportunities for youth riders, including the Youth Dressage Festival.
This article on how improving your dressage seat equitation originally appeared in the September/October 2019 issue of Young Rider magazine. Click here to subscribe!