You don’t have to be a competitor to reap the benefits of dressage training with your horse. Any horse can learn the basic lateral movements of the turn on the forehand and the leg-yield. Unlike the more advanced lateral exercises of shoulder-in, haunches-in and half-pass, they don’t require bend. (The advanced lateral exercises are used to increase collection.) “Mentally, the basic lateral exercises teach the horse obedience to the aids,” says renowned clinician and dressage coach Jane Savoie. “Physically, they’re loosening, stretching, suppling, toe-touching exercises.”
Introducing the Cues
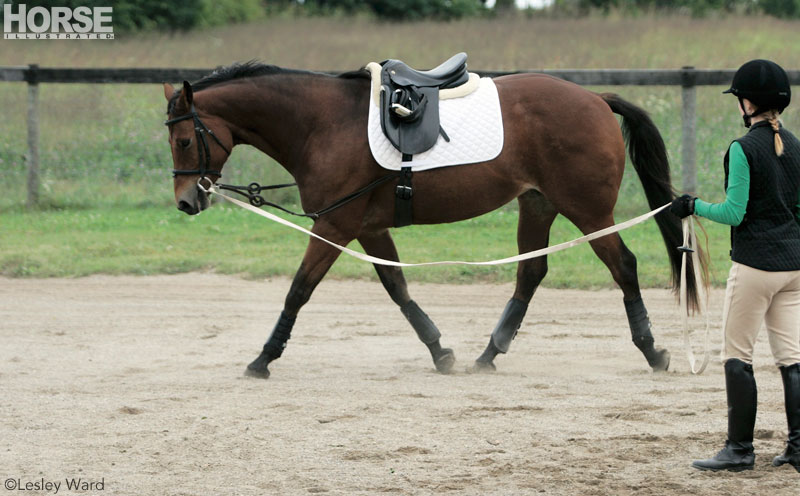
If your horse has never been introduced to lateral work before, begin teaching him the cues from the ground. You can practice while grooming your horse in the cross-ties or before you mount up for your ride, holding the reins in one hand.
“Put your hand on his barrel where your leg would be when you’re riding, and ask him to move his hindquarters over,” says Savoie. “[When he responds], pet him and do the same thing on the other side.”
Your horse will need to learn the difference between a leg cue at the girth that says “go forward” and one 3 or 4 inches behind the girth that says “go sideways.” “When you have one leg on the girth and one leg behind the girth, you’re saying go forward and sideways at the same time,” explains Savoie.
“Do everything in baby steps so your horse gets used to moving away from pressure on this particular spot on his barrel,” says Savoie. “By instinct, horses move into pressure, not away from it, so you want to teach that concept from the ground first. If you wanted to add another baby step after your under-saddle warm-up, have a friend on the ground hold the reins, then bring your leg back [to apply the cue]. The helper can use their hand the same way you did from the ground, so you’re just slowly adding a new variable and moving a step or two sideways with the hindquarters.”
Turn on the Forehand
The turn on the forehand is a 180-degree turn to change direction that begins and ends in a halt. It helps teach your horse to move away from your leg when it’s positioned 3 or 4 inches behind the girth. It’s also useful for opening gates without dismounting when you’re out on a trail ride.
“Once the horse knows the turn on the forehand, it should pretty much go out of your training repertoire,” says Savoie. “The turn on the forehand is done from a halt to a halt, so it basically stops the forward movement, which is something we don’t often want to do. Also, it’s a turn on the forehand, and our goal throughout training is to shift the center of gravity more and more back toward the hind legs.”
The positives are that it teaches you and your horse the same aids as a leg-yield, giving you more time to think about each aid. The turn on the forehand should be done slowly and deliberately: ask for one step and then halt; ask for another step and then halt, et cetera.

Head-to-the-wall is a good exercise for ensuring the quality of your leg-yield.
It will help if you begin by teaching your horse this exercise parallel to a fence or the arena wall. “In both the turn on the forehand and the leg-yield, you do not want to bend the neck,” says Savoie. “Starting and finishing it against the wall or the rail gives you a visual frame of reference that you are not using too much inside rein and bending the neck.” The more bend your horse has in his neck, the less he will be able to cross his hind legs, so in essence you’re giving him conflicting signals.
“However, there is flexion at the poll, away from the direction of movement,” says Savoie. “So if you’re tracking to the left and you halt on the rail to do a 180-degree turn, your horse is going to be moving his hindquarters to the left, which tells you that he needs to be flexed to the right [at the poll].”
Aids for Lateral Movements
The aids for the turn on the forehand and leg-yield are identical.
Hand Aids: To ask for lateral flexion at the poll, which is essentially positioning the horse’s head left or right, you will need to use an indirect rein aid.
“Starting with your thumb as the highest point, turn your entire wrist so that your fingernails point toward your face for a moment, then go back to your home position with your thumb as the highest point,” says Savoie. “It’s like having a key in the door and quickly but smoothly unlocking the door. While you’re unlocking the door, bring your pinky finger close to the withers; you don’t want it to cross over. This is why it’s called an indirect rein aid: When you turn your wrist, you could draw an imaginary line from your pinky finger toward your opposite hip.” With a direct rein, the line would go back to the hip on the same side.
While your right hand turns the key in the lock and brings the pinky finger close to the withers (but not back toward your body), your left hand functions like a supportive side rein. “Your left hand limits the amount of flexion you’re creating with your right hand,” says Savoie. “There has to be a marriage between the inside and outside rein. Your right hand (next to the fence) becomes your inside hand because of the direction of your horse’s flexion.” Inside and outside are determined by flexion, not by which side the rail is on. When the horse is flexed at the poll, you should just be able to see his eye and nostril.
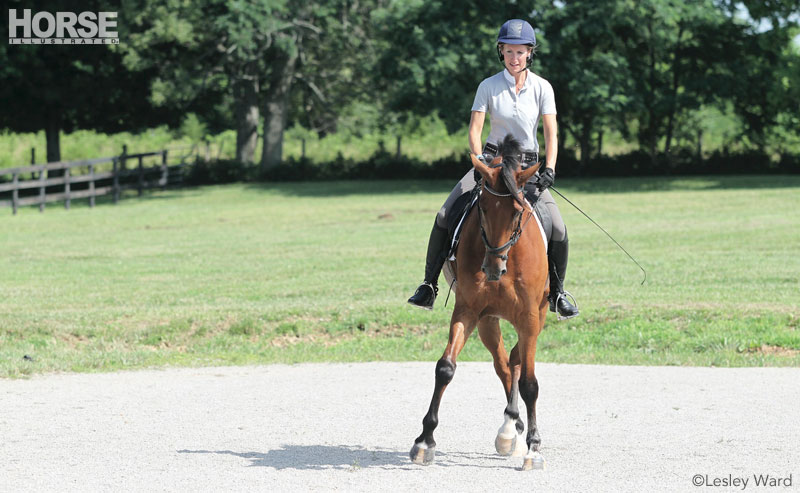
Seat Aids: Many riders get left behind the motion when their horse starts going sideways, which gives the horse conflicting signals. “For example, if your right leg is behind the girth saying, ‘Move to the left,’ but you get left behind and your body falls to the right, your body weight is saying, ‘I’m going to make it hard for you to move to the left,’” says Savoie. “Even though you basically sit equally on both seatbones, you want to think about sitting in the direction of the movement. In this example, you want to be thinking about sitting to the left.
“An exercise that will give you the feeling of sitting in the direction of movement is to pretend you’re about to dismount,” continues Savoie. “In this case, kick your right foot out of the iron and, without leaning forward, start to swing your right leg over as if you’re going to dismount. Just bring your right leg up 8 or 10 inches, then settle back into the saddle. Do that a few times, and feel how it puts your weight down into your left iron and left seatbone.”
 Click to view a diagram of the leg-yield |
Leg Aids: As mentioned before, when one leg is on the girth and one leg is behind the girth, you’re telling your horse to go forward and sideways at the same time. “Your end goal is to have your horse go sideways from the passive positioning of your leg, not the pressure of your leg,” says Savoie. “But your legs are in a ‘ready’ position: If your horse stops responding, then your leg can become active as needed.”
If you’re doing a turn on the forehand, for example, and your horse starts backing up, give a few squeeze-releases with the leg on the girth to move him forward and remind him to keep his front legs on that spot.
“Whatever quality is missing—either forward or sideways—the passive leg can become active for the moment to create more of that quality,” says Savoie.
Leg-Yield
If your horse isn’t familiar with leg-yields but you’ve taught him the turn on the forehand successfully, it’s best to start with a diagonal leg-yield from the second track (1 meter off the rail) over to the rail. Begin at the walk so you have more time to organize your aids. In time, you can do this at the sitting or rising trot.
“The reason starting so close to the rail is helpful is that there’s an invisible magnetic pull,” says Savoie. “If you’re only 1 meter away from the wall and you put your leg-yielding aids on, your horse is going to want to go toward the rail. Another thing that helps is to turn your head and look where you’re riding to. Horses go where we look. Once you can do that, gradually increase the distance from the rail, working up to the quarterline. Once your horse gets more adept, you can also start on the rail and move in toward the quarterline.
“Another type of leg-yield you can try is the zigzag away from and back onto the rail,” continues Savoie. “You should do the same amount of steps in each direction so that your horse is using his body to the same degree in both directions. It’s also a great coordination exercise for the rider because you have to switch your aids and change the flexion.”
If you want to do a zigzag leg-yield in posting trot, you’ll have the added coordination exercise of changing your posting diagonal when you switch your aids. The only time you can activate and influence the horse’s hind leg is when it’s pushing off the ground, which is easier to do in the sitting phase of posting trot.
“When you zig in toward the center of the arena away from the rail, you want to be on the ‘wrong’ posting diagonal,” says Savoie. “When you zag back out to the rail, you want to be on the correct posting diagonal. That way, if you have to turn your passive leg into an active aid, you’ll be using it at the right time.”
Off the Wall
 Click to view a diagram of the head-to-the-wall leg-yield. |
“One way you can tell that your horse is crossing high up on his knees and hocks and getting all the suppling benefits from the leg-yield is a head-to-the-wall leg-yield,” says Savoie. “The aids are the same, so if you’re on the left rein moving to the left, your horse will be flexed at the poll to the right.”
In this exercise, you only need to look at two criteria to determine that your horse is doing a quality leg-yield. First, make sure his neck is absolutely straight: that’s the responsibility of your supporting outside rein. Next, make sure his body is at approximately a 35-degree angle to the wall (a little less than half of a right angle). When your horse is doing both of these things, his legs will be crossing high up at the knees and hocks. “Remember what that feels like underneath your seat so you can re-create that feeling away from the wall,” says Savoie.
By teaching your horse the turn on the forehand and leg-yield, he will improve his suppleness and become more athletic. They’re great warm-up exercises for a horse of any level and will increase the quality of his overall performance.
Meet the Trainer
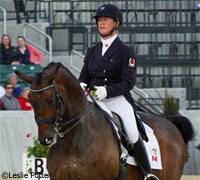
As a member of the U.S. equestrian team, Jane Savoie represented the United States internationally in Canada, Holland, Belgium, France and Germany. She has coached at three Olympic Games and travels throughout the country giving her popular workshops and seminars. She is the author of numerous books and CD/DVD programs.
www.janesavoie.com
Special thanks to Nikki Kowalski and Ballinagore Knight for assistance with these photos.
Managing Editor HOLLY CACCAMISE competes in eventing with her Thoroughbred cross, Artie.
Liked this article? Here are others you’ll enjoy:
Leg-Yield Troubleshooting
Dressage Tips from the Judge’s Box
This article originally appeared in the September 2013 issue of Horse Illustrated magazine. Click here to subscribe!


Great advice.
This was helpful, we were just working on this with my horse. It was fun to see this exercise performed in action. I am currently reading her book on Dressage and found it very much in sync with what my trainer has be doing with my horse. I love her book!!!