If you board your horse at home or a small local stable, chances are you don’t have a fancy course of jumps on which to practice. The good news is that you can build your own standards with a few common power tools and materials. Inexpensive landscaping poles can be purchased for around $3 each to complete the project. Here’s what you’ll need to get started, followed by step-by-step tips.
TOOLS: Saw or chainsaw and circular saw, drill with ¼-inch bit, ½-inch spade bit and Phillips head screwdriver
MATERIALS: One 8-foot length of treated 4”x4” wood, two 8-foot lengths of treated 1”x4” wood, box of 1 1/2-inch wood screws and pair of jump cups
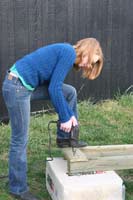
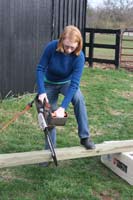 Step 1: Prop the 4”x4” beam up off the ground; sawhorses or bags of shavings/hay bales work equally well. Measure and saw into two four-foot halves. | 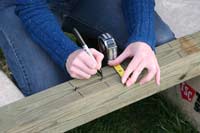 Step 2: Measure 18” away from the ground end on each of the four-foot pieces just cut. Start marking for jump cup holes in the center of the beam every three inches until you get to the top. |
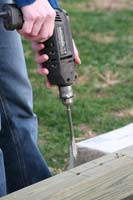 Step 3: Using the ¼-inch drill bit, make a hole at each mark, all the way through the beam. Switch to the ½-inch spade bit and widen each existing hole. | 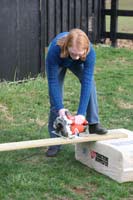 Step 4: Prop a 1”x4” plank off the ground, measuring and marking every 20”. Using the saw or circular saw, cut the board into four “jump feet.” Repeat with other 1”x4” plank. |
 Step 5: Prop up a four-foot 4”x4” beam so one of the feet lines up at a 90-degree angle along the bottom. Use two screws to mount the foot to the base of the beam. | 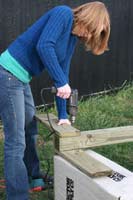 Step 6: Rotate the beam and continue mounting the other three feet in a pinwheel pattern, using two screws for each one. |
 Step 7: Set up your new standard to make sure it’s sturdy, then try mounting a jump cup and pin to check the fit through the holes. |
Now you’re ready to tack up and try your new jump!
Learn how to make your own Cross-Country jumps here>>


Hey, this is great. I was planning to make some jumps and this really helps.
you know i was just thinking about that today and now i know how to do it without having to pay tons of money 🙂
Awsome! I need some jumps at my Equestrian center! Thanks!
I don’t do this kind of stuff my dads stable hand does but it’s nice to know how to do it
Help! This is what always comes up when I click on the current HI exclusives. Something must be wrong with the link.
Can’t wait to build some!!!! We board my horse at a stable and they have poles but not the standards.. but they will soon!
The instructions are clear and easy. My problem is that I can’t read the entire thing on the website, only steps 1-4. The rest of it is cut off. I tried sending it to myself, but it is still cut off. Can’t print the entire thing, either. I am very dissappointed-this is an error with the website that should have been caught and corrected.
Cutting a board as in step 4 will lead to a pinched sawblade everytime and is dangerous. The short end of the board should be free to fall away.
thanks very much. thisis very helpful
This was very helpful- I made four standards. Next time I would use 2×4’s for the bottem though, because the 1×4’s aren’t very sturdy/heavy so you have to make sure it’s on level ground. Other then that- they turned out GREAT and our barn uses them all the time!
Would this plan still work to make 5′ standards? I need them to be just a little higher. 🙂
excellent but i used 2″ by 6″ inch boards on the base instead. they were very stable
These worked great! I have made 4 sets so far and am going to make a few more. I used 2×4’s for the feet for extra stability. Thanks for very clear and easy to follow instructions!!
Where do you find the landscaping poles??
yeahh! this is great!im so excited, gonna go make the standards today, this helped a bunch ! ill prolly use 2X4 for the base tho..
There is a instructional video version of this great how to online at http://www.horsegirltv.com/?p=3274 and it complements the instructions on HorseChannel quite well. We too used 2×6 feet instead of the 1×4.
this was very helpful, i have been trying to make showjumps for ages and now i can. thanks!