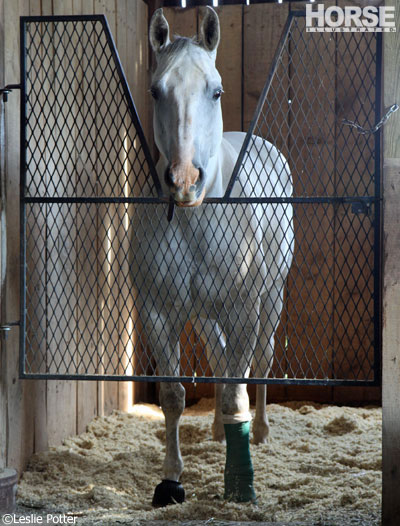
For anyone who owns a horse, it is no secret that you will more than likely encounter a wound at some point. It helps to be prepared. What should you have on hand in the event of an injury, and what do you need to know to properly bandage a wound?
First off, any wound on the body should be cleansed as well as possible. If your horse is fractious and won’t allow your help, then it’s best to wait until your vet can come to deal with it so you don’t get hurt. But, if your horse is cooperative and allows you to scrub the wound, then use sterile gauze sponges soaked in either “tamed iodine” (betadine) or chlorhexidine scrub. A proper wound scrub needs at least 10 minutes of steady scrubbing as you repeatedly work the wound free of debris, discarding soiled scrub materials as you go. The cleaning works even better if you’ve been able to trim or shave away overlying and surrounding hair before you start scrubbing – be sure to remove remnants of hair from the wound.
Once you’ve properly cleaned the wound, rinse it well to remove all the scrub soap since it is an irritant to healing. It’s best to use sterile saline as a rinse or you can make a proper salt solution by adding one tablespoon of table salt per quart of distilled water. Also add in enough betadine solution to the color of weak tea – about 10 milliliters per quart.
Dry the wound well before applying the bandage. You will have difficulty trying to bandage anything above the knee or hock so concentrate your bandaging efforts to wounds that occur below these areas.
Once your horse’s wound is clean and mostly dry, the next step is to apply some topical antibiotic ointment – the water soluble kind is best. Examples of water-soluble wound salves include triple antibiotic ointment, chlorhexidine cream, and silver sulfadiazine cream. Now you are ready to bandage. Bandaging materials you’ll want to have in your first aid supply box on hand include:
- A non-stick pad (Telfa) to apply directly over the cleansed wound
- Cotton (sheet or roll type) or Combine padding to wrap around the area of the leg to be bandaged in order to cushion against uneven bandage pressure
- Roll gauze to hold the cotton in place
- Elastic, self-stick bandaging material such as Elastikon or Elastiplast
- Gorilla tape or Duct tape to use to secure the ends of the Elastikon bandage
The How-To of Bandaging
Once the non-stick pad is in place over the open wound, take a thin layer of cotton or a Combine pad and wrap it around the lower limb. If you don’t have cotton or a sterile or clean Combine pad, then you can use a sanitary pad or a clean leg quilt – any of these materials provide some cushioning beneath the bandage.
Roll gauze is helpful to wrap around the padding to hold it in place while you prepare to apply the outer layer of self-stick bandaging material, particularly if you are alone and don’t have that spare set of hands to hold bandaging materials in place. For the outer layer, I prefer to use Elastikon since it doesn’t tend to bind down tightly like VetWrap or similar non-stretch materials do. The objective in bandaging is to apply it snugly but without restricting circulation – Elastikon has more giving properties than most other wrapping materials.
On each roll of Elastikon you’ll see a red line in the middle of the roll. This is meant to guide you while placing the bandaging material – if you just barely cover this red line with the next wrap around the leg, the bandage isn’t likely to slip apart from itself. Also, spiral the bandage up the leg as you wrap as this helps to keep the bandage in place. As you unroll the bandage to wrap the leg, pull when the material is over the front of the limb and then lay the material across the back of the limb – this helps prevent inadvertent tightening across the rear tendons.
If bandaging low down near the foot, you’ll have the best luck if you incorporate the heel bulb and upper hoof with Elastikon. It is particularly effective in preventing slippage if you make a figure-8 around the heel bulb. Securing the lower part of the bandage this way helps keep it from riding up onto the pastern.
Once you’ve finished applying the self-stick bandage roll, you might want to add a couple of small strips of Gorilla or Duct tape to secure the very end of the Elastikon so it doesn’t peel up and begin to unravel. Gorilla tape has no stretch and therefore should not be wrapped full circle around the leg as it will restrict circulation.
So, now you’ve got your horse’s lower leg wound wrapped up all nice and tidy to keep out the dirt and flies. If you’re having trouble with your horse keeping a bandage on for any period of time, it may help for you to confer with your vet about some tricks to use when bandaging or to show you how to apply the tricks mentioned here. Such hands-on instruction can really help you apply a bandage that will safely stay put.
Here are other resources on bandaging and first-aid for horses
First-Aid on the Trail
Bandaging a Hoof
Perfect Your Polo Wraps


We were always tought to wrapp both leg .wgat yohr thoughts