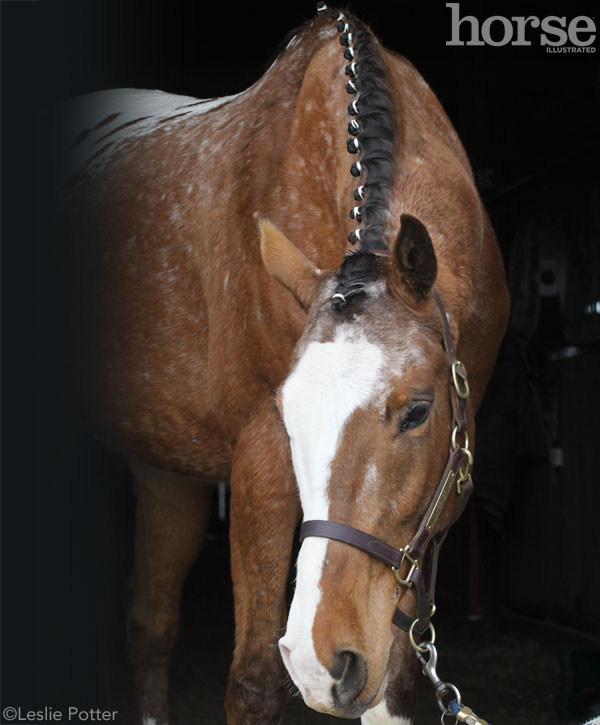
While many English competitors appreciate the look of a beautifully braided mane, it may seem like a daunting task to learn how to do it. The good news is that you can skip the more time-consuming braiding methods and still turn out a gorgeous set of braids by becoming a whiz with rubber bands. Braiding bands can be purchased at almost any tack store; just find the ones that best match your horse’s mane color. (White bands were used in the photos so they would be easier to see.)
While rubber band braids look better on a thinned/pulled mane, they are forgiving on a thicker mane if your horse is a tough customer when it comes to this task. A very thick mane will still need to be thinned, but you can get by with a less-than-perfect job.
Although sew-in or yarn braids can usually be done the night before a show, rubber band braids are easier for the horse to loosen and pop out if he rubs his neck. It’s better to do them the morning of a competition, but if you must do them the night before, put a stretchy hood on your horse to help keep the braids intact.
Before You Begin
For best results, start with a mane that has been pulled to about 5 inches in length. For dressage, jumpers or less formal shows, you can braid your horse’s mane on either side. For hunter competitions that require braiding, manes are braided to the right side, and traditional yarn braids are expected (learn how to do these at horseillustrated.com/Braiding).
Safely tie your horse, preferably on cross-ties, and use a stepstool to start braiding at the top of his neck just behind the bridle path. If your horse is regularly braided, he should have a short bridle path—only 1 or 2 inches—where the bridle’s crownpiece sits. If it’s too long, it will create an unsightly gap before the braids begin. See steps 1-8 below for mane braids.
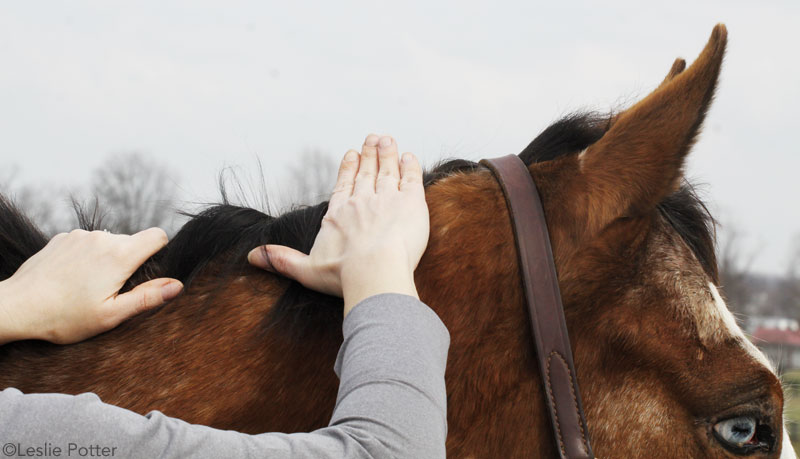
- STEP 1. To measure out the width of each braid, squeeze your fingers together with your hand flat or use a small metal pulling comb. Part the mane crisply after this measured section and hold back the rest with a hair clip.
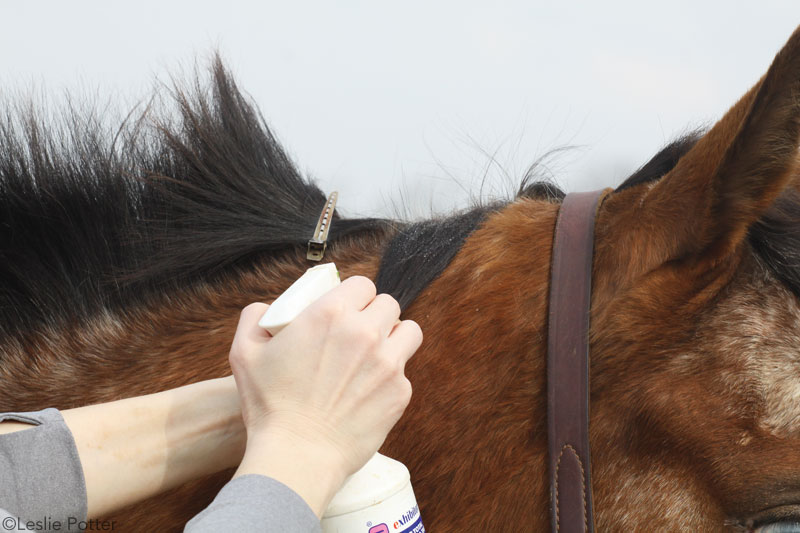
- STEP 2. Dampen the hair thoroughly with water, hairspray or braiding spray. The latter two provide better grip. Comb through the hair and begin braiding. Keep the braid tight by pulling sections straight out to the side as you go; keep the braid itself pointed downward, however.
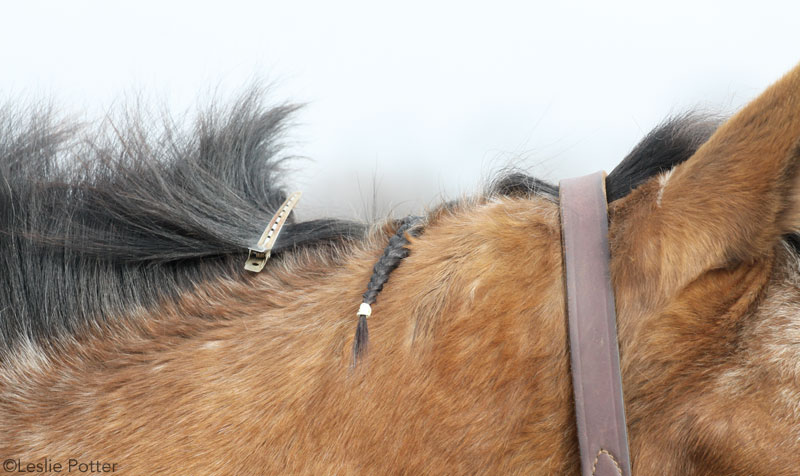
- STEP 3. When you’ve braided nearly to the bottom, use a band to tie off the braid. There should still be a little free hair at the bottom.
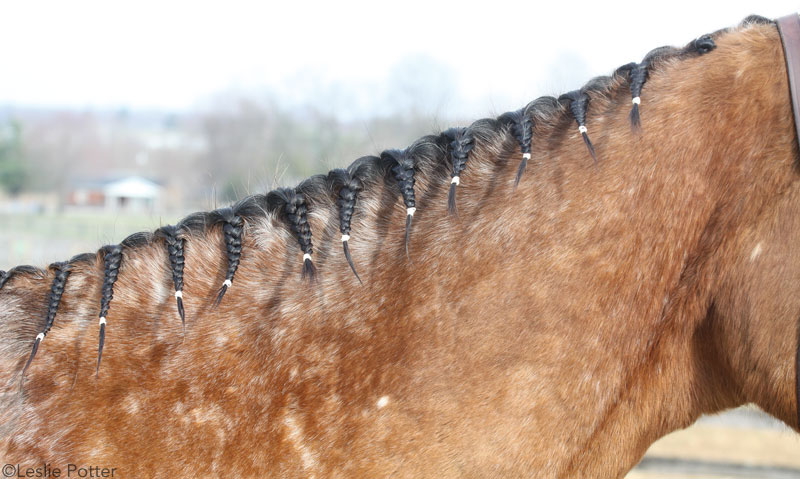
- STEP 4. Continue to braid all the way down the neck, using equally measured sections for each braid. The braids will be thinner as you get to the withers, but adapt your method to keep them as uniform as possible.
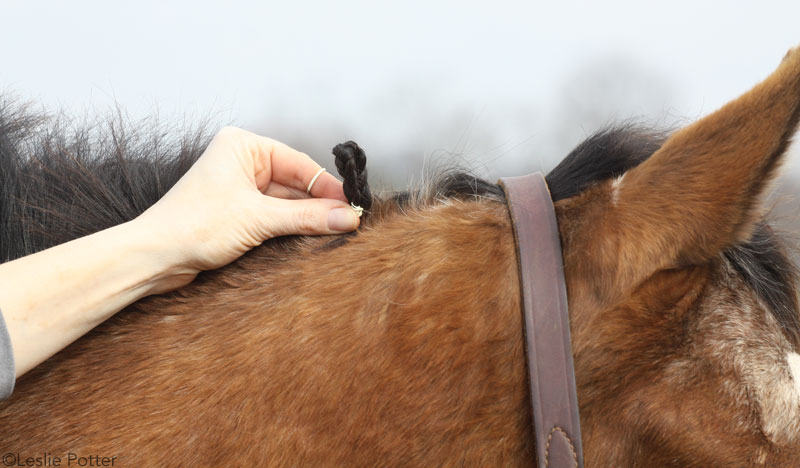
- STEP 5. When you’re ready to put the braids up, fold them in half so that the tail end is tucked up tightly at the crest.
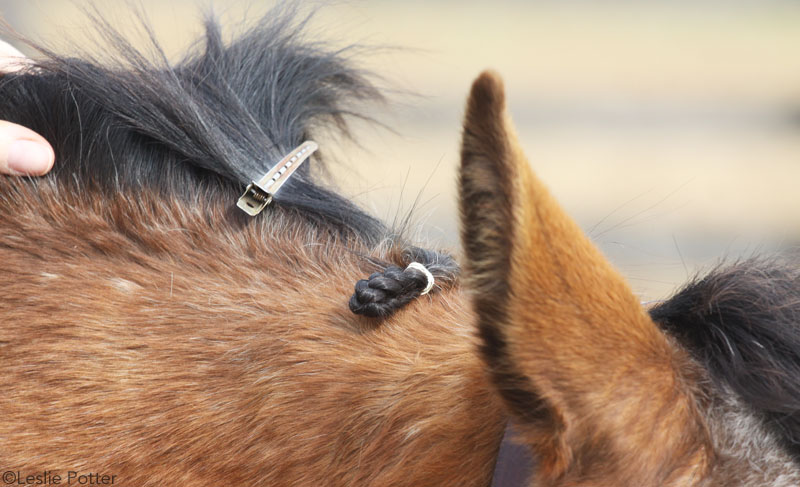
- STEP 6. Rubber-band this fold near the top so the loop points down; this second band should touch the first one for extra traction and staying power.
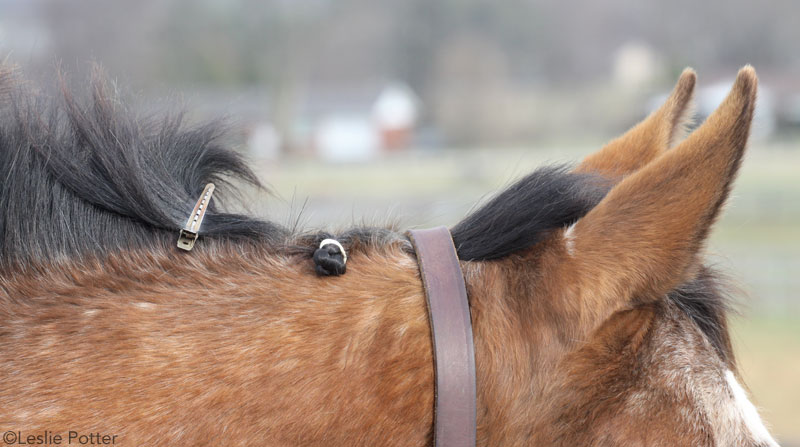
- STEP 7. Fold the looped braid in half one more time, tucking it under as tightly against the crest as possible. It shouldn’t stick up or out at all. Using a third band, secure this fold, which should look like a small ball or knot.
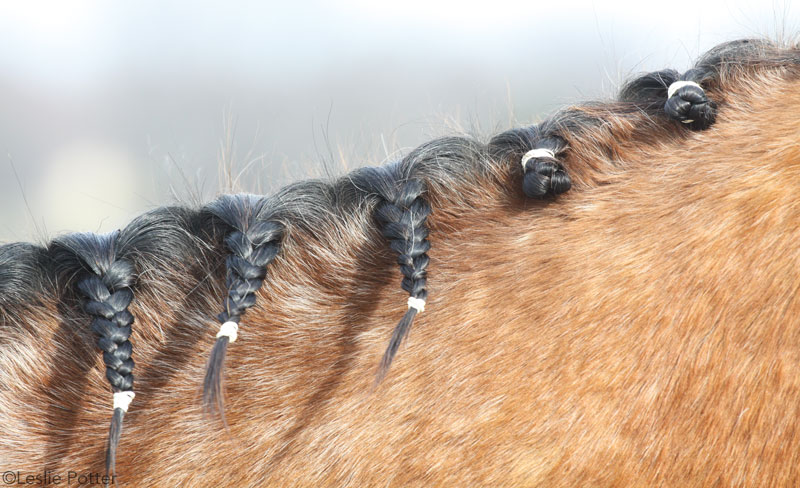
- STEP 8. As you move to the next braid, compare it to the previous one(s) to make sure it looks the same.
Braiding the Forelock
When it’s time to braid the forelock, have a friend hold your horse’s lead rope to help keep his head still; this will make the job much quicker and easier. Stand on a stepstool and take a small section of hair from the top of the forelock just in front of the bridle path, dividing it into three smaller sections. Incorporate more hair from alternating sides into each piece as you go down, making a French braid. Continue to the end of the forelock and secure it with a band.
The forelock braid should be secured just like the mane braids, folding it in half once and then again with three elastics total. If your horse has an extremely thick or long forelock, you can use a braiding pull-through to pull the free end of the braid under the French braid and leave it there, hidden from sight.

As with any style of braids, practice makes perfect, so don’t be surprised if every set you do looks better than the last.
This article originally appeared in the June 2014 issue of Horse Illustrated magazine. Click here to subscribe!


When I braid my mini’s mane the braids all stand straight up in the air. He looks like a punk rocker.