Photos by Melissa Arnold
When the temperatures drop and everything outside the barn is muddy or icy, riding may not be the best plan. That doesn’t mean you have to stop your horse’s training.
Maintain your relationship with your horse and have fun by teaching hand-signal cues!
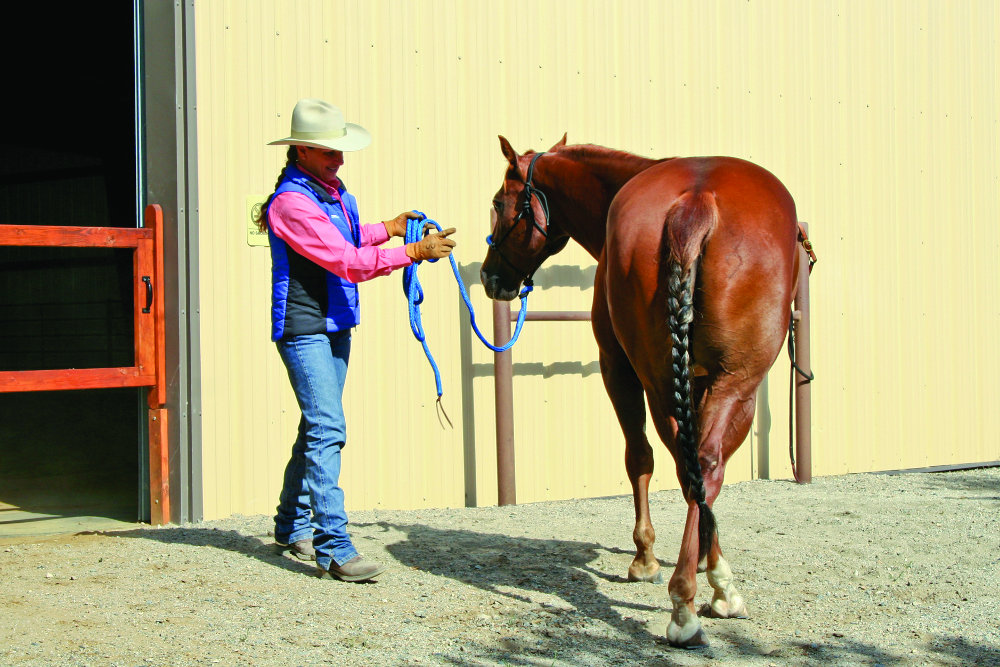
The cue for backing is to wag your finger. Until your horse understands, stomp your feet and wave your rope. As soon as he takes a step back, release the pressure. Read more under “Back Up” below.
Get Subtle
Have you ever wanted your horse to step over one little step or move closer to you so that he’s in the perfect place for grooming? It’s handy to be able to point your horse where you want him to be. Teaching hand signals will help him move into the right place—and to move without your constant pulls or pushes.
As you teach hand signals to your horse, you’ll learn to sequence your cues. You’ll give him the best possible chance to understand what you want before the cue is reinforced. You’ll have bonding time with your horse; he will learn to follow your directions; and your new cue-sequencing skills will carry over to anything new you’d like to teach your horse, from the ground or the saddle.
Horses detect patterns and are very observant. They pick up on your patterns easily. If you plan ahead and make sure that you give a hand signal before asking your horse to do anything, he’ll soon learn to follow that cue.
Here, I’ll help you teach your horse to respond to your hand cues as you signal for him to back up, come to you and move to the side.
GroundRules
Session Prep
Work in a large barn aisle, indoor arena or a paddock that has good footing, and make sure your horse has enough room to move without hitting a wall or rail. Your horse will learn not to trust you if you ask him to move directly toward a wall or rail. A horse doesn’t know if you’re only asking him to move a little bit—if there’s a solid wall in the direction you want him to move, he will think he may hit it. Outfit your horse in a rope halter with a 12- to 15-foot training lead attached with a rope-to-rope connection. Wear gloves to protect your hands.
Cues and Reinforcements
Plan your cues before you start. You must cue your horse first, then follow with a reinforcement. I see many people use what should be a reinforcement as the initial cue. If they are leading their horse and want to turn, they pull the horse with the lead to make him turn. That’s using your reinforcement—the rope—as the cue. The horse will never learn to do it because you have manually moved him instead of asking him.
Use your hand signal as the very first cue; then expand your cue with body movements and clucks. Follow through with a gentle bump on the rope if needed. Do all of that within about three to four seconds.
For each cue sequence you create, use two or three aids, followed by the reinforcement. Each part of the cue will have a half a second to a one-second interval, followed by the reinforcement.
Horses do well with this type of training because they feel pressure so keenly and will work hard for the release. They want to be left alone or have pressure—physical or mental—removed. Then make sure to add positive reinforcement—praise—once the horse has done what’s asked.
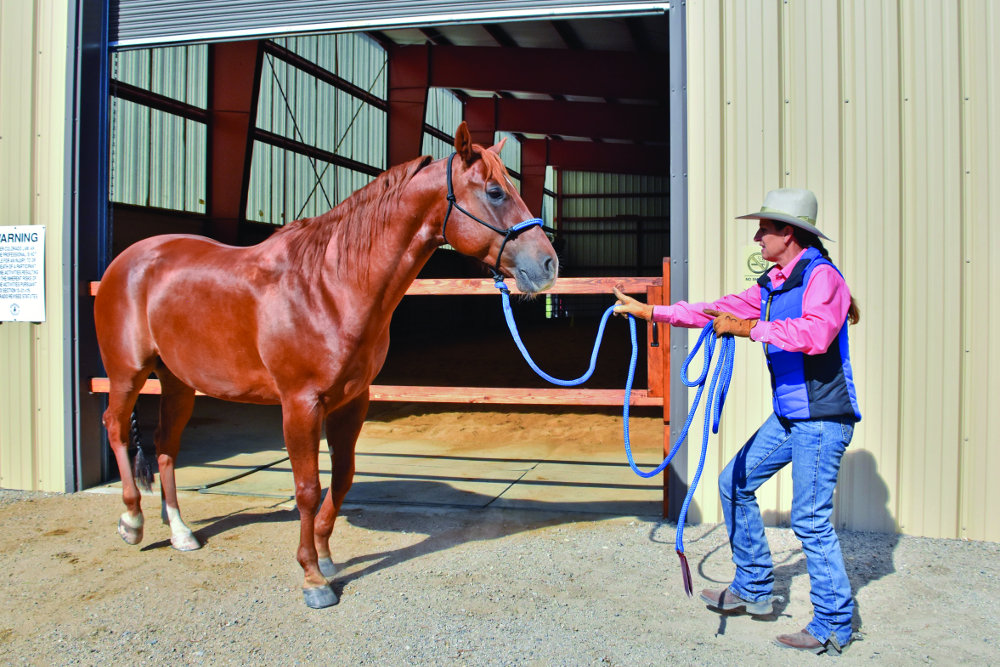
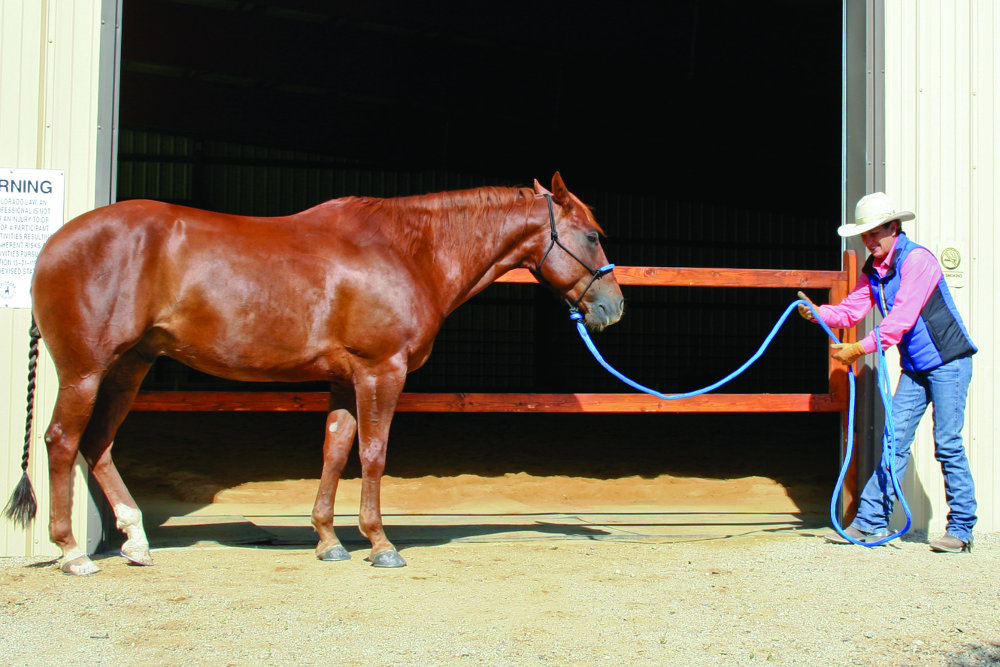
Back Up
To ask my horse to back up, I stand in front of the horse and face him, holding on to the long rope.
First, I point toward his chest. Then I wag my index finger from side to side. I raise my other hand to look big, and cluck. I stomp my feet to act like I’m moving toward him. I focus all my attention on the center of his chest. As soon as he initiates a backward movement, I release all the cues. If the horse doesn’t move, I will increase the pressure by waving my rope until he moves back.
As soon as he starts to move back, release the pressure. The release or reinforcement must come within a second of the cue. If your timing is good and your pressure is adequate, your horse should soon be stepping back with the wag of your finger.
The ultimate cue that you want your horse to respond to is the very first part of the sequence. He may not respond to that part initially, but if you consistently provide and reinforce that cue, he will learn it.
Be careful not to wait too long for the release. The sooner the release of pressure comes, the faster your horse will learn.
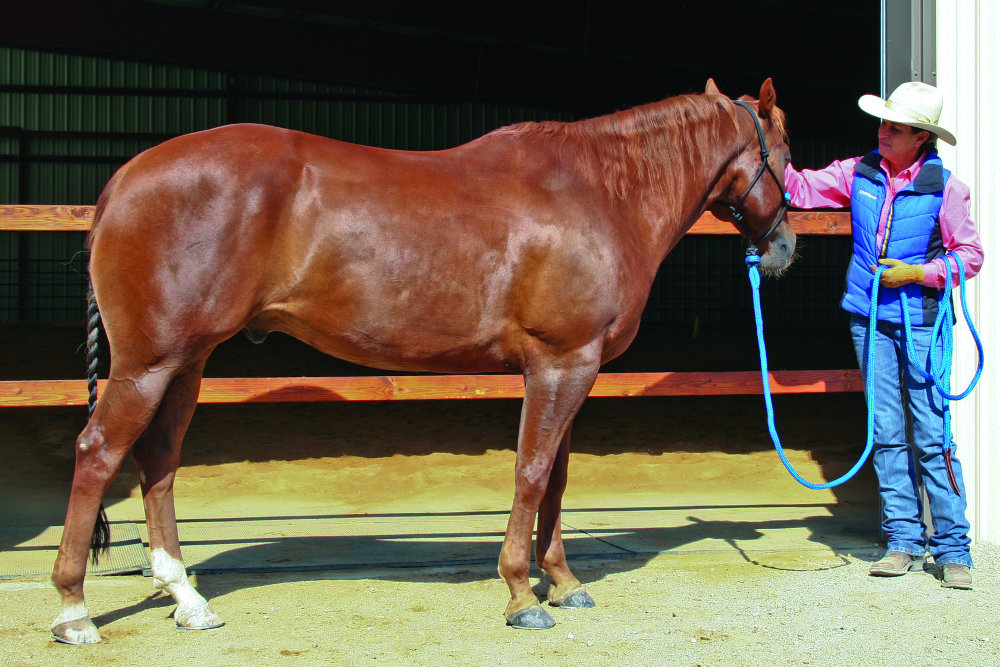
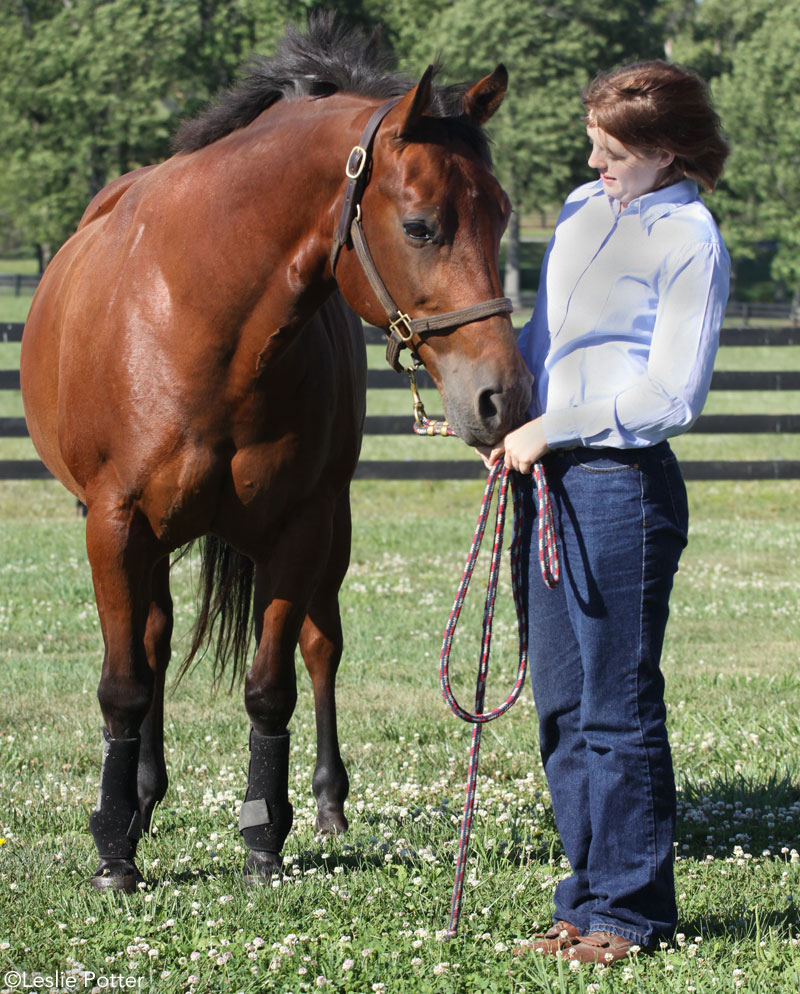
Use your index fingers to cue the horse to come to you. Use the rope but don’t pull on it, until he understands to walk forward. Immediately praise him.
Come to Me
Once your horse is willing to back away from you and stand at the end of the rope, ask him to come to you. Stand and face your horse and hold the end of your long lead.
Round your shoulders and angle your shoulders and your eyes away from your horse. Put your hands in front of you and use both index fingers to beckon your horse to you. Your horse doesn’t know this cue yet, and he doesn’t know that it’s OK to come towards you.
Allow the rope to move with your hand movements—not pulling, but moving with the waves of your hands. He’ll feel a gentle movement on the halter when the movement travels through the lead. When your horse approaches, rub him on the forehead and praise him.
Keep in mind that usually we train horses by asking them to move out of our space. Asking a horse to come into your space should be done with caution.
Only practice this skill with a horse that you have a respectful relationship with. Once your horse learns this cue, he’ll do it easily. Horses want this praise and love to be rubbed on.
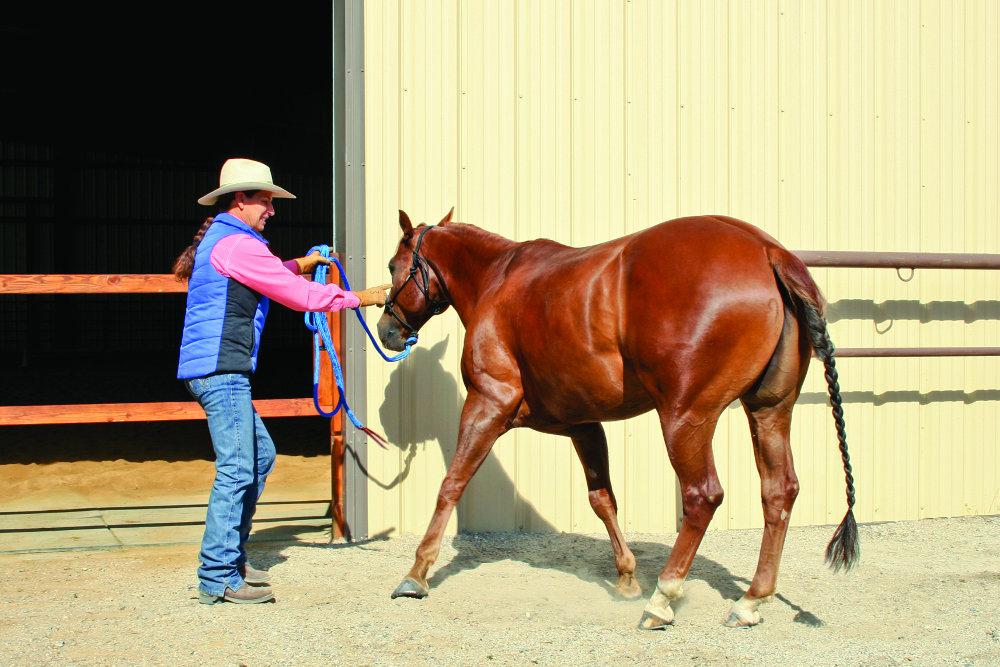
Move the horse’s hip and shoulder by pointing, then stomping, then poking with your finger. As soon as he moves, release the pressure. Soon he will understand that he should yield from pointing only.
Move the Hip & Shoulder
Now that you know how to sequence your cues, apply your hand signals to other parts of your horse’s body. Ask him to disengage his hindquarters by simply pointing at his hip. If he doesn’t move, stomp your feet and cluck. If he still doesn’t move, point at his shoulder and poke as a reinforcement of your cue. (You may choose to have a stick in hand to help keep you out of the kick zones.)
Be careful to slow down your cues when working on moving your horse’s hip. You don’t want him to just move away from you in a reactionary way; you want him to learn the cue and move thoughtfully. Point, and he should move away one step at a time.
Moving the hip and shoulder is easiest to teach when the horse has some forward motion. Once he knows your cues, you can stop his forward travel with a correction of the rope.
Point to his shoulder and ask him to move to the side. Again, sequence your cue so that you point, stomp and cluck, poke with your finger, then reinforce by bumping or waving the rope.
Once you can point to move your horse’s hip and shoulder, you can alternate the cues to ask your horse to sidepass. Point to the hip and have him move one step; then point to the shoulder. Repeat the hip and shoulder steps one at a time until the horse sidepasses easily from the ground.
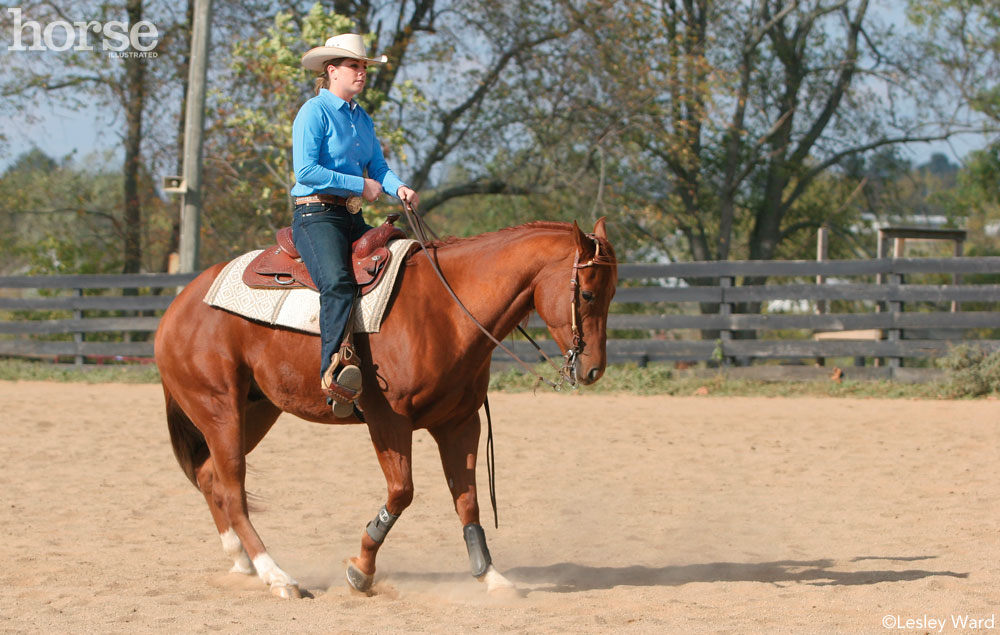
These cues will help you bond with your horse and will make your horse safer to handle and more focused on you. You’ll also be able to carry over the cues to riding. Teaching body control will help you work more easily with your horse from the ground or the saddle.
JULIE GOODNIGHT shares her lessons on her RFD-TV show, Horse Master (also online at tv.juliegoodnight.com), and through clinics and expos. HEIDI MELOCCO (www.whole-picture.com) is a lifelong horsewoman, equine journalist, and photographer.
This article originally appeared in the December 2016 issue of Horse Illustrated magazine. Click here to subscribe!


Good ideas, wish I had a barn to even work in.
Great information.
I wish I had a place to work with my horses, they have a shed, but no warm place for me to do much with them. Good ideas in the article.
Great training tips.
Good information and reading.
Lots of good information as everyone else has said.