Tiz the season for festive greenery and glistening lights. Instead of going store-bought, this may be the year to customize your décor with something one of a kind—a horse head wreath.
Horse Wreath Materials◆ Horse head drawing or outline to shape the wreath |
1. Gather your supplies and find an appropriate workspace. The chicken wire has sharp edges, which can scratch delicate surfaces and your hands. Be aware of this and cover your table if necessary.
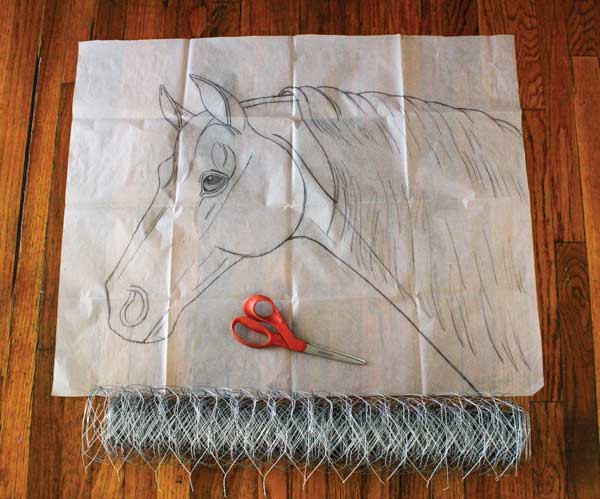
One of the most challenging parts of this project is finding the right horse head shape. I suggest drawing out the outline of a head on poster board first. Don’t stress if your drawing isn’t perfect. Most of the fine points will not be captured within the wreath’s shape.
Once you have your horse head drawing, carefully unroll the chicken wire. Cut off a square section that is as large as your piece of paper or poster. The wire is thin and breaks with regular scissors. I used my trusty old barn scissors for this.
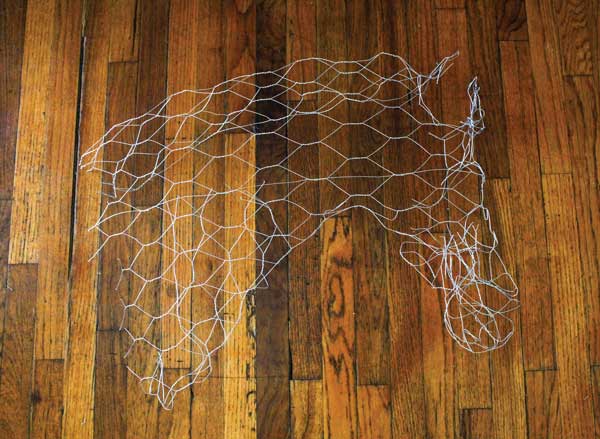
2. Bend the wire into the shape of a horse using the drawing as your guide. Make cuts in the wire as needed so you can roll the wire when shaping the ears and jaw.
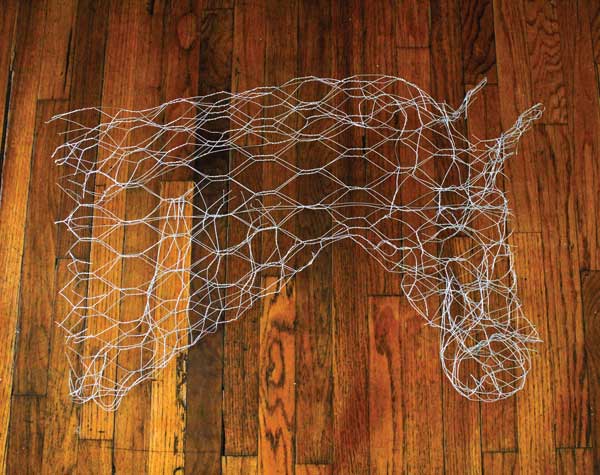
3. Repeat this process a second time to add an overlay of thickness to the wire base. It should be durable enough to hold several layers of garland. If you opt to use real greenery, a third sheet of wire might be required since it’s considerably heavier.
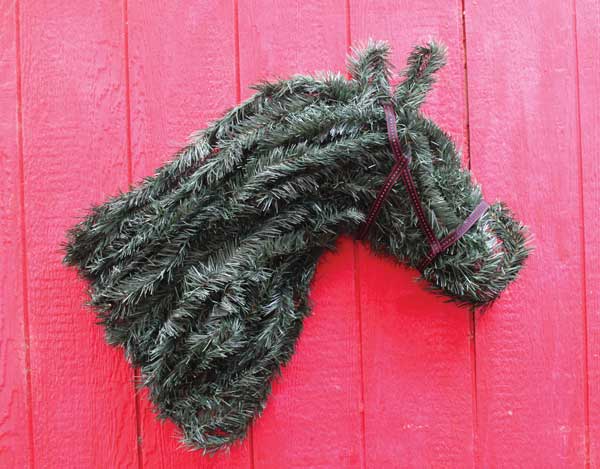
4. Now it’s time for the fun part—adding the greenery! Attach the garland to the chicken wire using small pieces of wire to secure the garland every few inches. First, work with larger strands. Then cut the garland as needed to fill in any thin spots.

5. Don’t skimp on the garland; you want to create a thick, full wreath. Make sure your garland is attached well, especially if it will hang on an outside door.

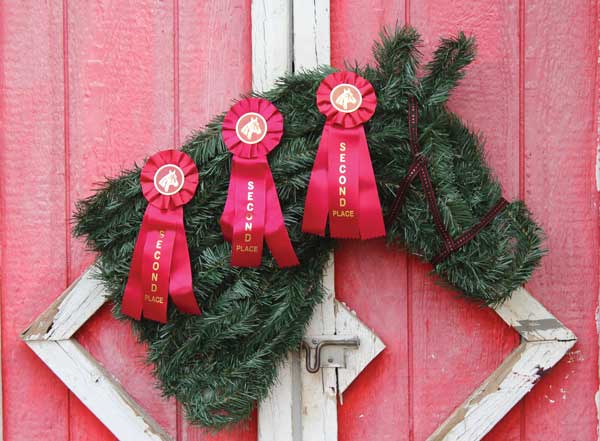
6. After the garland is attached, jazz up your wreath with additional decorations. Make a halter from ribbons and adorn the wreath with your favorite horse show winnings. Be creative! When you’re finished, it’s time to hang and admire. Simply hook the back of the wreath onto a nail with the back frame of wire.
This straightforward DIY might look intimidating at first glance, but it’s one of the easiest craft projects I’ve ever done. It took about two hours to complete and cost around $30 for supplies. Gallop over to your local craft store and make a horse head wreath you can enjoy year after year.
This article on how to make a horse head wreath originally appeared in the December 2019 issue of Horse Illustrated magazine. Click here to subscribe!