Photo by Daniel Johnson
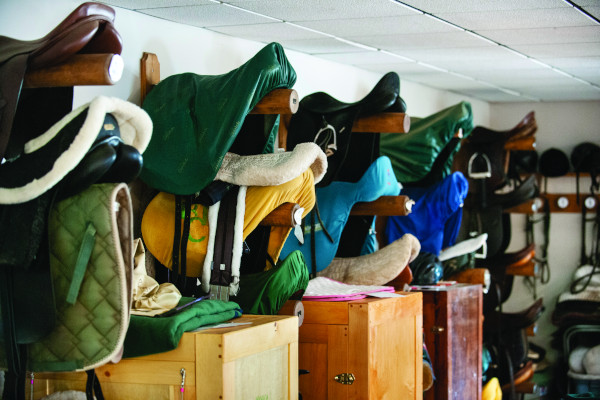
In many regions, horse owners spend less time riding in the winter, abandoning their tack rooms in a state of disarray after a frantic season of riding and showing. Add in the fact that nobody wants to clean in frigid temperatures, and that you may have mud from winter precipitation, and there is plenty to be done. To help motivate you for the job, we’ve broken down the task into smaller, easy-to-tackle steps.
First, Eliminate Unneeded Stuff.
The less clutter there is, the easier it will be to make the finished room look good. This might involve taking a hard look at your items and selling, gifting, donating, or—yikes!—trashing things that are just taking up space and adding to the clutter. Remember: fewer items = fewer things to clean and organize.
Evaluate your tack.
Sometimes horses go off to a new owner. Or they graduate to new gear. You might also have broken tack or items that were purchased in an incorrect size.
Take stock. Have you used that bridle in the last year? The last five? How about that yearling halter—from your mare that is now 7 years old? The same goes for blankets, sheets, wraps, and the rest. Keep the best, and sell or donate what you don’t need.
Go through your grooming tools.
Brushes, curry combs, and shedding blades don’t last forever. Neither does that dried-out bottle of mane detangler. Now is your chance to take everything out of the grooming box, clean, and save the good stuff (and maybe even make a list of new tools to purchase), and trash what you don’t want.
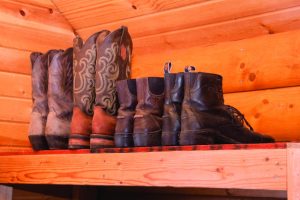
Any unused riding gear, like old boots, should be sold, donated or trashed, depending on condition. Photo by Daniel Johnson
Look at unused boots, helmets, gloves, and other riding gear.
If it’s in fine condition, you might be able to sell it or give it to another rider who can make use of it. Selling like-new or used items locally on social media marketplaces or sites like Craigslist is easy and can help you recover some of the cost of the item. Helmets more than five years old or that have had an impact or boots and gloves with holes in them can go in the dumpster—no guilt!
Don’t be afraid of the dumpster.
It can sometimes be a challenge—especially for sentimental people—to toss an unneeded item in the trash, but this is a fast way to make a lot of progress in your de-cluttering.
Try to be realistic about the likelihood that you’ll use these items in the future. It may seem like a bigger tack collection will be more fun, but that’s not always the case. Eliminating battered and bruised objects will make more room for the stuff you really love and will help make your collection look better.
Next, Remove Everything and Clean the Empty Tack Room.
It can be a big job, but physically removing everything from the tack room (temporarily into the barn aisle) will make it easier to clean the room itself. Once you empty all the shelves, move tack trunks, take out all the saddles and other items, you’ll find that actually cleaning the walls and floor shouldn’t take long at all.
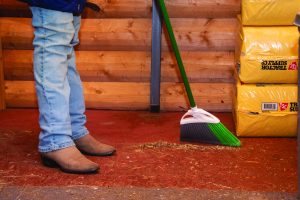
You’ll do a better sweeping job with a light broom—leave the heavy push broom in the barn aisle. Photo by Daniel Johnson
Sweep up cobwebs.
Even if your tack room is rodent-proof, it’s not spider-proof. It’s amazing how quickly cobwebs can accumulate. You can remove the bulk of cobwebs with a broom, but be sure to use a small, lightweight house broom—not that 26″ unwieldy barn aisle push broom that will wear you out. After sweeping, you can vacuum.
Don’t vacuum hay.
It seems like it should be so easy and convenient, but vacuuming even small amounts of hay will just clog the hose. You’re better off starting with a broom and then using the vacuum for any remaining dust. For sand, dried mud and feed pellets, the vacuum can be your best friend.
Use a vacuum filter.
Durable vacuums like Shop-Vacs are designed to be used with a variety of filters, such as dry filters that accumulate dust, filter bags that collect dust into a bag, and wet filters for liquid disasters.
But one thing you shouldn’t do is vacuum without a filter installed. Sure, the vacuum will function just fine without a filter, but if you look closely, you’ll notice that a vast amount of dust is simply being expelled out the back of the vacuum, creating a new mess as you clean the old one. Always keep a filter installed and keep it clean, since the suction of the vacuum depends greatly on the cleanliness of the filter.
Your Shop-Vac’s brush attachment will become your best friend while cleaning the tack room. Photo by Daniel Johnson
Use the brush attachment.
Your vacuum probably came with a soft brush attachment, and this is one of the best tools you can use for cleaning the tack room. Once you’ve removed the majority of the dust, debris and cobwebs, go back over things with the brush.
This works wonderfully for shelves, windows, sills, organization bins, and any other durable item that needs a good dusting. The advantage of using the vacuum is that the dust is automatically contained, rather than just spread around the way regular dusting might.
Wash the floors—and walls.
Once the dirt is removed, you can go one step further and wash the tack room surfaces. A simple vinegar solution works well for wooden floors and walls and can be used on concrete as well. The vinegar can help remove mildew spots, too.
Wash the windows.
Elbow grease and a window cleaning product should do the trick.
Finally, Put Everything Back in the Clean Tack Room.
This is the fun part! With the room clean, you can begin to put everything back—but in a sensible, organized fashion.
Use vertical space.
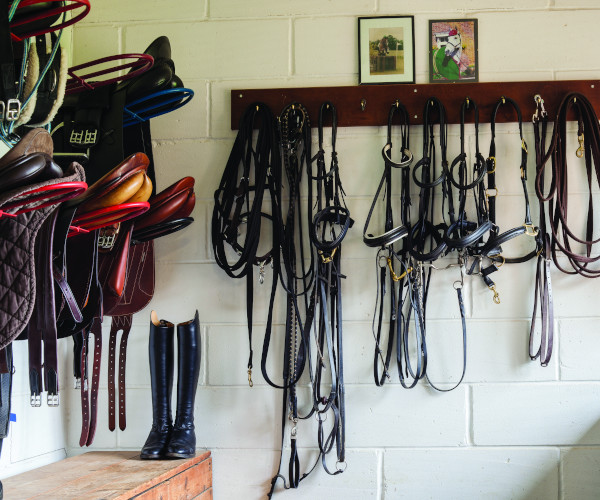
Anything you can hang on walls—bridles, saddles, blankets, helmets, boots—is one less item taking up valuable floor space. Maybe you’d like to install some new shelving, used cabinets, or other wall organizers. Saddle racks that attach directly into the wall can save a lot of space compared to floor racks. Clear floor space makes it easier to keep the room swept in the future.
Try a tack “island.”
Everybody loves kitchen islands—and you can try the same thing in the middle of your tack room, with a large level surface for working and plenty of storage underneath.

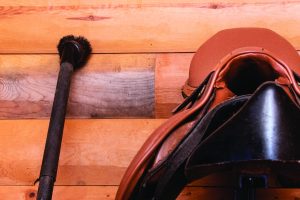
Make sure all tack is squeaky-clean before returning it to the clean tack room. Photo by Daniel Johnson
Clean each item as it comes back into the room.
Tack cleaning and leather care is its own topic, but definitely don’t bring moldy or filthy tack into your newly cleaned tack room.
Invest in some plastic totes.
Small items stay dust-free if they’re sealed in a plastic tote, and you can easily (and neatly) stack totes on top of each other for maximum storage. For efficiency, you might try clear plastic totes so that you can see at a glance what is in the box, but this might detract from the decluttered appearance of your tack room. In that case, labels are your friend.
If multiple riders have trunks in the tack room, have everyone organize at the same time. Photo by Daniel Johnson
Ask each rider to organize their trunk.
If the tack room has multiple riders’ stuff, each person should clean and organize their trunks.
Decorate.
Finally, why not go a step further and make the tack room look fun as well as clean? A fresh coat of white paint makes all the difference as a backdrop. You can easily decorate with an equine-themed sign or two, or maybe even find a way to display some of those show ribbons from last year. Add a bench for seating and boot-changing, and you’ve made your tack room less of a closet and more of a welcoming place to spend time.
Remember to have fun with your tack room project! Take your time, play music, and laugh a little. Order pizza and invite a friend to help. Soon you’ll be enjoying your newly cleaned tack room.
The Feed RoomYour tack room might also be a combination feed room, and if so, this introduces another set of tasks. 17. Sweep up. 18. Toss old feed bags. 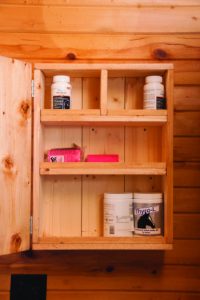 Clear out expired supplements and medications. Photo by Daniel Johnson 19. Empty and clean the feed containers. Empty the feed, hose out the container (you might need to scrub on it with some dish soap to loosen any sticky molasses), rinse well, and then let it dry thoroughly before you put the new feed back in it. 20. Clean the feed buckets. 21. Organize your supplements/medications. |
This article about tack room cleaning appeared in the April 2021 issue of Horse Illustrated magazine. Click here to subscribe!