Training a horse to show in hand can be time well spent. The most obvious reason is that it helps the horse show at his best in breed classes or inspections. But beyond that, it helps the horse and handler to develop a solid working relationship, which may translate later into a smoother start under saddle and a horse that is an all-around good citizen.
While this article is specifically about showing sport horses in hand, many of the basic concepts and potential benefits also translate to showing hunter horses on the line, in western halter classes, or presenting a horse for ground jury inspection in eventing.
In-hand work also provides the basic framework for later at-liberty training and will certainly make it easier if a horse needs to be shown to a veterinarian for a pre-purchase or lameness exam.
“For me, the basis of in-hand work starts with groundwork; this leads to desensitizing, the concept of boundaries, and responsiveness to pressure or aids—all things that translate to a more well-adjusted horse and are hugely beneficial to any horse once starting under saddle work,” says Quinnten Alston. Alston is a professional rider and handler who runs his own breeding program at Quantico Sporthorses in Southeastern Pennsylvania, which has produced an impressive string of breeding class champions at prestigious shows, such as Dressage at Devon. He is also an in-house rider and sales manager for Iron Spring Farm, a successful sport horse breeding facility in Coatesville, Pa.
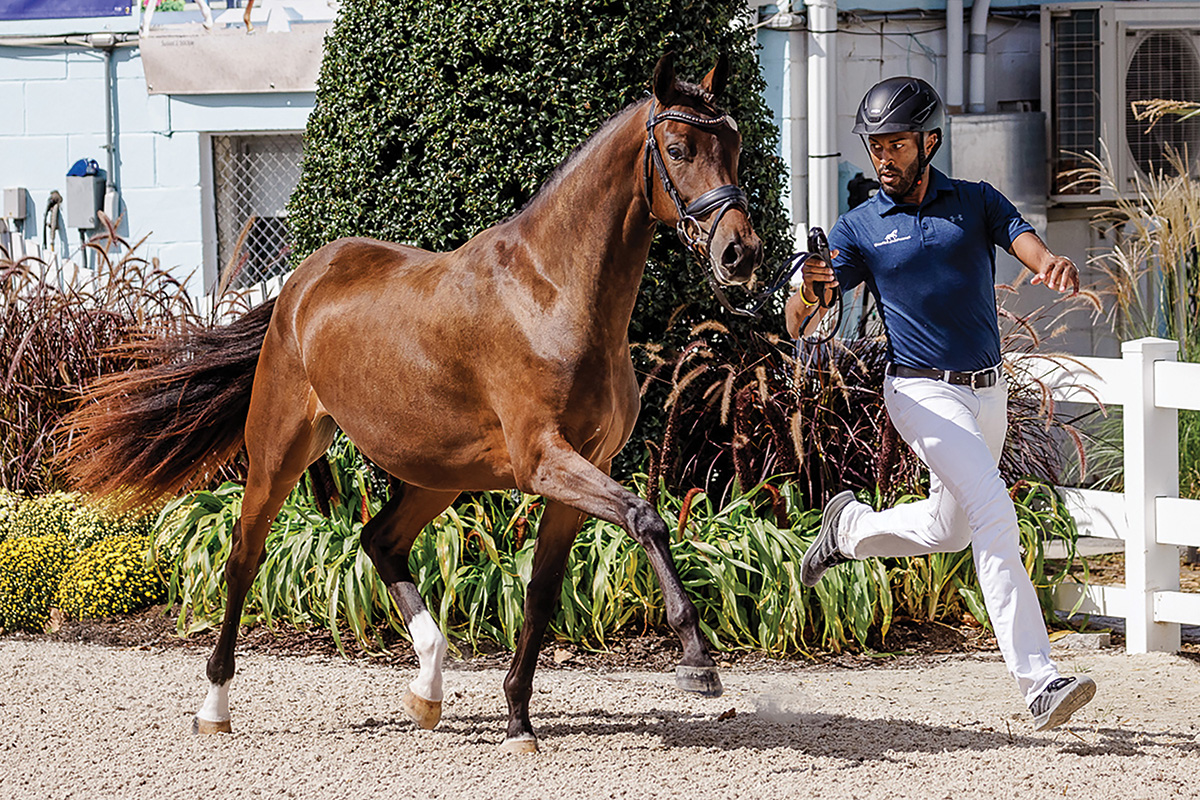
Running alongside a homebred mare Frida Kahlo QC, a Champion at Dressage at Devon, Quinnten Alston keeps her tracking straight and moving forward to show her lovely, big trot. Note the slack in the reins so she isn’t restricted and that Alston keeps his eye on her as they move. Photo by Purple Horse Designs
Purpose & Process of Showing in Hand
The United States Equestrian Federation (USEF) rules for Dressage Sport Horse Breeding lists the purpose “To encourage the breeding of horses suitable for dressage and to provide an opportunity to demonstrate the effectiveness of breeding programs.”
Horses are judged on their conformation and movement and are given a “general impression” score (which may be influenced by the behavior of the horse, turnout, and other factors). The handler’s job is to present the horse in a way that can show his best qualities.
An important consideration is that the handler must be able to keep up with the horse in order to show him well in competition, so be honest in evaluating your capabilities. If in doubt, ask someone to video you working with your horse to see if you are negatively restricting his forward motion. If you aren’t physically able, it may be better to hire someone else to show your horse.
Each animal is presented one at a time in the ring (except for group breeding classes, such as “Produce of Dam” or “Get of Sire,” where related horses are shown together). The handler walks the horse into the ring for examination by a judge. The horse is first stood up for conformation evaluation; the judge walks around the horse looking at him from both sides as well as from the front and back. Next, the horse is walked around a triangle pattern, followed by trotting the triangle. Finally, the horse is set up again for evaluation before exiting the ring.
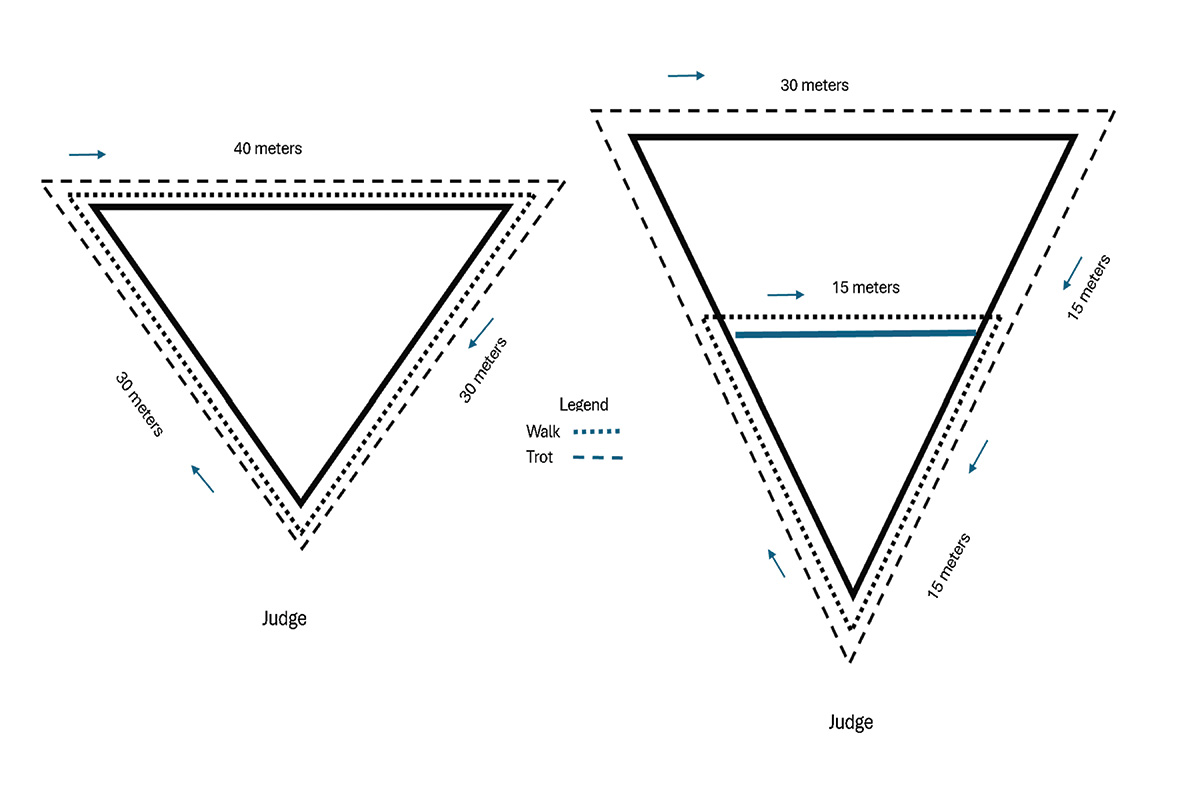
The United States Equestrian Federation-approved patterns for showing a horse in hand, taken from the dressage sport horse breeding section of the US Equestrian rule book. Photo courtesy US Equestrian
The judge stands at the apex of the triangle. He or she observes how “true” the horse travels, looking first from the back as he goes away down the first short side and then from the front as he returns on the other short side. The judge evaluates the horse’s more extended gaits as he travels on the long side of the triangle.
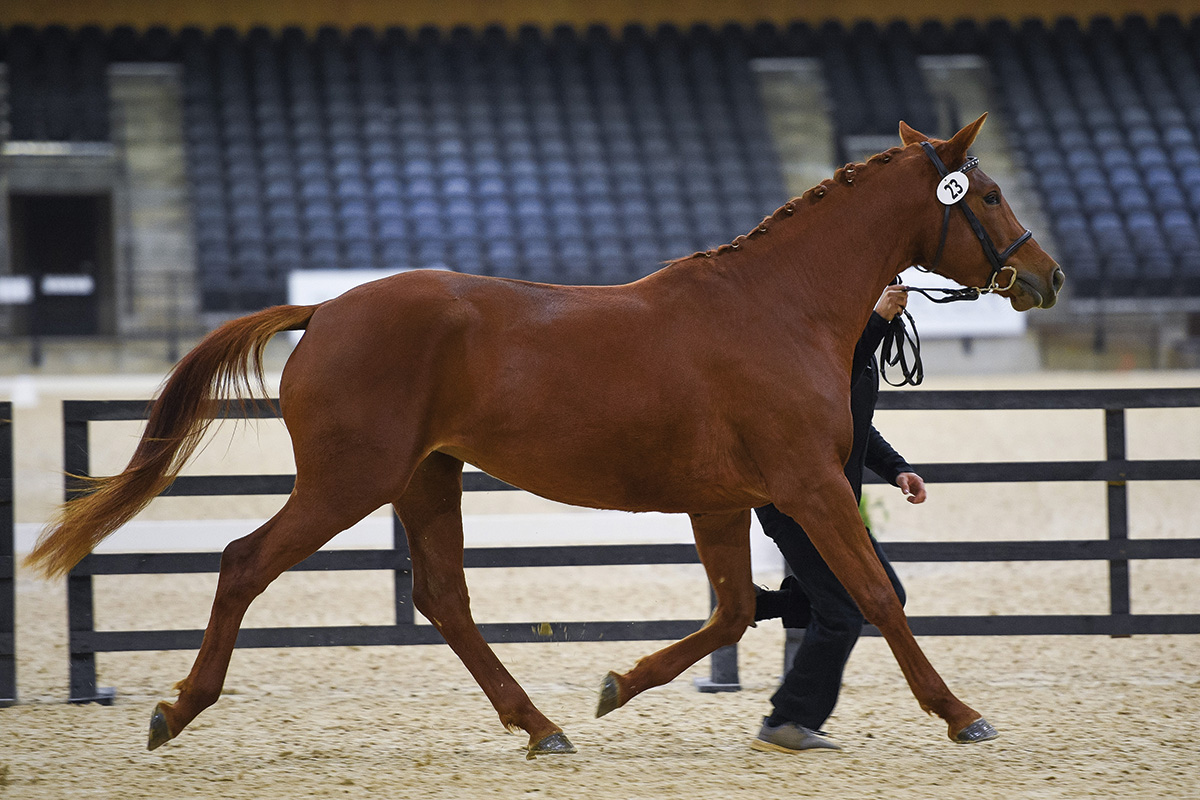
This mare is being shown at the trot on the long side of the triangle show pattern. The long side is for showing more extended gaits and brilliance. Photo by Allen MacMillan/MacMillan Photography
Getting the horse to move in a straight line is very important.
“The judge is analyzing the correctness of the gaits, which is harder to do if the horse is not moving on a straight line to or from the judge,” says Alston.
Getting Started with Showing a Horse in Hand
The aids a handler may use to communicate with the horse in hand include the handler’s body language, gentle touch-pressure applied to the body of the horse, guidance from the reins or lead, voice commands, and encouragement or direction (not punishment) using a whip.
Alston says he starts teaching a horse groundwork as early as he can, many when they are foals, after they are familiar with leading.
“Small introductions to moving away from pressure is the foundation,” he says.
The lessons start with responding to pressure applied to the front and hind end. Then, once the horse progresses on to walking and trotting in hand, he asks the horse to do both gaits on zig-zag lines. This helps the horse learn to change direction and teaches him to be more in tune with Alston’s body movement.
He also uses “square” drills: walking in a straight line, turning a 90-degree angle, continuing on a straight line again, and repeating until a square has been created. This teaches the horse to be respectful and to take into consideration where his handler is and will be going.
Alston advises that it’s easiest to have help from a whip person walking behind the horse the first couple of times so that the horse can figure out confidently walking and trotting in hand. He explains that some young horses may not understand the first time you ask them to trot in hand, but once they have a clear understanding of that, it’s as simple as asking them to be adjustable within the gaits.
“I use the terms ‘big walk/big trot’ and ‘small walk/small trot,’ but you are essentially asking the horse to cover more or less ground based on stride length,” says Alston. “I will also change my own stride length to match the horse. To accompany a bigger walk by the horse, I make my stride bigger, not faster. I always want to have the feeling that the horse is marching within his gait if I am asking for more ground cover. The movement has purpose and energy.”
Teaching your horse to stand in an open stance, then to stand square with front and back legs, and finally to go back to an open stance on the other side, is important so he understands the concept, according to Alston. However, since most of the horses he shows are young, and shows can be busy environments, he doesn’t get too focused on whether the horse is always standing perfectly in front of the judges.
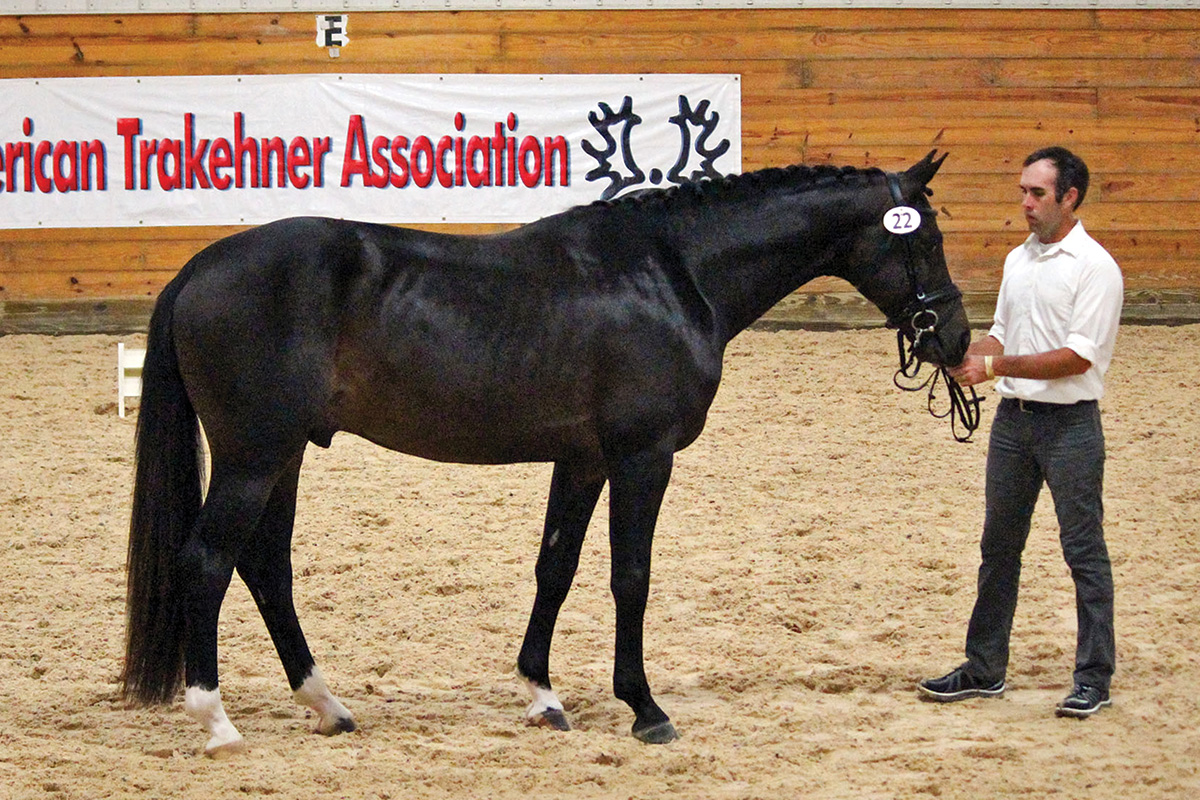
A good example of the desired “open stance” pose of the horse, demonstrated by Andrew Palmer and the young Trakehner stallion Hart Throb, which makes all four of the horse’s feet visible to the judge. Photo by Shelley Higgins/MacMillan Photography
He advises keeping training sessions short, 15 minutes or less, especially with younger horses, and to always end on a good note.
Equipment & Attire
USEF rules state that foals, weanlings, and yearlings may wear a leather halter with lead, but starting at age 2, horses must wear a bridle. Alston says he knows some handlers who use a bridle for yearlings, but he doesn’t until the horse turns 2. Regardless, he stresses that the halter or bridle should be well fitted to the individual horse.
“If in a bridle, the bit should be appropriate in size for the horse,” he says. “Every part of the bridle should be fit to the horse: noseband, flash, throatlatch, browband. The bridle should be practiced in prior to the show. Nothing is worse than a horse’s first introduction to a bridle being at the show.”
According to USEF rules, handlers and/or assistant handlers are allowed to carry either a dressage whip or longe whip to help direct the horse. Although Alston chooses not to carry one when he is showing, he does use a trusted assistant handler moving behind the horse with a longe whip at shows and inspections.
“I don’t always need a whip person at home, but you want to practice having that second person before you go to a show,” he explains. “If you have a horse that isn’t confident or is less forward, having a whip person while practicing can definitely be advantageous.”
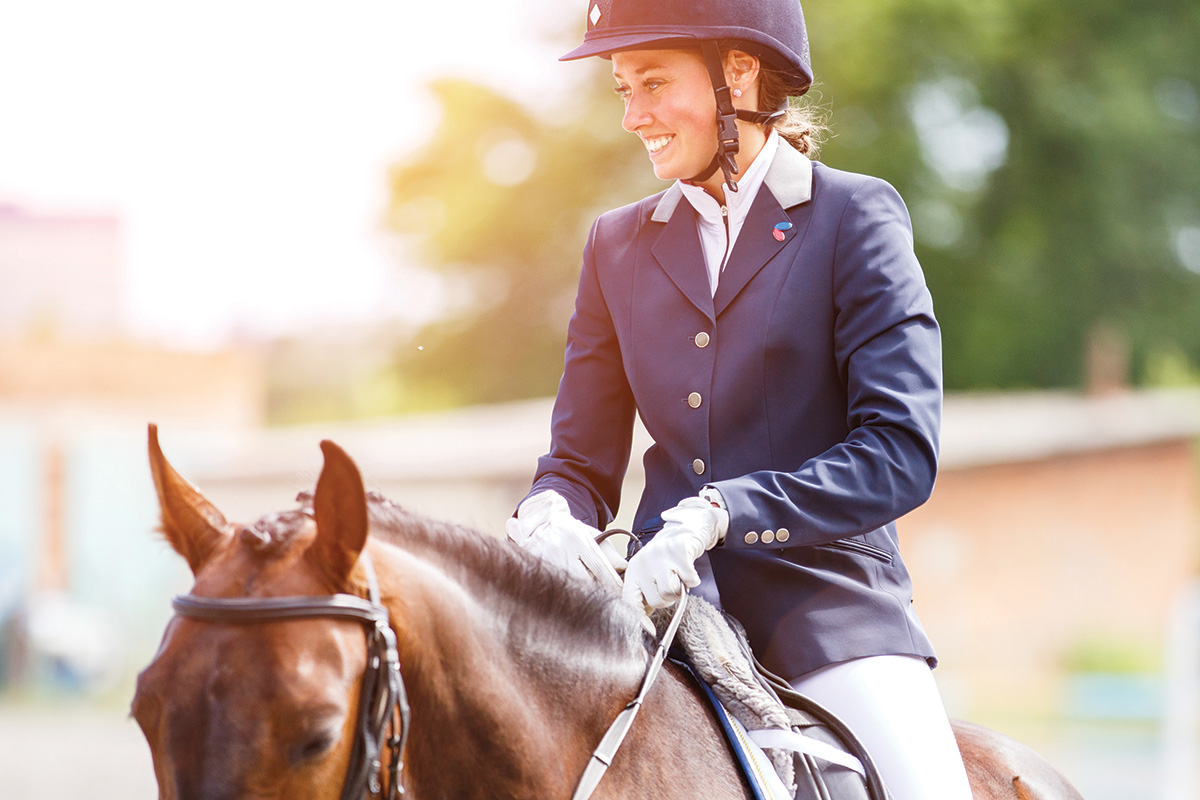
The USEF rule book directs “conservative sports attire and a helmet” for handlers. Beyond that, Alston advises that the helmet be well-fitted and to wear comfortable running shoes. He doesn’t wear gloves, but knows some handlers prefer to.
For more tips from Alston and a list of USDF learning resources, visit our Introduction to Showing Sport Horses in Hand.