Figure 1: Properly adjusted side reins. Photo by Samantha Torcise
Side reins can be extremely beneficial, when used correctly, to improve a horse’s understanding of rein contact, as well as help him to correctly develop his topline. Of course, the key phrase here is “used correctly.”
Why side reins? The simplest answer is: because they are not a leverage tool. They are to be used with a snaffle bit, and the side reins I select all have a stretchy element to them, whether it be an elastic insert, rubber donut, etc. Because they are used when longeing, once adjusted there is little to no human error involved, which is why it also improves the horse’s learning experience. I begin working a horse in side reins when he is having trouble understanding contact. It could be because the rider is still learning and is inconsistent, or the horse just is generally tense, worried, or trying to anticipate the next request.
How to Use Side Reins with Your Horse
Side reins can be used with a horse that is tacked up with a saddle, or they can be connected to a longeing surcingle. I use my side reins with my regular tack set-up by opening the buckled loop at the end of the side rein, running it underneath both girth buckles/end straps, and then returning it over the girth buckle closer to the horse’s tail and under the one closer to the horse’s nose (see Figure 2 below). As you can see this works best with a girth with elastic at both ends.
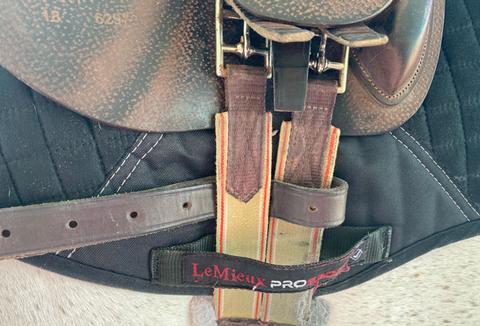
Figure 2: Open the buckled loop at the end of the side rein, run it underneath both girth buckles/end straps, and then return it over the girth buckle closer to the horse’s tail and under the one closer to the horse’s nose. Photo by Samantha Torcise
When buckling the side rein after securing it through the girth, you will be determining the length of the side rein. This is one of the most important moments. Take the snap end of the side rein towards the horse’s head while they have a relaxed headset. Their head shouldn’t be high and alert nor tucked down towards their chest, think of the head carriage they have when hanging out on the crossties or in their stall. When the snap reaches the horse’s mouth, that is the proper starting adjustment. If it is their first time in side reins, you can even loosen it an extra hole.
Starting too loose just means you will need to stop the horse and tighten it, while too tight could result in an accident or bad experience for the horse. Once you have found the correct length, clip the side rein to the D-ring of the saddle or a higher ring on the longeing surcingle. Repeat on the other side, while ensuring both side reins are adjusted to the same hole on both sides (see Figure 1 above for properly adjusted side reins).
Starting with Side Reins
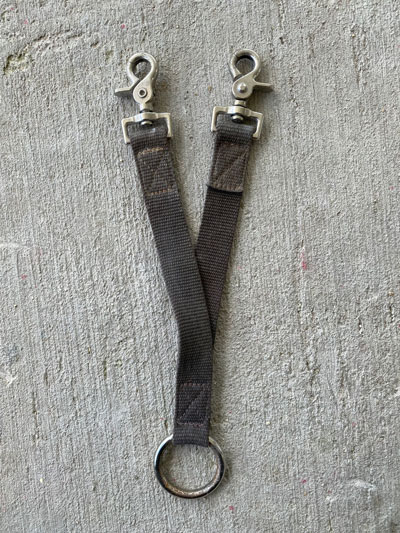
Figure 3: Bit attachment for a longe line. Photo by Samantha Torcise
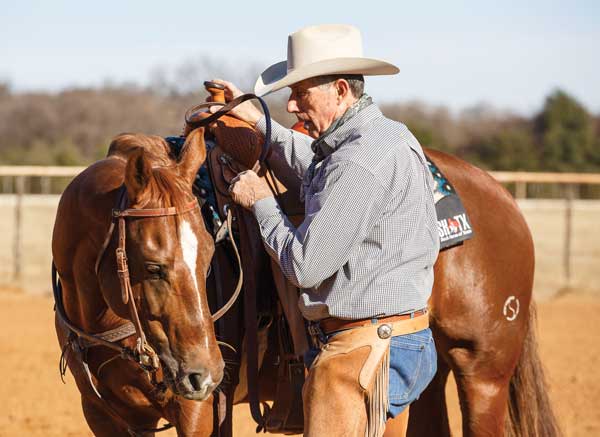
When longeing with a bridle, I prefer to use a bit attachment (see Figure 3) with the longe line while the side reins are clipped out of the way on the saddle (see Figure 4 below). Allow your horse to longe normally for 5 minutes or so, going both ways to stretch and get any excitement or bucks out.
After that, bring him to a halt and clip the side reins to either side of the bit. Encourage him to walk on with a driving aid, such as the voice, whip, hand, or end of the longe line. You do not want to pull him forward and create tension between a forward pull and the side reins, which are holding backwards.
Once the horse is walking well, ask for the trot. Many times, this is when horses will object to the side reins for the first time. For example, a horse that is used to raising his head during every upwards gait transition will be surprised to find out that is no longer an option. Because of this, be ready for your horse to have a reaction in which he moves backwards or raises his head. Then immediately cue him forward. By doing this, you are showing him that going forward and relaxing through the topline is the answer for relief of pressure. This is why it is so important for the side reins to be on the looser side, so that the possible negative reaction doesn’t turn into more than his head shooting up and a few backwards steps.
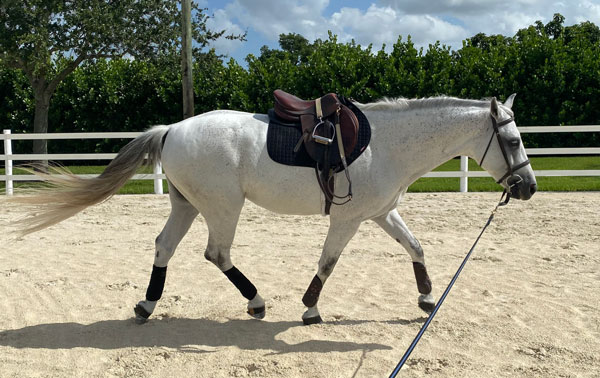
Attach the side reins to the saddle during longing so they are out of the way. Photo by Samantha Torcise
As your horse figures out the side reins, continue to longe normally for 10-15 minutes. Be sure your horse continues to carry impulsion, pushing from behind and using his neck to fill out the side reins in a nice arc. You may find you need to tighten the side reins a hole or two, and/or you may choose to tighten the inside side rein one hole more than the outside in order to encourage an inside bend. Meanwhile, watch for signs of fatigue, such as the horse over flexing in the poll and dropping their poll below the withers. As soon as this happens, it is time to stop for the day, even if it has only been five minutes.
Incorporate this into your horse’s training program and you will see big differences in their understanding of the contact as well as their physical appearance. Just like anything, there can be too much of a good thing. For weaker or green horses short sessions once or twice a week are helpful, with more experienced, stronger horses only needing biweekly or monthly reminders.