Enter our 12 Days of Christmas Giveaways here!
0 ITEMS
  • My Account
  • Holiday Gift Guide
  • Podcast
  • Webinar
Subscribe Combo
Enable cache13
Home Blog Page 1054

Riding the Flat and Running Walk

13

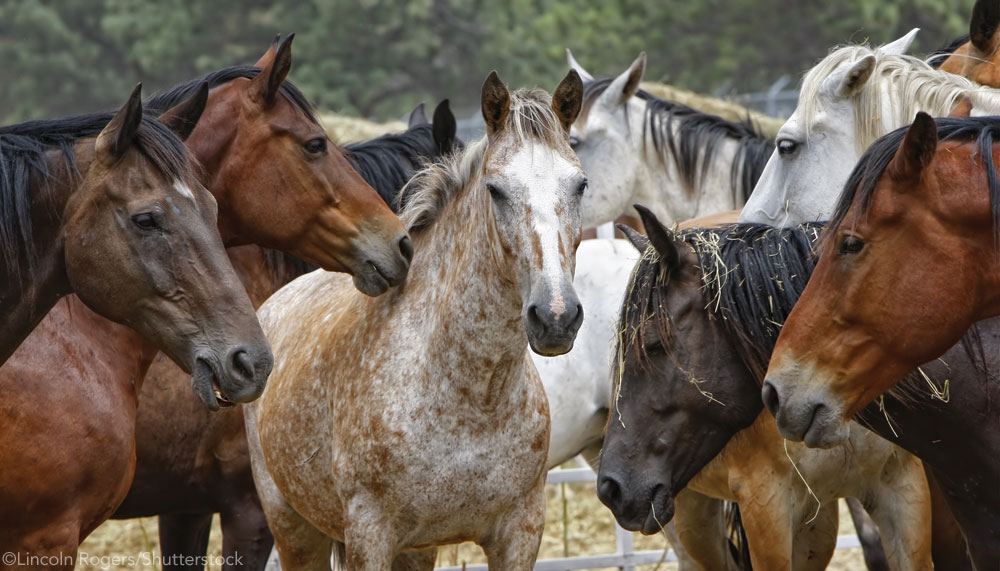
Riding the flat and running walk on a Walking Horse is like floating through air—it’s the ultimate ride,” says performance horse trainer Wendy Said, who has trained pleasure (flat shod) Tennessee Walking Horses, among other breeds, in Southern California for more than 25 years.

Tennessee Walking HorseThe Tennessee Walking Horse derived from the Narragansett Pacer and the Canadian Pacer, unique for their pacing gait, which was smoother than a trot. Often Walking Horses fall into this two-beat pace, where feet on either side rise together rather than a flat or running walk. “At a walk, your horse should have a loose four-beat footfall, with each foot hitting the ground individually,” Wendy explains. “Your goal is to continue this footfall while moving up to your faster gaits [flat walk and running walk].”

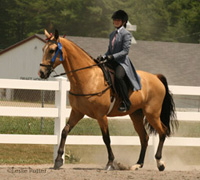
Wendy applies traditional training techniques to help her Walking Horses achieve these comfortable, ground covering gaits. Whether you show your Tennessee Walker or want to enjoy a smoother ride on trail, practicing these training techniques and learning some basic maneuvers can help you achieve those sought-after gaits.

The Basics

Sometimes, all a Tennessee Walking Horse needs to snap out of the pace and move into a flat walk is for his rider to use a few half-halts and drive him forward into the bit. “A half-halt is a maneuver where the rider engages forward movement with his or her legs while softly checking or slowing the horse’s front end through the reins. This allows the impulsion of the horse’s movement to be collected up to the rider’s aids [hands and legs]—creating roundness and balance,” Wendy says. “The half-halt is just a brief moment in time. The horse’s hind end will keep moving forward while his front end momentarily pauses.”

But with some Walking Horses, achieving the proper gaits is not so simple. Rather than using harsher bits or gadgets, Wendy relies on basic training principles. “Your goal is to create a supple horse that knows how to use his individual body parts and how to give to the rider’s leg. These are the same principles applied in basic dressage and most other disciplines,” Wendy says. Like all horses, your Tennessee Walker will benefit from becoming supple. Even if your Walking Horse gaits smoothly rather than paces, or if he gets “trotty” when you move him up, he’ll benefit from suppling. Wendy puts a strong emphasis on bending exercises and prefers to start horses in a hollow mouth snaffle; however, any bit your horse works comfortably in should be fine for these exercises.

Where to Start

Whether retraining a horse or starting a youngster, it all begins at the same place. Start at the walk and work on bending—circles, serpentines, figure eights and more. When you bend your horse, it’s important to use your inside leg to your outside hand and not let him drop his shoulder in. Tip your horse’s nose to the inside, far enough so that you can see his inside eye and so that he really bends. “The reason this is so important for a Walking Horse is that it teaches him to dramatically step underneath himself and position his hind end—creating an arch,” Wendy says.

Turns on the forehand are also emphasized in Wendy’s program. “This maneuver is a continuous sequence of steps. The forelegs are keeping time while the hind legs are making a quarter or half circle around them, one hind leg crossing over the other. Turns on the forehand help to supple the horse and prepare you both for the next step of your training.” Wendy recommends setting up cones for a visual aid. Start with four cones. Place your cones in a large square in the middle of your arena. Walk your horse around the outside of the square. “As you approach the first cone and half-halt, turn your horse’s nose toward the cone with your inside hand [hand nearest the cone]. Slide your inside leg behind the girth, pushing your horse’s hind end a quarter of a turn. Your outside leg and hand give slightly but support the shoulder from moving out sideways,” Wendy explains. Once you have mastered a quarter turn, reduce your cones to two, increasing the maneuver to a half turn. If your horse is prone to pacing, it’s important to practice turns on the forehand before moving on to the next exercise so that your horse understands how to move his hip away from your leg.

The Gait

After your horse is supple and moves easily off your leg, move him up to the flat walk. To advance the gait, maintain light contact on the bridle while pushing your horse forward with your legs. “If your horse has a four-beat rhythm, you’re good to go,” Wendy says. If he instead begins to pace, your suppling practice will come in handy. Wendy uses the following exercise to disrupt a pacing horse’s footfall:

As your horse is pacing along, half-halt him. Next, tip his nose toward the rail at a 45-degree angle while you use your outside leg just behind the girth to push his hips to the inside (your inside leg and hand will support his shoulder and keep it from dropping in). Thus, his front feet and hind feet will be moving on two different tracks or paths: front feet on the outside track and hind feet on the inside track. In this position, it will be hard for your horse to continue to pace. By pushing his outside hind leg in, you can disrupt the pacing footfall and start the correct four-beat rhythm.

If your horse begins to flat walk, rechannel him straight and continue forward: a quick reward for a job well done. Unfortunately, some horses don’t easily break the pacing habit, and for them you’ll have to keep trying. “The idea is not to go sideways down the rail but to disrupt the incorrect footfall and alter his next step. If your horse is still pacing after 10 feet, bring him back down to the regular or ‘dog’ walk and try again,” Wendy says.

Also watch out for frustration. If you or your horse become frustrated, no learning will take place, so take a break from the exercise.

Although this maneuver will not work for all horses, Wendy’s found it very useful for even the most hardened pacers. If your horse is not responding to your leg, go back to circles and turns on the forehand. It may take a while to find success, but remember you’re teaching the horse a life skill. Once he understands and responds to what you’re asking, keep practicing to refine the skill. Eventually a slight tip of his nose followed by leg contact behind the girth will become a cue to gait whether you’re in the ring or out on trail.

Micaela Myers is a horse-owner and freelance writer based in California.


This article originally appeared in the May 2004 issue of Horse Illustrated. Click here to subscribe.

Walking a Course

0

Doing well at horse shows is all a matter of preparation, and if you plan to jump at a show, you must be able to jump your horse at your own barn. You should feel safe on your horse and feel confident that he can easily pop over the fences you put in front of him.

When you look at a show schedule, pick classes with fence heights that you and your horse are used to jumping. If you jump 2 feet 6 inches at home, don’t sign up for 3 feet 3 inch classes at a show. This is just a recipe for disaster. Over jumping your horse can really hurt his confidence—and yours. When you’re deciding what time to arrive at a show, always give yourself some extra minutes for memorizing and walking the jumping courses. Let’s tag along as Alex goes on a “course walk.”

1. Memorizing the Course

Show organizers post showjumping courses outside the ring. They are usually stapled to the fence plank or a bulletin board near the gate.

Give yourself a few minutes to look at the course diagram and to look out at the arena so you know which fence is which.

You’re usually allowed to walk the course without your horse before you ride. There will be an announcement stating, ” You may walk the course now” and you’ll have about 10 minutes to go in the ring and check out the course close up. You can’t take your horse in the ring, so ask a pal or parent to hold your horse.

If you are at a show with your trainer, he or she will probably walk the course with you.

2. First Fence

When you enter the ring on foot, decide how you are going to approach the first fence. Figure out which lead you need to be on, and decide where you’re going to pick it up. If you plan to do a courtesy circle decide where you’re going to do it.

The first fence of a course is usually straightforward and simple. It might be a small upright fence or cross-pole, depending on what kind of course you’re jumping. It probably won’t be wide or covered in spooky decorations. Take a good look at the fence and make a mental note to aim for the middle of it when you’re jumping.Then walk around the fence and look for the next fence.

3. Fence to Fence

Head on your way around the course. Pretend you are on your horse. Are there any fences that might scare your horse? Alex notices that this simple-looking pole fence has a water tray under it. It’s blue and it has water in it. Alex’s pony might look at it, so Alex knows to ride strongly into this fence. If you think that your horse might spook at a fence, plan to really squeeze your legs around him or give him a kick as you approach the fence. And plan to look up and over the fence—not down at the water tray.

4. The Next Fence

Always look towards the next fence. Alex is checking out this solid wall, but then he’ll look to see where the next fence is so he knows where to steer his pony once they land. Sometimes there may be a sharp turn to the next fence—especially in jumper classes—so you might have to turn your pony’s head while you’re jumping. That’s a lot to think about while you’re in the air!

5. Jumping Combinations

A combination is a series of two or three fences that are placed one after the other with aset distance between them, usually allowing for one, two or three canter strides. The first fence is usually a  simple upright and the second one is usually a spread. The course designer has decided how many strides your pony should take between the fence, and you’ll ride the combination better if you stick to this number of strides.

Alex knows that his pony should take three strides between these two fences so that’s what he’ll be aiming for when he’s in the saddle.

6. Time to Jump

Some people like to walk the course twice. That’s OK. Walk it as many times as it takes for you to feel confident.

Now that you know the course by heart, it’s time to hop into the saddle, warm up and then wait for your number to be called.

Then it’s time to think positively, do a courtesy circle, pick up a good pace and head for the first fence.

Since you’re prepared, you shouldn’t get lost in the course. But if you do go blank after a fence, slow your pony down for a stride or two, take a deep breath and look around the next fence. You’ll soon be back on track.

Summer Survival

0

Before you head to the pool this summer, give a thought to your horse as she stands in the sun. She needs some extra care to keep her happy and healthy in the summer months.

Here are some things you can do to make sure your horse is comfortable in hot weather.

1. You still have to deworm your horse in the summer. Talk to your vet about which dewormer is appropriate in your area during the summer months. Cut down on worms and flies by picking up piles of manure in your horse’s field and placing them on a muckheap.

2. Don’t roach (clip off) your horse’s mane in the summer. She needs her mane to swish away flies. The same goes for her tail. Don’t cut it any shorter than her hocks. She needs it for fly protection.

3. If your horse sweats a lot in the field, bring her into the barn a few times a week and give her a quick shower with the hose to wash off the dirt and sweat on her body. Dried sweat attracts flies and you don’t want them “bugging” your horse.

4. Horses with white markings on their faces can get sunburn—especially around their noses and muzzles. The white markings peel and get sore. Prevent sunburn before it happens by using human sun lotion with a high UV protection rating. Protect white markings around the eyes by putting a dark fly mask on your horse.

5. Check your horse’s water trough every day to make sure she’s drinking water. When it’s hot, she needs to drink lots of water to stay healthy.

If you don’t think she’s drinking enough water, put electrolytes (minerals that encourage a horse to drink) in her feed and make sure the water trough is full. You can buy electrolytes at a feed store. They usually come in powder form and mix easily into feed. Remember to read the instructions on the tub.

6. If your horse is barefoot, her hooves may split during the dry summer months. If her feet look bad, schedule your farrier more frequently so she can trim the hoof and rasp smooth any cracks.


7. Always keep a salt block in the field so your horse can lick it when she wants. Salt encourages a horse to drink more water and should be available in her field all year round.

8. Does your favorite horse have enough shade in her field? If she doesn’t have any trees to stand under, you should have a run-in shed where she can go to escape the sun.

9. Many people bring their horses inside during the day in the summer to protect them from flies. Before you trap your horse in a stall all day, put a flysheet on her and see how she copes with the flies. She’d much rather be outside wandering around, nibbling on grass, than stuck in a stall for eight hours.

10. If your horse’s eyes get really gunky during the summer, wipe them clean every day with a damp sponge and put a fly mask on your horse during the day. Take the mask off every night so it never has the chance to rub her. Some masks have ear covers, too. If your horse manages to escape her mask (as many do!) on a regular basis, use roll-on fly repellent around her eyes.

Hunter, Jumper, or Equitation?

0

When you go to an English-style show, there are often three types of jumping classes that you can enter: hunter, equitation or jumper classes. They are quite different, and you should learn about them before you send in your entry money. Always be 100 percent prepared for the class that you’re going to enter. Let’s take a look at the three classes:

Equitation Class
Your riding skill is judged in an equitation class.

Equitation Classes

In an equitation class, the judge looks at you—not your horse. Your riding skill is judged as you guide your horse around a course of jumps. A rider with a good position—quiet hands, secure seat and strong legs—will place over one who’s bouncing around in the saddle and yanking on his horse’s mouth. The judge will note if you have your heels down, if you’re looking forward and if your hands are quietly resting on your horse’s neck. A rider who has a smooth round will beat a rider who gets left behind or points his toes at the ground.

If you get left behind, or thrown up on your horse’s neck, the judge will note this on her card and you’ll be penalized. You’ll also lose points if your horse taps a fence, knocks down a pole or refuses to jump. You’ll also be penalized if you’re on the wrong diagonal when trotting or if your horse is on the incorrect lead when cantering.

In an equitation class, your horse doesn’t have to be the smoothest jumper in the world, or the most elegant mover. The judge is looking at you, not him.

What do you have to wear in an equitation class? Beige breeches or jodhpurs, black boots, a ratcatcher shirt with a collar or a tie if you’re a boy, black gloves and a dark showing jacket. You’ll see a lot of velvet safety helmets in equitation classes, but you can cover your schooling helmet with a velvet cover.

Hunter Class
You’ll jump natural-looking fences in a hunter class.

Hunter Classes

Your horse is the one being judged in a hunter class. The judge watches to see if your horse is obedient and well mannered. His movement and jumping ability is judged. He should be a “good mover” and jump around the course in a steady pace. He must travel in straight lines and not wiggle in front of a fence.

In a hunter class, the judge will also look to see if your horse suits you. He shouldn’t be too big or small for you, and you should be able to control him easily.

Your riding style will not be penalized unless you do something to interfere with your horse’s performance, for instance, yanking on his mouth so he stops when he should be going forward.

You should wear the same showing outfit for hunter classes as you do for equitation classes. Hunter courses are fairly simple, and usually have eight or nine jumps. The fences aren’t fancy and will be natural colors like white and brown. You may have to jump brush fences or small wooden gates.

Jumper Class
Jumper courses are colorful.

Jumper Classes

The only thing that counts in a jumper class is time and faults. The horse and rider’s form is not judged at all. This is probably why you may see some dodgy riding in jumper classes! The fastest clean round wins. Horses must be nimble and quick—and jump anything that is put in front of them—and riders must be clever and bold.

Jumper courses usually have nine or ten fences. The fences are usually colorful and can sometimes be spooky to a horse. You might see a red wall or a green roll-top style fence in the arena.

If you go clear around the jumper course, you’ll get called back to do a timed jump-off against other people who have also cleared the course. A jump-off course has fewer fences than the jumper class. There might be a tight turn or two in the course. Riders cut corners and jump fences at angles to save time. The fastest time wins the class.

You don’t have to be the most graceful rider, and your horse doesn’t have to be the smoothest mover to win a jumper class. Jumper classes are less formal than hunter or equitation classes. You can wear a dark polo top, gloves, beige breeches or jodhpurs and black boots. You can wear a velvet safety helmet or a schooling helmet. You don’t need to wear a jacket unless it says so on the show program.

Showing Tip

At home, jump the sorts of fences you’ll see in the show arena. If you’re doing hunter classes, put some fir branches in front of a fence. If you’re doing jumpers, paint a fence or two with wild colors and shapes.

Are You Fit to Ride?

0
Silhouette Ride

Puff! Puff! Puff! Is that YOU after a few minutes of trotting? Sounds like it’s time that you started thinking about how fit you really are.

You expect your horse to trot and canter for miles, and be full of energy, but what about you? If you’re always gasping for breath, you won’t be able to get the best out of him. You don’t have to be 100 percent fit if you’re just planning to go on short trail rides, but if you want to go show jumping or barrel racing, you need to get into shape.

Reports have shown that lots of kids don’t get enough exercise. “But I ride—that’s exercise,” you might say. Of course, riding is exercise, but let’s face it—your horse is getting a much harder workout than you are when you ride him!We’ve got some exercises that will make you suppler and improve your stamina. And each one is designed to improve different parts of your body-parts that need to be in tip-top condition if you want to improve as a rider.

It’s a good idea to get into the habit of doing these exercises a couple of times a week. If you’re out of shape, start off slowly and build up the number of exercises you do gradually.

So what are you waiting for? It’s time to work out!

1. Start with arm lifts. You’ll need a pair of light weights, or make your own by using a fly repellent container or spray bottle. Place your feet apart, with your toes turned out, arms down and back straight. Tuck in that stomach!

Slowly bring your arms forward and up, keeping your palms down and your elbows slightly bent. Then, bring them down again. Do this 10 times.

This exercise strengthens your shoulders and upper arms, so if your horse tanks off with you, you’ll be able to stop him more easily!

2. Skipping rope is an excellent way of strengthening your lungs and building stamina. You’ll be able to gallop around an entire cross-country course without wheezing if you skip on the spot at least 20 times during your regular exercise sessions.

Don’t worry if you don’t have a skipping rope, a long lead rope will do fine.

3. Grab hold of the back of a chair. Slowly raise each of your legs behind you, lifting them as high as you can. Point your toes and keep your legs as straight as possible.

Raise each leg up 10 times.

This exercise strengthens your legs so you can use them more effectively on your horse.


It also tones up your tummy so your breeches won’t feel so tight!

4. The dreaded sit-ups! Keep your feet together—hook them under something solid if it helps. Put your hands behind or next to your head and slowly move your upper body forward.

Don’t try to touch your nose to your knees, just lift your back off the ground.

Sit-ups are good for your abdominal muscles and back. You’ll be able to do more sitting trot and bend easily over a fence if these muscles are strong. See if you can manage 10.

5. Time to work those thigh muscles because they help you to sit securely in the saddle. Sit down with your legs apart. Point your toes. Stretch forward with your upper body and arms and try to touch your toes, one leg at a time. Do it slowly, don’t strain anything! Do this 10 times with each leg.

6. Running strengthens your leg muscles and improves your stamina.


After you have finished the other exercises, you should be warmed-up enough for a short run. Run your horse’s field one or two times. Remember, you’re not in a race so you don’t have to gallop around at top speed. Stick to a human trot.

Loping Lessons

0

If you’ve spent some time walking and jogging your horse, chances are you’re looking forward to loping. For most riders this is the most exciting gait and many of the most popular western sports like barrel racing and reining are done at the lope. There’s just nothing like it.Although the lope is easier to sit than the jog, it’s also the gait a horse uses when he’s scared. Control and communication are especially important when you decide to speed things up.

Good horsemanship relies on clear, consistent cues so your horse knows what you want and   doesn’t get confused, scared or even angry. Your voice, hands, seat and legs are what help you    communicate with your horse. Here are some steps to make sure loping is fun and safe.

Never try your first lope in an unfamiliar place and never out on the trail. It’s best to try it in a round pen or an arena if you don’t have a round pen. You might ask your trainer (if you have one) to let you lope for the first time on the lunge line.

When loping for the first time, ride two handed with your reins fairly short so you have more control. Not short enough to be pulling on his mouth—just enough to take out the slack.  Walk and jog your horse to make sure he’s calm and ready to pay attention to you. If he’s nervous or pulling on the bit at these gaits, he is not ready to lope. See if he’s soft in the bridle, which means he will give you his nose both right and left and slow down when you just barely lift the reins.

Before you ask your horse to lope, he must understand that he should move away from pressure from your legs. For him to lope correctly, he must start his motion from his hind end. You control this part of his body with your legs. Spend some time moving his hip over at the walk and jog. Left leg pressure should make his hip move to the right. Your right leg asks him to move to the left. If he stays calm and keeps going forward, you’re ready to ask for the lope.

Make sure your horse is in position to take the correct lead. What’s a correct lead? When a horse lopes, the front and back legs on one side are in front of his other legs. If he’s on the wrong lead or if he doesn’t lope with his hind legs—called cross firing—and he will not be balanced.

To help your horse stay correct, start jogging in a circle to the left. Look where you want to go and keep your shoulders square and your hands in front of and below the horn. Your heels should be down and the balls of your feet on the stirrups. This foot position helps keep you balanced.

Lift your left rein gently to tip his nose to the left just a little. Make sure your other rein is steady so he doesn’t think TURN. Then squeeze with your right leg behind the cinch and kiss to him (make a loud smack noise with your lips.) Making the kissing sound lets your horse know that you want to lope and not just a sidepass.

It’s OK if he doesn’t lope right away. It’s better at this point to let him find the lope by himself so he doesn’t get worried about it. Keep asking with your leg pressure. Don’t take away your leg until he lopes—that’s the release that lets him know he did the right thing. Make the kissing sound again and run your reins forward on his neck a little.

Only your hands should go forward—not your whole body. If you lean forward you put too much weight on his front end and make it hard for him to use his hind end. Sit back on your pockets so when he starts to lope you’ll be in the correct position. Your seat is important for balance, and it’s what keeps your horse’s motion flowing.

If you get pitched forward, grab the cantle not the horn. Holding the horn pulls you farther forward and makes you stiff. Holding the cantle brings you back where you need to be. If he starts to get speedy, take a light, steady contact with your reins and roll your hips back. Make sure you’re not squeezing with your legs, and don’t pull on the bit. Pulling is an invitation to your horse to pull harder and get “chargy.”

If he doesn’t slow down, gently bring one rein back to toward your belt, bringing him into a small circle. This is a good thing to practice before you have a problem. If you’re horse runs off with you, you won’t panic if you’re prepared.

When he starts to lope, make sure to keep your hands still. Follow the rocking motion with your hips. Go a short distance, and then ask him to slow down to a jog, then a walk. Pet him and let him relax for a minute or two to let him know how great he is. Ask again and it will probably take fewer strides for him to lope. Pretty soon he’ll lope off with just a kiss and leg pressure from a standstill.

Never let your horse change gaits unless you ask him to. He should always move at a calm, controlled pace because he respects and understands your requests.

If your horse gets nervous or wants to speed up at the lope, make sure he doesn’t have a tack or health problem. Tooth problems or a bit that doesn’t fit right can make a horse run off.
Don’t overwork your horse. Loping while balancing a rider is hard work. If he’s breathing hard let him rest. Don’t just lope in circles in an arena. Lope straight lines and diagonals, and some days just go for a slow trail ride at the walk.

Warning Signals

0

Herd of horses

Horses and ponies can’t talk to you, but you can still understand what they are feeling just by paying close attention to their behavior.

If you study the way your horse behaves when he’s around you in the barn, and watch him when he’s out in the field with his pals, you’ll soon start to notice the messages that he sends out with his body language. Horses use different parts of their bodies to let you know how they are feeling, including their heads, ears, tails and legs.

If you ride a horse regularly, spend some time watching him out in the field. Take a picnic lunch out to the barn, and sit on the other side of the fence and just watch your horse and his pals for an hour or two. Note how they interact with each other. Horses that are friends stick close to each other. They graze side by side. If there are lots of flies, they might stand head to tail and swish flies off each other’s faces. If they feel itchy, they might mutually groom each other by nibbling on each other’s withers.

It’s nice when all of the horses in a field get along. One horse is usually the top honcho, and the others must obey him (or her!) The top banana gets fed first, and will sometimes chase his fieldmates away from hay or feed.

Unfortunately, there is usually a horse at the bottom of the ladder. He gets fed last, and gets bossed about sometimes. If a horse has been in a pasture for a while, he usually figures out where his place is in the group, and everyone gets along fine.

While you’re watching the  horses, you’ll probably see them interact with each other. They might just stand around and munch on grass, but they might also display some aggressive behavior to each other. Most of the time if a horse is annoyed with another horse, he will simply warn him to stay away. If the other horse doesn’t listen, the angry horse may kick out or charge at him. Here are some warning signals horses will give to other horses and to humans before they act aggressively. Have you spotted them at your barn?

Bottoms up!

If a horse feels threatened or grumpy, the first thing he’ll probably do is swing his body around so his tail is facing you or another horse. His ears will be back on his head, and his tail will be clamped flat.

If a horse does this to you or another horse, watch out—he may kick out. Sometimes a horse will do this when you approach him in a field or when you try to get him out of a stable. It’s best to stand clear and talk to him until he turns around and approaches you.

Watch that foot

After a horse swings his body around, if he’s still feeling threatened, he may lift up one of his feet and threaten to kick. If a horse does this when you are nearby, give him plenty of room. If you try to get close, it’s likely that he’ll try to kick you. If he’s lifting the foot because of another horse and not you, get out of the way. If he kicks out, you might get hurt.

Sometimes a horse will pick up his foot, usually the hind one, when you are grooming or clipping him. A ticklish horse will do this to let you know that you’re irritating him. He probably won’t kick you, but it’s best to be gentler or stop what you are doing.

Lashing out

If the horse’s warnings are ignored, it’s likely that he will lift one or both hind legs off the ground and kick out at you or the other horse. A nasty kick could really hurt or even kill you, so it’s important to recognize a horse’s warning signs and move out of the way.

Charge!

Another aggressive behavior that a horse may display is charging—when a horse runs at you or another horse and acts like he may bite you or the other horse. This doesn’t happen very often because horses are naturally timid. But, some horses were allowed to get away with bad behavior when they were young. They think that they can scare you by charging—and it works!

Here are some warnings that let you know that a horse is planning to charge.

Stand up straight

A horse that’s going to charge will stand up straight and look startled. His ears will be flat back on his head and his head will thrust forward towards you. Before the horse charges, he’ll lift his tail in the air and swish it from side to side angrily. He may lift his foreleg and paw the ground with it.

Get out of the way!

When a horse charges he stretches his neck forward and heads for his enemy. His mouth will be open—ready to bite you or another horse. A young person should not be sent out in the field with a horse that charges. If you’re frightened that a horse will charge at you, ask a horsey adult to go out in the field instead of you.

Play the Yo Yo Game

0

Have you played with a yo-yo, sending it away and then bringing it back to you? That’s how you play the Yo-Yo Game with your horse, teaching him to back (“yo”) and come (“yo”) to you!

Here’s a test. What do you do first before playing any Parelli Natural Horsemanship Game with your horse? Right! You play the Friendly Game (1)! You should also be able to successfully play the Porcupine Game (2), and Driving Game (3) before proceeding to the Yo-Yo Game. It’s important to play these Games in order.

Our goal with the Yo-Yo Game is to have your horse respond to the lightest signal.
You’ll amaze people when you just point at your horse and he backs up! Here’s another good reason for this Game — if your horse tries to nip you, just back him up. He’ll learn to not even try to bite! The same goes for a horse who is always crowding you — just back him up!

Before you try the Yo-Yo Game with your horse, practice by tying the halter to a fence post.

The Backward “Yo” 
First draw a circle in the dirt around your feet, about three feet in diameter. This is your own invisible corral — don’t move outside this corral!

It’s important to keep your feet still; it’ll help you learn how to move your horse without you moving. Your horse will respect you, because horses play the game of “who’s moving who” with each other, and by staying inside the circle, you’re the winner!

Your lead rope should be about 12 feet. Stand in your circle and drive your horse backward about three feet (Driving Game in the last issue). The middle of your rope should lay on the ground. There are four phases you may need to get your horse to move backward in the Yo-Yo Game.

Phase 1: Hold the end of the rope in one hand and place your other hand on your hip, so you’ll look like the boss!

Put a really stern look on your face, then wiggle your finger at your horse and think “back up!” If he takes even a half step, stop immediately and smile. He’s trying! Start again until he’s backed up about 10 feet. After he’s backed all the way, reward him by letting him stay there for a minute or so.

Remember to reward the slightest try. When your horse takes even a tiny step backward, stop immediately, smile, then begin again. He’ll try even harder for you the next time.

If he thinks your finger wiggling is silly, try this (Phase 2). Without moving your feet, hold the rope so that your fingers are closed around it and you can see your fingernails. Wiggle your wrist from side to side, which will cause the rope to move. If your horse still doesn’t back up, proceed to Phase 3.

For Phase 3, bend your arm at the elbow, stiffen your wrist and swing your lower arm from side to side in front of your body. Keep your elbow bent! Your horse should be getting the message now! This motion allows him to feel the wiggling rope all the way to the snap. When he does respond, quit. If he doesn’t respond, try Phase 4.

For Phase 4, straighten your elbow so your whole arm moves straight out from your shoulder. (Are you still inside your corral?) Send big, sweeping waves down the rope by moving your straight arm across your chest. By now your horse will really want to move backward!
 
Our goal is to have your horse respond at Phase 1: Point at your horse and he backs up.

The Forward “Yo”
There arefour phases for the   forward “yo” too. The ultimate goal is to be able to give your horse just a hand signal and have him come to you! Remember, the instant your horse takes one forward step toward you, immediately open your hands and smile, no matter what! And stay in your invisible corral! For Phase 1, smile, bend at the waist toward your horse and comb the rope with flat, open hands, palms up. Make it a smooth, rhythmic motion: right hand on the rope toward the horse, slide up the rope toward you, then repeat with your left hand, right hand, etc.

If your horse doesn’t come forward, put a little pressure on the rope by closing your fingers slightly, keeping the same combing rhythm on the rope. This is Phase 2. In Phase 3, place more pressure on the rope. Remember to keep your rhythm! If your horse still won’t come forward, you may want to ask an adult to try Phase 4, then you can go back to the other Phases. For Phase 4, lock onto the lead rope with hands closed tightly. Hold tight, but don’t pull!

Wait patiently until the horse shifts his weight forward or takes a step. Always give your horse a friendly rub after he’s come all the way to you in the forward “yo.” When you and your horse get really good at the Yo-Yo Game, try bringing him forward over a pole on the ground with just Phase 1! Far out!

Teaching your horse Parelli Games is fun and rewarding, but always have an adult nearby   during these lessons.

What’s next? It’s the Circling Game!

Slow Down, Speedy!

0

Get back in control of your horse or pony

Is your horse a speed demon? When you ask her to move up a gear, does she move up three? While galloping along at 100 miles per hour might be appropriate in the Kentucky Derby, it’s not suitable behavior on a trail ride. Sure, it’s fun to have a canter or two out on the trail. And maybe even a short gallop—if you’re in total control of your horse.

Let’s look at some reasons why a horse may bolt.

l Fright
l Pain from badly-fitting tack or poor riding
l High spirits
l Too much high-energy food
l Too much galloping and tearing around at top speed
l Always running in the same place

Stay Calm

If you ride a speedy horse, try to stay calm. If you get nervous, she’ll sense it and she’s more likely to misbehave. Keep your hands soft. Don’t pull on your horse’s mouth constantly. Encourage her to relax and stretch out her neck.You may have to change the bit you use if your horse is very strong. Ask a trainer for advice. If you use a snaffle in the arena, you may need a Kimberwick out on the trail.

If your horse evades the bit by putting up her head, you may have to put a standing martingale or a tie down on her. They put pressure on her nose and tell her to put her head down.

Don’t Pull Against Your Pony

If your horse runs off with you, don’t lean forward. Leaning forward tells your horse to go faster. You’ve taken your weight off her back, making it easier for her to speed up. Don’t hold on to the reins tightly. Your horse will just pull harder against you, and you’ll never slow her down. And take a deep breath and try to relax. If you’re tense, you’ll grip with your knees and this tips you forward even more. If your horse stumbles, you’ll eat dirt!

Control Tip #1

If a horse in your group bolts, turn your horse and begin   walking the other way. Don’t let your horse run off too. It can get really dangerous if the horses start racing each other.

Control Tip #2

If a horse wants to run, put her behind or next to a quiet horse and stick to the walk.

Get Back in Control
Sit back down in the deepest part of the saddle. Push both of your seatbones down and sit up as straight. Stop gripping with your knees. Move them away from the saddle flap, and push your heels down so you’re not tipping forward. Use half halts to slow her down. Here’s how you do a half halt. Keep your legs on your horse’s sides, but give a firm tug on the reins, then loosen them again. If she doesn’t slow down, use another firm tug, and then another and another. Don’t just pull against your horse. She’s stronger than you and can pull harder! As you canter along, do half halts to steady your horse and slow her down whenever you feel her speeding up.

Emergency Action

If you’re in a real runaway situation, pulling back on both reins probably won’t help. Grab a piece of mane with one hand, and use the other hand to give short, sharp tugs on one rein until she slows down. If you still can’t stop your horse—CIRCLE! A horse can’t gallop flat out on a circle. If you’re in a field and have the space, shorten your reins and use one one rein to steer your horse into a circle. Make the circle smaller and smaller until she finally stops. Once you’re back in control, stick to the walk until your horse calms down.

Control Tip #3

Stop in a place with some space and let the person riding the runaway work his horse for a while to get rid of excess energy.

Thanks to Jock Gurnee and Rosie and the gang at Bittergreen Farm for their help!

Teach Your Horse to Jump

0

5 Steps To Follow

Do you have a horse that doesn’t know how to jump? Maybe he’s a western pleasure horse and you’ve decided you’d like to ride him English-style. Maybe he’s a young, green horse that has never popped over a fence. If you are like most YR readers, you want to jump. Why? Because it’s fun!

If your horse is fit and sound, there’s no reason why he shouldn’t be able to jump a small fence or two if you teach him how to jump correctly. Follow our 5 easy steps and you’ll be popping over small fences in style. Always use an English saddle when jumping because jumping in a western saddle can be uncomfortable for both you and your horse.

Whoa!
Before you begin teaching your horse how to jump, you must make sure that he is sound (not lame) and in good health. Ask your parents and your instructor, if you have one, if they think he is fit enough to jump. Only jump under supervision—this means a grown-up should be nearby. Always wear an approved helmet with a fixed chinstrap. And make sure the fences and poles you are jumping are safe. Ask an instructor to check them out before you start jumping.

Step 1

Put a few poles on the ground around your arena. Incorporate them into your everyday schooling regime. If you are trotting a circle, trot a circle with a pole in it so your horse has to trot over the pole. If you are cantering down the long side of the arena, place a pole where you can canter over it easily.
Don’t get into jumping position when you jump—you don’t want your horse to actually jump over the pole, just walk or trot over it as if it isn’t there. If your horse jumps the pole, slow him down and walk him over the pole several times until he goes over it nicely. Stick to poles for a few weeks.

Step 2

Set up a line of trotting poles. Set five or six poles about 5 feet apart. You may have to adjust the distance if your horse keeps knocking or trying to jump the poles. Incorporate the trotting poles into your daily schooling regime. Walk through the line once or twice so your horse learns to pick up his feet. Then try the line at a trot. Trot through the line from both directions. You can do this while posting or in jumping position. Do the trotting poles for a week or two.

Step 3

Add a small cross-rail fence (about a foot off the ground) about nine feet away from the last trotting pole. Get into jumping position and aim your horse at the middle of the fence as you trot through the poles. Your horse is already picking up his feet and concentrating on the poles so the tiny fence at the end shouldn’t faze him much.

If he has problems jumping you may have to adjust the distance between the poles and the fence. Remember to stay in jumping position and put your hands slightly up his neck so you loosen the reins a bit. Green jumpers often jump HUGE and you don’t want to yank on your horse’s mouth if you get left behind. Grab hold of mane every time you head for a fence.

Don’t just let your horse stop trotting or cantering the second he lands. He needs to keep moving forward. Always alternate directions after you land. Turn right and then turn left. Go straight sometimes and ask your horse to halt from the trot.

Step 4

Set up a small upright fence in the arena—this means a straight pole in between the cups and a pole on the ground. Now your horse will learn to jump without trotting poles.


The fence should be small, no bigger than about 18 inches. Trot your horse around the ring until he’s going forward in balanced way. Then aim for the fence. Remember to look over the fence, not down atit. Get into jumping position a few feet away from the fence and loosen the reins a bit by pushing your hands forward on his neck. Aim for the middle of the fence and look up. Your horse should pop over the fence no problem.

Jump the fence from both directions at the trot. If he jumps it nicely at the trot, try it at the canter. If he starts rushing, go back to a trot.

Step 5

After a few jumping sessions, your horse should be popping nicely over the upright fence. Now you can set up a few more fences in the arena. Set up a small course of five or six fences. An easy course is two fences on each long side of the arena and two diagonal ones in the middle. Invent a course, and then do it at the trot.
Don’t worry if your horse jumps big or awkwardly.

Remember—he’s just learning how to jump. Jump the course two or three times at the trot, then give your horse a big pat. After a few weeks you can try cantering around the course. If your horse lands on the wrong lead after a fence, slow him down to a trot and ask for the correct lead. Never rush your horse by asking him to jump huge fences before he’s ready. Ask your parents or your instructor when they think you and your horse are ready to tackle bigger fences.

Follow the Leader

Here’s another way to help your horse become a better jumper. Set up a few small jumps in the arena. Put on your helmet and a pair of gloves. Put a halter and lead rope on your horse and lead him around the arena a few times. Walk and trot around (you’d better be fit!) After about 10 minutes of walking and trotting, lead him on a loose lead rope at the trot over a small fence.

He should follow you. Jump all of the rest of the fences, too. This exercise teaches your horse to jump without having you on his back making him unbalanced. Jump your horse like this at least once a week, and raise the fences as he gets more confident. If your horse trusts you, he’ll jump most things to keep up with you.
As you raise the fences, you might not be able to jump them. Just make sure that you run along side the jump and raise your hand so the lead rope goes over the jump standard. Use jump standards that aren’t very high.

Thanks to Jock Gurnee and Rosie for being super models!

0FansLike
0SubscribersSubscribe
We use cookies to help personalize content, tailor and measure ads, and provide a safer experience. By navigating the site, you agree to the use of cookies to collect information. Read our Cookie Policy.
OK