Enter our 12 Days of Christmas Giveaways here!
0 ITEMS
  • My Account
  • Holiday Gift Guide
  • Podcast
  • Webinar
Subscribe Combo
Enable cache13
Home Blog Page 1055

Western Position Problems

0

If you ride western style, you know that the way you sit in the saddle is very important. Just because the saddle is comfy and wide, it doesn’t mean that you can relax and completely forget about your position.The way you sit in the saddle and how you hold the reins affects the way your horse moves.

Sometimes it helps to see the mistakes you might make in the saddle, and then you can think about how you would fix them. That’s why we asked our reader Heather Dunham and her horse Rocky to demonstrate some position problems that might sneak up on you when you ride. Check out the problems, and then see how easy it is to fix them.

Posture Problems

Don’t slouch when riding your horse. If you’re sitting like a sack of potatoes, your body weight rests on your horse’s lower back, and this can be uncomfortable for him. He won’t be able to move nicely, and you’ll be behind the motion.

Quick Fix

Sit up straight, tuck in your tummy, and bring your shoulders up and back. Sit squarely in the saddle with your weight evenly distributed on each seat bone. Make sure that your shoulders are even. If one shoulder is in front of the other, your balance will be affected.

Hands Too High

It’s very easy to forget about your hands when you’re loping around having fun. Before you know it, your rein hand is a foot above the saddle horn and you are jerking your horse in the mouth—ouch!

Remember: a low hand means a low head. If your hand is high, your horse’s head will be high, too, and then he’ll be able to evade the bit.

Quick Fix

Relax both of your upper arms and let them hang right next to your body. Move your rein hand just in front of the horn. Slip one finger between the reins. This helps you steer if your horse doesn’t neck rein very well. Keep your rein hand relaxed so you have a soft touch on your horse’s mouth.

Drop your free hand down so it touches your thigh, and then raise it slightly.

Loopy Legs

Lots of riders make the mistake of pushing their legs too far  forward. Doing this pushes your rear end onto the saddle’s cantle and over your horse’s lower back. You might feel more secure in this position—especially at faster speeds—but it’s not pleasant for your horse. All of your weight is bumping around on his back. Instead of moving with your horse, you’re behind the motion and affecting his forward movement.

Quick Fix

Bend at the knees and bring your lower legs back until they are directly underneath you. Imagine a vertical line starting at your ear, through your shoulders, down your upper arm, through your hip and down to your heel. You should be able to stand up in the stirrups quickly from this position. If you fall back,your feet are too far in front of you.

Use Dressage Techniques for Schooling Your Horse

0

Did you know that the word “dressage” comes from a French word that means “to train”? Every time you sit on a horse and school him on the flat, you are doing dressage. Doing flatwork may seem boring at times for both you and your fave horse, but it’s the key to getting him well balanced and well behaved. Flatwork can make your horse a better jumper or a better barrel racer.

Pony dressage schooling

Flatwork teaches him to listen to your commands, and it makes him more supple. Now, you might not be planning to enter a dressage show any time soon, but some of the movements that you would do in a lower level test can be incorporated into your normal schooling sessions. Doing these exercises will help you train your horse for whatever equestrian activity you plan to do with him.Let’s take a look at some dressage movements that you can do with your horse.

Circles

Circles help you learn how to control your horse, and they help balance him and keep him flexible. As you school, incorporate lots of 20-meter (66 feet across) circles into your routine. If you’re not sure how big 66 feet is, grab the tape measure and map out a circle in your ring or field with cones or markers.

Mark out a ring area

Look for markers in an auto shop. People put them around their cars when they need to stop by the side of the road.

Circles should be round—not lumpy or pear-shaped! To keep your horse moving forward in a good circle, place your inside leg near the girth to keep him from falling into the middle of the circle. Your outside leg should be slightly behind the girth to prevent his hindquarters from swinging out of the circle.

Your outside hand should hold the rein so it touches your horse’s neck to stop him falling to the outside. Your inside rein asks your horse to bend his head slightly inward. Concentrate on keeping a steady pace in a circle, no matter what gait you’re doing. Don’t slow down and then speed up constantly. Once your horse masters 20-meter circles, you can try 10-meter circles.  It’s harder to keep your horse balanced on a smaller circle, but with lots of practice you’ll be able to do it.

Halting

Your horse should halt right away when you ask him. Practice halting every time you school. It’s easiest to ask for the halt when you are moving on a straight line. Sit down deep in the saddle, keep your back straight, keep your legs on your horse’s sides and then squeeze on the reins. Bring your elbows back so they are next to your sides.

If your horse moves after halting, ask him to halt again quickly. If he always moves on, ask him to halt, and then give another squeeze on the reins immediately to stop him from stepping forward. Give him a pat when he stands still.

Changing the rein across the diagonal

Your horse should halt right away when you ask him. Practice halting every time you school. It’s easiest to ask for the halt when you are moving on a straight line. Sit down deep in the saddle, keep your back straight, keep your legs on your horse’s sides and then squeeze on the reins. Bring your elbows back so they are next to your sides. 

Riding down the center line

It’s very important to be able to ride in a straight line. Most of the time we think we’re going straight, but our horse is actually wiggle-waggling from side to side. Practice riding down the center line of your arena. Look straight ahead and keep your horse straight by keeping even pressure on his sides with both of your legs. Try to keep your hands level and close together over his neck.

Bareback Riding 101

0

Bareback Riding
Bareback riding can be lots of fun, and it can improve your riding skills, too. When you ride without a saddle, you have to rely on your seat, your legs and your balance more than usual. You learn to move with your pony. It’s easier to follow your pony’s movement when you don’t have a saddle separating you.

Riding bareback will also strengthen your leg muscles, and help you to become a stronger rider.


Here are some rules to follow when riding bareback:

  • Work in a small arena in case your pony is naughty and decides to run off with you!
  • Wear a helmet (of course!)
  • Ride a quiet pony

Comfy Seat

If your pony has a wide back, he’ll probably be quite comfy to ride. If he’s got a big backbone, riding him may be uncomfortable, and you might need to use a bareback pad. Bareback pads are pretty inexpensive. They are like saddle pads with a girth.

Mounting

Unless you are a vaulting champ, you may need a leg up to mount your pony when riding bareback. Or use a mounting block. Try to mount quickly and lightly.

Faster Speeds

Make sure that you’re totally in control of your pony before you ask him to trot or canter. Bareback riding might seem easy when you’re walking, but trotting is a lot bumpier and cantering seems a lot speedier without a saddle. Before you ask for the trot, press your seat into your pony’s back and try to relax. Let your legs hang down long. Your thighs and calves should touch your pony’s sides. Don’t grip with your knees when your pony speeds up.

Bareback Canter


If you bump around too much, lean forward a bit and grab hold of some mane.

When you get used to the faster gait, sit up and tall and try to absorb your pony’s movement with your body. Try not to yank on your pony’s mouth with the reins. Keep your hands as still as you can.

Once you’ve mastered sitting trot, try posting. Stay on the correct diagonal as you trot around the ring. The same goes for cantering. Make sure you’re on the correct lead.

Ask for the canter just like you would if you were riding in a saddle. Keep your inside leg near the imaginary girth, and nudge your pony with your outside leg behind the imaginary girth.

Stick to a slow, collected canter so there’s no chance of  losing your balance.

Exercises

When you first get on your pony bareback, walk slowly around the ring a few times. You may not feel very secure at first—riding bareback can seem kind of wobbly—so do some exercises to help you get more balanced on his back. Do some arm swings, toe touches and leg lifts. If someone will hold your pony, you can try the around the world exercise on him.

Jumping Bareback

Jumping bareback can be hard on your pony, especially if you get left behind and bounce around on his back. Use a neckstrap or grab hold of some mane to make sure you jump with your pony, not after him! Stick to small fences, and only jump if you are in total control of your pony.

Bareback Jumping

I’m Falling Off!

If you find yourself slipping off your pony at some point and can’t shift yourself up on to his back again, you might have to do an emergency dismount so you don’t eat dirt. Press your hands on his neck and push up, swing your leg over and leap away from your pony. Land facing forwards, with both feet on the ground and bend at the knees. If your pony stops or slows down, grab hold of the reins. If he runs off let go. Better to break the reins than your arm!

Thanks to Jock Gurnee and the gang at Bittergreen Farm in Mt. Sterling, KY for their help with this feature!


This article originally appeared in Young Rider magazine. Click here to subscribe!

Play the Sideways Game

0


Want to know a secret? Well, let me tell you something that very few people know. The better your horse can move sideways, the better he does everything else! Did you know that?  Think you’re ready to start? Hold it! What is the most important of all the PNH Games? It’s the Friendly Game, and you play it with your horse before doing anything else. And before you play the Sideways Game, please make sure that you and your horse can successfully play the Friendly, Porcupine, Driving, Yo-Yo and Circling Games.

Once these are in place, the Sideways Game comes easily because all the ingredients are covered. Now before we start, I want to mention that a few of the horses in these photographs were rescued recently by the Thompson family, so even though their ribs show, the horses now have a really good home and will soon blossom!

NOT FOR SURVIVAL!

A horse in the wild often runs away from something scary or something that he thinks might eat him for lunch. He always runs straight, right? He certainly never goes sideways! So sideways is not a movement that is commonly used by horses. Because he has to cross his legs, sideways is not a good escape mechanism for a horse. But sideways motion does cause a horse to think — so if your horse gets excited, play the Sideways Game with him until he starts thinking again!

WHY GO SIDEWAYS?

It’s not “sidepass,” it’s “sideways.” Each of the PNH Seven Games has a purpose.
The Sideways Game teaches the horse suspension (lift) to his movement, it increases his athletic ability, teaches him to yield sideways, teaches him to think, and prepares him for more advanced movements like turns, spins and lead changes.

BE PREPARED

You’ll need a halter, 12’ lead line, and a Carrot Stick with a Savvy String. Because your horse will probably want to go forward (instead of sideways) when you first begin, practice this along a solid fence so you have a boundary.

ZONE WHAT?

The two “zones” that we mainly “talk to” for the Sideways Game are Zone 1 and Zone 4 (see chart). Zone 1 is the “space” in front of the horse’s nose; Zone 4 is the horse’s rump — the area between his flank and the top of his tail.

FIRST: THE DRIVING GAME

Hold your 12’ lead line loosely about 3’ from the snap, and using your Carrot Stick, move your horse’s Zone 1 (no touching!) away from you in a full circle (like in the Driving Game). Stop and rub your horse (Friendly Game). Now drive Zone 4 in a full circle by tapping the ground with the Carrot Stick, then rub him.
If he doesn’t move, you might need to tap him.

SIDEWAYS WE GO

Walk up to a fence, then start walking down the fence with the rope in your hand that’s closest to the fence. The Carrot Stick and Savvy String will be in your other hand. As you walk, let the rope slide all the way out to the end.Keep walking and start flapping the Carrot Stick and String behind you so it causes your horse to move out and around you. As your horse comes toward the fence, put your arms in a “L” shape.

If the rope is in your left hand, then extend the left hand straight forward and the right arm out to the side. By having your hand with the rope stretched out forward, this will stop you from pulling on your horse. If he gets to the end of the rope just hold steady as you walk; don’t just pull on the rope or he’ll face you.

Keep walking at a steady pace and rhythmically “flap” the Stick and String out to your side.Ask for just a few steps sideways, then stop and relax so he’ll know he’s doingthe right thing. At first he might run behind you again, but if he does, don’t worry! Keep your feet still and—using your 12’ line and Stick and String—send him around you again just like you would in the Circling Game, but only in a half circle.

It’s important to keep a steady walking pace—not too fast and not too slow.
If you horse stops, don’t get closer to him. Use your Stick and String towards Zone 1 to get him to start moving again. The safest place for you to be is 12 feet away from your horse, especially while he’s learning.

AS ALWAYS . . .

Play the Sideways Game from both sides—a good test to see how coordinated you are!

HOW DO I STOP?

Relax, slow yourself to a halt and allow your horse to do the same. Don’t pull your horse to stop him.

BRITNEY TUNES?
It’s fun to think about some great song while playing the Sideways Game to keep your rhythm consistent. What tune would you choose?

Even though these games are a great way for you to teach and play with your horse, make sure there is always a responsible adult present.

NEXT ISSUE

Learn how to play the  Squeeze Game (great for teaching a horse to load into a trailer). For more info on PNH, check out
www.parelli.com.


Play the Circling Game

0

In part five of our amazing series, Linda Parelli of Parelli Natural Horsemanship teaches you “The Circling Game.” You and your fave horse will be spinning and having fun!

The Circling Game is really fun because your horse has to be responsible! In playing this game, your horse learns to stay in one gait and go in one direction—without clucking at him or snapping a lunge whip behind him. In fact, you don’t move at all even though your horse is going around you! It’s important to know that this isn’t sending your horse round and round in circles (like lungeing) which can become boring for you and the horse! And it’s not about exercising, either.

So why do we play this game? Have you ever wished your horse would maintain a gait without constantly squeezing your legs to keep him going? This will help!
The Circling Game also helps keep your horse mentally connected to you instead of  ignoring you. It also teaches your horse to move on a circle with confidence and to disengage his hindquarters and stop from a walk or trot. 

Let’s start! Oh, wait. What’s first? Yep! The Friendly Game (it’s always first before any of the Games). And make sure you’ve become really good at the Porcupine Game, the Driving Game and the Yo-Yo Game. Now we can start!

A THREE-ACT PLAY

The Circling Game has three parts: the Send, the Allow, and the Bring Back. You will learn how to “send” your horse out on a circle, “allow” him to do his task, and then “bring back”your horse to you.

THE SEND

Start with a small circle (when you get really good, you can use 6 feet of the rope, then eventually all 12 feet). Hold your 12-foot lead rope about three feet away from your horse in your right hand. Use the Porcupine Game to move your horse backward with your hand on his nose until he’s just out of reach so he’s ready to “send.” Show your horse where you want him to go. To go to the right, hold your lead line up high to the right and point with your index finger!

 If your horse is stuck and doesn’t move, smile and lift your Carrot Stick with your left hand, swing it, and gently touch your horse on his neck (don’t poke!) while your right hand is still pointing with the lead rope. If he starts and then stops, tap the top of his rump with the Carrot Stick. Here’s another tip: Turn your bellybutton in the direction you want your horse to go. Remember to open your hand to allow your horse to start his circle. If you keep your hand closed and tight, he’ll turn and face you rather than going out on the circle.

THE ALLOW

Borrow a hula hoop and plop it on the ground (or draw a circle in the
dirt) and stay within that hoop or circle. Once your horse walks out on the circle, rest the Carrot Stick on the top of his back in a friendly way. Your hand should be open with the handle of the Carrot Stick resting on your palm. This will keep the stick from bouncing.

If he stops, tap him lightly a few times on the top of his rump. As soon as he goes forward again, rest the Carrot Stick on the top of his back like before. When he starts going in a full circle by himself, place the Carrot Stick on the ground with the handle resting against your belly. Smile, relax, and pass the rope around your back to your other hand. If your horse is sneaky and stops behind you, turn toward him, smile, and bring him in to you.

Then send him out again! Pretty soon he’ll realize it’s easier to do the full circles rather than stopping and restarting all the time. Do at least two circles but no more than four (just walk at first).Don’t let your horse get bored with this! Thisgame is a challenge, not just repetition.

THE BRING BACK

In bringing your horse back to you, ask him to disengage his hindquarters and turn and face you (just like you taught him in the Driving Game). Lean sideways towards your horse’s rump and really focus your eyes (scrunch your eyebrows and narrow your eyelids) on his hindquarters. Tap the side of the horse’s rump.He will yield his hindquarters (by turning them away from you) and face you!

This way he’ll always focus on you for whatever directions he needs. It’s pretty neat to be able to do this with just a “look” after you’ve practiced for a while.
Remember to play this game in both directions.

AND THE PONIES GO ROUND AND ROUND!

You can see by the photos taken at the La Cense Ranch in Dillon, Montana that the Circling Game can be really fun! But remember that these students have practiced and have gone through several levels of Parelli Natural Horsemanship.  When you are really good at these games, you and a friend could stand in a tire and play the Circling Game. Or several of you could create a merry-go-round of ponies. What else can you think of?

Play the Driving Game

0

Remember how you used steady pressure in the Porcupine Game to get your horse to move? Well, in the Driving Game, you don’t touch him at all! The Driving Game teaches your horse to yield from your signal instead of from physical pressure. With the Driving Game, you can give your horse directions from a distance! Begin by doing the Friendly Game (March/April YR) all over your horse. Do this before every Game.

BACKWARD

To drive your horse backward, take the Carrot Stick (remember, this is not a whip and is only an extension of your arm) in one hand. The other hand should hold the 12’ lead rope. (It’s okay if the rope drags on the ground; that’s better than having it coiled in your hand.) It’s important to have a determined look on your face—really concentrate!

From about 10 feet away from your horse’s head, start tapping the Carrot Stick on the ground as though you were blind, and slowly walk toward your horse.

Tap with rhythm, softly at first, like you were playing a drum. Only increase the strength of your tapping if your horse doesn’t move. Walk straight toward him (don’t touch him!), tapping in rhythm. Don’t stop! Your horse has to move!

This is just like how one horse would drive another horse out of the way. He wouldn’t stop until the other horse moved.

Another way to move your horse backward is to place the lead rope over both elbows and take the Carrot Stick in both hands (spread them apart).

Stand about 10 feet away from your horse’s head. Put the Carrot Stick up in front of you and push the air toward your horse’s nose.

Do it slowly at first, then increase the rhythm if your horse doesn’t move backward. There’s no need to rush! (If your horse is “on top of you,” move him away like in the Porcupine Game, then start the Driving Game.) Once your horse gets used to these lessons, try using just your fingers in the air to move him. Spread your fingers apart and flick them at your horse like you are flicking drops of water at him. See if you can get him to move backward with this motion.

Always remember to stop your motion, whether it’s from your hands or the Carrot Stick, when your horse moves (even one step). Then smile at him, rub him, and begin again! None of this will teach a horse to be head shy, because after he’s finished moving backward, ask him to lower his head and play the Friendly Game by rubbing his face.

FRONT END

To move your horse’s front end, stand at the side of your horse between his shoulder and head. With the lead rope in the hand closest to the horse’s shoulder, hold the Carrot Stick in front of you between your two hands and level with your horse’s cheek bone (or as high as you can comfortably reach). Walk slowly but determinedly toward your horse while pushing the air. Start slowly, with rhythm, and only increase the rhythm if your horse doesn’t move.

As soon as he yields (this may be only one step), relax, drop the Carrot Stick downward, smile, and rub your horse with the Carrot Stick. This teaches your horse to read and respond to your body language, not just because there is a stick. By rubbing him with the Carrot Stick, you’re making sure he’s not afraid of it.

Try moving his front end by using just your hands in the same position between the horse’s head and shoulders. Remember, push just the air, and stop and rub him when he responds.

HINDQUARTERS

With the lead rope in thehand closest to the horse’s head, hold the Carrot Stick in the other hand by the handle. Put a determined look on your face, and approach your horse’s hip by moving out in a wide arc (stay wide — you don’t need to get close to his body). Tap the ground with the Carrot Stick (remember: rhythm, rhythm, rhythm).

As he yields his hindquarters, his head should face toward you. Stop, smile and rub his head with your hand. If he doesn’t bring his head to you, but turns it away and tries to leave, shorten your lead rope so his head is tipped toward you. Keep approaching his hip and tapping. The moment he looks at you and turns his hip away, stop, smile and rub him! It’s just that simple! Be sure that each time you play any of the Games there is a responsible adult present.

Next time: The Yo-Yo Game.


This article originally appeared in the Young Rider magazine. Click here to subscribe!

A-to-Z of Horse Feed

0

Vitamin A

Your horse must have vitamin A in his diet. Vitamin A is found in fresh plants. If your horse eats lots of green and leafy grass and hay, he should get enough vitamin A. Ponies that lack vitamin A have dull coats, weepy eyes and brittle hooves. They may get sick a lot. If your horse is stabled or in a pen, make sure he eats lots of succulents like apples and carrots because they contain vitamin A.

Alfalfa

A rich, nutritious hay which gives a horse lots of energy.

Biotin

Biotin is one of the very important B vitamins. It’s found in grass and vegetables and in grains which are high in protein. It’s necessary for good hoof formation and healthy horn growth. If your horse’s hooves are brittle, add a biotin supplement to his feed.

Calcium

Calcium is essential for strong, healthy bones. Most complete feeds (sweet feeds or pellets) contain the correct amount of calcium for your horse.

Bran

In the past, people fed their ponies bran mashes (bran and warm water) as a pick-me-up after a hard day’s work. It also acts as a laxative. But now we know that bran is high in phosphorous which can affect the calcium levels in your pony’s body. If you feed your pony too much bran his diet becomes unbalanced. If your pony isn’t constipated, there’s no reason to feed him bran.

Carbohydrates

Carbohydrates are the main source of energy for a horse. They are found in vegetable tissue and come in three forms: sugar, starch and cellulose (fiber.) They give a horse energy. Sugar comes from green grass and many grains. Cellulose occurs in grass, hay and straw. Starch is found in carrots and many grains.

Complete Feeds

Complete feeds are a mix of grains such as barley, oats and corn. They contain all of the   vitamins and minerals a horse needs. They are easy to use because manufacturers tell you how much to feed your horse. Combined with hay or grass, complete feeds should give your horse a well-rounded diet.

Electrolytes

Electrolytes are supplements generally given to competition horses. They combine minerals— including chloride, sodium and potassium—that a horse needs to stay healthy. If your horse has access to loose salt or a salt block and a nutritious diet, it’s unlikely he will need electrolytes, but if he does lots of work—for instance, if he’s an eventer—he may need these minerals replenished. Horses that live in hot weather and sweat a lot may also need them.

Fat

Fat is an energy source, and it keeps your horse’s body tissues healthy. Most ready-mixed feeds will contain the correct amount of fat to keep your horse feeling good.

Grass

A horse’s natural diet. Grass has almost all the vitamins and nutrients he needs to stay healthy. In the wild, horses can live happily on an unlimited supply of grass and water.

Hay

Hay is grass that has been cut and dried, usually in the summer when it’s most nutritious. It’s usually stored in bales. If a horse doesn’t get much work, he may thrive on a diet of hay only—if the hay is nutritious.

Hay Cubes

Hay, usually alfalfa, that has been ground up, dried and compressed into cubes or pellets. They can be fed to a horse if you can’t get hay. Sometimes cubes are the only food given to a horse.

Pellets

Pellets can be fed as a complete feed, along with hay, to your horse. They are a mixture of crushed grains, vitamins and minerals. Throw a few carrots and apples in with them to spice up your horse’s mealtimes.

Salt

Salt is an essential mineral; a horse loses it when he sweats during exercise or in hot weather. Some feeds have salt in them, but if your horse does a lot of work in warm weather, he may need more. A horse normally requires 1-2 ounces of salt a day. A stressed-out horse may need even more! Put a salt block in your horse’s field or stable so he can lick it whenever he wants or add an ounce or two of loose salt to his daily diet.

Sugar Beet

A by-product of sugar. It comes in pellets or shreds which can be soaked for a few hours in water before feeding to make it more palatable. It’s good roughage and often given to skinny horses to help them gain weight.

Succulents

Succulents are juicy foods like apples and carrots. They are tasty and add variety and moisture to your pony’s diet.

Sweet Feed

A complete feed containing different types of grain, moistened with molasses to make it extra tasty.

Timothy

A type of hay that is very leafy and coarse. It is low in energy and moderately nutritious.

Water

Unlimited access to fresh, clean water in his stall and field is absolutely essential to your horse’s good health. If he doesn’t get enough, he could become dehydrated, lose his appetite or even colic.

Speed Event Schooling Strategies

7

Practice makes perfect, right? Yes, but if your speed event practice consists of running a pattern over and over again, all that hard work could backfire. Horses that run a barrel or pole pattern for practice begin to think they know the pattern better than you do. What’s worse, the excitement and stress of running the pattern repeatedly makes your horse think one thing when he sees a barrel or pole: run. The result is a horse that bolts through his turns without listening to the rider; barrels and poles are tipped over, turns are blown and things quickly spiral out of control. In addition, repetition can also make a horse sour on the patterns or bored. But the right kind of practice does make perfect. After years of coaching riders, attending clinics and training horses, Linda Stenerson, a longtime national barrel racing competitor herself, knows the tried and true schooling strategies to help a horse stay focused and challenged. Here’s her advice to make the most of your practice.

Barrel Racing
Los Alamos Rodeo by Larry Lamsa on flickr/CC BY 2.0


Think Turn, Not Run

A horse that runs through his turns is the number one problem Linda sees in competition—a problem exacerbated by hurrying straight through the pattern in practice. “I feel practice is a time to correct problems like running through a turn,” Linda says. “Slow down practice and allow your horse to think about what you are trying to teach him.”


To make a tight, fast and accurate turn, your horse needs to rate his speed before a barrel or pole. Linda suggests imagining your horse is an accordion: On the straightaways, he’s stretched out for full speed, but around the turns he must “accordion up”—pull his body together and bring his hind legs underneath himself so that he takes the shortest way around the obstacle with maximum power. “My motto for years has been ‘rate, sit down, come around, drive,’ ” Linda says. “Rate comes first—and drive, referring to run, comes after the turn and not in it.”


To improve your horse’s competition runs, Linda recommends the following exercises, which will bring your horse’s attention back to you and improve his rating, turning and overall performance.

#1 Practice Stopping

“Regardless of the speed you approach the barrel [or first and last pole], by reinforcing the rate, you teach your horse when to prepare for the turn by slowing down,” Linda says. One exercise she uses for teaching a horse when to prepare for the turn involves stopping him at the point where you want him to rate.


Approach the barrels at the walk, trot, lope or gallop, then stop your horse where he should rate. (Note: whether you compete using the straight pole pattern or Quarter Horse poles, Linda recommends always practicing with the Quarter Horse poles pattern). Pair the spot where you want your horse to rate and the “whoa” command, and ask your horse to stand until he relaxes a bit, then complete your turn at the walk or trot. After completing the turn, pick up your original speed and continue to your next turn, where you’ll stop once again at the point where you want your horse to rate (riders practicing poles will rate at the first and last pole, where a complete turn is required; barrel riders will rate and stop before each barrel).

#2 Trot the Turn

Another strategy Linda recommends to help your horse rate and think about his turns involves trotting around the barrels (or first and last poles). Lope or gallop the pattern, but break into a trot where your horse should rate. Trot through the turn, picking up speed only after the turn is completed.


Next, try completing the entire pattern at an extended trot, but bring your horse into a collected trot where you’d want him to rate. Maintain the collected trot through the turn (think of the accordion image), then return to the extended trot between obstacles. As Linda points out, this exercise will help “remind your horse to be in control for the turns.” Trotting the pattern is also an excellent way to condition your horse.

#3 Pleasure Barrels

To teach your horse to listen to you when he sees a barrel, practice riding an alternative barrel pattern that Linda calls “pleasure barrels.” “The three barrel pattern is so boring to your horse that after a while he begins to try his own ideas on how to turn barrels,” Linda says. “By changing his practice time, it allows him to relax and listen to the things you’re teaching him about approach and rate.”


For this exercise, pole benders can use poles set in a cloverleaf barrel pattern and complete the exercise as follows to improve their turns. With the pleasure barrel pattern, you’ll ride a triangle around the outside of the cloverleaf barrel pattern, circling each barrel four times. Start loping on your right lead, headed to the right. Circle the top (third) barrel, making a medium-size circle around it—staying about 20 feet from the barrel and keeping it in the center of your circle. Repeat the medium-size circle a second time, then complete two small circles (about the size you’d use running the pattern). Lope a straight line to the outside of the next (first/right) barrel and repeat the two medium-size and two small-size circles to the right. Ride to the second barrel and again make four right turns, then ride on to the top (third) barrel. Complete your turns at the third barrel. If you want to mix things up once you’ve completed your second round of turns at the third barrel, continue to the first barrel, make your four turns, then run the proper cloverleaf pattern, moving from the first barrel to the second and completing the pattern as you normally would. Lope the pleasure barrel pattern to the left as well.

#4 Telescope

To challenge your horse, Linda suggests riding a telescope pattern. “Telescope barrels are a good way to change your practice. To me it’s all about giving your horse challenges during practice time while still teaching him the proper placement for his feet in a turn and always rating to prepare for the turn,” Linda says. “Telescope barrels are also a challenge for the rider, who must correctly cue the horse for each turn.”


For the telescope pattern, you’ll need 8 – 10 cones, poles or barrels. Set them parallel to each other. The first two will be 45 feet apart and the final two 25 feet apart—thus forming the shape of a telescope. First, try trotting the pattern, making a right turn around the first obstacle and a left turn around the obstacle directly across from it, moving your way through the telescope from the wide end to the short end. Next, try the pattern at the lope. Just as in barrels or poles, your horse will have to switch leads with each turn. Once you’ve mastered the exercise, mix it up. For example, turn right around the first obstacle then left around the second one on the opposite side. You can skip around to keep your horse on his toes, listening to your cue to turn rather than his own memory of the pattern.

…and Don’t Forget

When you practice, Linda warns never to pass near a barrel if you are not planning on turning it. “You’re always teaching your horse something,” Linda says. “Just make sure it’s something you want to teach him.” By running close by a barrel and not turning it, you’re teaching the horse that’s sometimes OK to do. The same goes for bad turns: If your horse makes any of his turns too wide or too tight, make the turn again, and don’t move on until it’s right. If your horse drops his shoulder into the barrel at a particular point in your turn, circle your horse there beside the barrel (in the same direction you’re turning the barrel), then complete the turn.


To emphasize completing turns and staying focused when practicing at home, Linda asks her horses to complete the final turn around the third barrel and then return to the rail rather than running back to the starting point (see dotted line on cloverleaf diagram). However, she recommends starting and finishing each workout by completing the pattern in the correct format so that the final memory your horse goes home with is the correct pattern.


There are countless ways to practice your horse for speed events. The important thing is to avoid burnout or tension caused by constantly running the same patterns. Keep your horse’s mind and body sharp, and his runs will be, too.

Further Reading
Build Speed for Better Barrel Racing
Seven Habits of Highly Effective Barrel Racing

Micaela Myers is a horse owner and freelance writer based in California.


This article originally appeared in the April 2004 issue of Horse
Illustrated.  Click here to subscribe.

Beet Pulp for Horses

5

Generally considered a safe high-fiber feed, beet pulp has been fed to horses for years. But is it right for your horse? Forget pulp fiction. Talk to your vet and get the facts here so you can make an informed decision on whether to add beet pulp to the menu.

Beet Pulp Basics

Pelleted, pressed or shredded, beet pulp is a dietary mainstay for many horses these days—it’s available “plain,” or it’s often found as a primary fiber ingredient in several complete feeds and feed supplements. The fiber in beet pulp is highly digestible, which makes it a good non-starch energy source. It’s also highly palatable—even if you have a finicky eater. And it’s not just for horses. It’s found in other livestock feeds and pet foods.

Soaked Beet Pulp

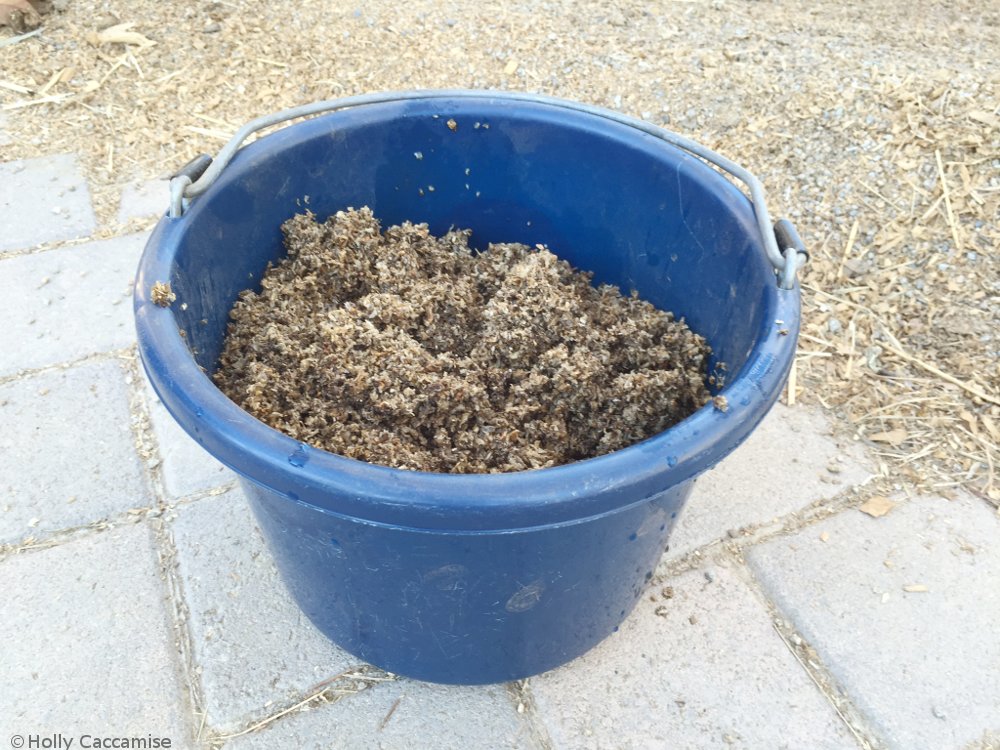
As its name suggests, beet pulp comes from sugar beets (the same root crop that provides “sweetness” to lots of our favorite edibles such as candy, syrups and cereal). Pulp is the high-fiber material that remains after sugars are extracted from the beets—from there the “mush” is squeezed, dried and formed into pellets or shreds. Bagged and shipped, it’s available nationwide at a feed store near you. As part of a complete feed, beet pulp can be a little pricey—but served plain alongside hay or pasture, it’s a cheap side dish.

Who Gets Beet Pulp?

A horse’s age, breed and performance level all influence his nutritional needs. Beet pulp is generally considered safe for most horses, but it isn’t necessarily a substitute for good quality forage unless your horse has dietary restrictions.

“I believe that feeding horses long-stem hay, when they can handle it, is a more natural feed,” says Tina Kemper, DVM, Diplomate ACVIM, of San Luis Rey Equine Hospital in Bonsall, Calif.

But some of the nutritional benefits of beet pulp are comparable to many types of forage. For example, the fiber content of beet pulp is in line with most hays, and the protein content is similar to good quality grass hay (7 to 8 percent). Like alfalfa hay, beet pulp is relatively high in calcium and very low in phosphorus (about 6:1)—an important consideration when meal planning.

“Beet pulp has a higher calcium content than grass hay, so I wouldn’t recommend it for a horse that has a tendency to make kidney or bladder stones, accumulates calcium carbonate sludge in the bladder or has kidney disease,” advises Dr. Kemper.

For horses that need to pack on a few pounds many owners turn to beet pulp, but it shouldn’t completely replace good quality hay. Even when good forage is in short demand, Dr. Frederick Harper, extension horse specialist at the University of Tennessee’s Animal Science Department, reports in his Horse Information Series that “beet pulp can replace about 25 percent of the hay fed on a pound-per-pound basis.”

Dr. Kemper says, “Beet pulp can be used for weight gain, but it wouldn’t necessarily be my first choice. It is quite a bit lower in fat than many of the grains, such as oats, and also a little lower in digestible energy. I believe that many of the complete feeds are a wiser choice, as the commercial feed companies have put quite a bit of effort into making sure that these feeds are nutritionally balanced.”

Dr. Kemper concedes that she occasionally recommends beet pulp for horses that need to fatten up but get too “hot” on grain products.

Valid debates continue for and against feeding beet pulp as part of a management program for horses that have recurrent bouts of tying up, clinically referred to as “recurrent exertional rhabdomyolysis” or RER. More recent studies have shown that other diseases associated with RER, such as polysaccharide storage myopathy, can also be managed by a diet that includes beet pulp.

Debates aside, a majority of veterinarians agree that horses suffering from these diseases should be on diets somewhat higher in fat, but low in digestible energy and starch. Even though beet pulp is lower in digestible energy than most grains, it’s higher than most hays, including alfalfa. It’s definitely low-starch fare, but high in fat it isn’t. “I would not recommend the use of beet pulp for horses that tie up,” warns Dr. Kemper. Instead, she recommends grass hays, along with commercial feeds specially formulated for these horses.

Still, some studies have pointed out that diets with beet pulp benefit horses that chronically tie up, because the low sugar/low starch makeup helps keep blood glucose responses low. In a study published in January 2003 that was conducted by Anne Rodiek, Department of Animal Sciences and Agricultural Education, California State University, Fresno, beet pulp elicited the lowest blood glucose response (blood sugar produced after eating) over all other feeds that were tested. Other diseases, such as laminitis, mandate a low starch/low sugar diet: Grass hays, along with beet pulp, are often on the grocery list for these horses too.

Older horses with dental problems can benefit from soaked beet pulp, says Dr. Kemper, although she advises that some of the senior feeds on the market are a more balanced source of nutrition. For horses that inhale their senior feed, Dr. Kemper says that the addition of some soaked beet pulp can help slow down an enthusiastic eater.

But as foals go, beet pulp is not optimal because of the calcium to phosphorus ratio. “Beet pulp use in foals is a little tricky. I generally don’t recommend it as it is easy to create an imbalance when formulating diets for fast growing foals,” Dr. Kemper says.

Respiratory problems in horses, such as chronic obstructive pulmonary disease (COPD), are complicated by dusty feeds, so beet pulp is often added alongside pre-soaked hay and/or pelleted feed. When soaked, beet pulp is a dust-free alternative.

Urban Legend

Many supplemental and complete feeds are fed dry—and include beet pulp as a main ingredient. The hazards of feeding unsoaked beet pulp are exaggerated, but some horse owners don’t want to take any chances.

“I always recommend soaking it to try and minimize the risk of choke and gastric impactions, although I personally have never had the misfortune of having to treat one of these conditions caused by beet pulp,” Dr. Kemper says. “But all it takes is one greedy eater—the way beet pulp pellets tend to expand could make for a particularly difficult choke to resolve. It certainly doesn’t hurt to soak it, so why not take the opportunity to get more water into the horse?”

Make Changes For the Better

Non-traditional feeds, like beet pulp, can provide benefits for some horses when safe feeding management is practiced. As recommended by your veterinarian, make any feed change (amount, type and schedule) slowly. And look for warning signs that could be telling you what you’re serving up for dinner doesn’t agree with your horse.

Further Reading
Meeting Your Horse’s Nutritional Needs
Seven Feeding Myths Shattered


This article originally appeared in the April 2004 issue of Horse Illustrated. Click here to subscribe.

Gridwork

0

If you love popping over fences, you are guaranteed to like gymnastics—sometimes called gridwork. Gymnastics are jumping exercises that benefit both you and your horse. You set up a line of carefully spaced fences and poles (a grid) and jump them with your horse. If a grid is set up properly, with the correct spacing between jumps, your horse should jump it easily.

Here are some of the benefits of jumping grids:

Grids can build up your horse’s confidence. If he’s a spooky jumper or refuses a lot, grids can improve his jumping.

Grids are good exercise for your horse. They make him more flexible.

Grids can build your confidence, too. Because most horses find them easy, you can concentrate on your riding position.

Setting Up A Grid

The most important thing you’ll need when jumping a grid is…a helper! A person on the ground watches you jump, and adjusts the distances between the fences if your horse is having trouble jumping the grid.

Set up a simple grid with four fences. Simple cross-pole fences are fine. You’ll need an extra placing pole to put in front of the first fence, too. The fences should be one stride apart. This means that your horse lands after the fence, takes one stride, then takes off again over the next fence.

It’s important to set distances that are perfect for your horse. If your horse takes two strides between the fences, stumbles or jumps too big, your helper needs to move the jumps closer together or farther apart. Don’t make your horse jump bad distances, because you’ll ruin his confidence. And remember, a pony has shorter strides than a horse, so if you are riding with a friend on a pony, you won’t be able to jump the same grid.

Distances
All of these distances are approximate. You’ll probably have to adjust these to suit your horse or pony.

Horses: Put a placing pole on the ground 9 feet in front of the first fence, then each fence should be approximately 17-18 feet apart.

Small horses, large ponies: Put a placing pole 81/2 feet in front of the first fence, then each fence should be about 16-17 feet apart.

Small ponies: Put a placing pole 7-8 feet in front of the first fence, then each fence should be about 14-15 feet apart.

1. The first time you do a grid, it should be made of simple trotting poles. The poles should be on the ground between the jump standards. After you’ve warmed up your pony on the flat, start your gridwork. Make sure your pony is trotting at a nice, active pace, and then head for the grid. Get in jumping position before you get to the placing pole. Then, keep your legs on your horse, soften your hold on the reins and aim toward the middle of the poles.

If your horse trips or knocks a pole, he may be going too slowly. Or the poles may not be quite the right distance for him. If he trips up the second time you do the grid, your helper must move the poles to make it easier for him.

Don’t let your horse canter. Make him trot all the way through the grid.

2. Once you’ve been through the trotting pole grid several times, ask your helper to put up a small cross-pole at the end. It’s likely that your horse will want to canter over the tiny jump at the end, and you can let him. Sit quietly and let him figure out the grid for himself. It’s OK to trot in and canter out. Just keep your legs on your horse so he keeps moving forward.

3. Now the grid can get a bit more complicated. Get your helper to put up the first cross-pole, so your horse jumps in, trots over two poles and then jumps out. If the distances are correct, he should have no problem getting one stride between each fence. If he jumps the grid nicely once or twice, you can add other cross-poles, until he is finally jumping a whole row of cross-poles.

4. Finish up by making the last fence a small vertical. If your horse has been jumping smoothly through the previous grids, he should jump the vertical nicely, too. After you’ve popped over the vertical once or twice, make the second to last fence a vertical, too.

You can play around with grids, and change them as much as you want. But remember, grids are tiring for your horse, and you shouldn’t do them more than once a week. And always be flexible — if a distance isn’t working out, and your horse is stumbling or jumping awkwardly, move the fence right away so he’ll be able to jump it nicely.

Thanks to Marty and Jan Whitehouse and Critter Control of Red Gate Farm, Lexington, KY for their help with this feature.

0FansLike
0SubscribersSubscribe
We use cookies to help personalize content, tailor and measure ads, and provide a safer experience. By navigating the site, you agree to the use of cookies to collect information. Read our Cookie Policy.
OK