Enter our 12 Days of Christmas Giveaways here!
0 ITEMS
  • My Account
  • Holiday Gift Guide
  • Podcast
  • Webinar
Subscribe Combo
Enable cache13
Home Blog Page 1056

Young Rider Trotting A Horse

0

Bounce, bounce, bounce! Sometimes trotting can seem very bumpy and fast — especially if the horse has long strides and is extremely springy. But you can’t refuse to ride a horse just because he’s got a bumpy trot, can you? A good rider should be able to ride any type of horse, no matter how high he bounces you out of the saddle. Don’t worry — if you ride a bumpy horse regularly, you’ll soon get used to the up-and-down motion, and ride him like you do any other horse.

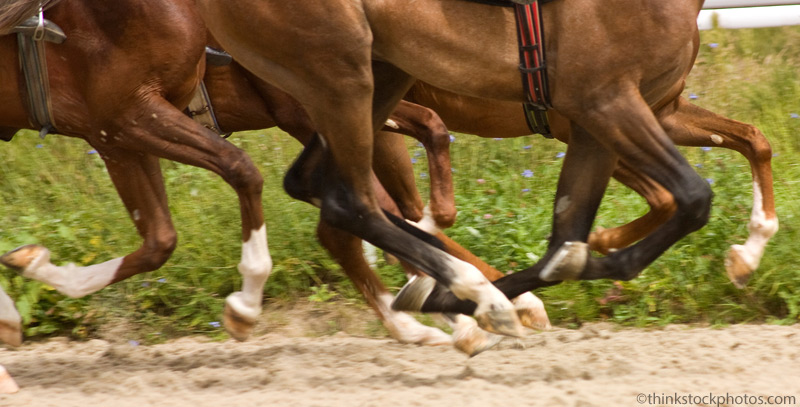
Trotting is a two-beat gait. This means that when you listen to the footfalls, it sounds like “one-two, one-two.” When a horse trots, he springs from one diagonal pair of legs to the other. The front right leg and the rear left leg move forward together and the front left leg and the rear right leg move forward together. In between this movement is a second when the horse is completely off the ground. This is why the trot feels bumpy. If this sounds confusing, watch a horse as he trots around the ring. It will soon become clear to you.

Asking for the Trot

Your position at the trot should be the same as at the walk.

  • Look in the direction you are going.
  • Keep your elbows close to your body.
  • Keep your hands even and near to the withers.
  • Sit deep in the saddle and keep your back straight
  • Stretch your legs down and keep them close to your horse’s sides.
  • Shorten your reins slightly.
  • Squeeze with your legs several times until your horse trots. Posting to the Trot
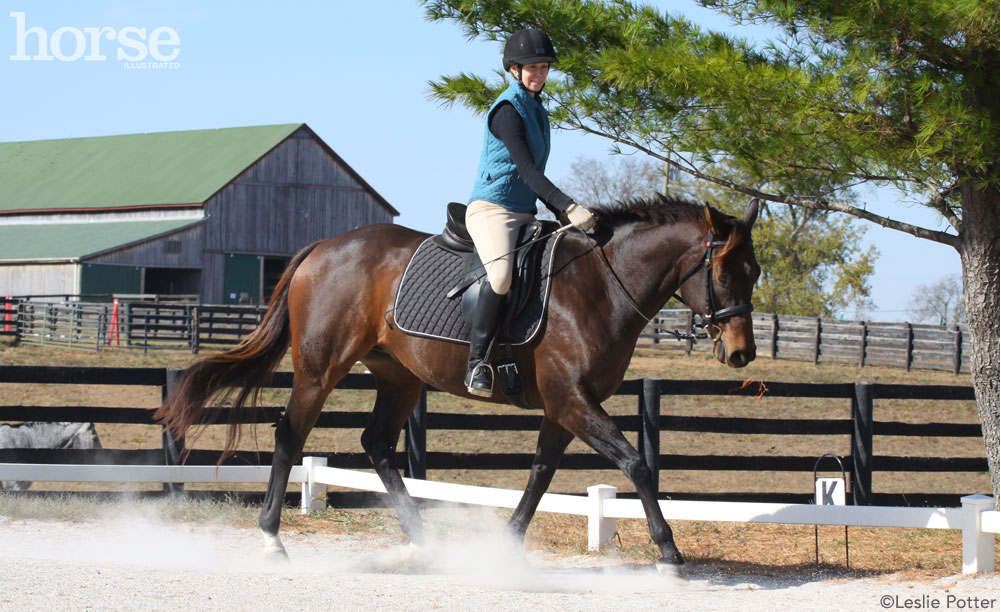
    Posting (rising) makes trotting more comfortable and less tiring for both you and your horse. When you post, the up-and-down motion of the horse lifts you up out of the saddle naturally. You rise up when one diagonal pair of legs lifts off the ground, and sit down as the same pair returns to the ground. Posting is usually easy unless the horse you’re riding is really bouncy.If you’re finding it difficult to post, count “one-two, one-two” to yourself as your horse moves along. Rise on “one” and sit on “two.” Count until you start to feel a rhythm, then start riding and sitting in time to the horse’s trot.

Diagonals

If you take lessons, you’ve probably had an instructor shout, “You’re on the wrong diagonal!” Whoops! What’s a diagonal? Diagonals are a way of making sure you are up out of the saddle — or sitting down in the saddle — on the correct beat. The diagonal you should be on depends on which direction your horse is traveling in the arena. If you’re on the correct diagonal, it’s easier for your horse to stay balanced. If you are riding around the ring on the right rein (your right rein is on the inside), you should rise and sit in time with your horse’s left foreleg — the front one on the outside of the arena. If you’re riding on the left rein (your left hand is on the inside), you should rise and sit in time with your horse’s right foreleg.

Checking Your Diagonal

It’s easy to check if you’re on the correct diagonal. Just look down with your eyes — not your whole head — and look at your horse’s outside foreleg. When it’s forward, you should be up out of the saddle. When it’s back, you should be sitting in the saddle.

Changing Your Diagonal

When you reverse your direction, you must change your diagonal. It’s easy. Just sit down in the saddle for two beats. Think to yourself: “Up-down, up-down, down-up.” Then you should be on the correct diagonal. When your instructor says that you are on the wrong diagonal sit two beats, then up again. Of course, now that you know all about diagonals, you’ll always be on the correct one!

Trotting at a Show

You must always be on the correct diagonal at a show. A judge will mark you down if she spots you on the wrong diagonal in a flat class. Being on the wrong diagonal can knock you out of the ribbons.

On the Trail

If you’re on a trail ride and there is no inside or outside rein, change your diagonal every once in a while. This helps your horse stay flexible. Some horses are more comfortable to ride on one diagonal than the other, but you must make yourself switch diagonals regularly so your horse doesn’t become “one-sided.”

Cantering on the Wrong Lead

0

It happens to everyone once in a while. You ask your horse to canter and off he goes — on the wrong lead! His outside foreleg reaches out farther than his inside foreleg, and his canter feels unbalanced. If you’re lucky, your horse has no problems picking up the correct lead. But if the Young Rider “Help” letters are anything to go by, quite a few of you are having trouble getting your horses on the right lead. So let’s take a look at the canter, and figure out the best way to make sure your horse takes off on the right lead the first time you ask.

Start Off Right

Your horse needs to be trotting at a brisk pace before you ask him to canter. If he’s slopping along with his nose on the ground, it’ll take a while before he gets up enough energy to canter. So gather up your reins and take a firmer hold on his mouth. The reins should be short enough to control your pony, but not so short that they jab him in the mouth as he trots. Continue rising to the trot, but really sit down deeply when you hit the saddle. Sit up straight and squeeze your horse’s sides with both of your legs. Once your horse is trotting with plenty of energy you can ask him to canter.

Asking for the Canter

If you’re having problems getting the correct lead, always ask for the canter in a corner, or while you are trotting in a circle. Here are the correct signals to tell your horse to canter:

  • Put your inside leg (the one next to the middle of the arena) near the girth.
  • Put your outside leg (the one closest to the arena fence) behind the girth.
  • Squeeze with the inside rein so your horse turns in his head slightly. You should be able to see his eyeball before you actually give him the signal to canter.
  • Finally, give him a kick with your outside leg (the one behind the girth), Correct Lead?
    If your horse is on the correct lead his inside foreleg will reach out ahead of his outside foreleg. If you’re traveling to the right, your horse is on the “right lead.” If you’re traveling to the left, your horse is on the “left lead.”

    If you’re on the correct lead, your horse will feel smooth at the canter. If he’s on the wrong lead, he may feel bumpy and awkward. If you can’t tell just by “feeling” if your horse is on the correct lead, you’ll need to glance down and look at his inside leg to see if it stretches out farther than his outside leg. Don’t lean forward and look down though, because you’ll unbalance your horse and he might start trotting again. Simply glance down with your eyes — not your whole body!

    Wrong Lead? Try Again Quickly!
    If you’re on the incorrect lead, your horse’s outside foreleg will stretch out farther than his inside leg. If you’re on the wrong lead, bring your horse back to a trot immediately. If you’re near a corner of the arena, squeeze on the inside rein and ask for the canter again. If you aren’t near a corner do a 20-meter circle so your horse is bending his body and ask for the correct lead. Once he takes it, leave the circle and go large around the arena again. Give him a pat to let him know that he’s done the correct thing.

    Wrong Lead Again?
    If your horse seems to be landing on the wrong lead a lot, try cantering him on a lunge line. If he picks up the correct lead with no problem, the problem is probably the rider on his back — um, that’s you! Sometimes a floppy rider can unbalance a horse, and he’ll find it difficult to take off on the correct lead. Or you might not be asking him properly. If you just can’t seem to get the correct lead, it might be time to have lessons with an instructor. She might be able to give you some pointers that can help you work with your horse better.

    Sometimes this little trick works: As you head into a corner, squeeze on the outside rein and ask your pony to turn his head to the outside, then squeeze on the inside rein to make him turn his head to the inside. Just as he’s turning his head, ask him to canter with your leg aids. This method isn’t pretty but it can be effective. Turning his head out, then in, unbalances him slightly, and as he turns to the inside he’ll tend to take off with the inside leg leading. Do this exercise until he gets the lead every time, then go back to the correct way of asking for the lead.

    Advanced Tip

    As you trot, pay attention to your horse’s footfalls-the order in which his hooves hit the ground. If you watch a horse from the ground, his diagonal pairs of legs move together. The front right leg and the rear left leg move forward together and the front left leg and the rear right leg move together.

    When you are trotting, glance down at the outside foreleg. When it is heading back under your horse, ask for the canter. Why? When the outside fore is coming down, his outside hind leg is just about to push off underneath of him; this is the leg that influences how your horse departs in the canter.

    So, glance down. When the outside fore is under your horse, nudge him with your outside leg to ask for the canter.

Horse Clubs For Kids

0

Got some time on your hands? Feeling a bit bored? Why don’t you join a club! There are lots of horsey clubs to join-and even if you don’t have a horse, you can still sign up and have fun. Being in a club is a great way to meet horse-crazy people like yourself, and you might get to hang around horses.

We looked at a few clubs. One might be perfect for you!

1. The United States Pony Club

Pony Club teaches riding, mounted sports and horse care to young people through the age of 21. Join Pony Club and learn how to look after your horse or pony properly, try a new sport like combined training and take part in special competitions. The Pony Club holds instructional rallies so you can improve your riding skills, and most local clubs have fun summer camps, too. Contact the USPC to get information about a club in your area or check out its website: www.ponyclub.org

USPC, 4071 Ironworks Pike, Lexington, KY 40511; 606-254-PONY

2. 4-H

There’s a 4-H club in almost every town in the United States. The 4-H offers a lot of activities, but the horsey ones will appeal to young riders. Equestrian 4-H groups hold instructional meetings and group trail rides. These clubs hold horse shows to raise money for the club and for charities. Join your local 4-H and it’s likely that you’ll learn horse-care skills, and participate in fun shows. To join your local 4-H, look up your local Cooperative Extension Office in your telephone book under County Government.

4-H, 7100 Connecticut Avenue, Chevy Chase, MD 20815; 301-961-2840 or 1-800-368-7432

3. American Junior Paint Horse Association

It’s fun hanging around other people who love Paint Horses as much as you do. The AJPHA is for all kids interested in Paint Horses. You don’t have to own one to join the club. Members receive a membership card, pin, decal, a subscription to Painted Press and a rulebook. If you join, you’ll also be eligible to take part in fun APHA programs including annual photo, essay and art contests, and you might win an APHA youth scholarship. You can also attend the AJPHA Youth Leadership Conference.

AJPHA, P.O. Box 961023, Fort Worth, TX 76161; 817-439-3400

4. American Quarter Horse Youth Association

The American Quarter Horse Association is dedicated to getting kids hooked on Quarter Horses! More than 30,000 young people, from dozens of countries, are members of their youth association. Wow! That’s a lot of Quarter Horse lovers! AQHYA offers lots of fun activities, including writing, photography and drawing contests. It also offers the Wrangler Star Program which provides you with workbooks that teach you about horse care. This is a four-level program and prizes are awarded to you when you complete a level. The AQHA also hosts a huge world championship show for young people every year in Texas.

AQHYA, P.O. Box 200, Amarillo, TX 79168, 806-376-4811

5. Appaloosa Horse Youth Association

The AHYA was set up so kids could have lots of fun on their Appaloosas. The club has programs which help kids learn how to ride and teaches themhow to train horses properly. It also gives recognition to kids who ride, show and breed Appaloosas. Activities may include team tournaments, speech contests, judging contests, youth clinics, scholarships, shows, meetings and conventions.

The AYA offers a national point system. Points earned may lead to various lifetime awards, annual high point awards and awards to recognize outstanding youth horses. You have to be 18 or under to join the AHYA.

AHYC, 2720 W. Pullman Road, Moscow, ID 83843; (208) 882-5578

6. Arabian Horse Youth

Love Arabian Horses? This is the club for you if you’re under 18. Whether you own a horse or not, you can get experience riding, caring for and showing horses with other kids who love Arabians. As a member, you’ll get a year’s subscription to International Arabian Horse, plus you’ll get to enter lots of contests and be eligible for scholarships and awards. Check out its website or call 303-696-4500 for more information.

Arabian Horse Association, 10805 East Bethany Drive, Aurora, CO 80014

7. American Morgan Horse Association Youth

The AMHAY is open to young people under 22 who want to improve their horsemanship skills and learn all they can about Morgan Horses. You don’t need to own a Morgan to join this association-you just have to love them! When you join the AMHAY you’ll receive lots of cool stuff, including a membership card and decal and lots of information about Morgans. You’ll also be able to work toward Achievement Levels, enter special show classes, participate in photo contests and apply for scholarships.

American Morgan Horse Association, P.O. Box 960, Shelburne, VT 05482; 802-985-4944

8. National High School Rodeo Association

The National High School Rodeo Association was created to give high school students the opportunity to participate and compete in rodeos. Members compete in lots of activities, including cattle cutting, pole bending, barrel racing and team roping.

NHSRA members compete at state levels for local recognition and the top four contestants in each event qualify for the National High School Finals Rodeo held annually in July. More than 1,500 contestants compete for national titles, awards, and scholarships.

NHSRA, 11178 North Huron, Suite 7, Denver, CO 80234; 303 452 0820

9. National Little Britches Rodeo Association

The NLBRA is a western program that features all the rugged events of professional rodeo for boys and girls, ages 8 to 18. Members compete in rodeos that offer classes, including trail classes, breakaway calf roping, barrel racing, pole bending, bull riding, calf roping and team roping. There are more than 150 NLBRA rodeos a year.

As a member of the NLBRA, you’ll receive accident insurance as well as a subscription to the NLBRA News, which is published monthly.

NLBRA, 1045 West Rio Grande, Colorado Springs, CO 80906; 719-389-0333

10. United Thoroughbred Fan Clubs

A club for kids who love Thoroughbreds and are interested in racing. Check out the <ahref=”http: members.aol.=”” com=”” unitedtbfc=”” main.html”=””>Web site to find out what it’s like to work in the racing industry, check out different tracks and learn about lots of famous racehorses. You’ll also get information about big races like the Kentucky Derby-and you might win a chance to attend a top race meet. You’ve got to be 18 or under to join the United Thoroughbred Fan Clubs.</ahref=”http:>

Boots and Bandages

0
Horse Boots

If you’ve been riding for a while, you’ve probably noticed that some horses wear boots or bandages on their lower legs. These boots and bandages are for protection.

Sometimes a horse needs to be protected from himself. Because of his conformation (the way he is built), he may kick himself or brush his legs with his other hooves. Sometimes a horse needs to wear boots or bandages because of the work he is doing. If a horse does strenuous work that involves jumping or galloping, boots or bandages may help protect the delicate tendons in his legs.

But, just because everyone else down in the barn puts boots or bandages on their horses, it doesn’t mean you have to put protective gear on your horse. If you don’t work your horse hard and he doesn’t cut or scrape himself when you ride him, he may not needs boots or bandages at all.

If you don’t know if you should put protective gear on your horse’s legs, ask a knowledgeable instructor what she thinks. Explain the sort of work you do with your horse and let her take a look at his conformation. An experienced instructor will be able to tell if your horse needs boots or bandages.

Here are three types of boots and bandages you might spot around the barn.

Splint Boots (Brushing Boots)

Mainly used for show-jumping, fast work, cross-country jumping, western reining, gymkhana games.

Splint boots have a thick and/or hard plate that covers the inside of a horse’s lower leg. The plate protects a horse when he hits the inside of one leg with the opposite hoof. When a horse hits himself with the other hoof, it can cause nasty cuts on the inside of the leg. These cuts may take a long time to heal. Splint boots are probably the most widely used boots by horse people.

When putting a splint boot on, fit it slightly higher around the leg, then slide it down so the leg hair doesn’t get ruffled up and cause rubs. Many people fasten the bottom strap first so the boot doesn’t slip while you are securing it.

Bell Boots (Over-Reach Boots)

Mainly used for cross-country jumping, galloping, show-jumping, traveling in a trailer.

Bell boots sit on the bottom of the horse’s foreleg, around the coronary band at the top of the hoof. They are designed to fit the contours of the pastern and heel area. Bell boots are used on the front hooves and they help protect the front heels from getting nicked by the back hooves. Bell boots are made of rubber or stretchy material. Some have to be pulled on over the hoof and others have Velcro fastenings. They should not be so long that they interfere with a horse’s way of going — he should not trip over them!

Exercise Bandages

Mainly used for cross-country jumping, galloping, strenuous dressage work.

Exercise bandages are stretchy wraps that give support to the tendons in a horse’s lower legs. They tend to be used when a horse is in strenuous work, or if he has suffered from tendon problems in the past. They are wrapped around the lower leg, and are usually secured with a Velcro strap.

Putting on a bandage properly is a skill that takes time to learn. If the bandage is not stretched out properly with the right tension or if it is wrapped incorrectly, it could hurt your horse’s leg instead of supporting it. Ask an instructor to show you how to wrap a leg and then practice, practice, practice until you get it right.

Friends with the Farrier

0

If you have a pony or take care of one, you’ll know that the farrier is one of the most important persons in his life. Sure, you feed him and the vet gives him shots to keep him healthy, but if your pony’s feet are in bad condition, you won’t be able to ride him — and that’s no fun. Like the old saying goes, “No hoof, no horse!”

The farrier is the person who trims your pony’s hooves, and puts shoes on him if needed. A pony’s hooves are like human nails. They grow about a quarter of an inch a month, so they need to be trimmed and filed (rasped) into shape regularly.

If your pony’s hooves get too long, they could crack and make it difficult for him to move properly. His shoes could get loose and fall off. He could also become sore and lame.

So now you see how important the farrier is to your pony. That’s why we decided to talk to a farrier and find out how you can help him do his job.

Farrier Fact File

Eric Johnson works in Lexington, Kentucky, one of the horsiest places on earth. He’s been shoeing for more than 12 years, and he works on all sorts of horses, including eventers, dressage stars, trail horses and Pony Club ponies. Eric likes being a farrier because he can be his own boss and he can set his own hours. “I like horses a lot, too, and that’s a big plus to the job,” explains Eric. Eric admits that being a farrier is a tough job sometimes.

“Having a 1200 pound animal leaning on you all day can be hard,” he says.

We asked Eric what young riders like you can do to make their pony’s shoeing go smoothly, and here’s what he said.

Farrier Tips

1. Be on time for the farrier. If the farrier is coming at 8.30 a.m., be in the barn with your pony. Don’t run up and say, “I’ve got to get my pony out of the field.” Farriers are busy people and have other horses to shoe.

2. Your pony should be clean and dry. If the pony is soaking wet, the farrier will get wet, too.

3. Pick your horse’s feet out before the farrier comes.

4. Be present when your pony is being trimmed or shod. The farrier may need to ask you questions about your pony, or he may ask you to hold your pony.

5. Have a clean, level surface for your farrier to work on. It helps if the area is well lighted, too, so the farrier can see what he’s doing.

6. The shoeing area should be peaceful so your pony is relaxed for the farrier. Eric says, “A jumpy, nervous horse is difficult to shoe. He’ll start associating the bad experience with the farrier.”

7. Your pony should be well-behaved. Eric says that the farrier shouldn’t have to train your pony. Practice picking out your pony’s feet before the farrier comes.

8. If you have a dog, keep an eye on him. Dogs love to chew on hoof that has been trimmed off, and they may get in the way of the farrier.

9. Your pony should be trimmed regularly. Eric recommends every six weeks, but it may be longer or shorter depending on the time of year. Don’t wait until your pony’s hooves are a mess and then call the farrier.

10. Have some fly spray handy, especially in the summer. It’s hard to shoe a horse when he’s twitching flies away.

11. If you have a shoeing emergency — for example, a shoe falls off the day before a show — be polite and friendly when you call your farrier to ask (beg!) him to come out. “Most farriers will be happy to help you out in an emergency,” says Eric.

12. Farriers like to be paid when their shoeing job is finished so make sure Mom or Dad has a check or money ready.

If you’d like to learn more about farriers, check out the American Farriers’ Association’s website.

Saddle Seat Riding

0

If you ride hunt-seat style, it’s easy to forget that there are lots of other kids who ride western or saddle seat style. Let’s meet a talented reader who loves putting on her bowler hat, buttoning up her long jacket, and showing off her high-stepping Saddlebred horse in saddleseat classes. Ashley Howard of Lexington, KY, is the proud owner of Mikey, a sleek chestnut 16hh Saddlebred.

Ashley learned how to ride hunt-seat style, but after about a year she discovered the world of saddle seat riding and Saddlebred horses and she switched over. “I loved the way Saddlebreds looked, and I liked the formal style of saddleseat riding,” explains Ashley. Ashley began taking saddle seat lessons, and when she became a more experienced rider, she and her mom began looking for a Saddlebred.

A local trainer found five-year-old Mikey and thought he’d be perfect for Ashley. She was right. Ashley fell in love the minute she spotted the young horse, and after riding him in lessons for a few weeks, and getting to know him, Ashley bought Mikey.

When most people think of Saddlebreds, they picture show horses with extra-long hooves and heavy, specially made shoes. But most Saddlebreds are “naturally shod” — just like your horses and ponies. Mikey wears normal shoes, and his feet are trimmed just like any other pleasure horse.

Ashley rides Mikey in a cutback Lane Fox style saddle with broad, flat flaps. The cutback pommel allows plenty of room for the high-headed motion of a Saddlebred — the saddle won’t rub his withers. The saddle seat is quite flat and very long. This is so a rider can sit back a bit and move her weight away from her horse’s shoulder so he can raise his withers and move his front legs more freely.

Normally Ashley rides Mikey in a simple snaffle bit, but when she goes to shows she uses a double Weymouth bridle with both a snaffle bit and a curb bit. The bridle is thinner and more refined than a regular hunt bridle, and the reins tend to be thinner. Using a colorful patent leather browband, like the one Mikey is wearing jazzes up Saddleseat show bridles.

When Ashley goes to a show, she really dresses up. She wears a dark blue saddle suit. It has a coat with notched lapels and tails that reach down to her knees. Underneath she sports a matching vest and a plain, white button down shirt. Her jodhpurs fit snugly around her thigh and calf, and then flare out over her short, black jodhpur boots. She finishes off her show outfit with a bowler hat and a pair of black gloves.

Ashley explains that while saddle seat riders wear dark saddle suits — gray, blue, black — for equitation classes, for less formal country pleasure classes they can wear brighter colors and really show off their own personal style.

Even though he’s a Saddlebred, Mikey has been trained to walk, trot and canter like ungaited horses. But when he trots, you can tell he’s a Saddlebred because of his high leg action. Sometimes Ashley puts tiny, lightweight chains on his legs to encourage him to lift his legs a little higher. They are tiny chains, though — almost like a bracelet that you or your friends might wear.

Riding saddle seat is a lot different than hunt seat. “You hold your hands higher, like you are carrying a tray of coffee cups,” explains Ashley. “You ride in much longer stirrups, and you grip with your knees and thighs, not your calves. You don’t use a lot of lower leg pressure. Your heels should be down. If someone is watching you from the ground, she should be able to see the bottom of your feet.”

“And you talk a lot more to your horse. Mikey listens to me. When I say trot, he trots.”

A lot of Saddlebreds are taught two gaits when they are young: the slow gait and the rack. The slow gait is a four-beat gait with the same footfalls as the walk. Each foot rises from the ground and hesitates in the air. The rack is a faster version of the slow gait, with footfalls that occur in rapid, even intervals.

Mikey can jump, too! Ashley says that he clears two feet easily and that she is training him to jump higher. She takes him to a lot of local shows, and loves to ride him bareback. Mikey is also is wonderful out on trail rides. What a Saddlebred star!

Administering Horse Medication

48
Administering medication using a syringe


You’re watching your vet head down your driveway. He’s examined and diagnosed your horse—now it’s up to you. You’re clutching a large plastic bottle filled with pills that need to be administered twice a day. Unscrewing the cap, you shake some pills into your hand—they’re enormous! How will you get them into your horse?

Fortunately, there are many ways to help the medicine go down. Here are some resourceful techniques, but before you try these or any other methods, always ask your vet if the pills can be crushed, or dissolved in a small amount of water, or if they must be administered whole. Don’t assume you can grind or dissolve your horse’s meds and add them to his feed; time-release pills sometimes have to be delivered to his digestive system intact. Find out before you proceed.

If powdering the pills or dissolving them is acceptable, ask if there are safety factors you should know about. Some horse medications can be toxic to humans when inhaled or absorbed through bare skin, especially over prolonged periods of time. It’s always wise to wear latex gloves while processing medication, but your vet may suggest more stringent measures depending on the potential toxicity of the medication involved.

Grind It Up
If your vet prescribed a powder medication, or you’re grinding up pills, you will want to mix it with feed or dose it from a syringe.

To efficiently reduce horse pills to granules or powder, use a mortar and pestle (available at kitchen supply or import shops and from food co-ops selling herbs) or a small electric coffee grinder. Whichever you choose, reserve your pill powdering apparatus for veterinary use only. Clean it by scrubbing it in hot, soapy water.

To break up large, hard pills before grinding, tuck them in a small paper envelope, stick that inside a plastic sandwich bag and whack the pills with a hammer. Powder only enough pills for a single dose and process them just before dosing.

Make Your Own Balling Gun

A few years ago when we were faced with the sad task of dosing our laminitis-stricken mare with daily bute, our vet showed us how to make and use this homemade PVC pipe balling gun. Its components can be purchased at any hardware store. Here’s how the tool is constructed:

Materials
One 12” piece of 3/4” inner dimension PVC pipe
One 3/4” wooden dowel rod
One 1” washer with a 1/8” hole
One 1” long #6 screw

Use coarse sandpaper or a file to smooth both ends of the PVC pipe. Insert the #6 screw through the washer and screw it into the end of the dowel rod. Drop the rod inside of the PVC pipe. That’s it!


To keep the rod from falling out, hold onto the dowel rod and PVC pipe simultaneously, and proceed as recommended under “Shoot it Down.”


Feeding Powdered Pills
Anyone who’s medicated horses knows how frustratingly fussy some are about accepting doctored feed. Still, yours can probably be conned into doing it. The trick lies in discovering a carrier food he likes. Try blending his powdered medication with mashed, cooked carrots or with applesauce and stir the mix into his grain. He has asweet tooth? Add powdered pills to crushed after-dinner mints, pancake or corn syrup, molasses (or molasses whipped with brown sugar) or honey. Powdered fruit-flavored Kool-Aid that’s premixed with sugar tempts many horses. So does yogurt in fruity flavors. And many horses adore peanut butter.

Does your horse greedily chomp hand-fed treats? Quarter an apple and set three of the quarters aside. Cut a deep slash in the fourth quarter, pack it with the crushed or powdered pill and press the edges shut. Feed your horse two of the plain quarters, then slip him the doctored piece, rapidly chased by the third unadulterated quarter. It works nearly every time.

If you feed your horse sweet goodies, try this messy but effective trick: Stir powdered medication into a glop of canned cake frosting and let him lick it off of a flat surface, like a portable cutting board. It’s safer than hand feeding.

Medicated carriers blend well with sweet feed, and the sweetness helps mask bitter flavors, as does alfalfa molasses. Unless you’re positive your horse will accept doctored feed, only add a dollop of medication/carrier mixture to just a moderate amount of feed—don’t overwhelm him. Be sure to thoroughly blend whatever you use into the feed, rather than drizzling it on top. After your horse cleans up the spiked feed, you can give him the rest of his ration. Allow him three hours to consume medication-laced feed. Then, if a significant amount remains, remove it and try a different carrier. If you’re not certain whether his medicated feed is being consumed or scattered, consider feeding it from a nosebag.

Syringe Dosing
If your horse rejects medicated feed, try dosing ground pills or powdered medication through a syringe. To do so, blend the powder into no more than two ounces of runny, goopy carrier. Good ones include finely pureed baby foods like carrots or applesauce, fat-free yogurt (it’s stickier than the low-fat kind; smooth vanilla, lemon or coffee flavors work well), sugary syrups or molasses, or smooth peanut butter liberally thinned with vegetable oil.

Load the spiked carrier into a catheter-tip irrigation syringe (get it from your vet or local tack and feed store) or an empty large-volume, single-dose paste deworming tube you’ve scrubbed in steaming, sudsy water and rinsed thoroughly. Administer the dose as though you were paste deworming your horse, taking care to squirt all medication well back on his tongue. As soon as you’ve emptied the syringe, grasp your horse’s jaw and elevate his head. Hold it up until he swallows.

Dosing By Hand
If your horse is willing, you can give an intact pill by hand when necessary. However, if your horse is on medication for the long term, he may eventually begin to refuse this method. To dose a horse by hand, stand alongside him, facing him. Insert your fingers into the bars of his mouth. When he opens his mouth, reach in and grasp a fistful of tongue.

Hot Tip!

If your horse resists paste deworming but you want to syringe dose medication, rehearse using tasty, unadulterated carrier. You’ll perfect your technique and he might just decide being dosed tastes pretty darned good.

Hold tight. Coax the tongue down and out the side of his mouth. His mouth will gape open. Place the pill as far back on his tongue as you can, taking care not to snag yourself on his teeth. Now quickly release the tongue. This will carry the pill to the back of his throat where he’ll gulp it down.

Shoot It Down
Not crazy about sticking your arm inside a horse’s mouth? Neither was the soul who invented the balling gun. This plunger-fitted tubular implement is often used to propel pills down large animals’ throats, particularly cattle. Ready-made metal or plastic balling guns can be purchased from veterinary supply catalogs, but you can easily make your own (see “Make Your Own Balling Gun” pg. 95). To use any of these tools, draw back the plunger and insert a pill in its open end. Hold it so the pill doesn’t slide out. Elevate your horse’s head and with or without extracting his tongue, insert the implement into his mouth up to the base of the tongue and zap the pill down his throat. (Never insert a balling gun farther than the base of your horse’s tongue. Ramming it into his throat can cause serious, permanent damage. And never administer large, whole pills or halved pills to Minis or foals.)

It may take some trial and error to find the best method of getting the medicine to go down, but with a little creativity—it can be done.

Liked this article? Here are others you’ll love:
Video: Administering Eye Medication
Deworming the Reluctant Horse

Sue Weaver is a freelance writer from Arkansas.


This article originally appeared in the February 2004 issue of Horse Illustrated. Click here to subscribe.


Liniments and Poultices for Sore Horses

7

Thoroughbred legs

Gels, clays, lotions, oils, muds and more—package labels on liniments and poultices tell you these products provide “cooling heat,” “warmth,” “a cool, soothing sensation,” “relief for sore muscles and overworked tendons.” But do they really benefit an achy horse and warrant space in your ever-crowded tack trunk?

For Therapeutic Purposes

Liniments are designed to provide temporary relief for minor aches and pains often associated with arthritis and overworked muscles. Active ingredients typically generate heating or cooling effects (think Ben-Gay for horses). Poultices usually provide temporary “cold” therapy for inflamed tissues and are commonly clay-based.

Both cold and hot therapies have their place in veterinary medicine. “Through time, a lot of veterinarians and horsemen out there have gone back and forth between hot and cold, trying to get the best out of each,” says Dr. Earl Gaughan, DVM, Diplomate ACVS, associate professor of equine surgery at Auburn University’s College of Veterinary Medicine. “I can’t argue with this, as sometimes a horse benefits from a little bit of both.”

Cool It Down

When it comes to injury, a good rule of thumb is: cold treatment for fresh trauma and as a preventive therapy after heavy work; heat treatment for arthritis and older, “set” injuries that are cold to the touch. “Cold therapy is great in the early acute phases after injury,” says Dr. Gaughan. “Cold minimizes inflammatory response to the injury, and it’s a pain reliever—an analgesic.” Dr. Gaughan says that by reducing initial inflammation, the risk of further injury from excessive swelling is minimized.

Cold therapy is also common practice for many trainers and competitors who want to ensure their performance horses stay in peak condition. Craig Schmersal, top-level National Reining Horse Association competitor and part of the gold-medal winning reining team at the 2002 World Equestrian Games in Jerez, Spain, says part of the daily routine for horses in training at his ranch in Menifee, Calif., is to ice their lower legs after a workout. “It’s part of the regular daily routine for every horse that is exercised beyond a light workout.” Craig says the cold therapy helps prevent inflammation after a tough day of training.

While ice is always the preferred cold therapy, poultices are a “second-aid” option to cool things down. Gooey and messy, poultices are typically made of clays—kaolin (white clay) and bentonite (clay from volcanic ash) are common—and glycerin, and are frequently used as cold therapy on the lower legs (tendons, ligaments, joints) and hooves (traumatic injury, bruises, abscesses) to reduce swelling and aid healing.

Craig says that at the 2002 World Equestrian Games, his mount Tidal Wave Jack was poulticed after each day’s competition and remained wrapped overnight. “Our team veterinarian took good care of the horses, poulticing them every night. It’s a great way to bring down minor swelling,” and as long as the poultice is not medicated with any banned substances “it’s legal at competitions,” he says.

But not everyone is slathering poultice on their horses’ legs these days. “Some of the cooling topical agents on the market are advertised as pain relievers—I think that they get minimal results,” Dr. Gaughan says. He explains that while a poultice may go on “cool,” wraps naturally warm the legs.

To counteract the “heat-up” caused by wraps, some manufacturers recommend applying water-moistened butcher’s paper (a clean lunch sack will work too) over a thick application of poultice, followed by a cotton bandage wrap. The wet paper helps keep the poultice moist and cool.

Some poultices are marketed as hot or cold therapies; these products can cause heating or cooling effects depending on active ingredients and how you wrap. For example, some products can be used in “sweat wraps,” which are used to generate heat.

Some Like It Hot

Antiseptic, analgesic or something in between, all topical liniments are not created equal. Generally speaking, a liniment is a liquid or semi-liquid preparation that is applied to the skin to provide pain relief. Many liniments are marketed as “topical antiseptics,” meaning they are generally safe to use on superficial scrapes and cuts to help prevent infection. Some antiseptic liniments are also designed to provide temporary relief for muscular soreness, stiffness or swelling caused by overwork or exertion. Some are even purported to benefit arthritic equines by relieving pain and swelling in the joints.

If a liniment is being advertised as a topical analgesic, however, more than likely it’s not to be used on open cuts or wounds, no matter how superficial. Topical analgesic liniments contain pain-relieving ingredients that induce certain neural and vascular reactions—heat or cooling effects—when applied. Many are great for sore muscles and arthritic joints but can really sting on an open wound. Menthol, eucalyptus, capsaicin (made from chili peppers), camphor, mint oils and others are common ingredients found in topical analgesic liniments.These products are often used to help “warm up” a horse before a workout and are frequently used after exercise to relieve sore muscles, especially the large muscles on the back, shoulders and loin. Warmth also helps arthritic joints. “If an arthritic horse can warm up physically or with something topical, that’s thought to help,” says Dr. Gaughan.

Liniments can also be used as body braces—think aftershave products and other alcohol- or witch hazel-based skin braces for humans that contain active ingredients like menthol and mint oils. After a warm-water rinse or application of warm towels over the large-muscle areas, the horse is towel dried and then given a liniment “rub down” to help loosen tight, overworked muscles. Craig Schmersal says part of the daily routine for horses on his ranch is a liniment body brace after exercise to help relieve fatigued muscles. While some trainers use home remedies, Craig says, “We use liniments available at any tack store.” Braces can be diluted or used full strength, depending on manufacturer directions. Always read product labels: Some manufacturers warn against liniment application under saddle areas before riding, which can lead to skin irritation and scurfing.

Liniments are also used for “setting up” horses that experience minor stiffness after a heavy workout. Setting up involves applying an analgesic liniment on all four legs and then lightly wrapping after a hard day’s workout.

If it’s sweat you’re after, consider cellophane. Sweat wraps are designed to reduce fluid build-up in the lower legs and are accomplished by applying a liniment, followed by a cellophane wrap, then a cotton bandage. Sweat wraps trap heat so they aren’t part of first-aid for “fresh” injuries. “If you’re consulting with your vet on an old injury, and you know what you’re dealing with, then a sweat wrap is a consideration,” says Dr. Gaughan. Besides traditional liniments, substances that are commonly used to “sweat it out” include, DMSO, nitrofurazone ointment, petroleum jelly, glycerin or glycerol and mineral oil.

Whether setting up or sweating it out, read product labels. To avoid skin irritation and scurfing, some liniments are recommended only when using porous wraps.

If all you need to do is heat things up, however, a liniment may not be what the doctor orders. “If you took a horse that just had stocked up legs and put appropriately applied cotton standing wraps on him, you’d probably push the fluid out,” Dr Gaughan says. Like any health care issue, Dr. Gaughan advises that it’s always a good idea to call in the vet. “If a horse is frustratingly stocked up and swollen, you need a veterinarian to look at him to determine if there’s a cause to be concerned about.”


This article originally appeared in the March 2004 issue of Horse Illustrated. Click here to subscribe.

20 Tips to Make You a Better Jumper

0
Hunt Seat Equitation


It’s a wonderful feeling when you and your favorite horse fly over a big fence together. It’s Young Rider’s goal to make sure all of our readers are terrific jumpers, so we’ve got 20 tips that will help you fly over fences in style.

1. Always shorten your stirrups a hole or two before jumping. This lets you bring your body weight forward so you can stay over your horse’s center of balance throughout the jump.

2. Always look straight ahead over the fence. If you look down you can affect your horse’s balance and he might not jump very well.

3. Remember to push your hands forward when going over a fence. Rest your hands about 8 to 10 inches in front of the saddle and rest your hands on your horse’s neck. Doing this makes the reins looser and you won’t jab your horse in the mouth if you get left behind the motion.

4. Use a neck strap if it’s hard to stay balanced while jumping. Fasten a stirrup leather around your horse’s neck like a collar and hang on to it to stop yourself from bouncing around.

5. If your horse tends to run out of a fence on one side, carry a whip on that side and tap him with it on his neck as you approach the fence. Put lots of pressure on that side with your lower leg so he doesn’t run out.

6. Try to be confident and calm while approaching a fence. A horse can tell if you are scared. If he thinks you are too frightened to jump a fence, he probably won’t want to jump it either.

7. Don’t duck! Ducking is when a rider leans to one side when jumping. This is a bad habit and can make your horse jump badly. Have your instructor or a pal yell at you to stay straight when you approach a fence until you remember to do it yourself.

8. Let the fence come to you instead of trying to anticipate your horse’s takeoff point. Don’t lean too far forward and leap over the fence before your horse does. Push your heels down, set your legs next to the girth and keep your bottom close to the saddle. Get into jumping position a stride or two away from the fence.

9. If your horse is refusing (stopping) a lot, go back to popping over trotting poles and tiny fences for a while. When he is jumping little fences with no problems you can go back to jumping bigger ones.

10. If your horse refuses a fence, don’t beat him. Give him a sharp smack with the whip behind your leg, quickly trot a small circle and point him at the fence again. Be more aggressive and really “kick on” as you approach the fence a second time.

11. Always aim for the middle of the fence. This gives your horse less chance to run out.

12. When you are jumping a single fence, alternate the direction you go after you jump. Turn left after one jump and then right the next time. This stops your horse getting bored.

13. After jumping a fence, don’t let your pony slow down and stop right away. Keep him trotting or cantering actively until you are well away from the jump. If you let him stop every time, he’ll get lazy and refuse to move on after jumping a fence.

14. Even when you’re not jumping, practice jumping position for five minutes at a time. Riding in forward position strengthens your legs and makes you a better jumper.

15. Set up a grid. Place three crosspole jumps about 12 feet apart. Get into forward position in front of the first fence and stay in it through the grids. Horses seem to like grids and you can concentrate on your position while your horse zips through the jumps.

16. Always warm up your horse properly.Spend at least 15 minutes walking, trotting and cantering before you pop over any fences. Your horse may not feel like jumping if he’s not warmed up.

17. Don’t jump the same fence 100 times. Your horse will get bored and he might refuse. If you have only a couple of jumps in your field, move them around and liven them up by putting tires, flowers or buckets around them.

18. If you think your horse is going to spook at a scary jump, ride several 20-meter circles in front of it, so he passes by the jump every time he comes round the circle. After circling three times head toward the fence and pop over it.

19. Never walk your horse up to a fence and stop him so he can take a look at it. Stopping in front of a fence teaches your horse to refuse. It is better to ride in a circle next to the fence.

20. While jumping a course, look for the next jump in the course as you land after a fence. Looking at the next fence will help you to approach it properly.

Perfecting the Posting Trot

33

For many riders the days of learning to post the trot are relics of the past. The hours spent listening to our instructors shouting “up down, up down” (as if that made it any easier) are over. Our time is now spent in better pursuits, such as learning to jump trickier courses or trying our hand at more challenging lateral work.

English Appaloosa Trot
AppyEnglishHorse by eXtensionHorses on flickr/CC BY-SA 2.0

But the posting trot still deserves our attention. It’s an important skill to perfect, particularly since we use it so much of the time. As you fine-tune your position, you’ll be surprised at how much better your horse responds. An improved posting trot will give you steadier hands, better control of your leg aids and a softer seat.

Stylistic Differences

There is a difference between a hunter rider’s posting trot and a dressage rider’s. Yet dressage riders often post like hunter riders and hunter riders often post like dressage riders. Pay attention to which style you’ve adopted, as it does have an effect on your horse.

Hunter Style:

A hunter rider should lean forward and post forward and backward. “The angle of the shoulders in the posting trot should be about 30 degrees in front of the vertical,” says Scott Hofstetter, top hunter rider, coach and judge from Ocala, Fla. “In this way, you can move with the motion of the horse, which will allow your horse to trot out better.” Hunter riders also use the posting trot as a tool to get off a horse’s back and allow him to stretch his neck out and forward. If a hunter rider posts up and down over the vertical, such as from a chair type of seat, the rider can land quite hard on the horse’s back, making him reluctant to take a bigger stride. “We want our horses to be in front of the vertical and leading with their noses out, as opposed to a dressage horse that is more flexed,” adds Scott.

Dressage Style:

Dressage riders, on the other hand, should sit over the vertical with shoulders and hips in one line. Their thighs should hang as straight as possible with the knees slightly bent. The angle of the shoulders should never come forward but remain straight. The hips should rise out of the saddle and forward over the pommel and land back in the saddle in the same place. In this position, the rider is able to keep the lower leg quietly against the horse’s barrel throughout the posting trot so that he or she can use the lower leg when needed. This position also helps the horse arch his frame and encourage his haunches under.

Top Six Posting Faux Pas

1. Problem: A Heavy Seat

Culprits: Hunter Riders and Dressage Riders

“I often see riders posting straight up and down in a chair seat rather than forward and back, and that causes them to land heavy on the horse’s back,” says Scott. This position also makes it difficult to balance, which causes hands to bounce and jar the horse’s mouth.

Cure:

Stiffness is often the problem. For the hunter rider, pick up the posting trot, and with one hand grab your horse’s mane about halfway up the neck (make sure to keep your shoulders square). This will pull your shoulders forward to the correct 30 degrees and help you feel how to land in the saddle softly. Maintain this position for 15 to 20 strides and then let go of the mane. Repeat if you fall out of position.

For the dressage rider, a stiff, closed hip angle is usually the problem. Think of the posting trot originating from a kneeling position instead of a sitting position. Your knees should point to the ground, and your hip angle should open as you rise and close as you sit. Think about someone pulling your belt buckle forward as you rise and then pushing it back as you sit. Don’t let your knees shift around. Keep them pointing toward the ground as best as you can.

2. Problem: Incorrect Leg Position

Culprits: Hunter riders

“If your lower leg is too far back, your upper body will fall too far forward. If you ride with your leg in front of the girth, then your upper body will be too far behind the vertical,” says Scott. “If your leg is at the girth (essentially the middle of the horse), then your shoulders will be in the right position.”

Cure:

Stand in your stirrups and begin trotting. You can stand either straight up or in two-point. If you feel balanced, your legs are in the correct position.

3. Problem: Eyes Down

Culprits: Hunter and Dressage Riders

“Riders tend to get absorbed at the posting trot and end up staring down to the inside of the ring or at their horses’ necks. It’s an easy habit to get into and a hard habit to break,” says Scott. Also, eyes down will lead your upper body forward, and before you know it you’ll be slumping.

Cure:

Practice looking ahead by gazing at a focal point ahead of you, such as the tops of the trees or the roof of a building. This will bring your eye level up and will keep you from falling forward or slumping.

4. Problem: Incorrect Arm and Hand Position

Culprits: Dressage Riders and Hunter Riders

Your hands and arms shouldn’t move with your seat in the rising trot. They should remain stable and separate from your body. If you take your hands and arms with you as you sit, you’ll have a very unstable contact-loose then tight. This will cause your aiding system to be haphazard at best.

Cure:

Concentrate on keeping your arms and hands in the same position as you rise and sit. It helps to think about moving your hips between your elbows as you rise.

Dressage Trot


5. Problem: Involuntary Leg Movements

Culprits: Dressage Riders

Have you ever heard your trainer drone on and on about your constant kicking or “nagging” with your leg, but you know for sure that you haven’t been? If your upper leg is tight and gripping, your lower leg will pop away from the horse’s barrel as you rise and strike against it as you sit. Sounds a bit like kicking doesn’t it? Well, it looks like it, and your horse won’t know the difference between a honest-to-goodness leg aid and a mistaken thump. It’s very difficult to give a clear aid if your leg is always involuntarily bebopping against your horse’s side. To the horse it feels much like communication through static.

Cure:

This is a case of too much tension in your upper leg and not enough in your lower. Keep thighs and knees soft and lower leg on. Focus on holding your calves lightly against your horse’s barrel, and don’t let them come off as you rise. Have a friend point out when your legs are moving and make a mental note of how this feels.

6. Problem: Can’t Get the Right Angle

Culprits: Hunter Riders

If you were told there would be no math involved, and you’re slightly stumped as to what a 30-degree angle is, you may get stuck riding too far forward or not enough.

Cure:

“An exercise that I find beneficial is to practice changing the angle of your upper body in the posting trot,” says Scott. “This will help you feel when you are in the right 30-degree position, where the vertical is and what it feels like to be behind the vertical. Pick up the rising trot and come forward to what you think 30 degrees is.” When you’re in the correct position, you’ll feel your horse relax and move forward and feel your seat get lighter. Now come back on the vertical, which will help you understand where the middle point is. Then lean back behind the vertical. Repeat the exercise. You’ll soon get a feeling of what angle you are in.

You’ve come a long way from the first ups and downs of learningdiagonals, but there’s always room for improvement. Check yourself for these six faux pas; the results should show in better equitation, and most of all, in your horse’s response.

Further Reading
Look Ma, No Stirrups!
Sitting Trot in Style

Award-winning writer Sharon Biggs is a frequent contributer to Horse Illustrated and has written for many other equestrian and women’s magazines in the United States and the United Kingdom. She is the author of “In One Arena: Top Dressage Experts Share Their Knowledge Through the Levels” (Half Halt Press).


This article originally appeared in the April 2004 issue of Horse Illustrated. Click here to subscribe.

0FansLike
0SubscribersSubscribe
We use cookies to help personalize content, tailor and measure ads, and provide a safer experience. By navigating the site, you agree to the use of cookies to collect information. Read our Cookie Policy.
OK