Enter our 12 Days of Christmas Giveaways here!
0 ITEMS
  • My Account
  • Holiday Gift Guide
  • Podcast
  • Webinar
Subscribe Combo
Enable cache13
Home Blog Page 1063

Showing A-Circuit Hunters

17
A-Circuit Hunter


If you find yourself longing to compete at national shows, here are four tips that the A-circuit riders and trainers we spoke to agreed upon as prerequisites for venturing into the major leagues:

  1. Have a suitable horse.

    The main reason A-circuit caliber horses are so expensive is that they are the cream of the crop. They generally have impeccable conformation and flawless movement, and possess a show-ring presence that says, “Look at me.” Most importantly, they have to be the right type of horse for the division in which you are competing. If you are wondering if your horse measures up, take it to a reputable trainer who competes at A-level shows, and ask for an honest evaluation.

  2. Get instruction from a knowledgeable trainer you feel you can trust.

    Make certain the trainer you choose travels to the away shows and is willing to take on another student of your level. Because a trainer’s livelihood depends primarily on the success of his/her students, by nature most trainers are somewhat controlling, so be ready to allow your trainer to make major decisions about you or your horse. Hunt-seat trainer Susan Smith even goes so far as to accompany her novice students when they shop for show attire. “It’s a very trendy sport, and if you’re not in style, you stand out,” she explains.

  3. Realize ahead of time what the costs will be.

    Before you commit yourself to going to an away show, get a list of charges in writing from your trainer. That way there won’t be any grim surprises when the bill arrives. Although you have paid for your horse’s board and training at home, there will undoubtedly be additional charges for at-show instruction (called a ring fee, or rail fee) and for extra feed and stall bedding. Add to that the day-care fees for having the services of a groom. Then there are the braiding fees if you show hunt-seat. And be forewarned: the braids at A-circuit shows are usually redone each day. Finally, it’s customary to divide the trainer’s traveling costs among the clients. Show fees can be staggering, but there are ways to cut costs if necessary, providing you have an understanding trainer who allows certain riders to attend A-shows on a shoestring. With your own truck and trailer you can haul your own horse, and possibly earn extra money hauling someone else’s. If you are meticulous about grooming your horse properly, you can save grooming and braiding fees by doing the job yourself.

  4. Have realistic expectations.

    It can be heartbreaking to attend major shows and return ribbonless time after time. It may help to remember that this is competition at its best, and there is no harm in admitting that you (or your horse or pocketbook) are not quite up to it. Some riders shrug off the major shows because they already have too many demands, such as family, school or jobs, on their time. If, for any of these reasons, you’re not ready to make the commitment to A-level shows, there are always the B-level shows, which are a step down in toughness and last only one or two days. Check local horse show associations, which sanction smaller shows, where members can still compete for high-point trophies and year-end awards.

No thanks, you say? Read more about finding the right circuit for you and your horse:
Show Where You’ll Shine
Rating the Competition

Last Chance at Retraining

6

Bruce Lachiusa, who has an extensive background as an eventing competitor, a veteran trainer in several English and western disciplines, believes that most problem horses are created by riders who don’t know how to ride. “They pull back on the horse’s mouth, long and hard,” he says. “The mouth eventually goes dead, and the horse gets scared. Then they say it’s a mean horse.”

Some problems are caused by ill-fitting tack, which can create an uncomfortable situation that a horse will want to escape from. This can include increasingly severe bits used as quick-training fixes by ignorant riders.

Shortcuts in training methods can also create problem horses. Without the proper foundation and the slow bringing along of a horse that allows it to develop both mentally and physically, horses may become fearful or resistant to advanced work. “If you start forcing a horse into a frame, they will get sour on you. This happens when owners want results and want them now,” says Lachiusa.

Reschooling

For most problems, rehabilitation consists of reschooling both horse and rider. Explains Lachiusa, “Owners have to take lessons, too, because there’s no sense fixing the horse’s problem unless I can tell them how the problem occurred and how to change their riding style.”

Generally, Lachiusa schools riders for about four or five sessions. Horses require far more time; the minimum is 60 days, with the most severe cases taking up to a year or more.

Reschooling usually involves gentle handling and returning to the basics. There are occasions where he must reestablish respect from the horse, or change its tack, but whatever the situation, he first determines the cause of the horse’s problem.

For example, Lachiusa recently retrained a 6-year-old Thoroughbred mare who would come unglued when ridden. “She had been to three different trainers trying to get broke,” he says. “They could get on her back, but she would go around the arena completely tense, stiff and totally unhappy, and then explode when she couldn’t take it anymore.”

Lachiusa discovered that her tenseness derived from being pushed too hard in her early training. “She was just a mare that needed a very long time to break, and nobody really wanted to do that,” he says.

To defuse her, Lachiusa took her back to beginning training, with longeing under tack to get her used to the saddle and sacking-out to get her less nervous about her surroundings. “We spent a lot of time just doing quiet walks and hacking around fields,” Lachiusa says. “When I finally asked her to work, to come up underneath herself and go forward on the bit, it wasn’t a huge shock. Once she established in her mind that riding wasn’t that terrible and everything was going to be okay, she settled down and trained really nicely.”

With runaways, Lachiusa starts from “ground zero, just like they were never broken. That means halter breaking, everything.” He spends a lot of time retraining runaway horses by using circle patterns. “I use a big fat, soft, full-cheek snaffle that won’t get pulled through the horse’s mouth, and a set of draw reins, and just go out and ride circles,” says Lachiusa. “The horse may be nervous, or go as fast as he wants; I don’t care. He’s eventually going to get bored, so I wait until he settles down, give him a pat, and keep going.”

Horses that rear usually do so because they are evading; blocking; carrying severe, painful bits; reacting to bad hands; or were taught to rear as a game but it got out of hand. There are several ways that Lachiusa rectifies this, depending upon the cause and the individual horse, but usually correction involves going back to classical work: circling, softening and groundwork.

Don’t Emulate the Pros

Lachiusa warns owners to leave most specialized training to the experts. Reschooling involves a lot of experience and skill; retraining rank horses can be dangerous to both the handler and horse if the trainer doesn’t know exactly what he’s doing.

What a rider can do, though, is avoid creating a rank horse in the first place by not rushing a horse’s training or skipping steps, and learning how to sit the horse correctly. Building a good training foundation for both yourself and your horse will help ensure that your horse will never have to make the journey to a “last chance” farm.

Clipper Maintenance

5

With proper use and maintenance, your clippers can last for many years. To keep them in top condition, follow the manufacturer’s instructions for that particular clipper and lubricate regularly according to instructions. It sounds obvious, but follow the directions carefully. For example, some manufacturers recommend using a cooling spray during use; others do not.

Store clippers in a dry place. A small toolbox is ideal and can also hold blades, lubricant, et cetera. Unless clippers are warranted as maintenance free, they should be cleaned and serviced once a year. 

Care of the blades is important if you want them to last and hope to get a smooth cut.    

If you only start out with two types of blades, purchase a set of #10 blades, which are most commonly used for body clipping, and a set of #30 blades for finer trimming.

When buying blades remember: Choose high grade steel which contains chromium and a high carbon content to retain sharpness longer. Ice-tempered steel blades coated with titanium are harder than average blades which translates to longer life and less sharpening. Some premium blades have an additional chromium coating to resist outer surface corrosion.

Blades can have a long life if properly stored and cared for. Ken Aldrich Of Big Sun Equine Products in Ocala, Florida, offers tips on caring for clipper blades.

  • Use a blade and wash as directed rather than use kerosene or fuel.
  • Store them properly in a blade holder with oil in it, or in a plastic bag which contains lubricant. An inexpensive way to store blades is wrapped in a sock sprayed with WD-40.
  • Always have an extra set of sharp blades on hand and switch out blades if they become hot while clipping.
  • Lubricate blades during clipping.
  • Make sure the horse is clean before you start.
  • Have blades sharpened whenever they begin to dull. (In addition to slowing the job and delivering less than quality results, dull blades tug on the hair and make clipping uncomfortable for the horse.)

Cynthia McFarland is a freelance witer based in Florida.

Grooming Tips From the Top

27

Halter and showmanship horse and handler

Every top show groom has his or her own bag of tricks out of which they pull some secret technique to make their horses stand out. Here’s a list of tips to help you shine on show day:

  1. For really white socks or stockings, dust the legs with baby powder, corn starch or French white chalk.
  2. To cut down on static electricity in the mane and tail, use dryer sheets. One wipe-down through the hair will help eliminate static.
  3. Rub a dab of baby oil along the bridle path to get rid of that chalky, just-clipped look and make it shiny.
  4. For breeds that show with a patent-leather shiny hoof, fill in any old nail holes with a spackling compound that matches the color of your horse’s hoof. For a black foot, the color of the compound won’t matter. To polish the feet, use the wax-based, cake shoe polishes to add a deep luster to the foot while protecting it from the drying effects of hoof lacquer, which can be applied over the shoe polish.
  5. When you don’t need to pull the mane, use thinning shears to shorten it without having the chopped look of scissor cuts.
  6. Clippers can give you the effect of a pulled tail, without having to pull out hairs. Run the clippers carefully along the outside of the dock and down about 4 to 6 inches, just up to the point where the hair begins to crest over. Thin the hairs along the top of the tail and blend longer hairs to gradually blend into the shorter ones.
  7. Use setting gel when braiding to help stray or short wisps stay put in the braids.
  8. Wash your horse a couple of days before the show so the oils of the coat have time to work to the surface for a natural shine. Keep a light sheet on to keep the coat clean until show day.
  9. If you choose not to band a western horse’s mane, lay a dampened towel over the neck to help the hairs lie down smoothly.
  10. Keep a wrap on your horse’s braided tail – temporarily – so that it arrives at the show grounds with the braid intact.
  11. Apply only one coat of hoof oil or dressing if arena footing is deep. The oil will collect dirt, but the judge will know that you made the effort.
  12. Instead of using rags to wipe down your horse, purchase inexpensive knit gloves (available at most drug or hardware stores) and apply the product directly to them. When you are finished, they can be washed.
  13. For coarse tails, use a hot oil treatment in addition to your regular equine conditioner to soften the hairs and make them flow.
  14. If your horse gets shavings in its braids, use a small, short-bristled brush to gently remove them without damaging any of your work.
  15. If you clip the inside of your horse’s ears, place cotton inside to prevent hairs from entering the ear canal and also to deaden the buzz of the clippers.

Further Reading
On the Go Shampoo
How to Bang a Horse’s Tail
Zone Grooming

Horse Trailering Emergency

6

You’re towing down a high-crowned, two-lane country highway at a safe speed. Your trailer and truck are in perfect working order and your horses are calm and snug in the trailer behind you. You notice a semi-trailer truck headed toward you seems to be traveling much faster than the other vehicles that have passed. As the massive truck flies by, the sudden change in air pressure causes your fully loaded trailer to start swaying. You struggle to hold the wheel straight as the trailer begins fishtailing. The trailer wheel drops off the side of the road and before you can react again, the trailer tilts into the ditch …

Horse Trailer

Although no one plans to have accidents, they happen. The key to weathering them, say crisis-management experts, is planning in advance exactly what you will do if an accident occurs.

Taking Control

The idea is to be proactive rather than reactive, says Dr. Jim Hamilton of Southern Pines Equine Associates in Southern Pines, N.C. Dr. Hamilton’s practice includes Olympic-caliber horses, and he has helped North Carolina officials add information about animals to its statewide natural disaster planning program. Hamilton has also helped the state develop a continuing education unit on emergency management of animals. This program is included in the state’s annual training for emergency medical technicians and other rescue personnel.

Top athletes often use the psychological technique of “visualization” to help them mentally plan and execute a winning strategy. They close their eyes, break their task down into the smallest possible steps, then mentally watch themselves going through each of those steps. When the time comes to actually perform, they go out with confidence because, in a sense, they’ve already been there and done that. They can focus and concentrate. Surprises are less likely because they have already thought through every possible scenario.

“When people get panicky, they forget a lot of things they’ve learned,” says Dr. Hamilton. “Accept that fact and take steps to help yourself think clearly in emergency situations.” Even in accident situations where no one is physically hurt, the ability to be ingenious and resourceful can be severely hampered by anxiety. The best planning you can do, he says, is to sit down and think of every possible thing that might happen to your horse on the road. Then think about how many different ways you might face each emergency and what tools and supplies you would need. Finally, imagine yourself actually taking the necessary actions to resolve the problem.

Planning Ahead

A good first-aid kit is one of your most essential supplies. Use your veterinarian’s experience and knowledge to help you stock appropriate first-aid supplies. Discuss his or her recommendations about carrying and administering prescription drugs for things like pain relief or sedation. This can be a very personal decision for both owners and veterinarians. Be honest about your ability and comfort level. While one horse owner might feel quite confident and competent about giving a horse an injection, another might feel anxious about it under the best of circumstances. Carrying and anti-inflammatory paste to use in an emergency will not do much good if you cannot administer your horse’s paste wormer at home under less stressful conditions.

Among the medical problems you should plan for are colic, heat exhaustion, dehydration, superficial injuries, deep wounds and broken limbs If you have never taken a first-aid course, now is the time to do so. Many first-aid techniques, such as applying pressure to wounds to stop bleeding or applying ice packs to sprains, are the same for horses as they are for people. Work with your vet and consult veterinary guides to learn how to adapt standard first-aid techniques to horse anatomy if you do not know how to do that already.

One of the most common problems Dr. Hamilton sees is people who trailer their horses without adequate water supplies. They will use the excuse that they are not traveling very far, that their horses will not drink while traveling anyway or that there will be ample water at their destination. That is a primary example of poor emergency planning, he says.

Imagine that a mechanical breakdown has stranded you alongside a busy interstate highway. It is a very hot day and you have no water with you. The tow truck says he’ll be there in an hour but doesn’t actually arrive for almost 90 minutes. After assessing the situation, he says he needs to return to the service station for a part to fix your engine. Another 90 minutes go by. Your horses are now hot, thirsty and possibly becoming dehydrated. You need fresh water for them to drink to stave off colic and, as time goes on, you realize that you also need it to help cool them down.

If you trailer two horses, says Hamilton, plan to carry about 5 gallons per horse for drinking, plus another 5 to 10 gallons to cool them if the heat becomes too much. Just in case, he also likes to see about 5 gallons of water available to cleanse major wounds. That’s a total of 20 to 25 gallons of water. If you will be on the road more than three or four hours, this amount should be increased. People who plan ahead use special molded plastic containers that fit into the nose of their trailers, strap plastic gerry cans into the trailer’s wheel wells or improvise with various types of plastic coolers. Regardless of how they do it, they are prepared with enough water to meet the demands of several potential emergencies.

Another example of advance planning is finding and preparing suitable splinting materials to use in the case of a broken limb. Dr. Hamilton likes to use a splint-length of PVC pipe to stabilize and support a leg. However, he notes, these must be custom-cut to fit a particular animal. Get help from your vet to choose a pipe diameter and length suitable for each animal, then label them with the animal’s name. If you don’t want to carry a PVC splint, says Dr. Hamilton, think ahead about what supplies are on your trailer and how you could improvise with them to make a splint.

Many people now use fleece-lined shipping boots instead of standing bandages, but the well-prepared traveler should still carry a set or two of those stretchy, old-fashioned knit bandages for wrapping and holding splints or bandaging materials. Extra towels should be on hand as well, since they can be used to clean wounds or apply pressure to stop bleeding.

Step By Step

Because it can be hard to think clearly in emergencies, Dr. Hamilton advises horse owners to carry a checklist in their glove compartment to pull out and follow. Here are the steps he recommends:

  1. Be calm. Assess your physical condition and that of any passengers before attending to the horses. Emergency personnel often report that their most difficult job at the scene of a trailering accident is calming a hysterical owner. Try to relax, focus and think as clearly as possible.
  2. Determine if you need outside help and how to get it. Do you need to call 911 to get emergency medical attention or summon the police? Do you need to call a service station or a tow truck? Having a list of phone numbers with you in your vehicle can help you stay calm and take action decisively. A cellular phone (fully charged and with roaming capability for the areas you are traveling through) or a citizen’s band radio can make a critical time difference in a medical emergency.
  3. Assess the condition of the horses and their needs. Do the horses have injuries or other immediate medical needs? Is a horse bleeding profusely? Is he breathing rapidly and shallowly, have a weak pulse or slow capillary-refill time? Gather as much specific information as possible to relay to the nearest veterinarian. The vet’s biggest challenge when a phone call comes in about a trailering accident is trying to surmise what the horse is doing and what is medically needed. The clearer the owner can be, the more accurate the veterinarian’s phone recommendations can be. If the emergency is a mechanical one, the horses’ needs may simply be for food and water while waiting for help to arrive.
  4. Unload the horses only if you are in a quiet, absolutely safe area with enough personnel to manage the animals. Relaxing the animals and stabilizing any injuries is often the first goal after an accident. However, Dr. Hamilton cautions, never unload the horses along the side of a high-speed interstate highway. That is a recipe for disaster. If at all possible, pull off the highway and find a quiet area to unload. Otherwise, keep the horses in the trailer until an alternate tow vehicle or other help arrives.
  5. Determine what you can do and accept what you cannot do until further help arrives. In a true emergency, your ability to affect the situation may be severely limited. For example, you may not be able to do much more with a heavily bleeding gash than to try to calm the horse while you apply steady pressure until the vet arrives.

If a horse is acting colicky, you can encourage the animal to drink until the vet arrives to fully assess the situation. Figure out what is possible and take those actions while you wait for a veterinarian or other emergency personnel to come. However, avoid overreacting and making the situation worse by trying to do more than you are equipped to handle.

Second in Command

Another critical contingency to plan for is what will happen if you are unable to act at all. If you are unconscious or removed from the scene of an accident because you are injured, who can make decisions in your absence?

Dr. Hamilton recommends that every horse owner prominently display a card in the front of their trailer, either laminated or protected in a plastic holder, that lists vital emergency information for police or other rescue personnel to follow. Besides the names of horses and your name, address and phone numbers, list the phone numbers of the barn where you board, your veterinarian and any other responsible persons.

It should be absolutely clear to police and others who the designated decision maker is in the event you are unavailable. There have been numerous instances of police officers who have been ready to shoot a horse they thought was dying, only to find, when the veterinarian arrived and administered fluids, that the horse was only exhibiting signs of shock.

Emergency Training for First Responders

In his work with emergency personnel, Dr. Hamilton has found that most of them have a basic fear of horses, which they do not like to admit until after an event is over. Many have no experience with large animals.

“The vast majority of emergency responders have no clue how to approach a horse, how to apply a halter or what a lead shank is,” he says. “Most have some concept that horses can kick. Their fear factor plays a big role.”

Post-event questionnaires also show that emergency personnel’s lack of experience with horses frustrates them in other ways, too. For example, many report arriving at the scene of trailering accidents and being unable to figure out how to safely enter a horse trailer, which doors the horses unload through, or how to work the panic snaps so commonly found on trailer ties.

One solution for that dilemma is for local horse organizations to work with their area emergency personnel to provide some familiarity with horses and horse equipment.

Thanks to two dedicated horse owners who were also volunteers, the Stevenson Volunteer Fire Department in Stevenson, Connecticut, staged a horse trailer emergency drill for several area fire companies. With local 4-H clubs supplying horses to handle, a veterinarian on hand explained how to approach and handle frightened horses. And with a donated trailer to take apart with pneumatic tools, fire and rescue personnel got hands-on experience dealing with an emergency involving horses.

As part of North Carolina’s continuing education program, emergency personnel can take 12 hours of training on horse behavior, horse first aid, horse handling and what to expect at barn fires or trailering accidents. As part of the course, trailers are available to examine, and EMTs practice catching and haltering horses in paddocks. Similar training events organized by horse owners in cooperation with their local emergency officials are an investment in emergency planning that could someday save equine lives.

An ounce of prevention can help avoid many trailering emergencies. Before leaving on even a short trip, make sure your trailer and towing vehicle are in good condition. Annual inspections should include a thorough check of the trailer’s tires, brakes, undercarriage and floor, and all hardware. Make sure your trailer’s hitch is properly maintained and that you know how to use all of its safety features. A blown tire or a ball hitch that comes unfastened as you’re traveling down the road could be the start of a major emergency.

The worst accident is the one that could have been avoided.

Further Reading
Trailer Accident Survey Yields Tips
Safe Trailering
Trailer Emergency Kit

Teach Your Horse to Pivot

2

Think pivots are just fancy reining maneuvers too difficult for the likes of you? Think again. Picture yourself trail riding along a new path, hemmed in on one side by prickly bushes and a sharp drop on the other. The trail isn’t wide enough to reverse by walking a circle. So what do you do if you hit a dead end or your riding partner needs help behind you? You can try backing your horse the whole way and hope he stays straight — or you can just turn 10 degrees in place: a half pivot.

Western palomino horse bending

Or maybe you do want to try some arena classes like reining western riding and horsemanship, but those 360-degree spins look intimidating. Don’t let that keep you away. You can get any horse that understands the basics of neck reining and leg yielding to pivot, even if he has never done it before — once you know what doors to open and which to close.

To help you learn these doors, whether you want a more flexible trail horse or a shot at the blue ribbon, we asked multiple world champion Charlie Cole to explain his system for producing flawless pivots. He demonstrates the technique on one of the Quarter Horses in his training barn, Classy Hobby Doc, who won the reserve horsemanship title at the 1997 All-American Quarter Horse Congress as well as AQHA World Show titles in trail and western riding.

Spectacular Pivots

In order to perform this maneuver, your horse does need to know how to yield to neck-rein and leg-yield cues. If he doesn’t, you’ll want to work on those before tackling the pivot.

Charlie recommends you outfit your horse in a snaffle bit until he’s learned the lesson, and you’ll use two hands. Once he’s mastered the pivot, you’ll bring your hands gradually closer until you can hold the reins in one hand. (Your basic hand position will remain the same.)

Your horse should start out standing straight, with his tail, back and poll aligned. Your elbows should be at your hips and will remain there even while cueing. Your hands should be just in front of the pommel about horn level with even rein pressure. The amount of slack you’ll have will depend on your horse and may need to be adjusted as you do the pivot to keep your horse in place. You should be sitting evenly in the saddle, with the weight down in your heels and your shoulders and hips as square as possible.

To begin a pivot to the right, your left hand will move to the right, bringing the left rein against your horse’s neck, to tip his nose to the inside of the turn. (Your hand should not move backward, which would tilt his nose to the left.) Simultaneously, you’ll apply pressure with your left leg at the girth. Be sure to keep your inside (right) leg off his body so you don’t block his movement in that direction.

These cues combined should encourage him to push his front left leg across the right leg and take the first step into the pivot. If he does, be sure to reward him with a pat or word so he understands this is the correct response.

If your horse surprises you by performing an entire pivot at these cues, instead of a single step, don’t continue to apply constant leg pressure, which will cause him to build up speed: Just tap him with your leg at the girth to maintain his cadence as he turns. If, on the other hand, he takes only a single pivot step, simply continue to apply the cues to complete a 360-degree turn. A proper pivot should feel smooth and even as your horse’s legs reach around and cross over; his inside hind leg should remain planted on the ground throughout the whole turn, his body should stay slightly arced and his head should remain tipped in.

If you find yourself in a dream and your “untrained” horse is maintaining a nice cadenced pivot on a planted inside leg and crossing front legs, just keep your leg off him, and don’t pinch yourself. Enjoy the ride!

If, however, you find yourself waking up and your horse has missed the mark, don’t be discouraged. Chances are, if he’s never done it before and you haven’t either, your first few tries won’t be any better than your first attempt at parking your new dually in the economy-car parking lot. Your horse may be confused and try to step forward or backward, do a sidepass, move too quickly or too slowly. You’ll need to experiment and develop a feel for how much leg and rein pressure you’ll need in order to accomplish a perfect pivot.

Just go back and try again, paying close attention to your own position and cues throughout. Read the following list for common problems and their fixes, and run through it in your mind as you’re sitting in the saddle.

Troubleshooting

Generally speaking, rider error is the cause of most pivot problems. You may think you’re cueing properly and clearly but actually be unintentionally sending out the wrong signals.

Here’s a rundown of common problems, why they occur and what to do to fix them.

Problem: Instead of moving sideways in a spin, your horse straightens his head or turns his head to the outside and steps forward in a straight or curved line.

Cause: You’re either not using enough rein on this horse, or you’ve brought your hand too far over, across the horse’s neck, so it has reversed the cues.

Fix: Keep your outside hand from crossing over the horse’s neck to the opposite side when you lay the rein against it. If he’s not tipping his head in when you touch him with the outside rein, bump him with the inside rein (pick up the slack by lifting it straight up, not back) then return it to its position even with your left hand, and make sure the outside rein is laying against his neck to encourage more arc. Repeat if necessary, but return to position each time.

Problem: He’s rocked back too far on his haunches or even takes a step backward.

Cause: You’re using too much rein.

Fix: Soften the rein pressure and tap him up with your leg at the girth to make him rock forward then step around.

Problem: He’s bending too far into the arc.

Cause: He’s paving attention to your reins but not listening as well to your legs.

Fix: Bump his shoulder over.

Problem: Your horse is “cheating,” sidestepping with his front legs instead of crossing his outside over his inside leg. You can tell because you’ll hear his front legs hit, his head pops up as he does it and the turn will feel rough.

Cause: You might be using too much rein, not enough leg or possibly have uneven weight in the saddle.

Fix: To avoid this, you’ll need to make him step up a bit, so you’ll release your hands. If softening the reins causes him to step forward out of the pivot, pop him on the outside shoulder with your left leg so he’ll move over instead of ahead. Keep yourself balanced by keeping your weight as centered as possible. You might step into the inside stirrup a bit more to battle centrifugal force.

Problem: He swaps ends &$151; taking a step with the hind leg that should have stayed planted throughout the pivot. It’ll feel like he’s backing and popping his hind end.

Fix: Again, soften your reins and encourage his sideways motion.

Problem: He sidepasses.

Cause: His body isn’t arced enough to make him realize he should be turning in place, so he’s interpreting the cues as a command to move sideways in line.

Fix: Take up more rein to emphasize the arc in his body more, and drop your outside leg forward to bump his shoulder.

Problem: He’s pivoting correctly, all right, but so sluggishly you think you’re riding a very large snail.

Cause: It’s a new maneuver for him and he may still be a little unsure that this is what you want. Or he might be a bit stiff or even just lazy.

Fix: Slow is fine, especially for anything new. Make sure he thoroughly understands the cues and maneuver and can maintain a consistent, cadenced rhythm before you ask for any sort of speed. Once you’re sure he’s got the pivot down pat and you’ve warmed him up out of any stiffness, if you want to increase his sluggish speed, just tap with your leg at the girth. Increase the aid or add a slap with the ends of your reins, if necessary.

Problem: Your horse thinks he’s a spinning top and races through the turn as if pursued by demons.

Cause: Whoa! Ease up on the pressure. You’ve got a sensitive, possibly nervous and excitable guy and won’t need to worry about building up speed. For now, you want to take it slow and easy so take up a little slack and ask a bit more politely with that leg of yours (as in less pressure when you cue) until he’s listening and responding with a calm and cadenced maneuver.

The Final Product

If you try these fixes and still don’t seem to be able to pivot our horse, ask a trainer or more experienced rider for help. They can watch you ride and determine if you’re doing something you’re not aware of. They can also ride your horse for you and attempt to pivot. If they aren’t able to pivot either, your horse may be experiencing some pain or physical problem that prevents him. However, the most likely reason is a communication failure between horse and rider.

The pivot can be a fun maneuver for you and your horse and can even be exciting when done at faster speeds. And it can be useful on trail as well. But more importantly, learning the pivot is a way to enhance the communication between you and your horse and increase your horsemanship skills. With patience and practice, you’ll soon be spinning with the best of them.


Charlie Cole and his partner, trainer Jason Martin, run their training barn High Point Performance Horses out of Chino Hills, Calif. With the world titles the team has been racking up over the last several years, they’ve made quite a name for themselves — and their students.

Acupuncture

5

Acupuncture, perhaps the best-known Chinese medical technique, is not limited to humans — it is also being practiced on horses. Acupuncture is the insertion of needles in specific points (also called “acupoints”) on the body to reestablish the subject’s energy by balancing the body’s yin and yang forces.

“By treating specific points, acupuncture essentially stimulates various nerves and relieves free circulation,” says Allen Schoen, D.V.M., director of the Veterinary Institute for Therapeutic Alternatives in Connecticut. “Acupuncture is one modality that can be extremely beneficial. It has its limitations, but when used appropriately, it is a wonderful approach to help horses heal,” Dr. Schoen says. “Acupuncture can address arthritis, paralysis, diarrhea, allergies, Lyme disease, muscle pains and many other ailments.”

“There are few side effects because it is a noninvasive alternative and the worst that could happen is that the treatment does not succeed,” says Dr. Richard Joseph, a staff neurologist at the Elmer and Mamdouha Hospital of the Animal Medical Center in New York City.

If conventional medicine is indicated but the animal has some reaction to aspirin or steroids, acupuncture is a healthy option to avoid a drug’s side effects, Dr. Joseph adds.

One reason acupuncture is successful is that the animals’ discomforts are relieved and they associate the treatments with feeling better. But while aspirin or antibiotics may be hard to administer, inserting needles for a period of time on a horse’s body presents a challenge as well.

There are several techniques using traditional needles or a technique known as aqua acupuncture, Dr. Schoen explains. In the latter, a needle is used to inject an aqueous solution at a specific acupoint. A popular solution is a suspension of B-12. The needle can then be withdrawn, but the effect is close to that of the traditional acupuncture needle. “This prevents the needles from breaking inside the horse,” Dr. Schoen says, because the needle is not left in the horse.

While acupuncture has been recognized by the American Veterinary Medical Association (AVMA), there is a lot of anecdotal evidence but no scientific studies to validate the benefits of acupuncture on horses.

Goodbye Saddle … Hello Ground

8
Falling off a Horse
Barrel Racing at DuPage County Fair by Daniel X O’Neil on flickr/CC BY 2.0

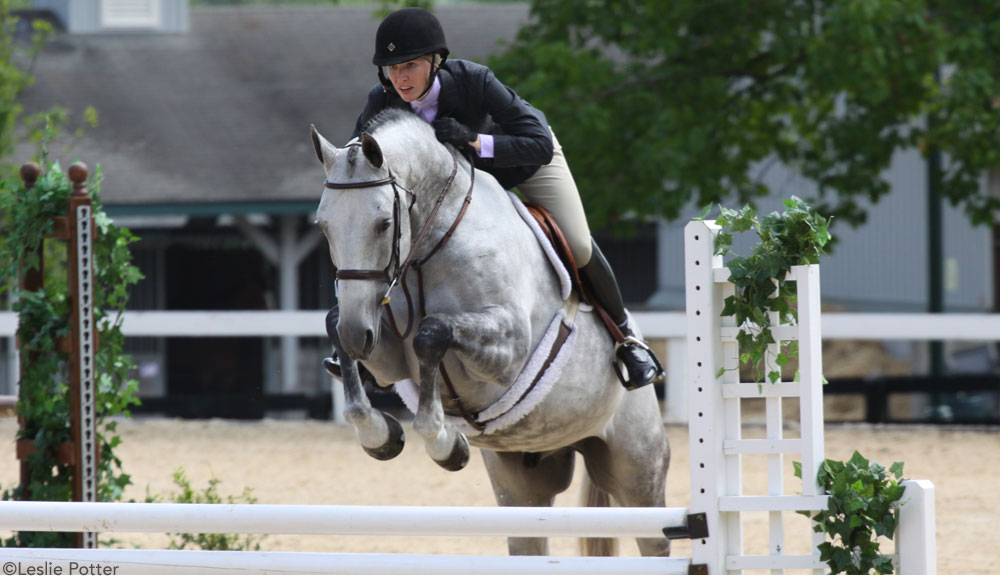
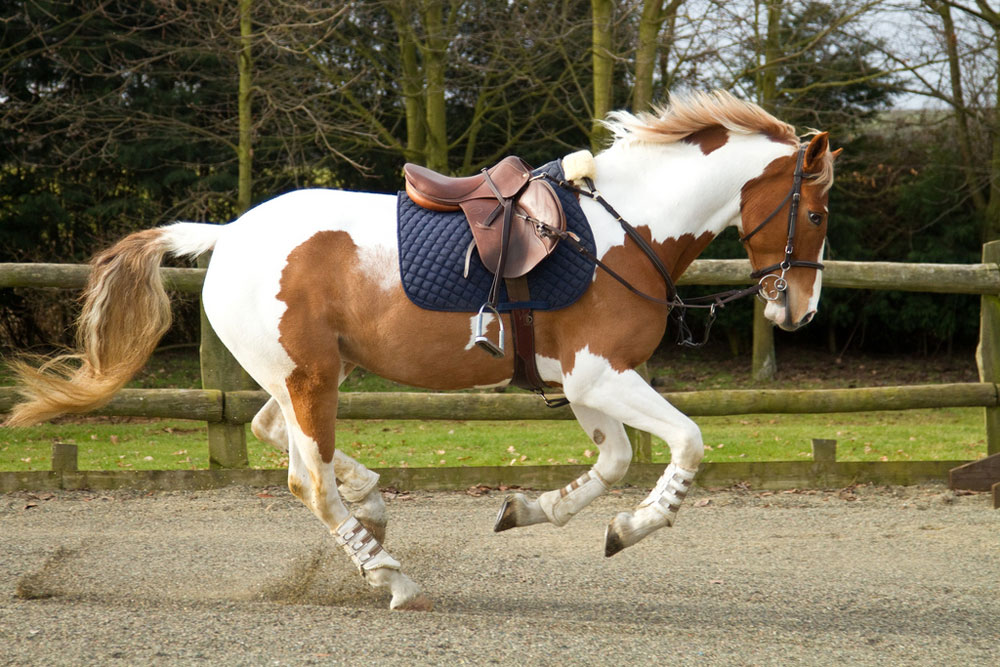
Anyone who rides a horse is almost certain to fall off at some time. On most occasions these unexpected departures from the saddle are nothing more than a nuisance, and the end result is embarrassment or a dented pride, rather than physical injury. Sadly, that’s not always the case.

Falling off is never a pleasant experience, and that probably explains why some riders feel that any mention of the subject is tempting fate. But if everyone who rides a horse has just one fall a year, that’s still millions of falls with the possibility of millions of injuries. With that in mind, it’s important to consider what can be done to protect yourself.

Not surprisingly, riders under instruction have far fewer falls than those who do their own thing, which is good news for beginners who take lessons. For example, Monica Sellers, a trainer in Lancaster, Calif., teaches at least 30 students a week, but each year, only five to 10 part company with the horse. A little further south in Hemet, instructor Pattie Roberts, who works mainly with young clients, says falls are rare.

In skydiving, gymnastics and some martial arts, learning how to fall is an essential part of basic training. Riding does not place such emphasis on falling training, despite its fairly high degree of risk. Even riders receiving regular lessons have described the amount of advice given on dealing with a fall as minimal.

“If a student is especially timid, I will discuss and validate their fears (of falling), but I don’t want to focus too much on the negative aspects of riding,” says Sellers. Maybe that explains the general feeling: Riding is about building confidence and developing a partnership, so anything that veers a rider off that course is often considered unhelpful in attaining these goals.

Emergency Exit

Several trainers and equestrian organizations do teach the emergency dismount, which can be useful in difficult situations. It’s a simple technique. The rider bends forward and wraps the arms around the horse’s neck, kicks away both stirrups, then swings a leg over the saddle and pushes away from the horse.

Riding student Lori Coulson from Ohio learned the emergency dismount during her early lessons. “This was practiced first with the horse standing, and then at a walk, and later at a trot. Once we had it right, our instructor would periodically yell, ‘fall off.’ There was no warning, but boy it sure works. In all the times I’ve come off, there’s only one where I didn’t land on my feet,” she says with pride.

There’s certainly a case that can be made for being prepared. But for the numerous riders who are not, what should they do when the awful moment comes? Roll up in a ball? Keep hold of the reins? Try to hang on and work their way back into the saddle?

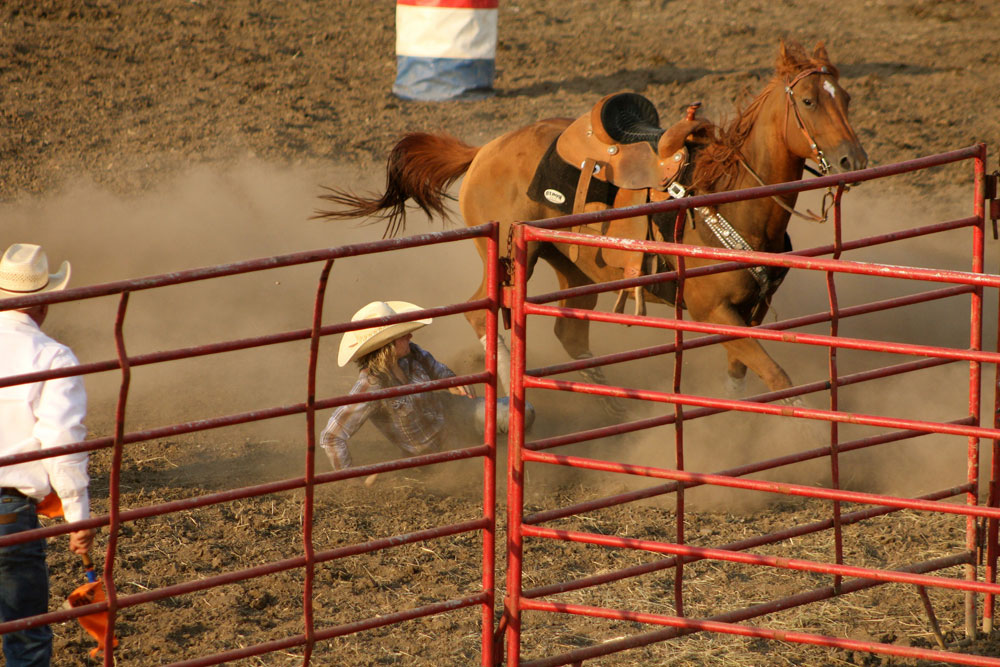
Falls are the bane of steeplechase jockeys. Racing along at 25 to 30 mph over stout fences with a dozen or more horses close by carries a heavy risk. Jump jockeys try to roll up into a ball the moment they hit the ground. The body is curled up with the chin in toward the chest and the head braced with the hands. By rolling with the fall, the impact is spread, decreasing the risk of broken bones.

Jockeys always remain still. To get up and run—assuming you’re fit enough to do so—could put you at risk of being run over by the rest of the field, endangering yourself and other competitors. These techniques are also helpful for non-race riders as well, especially when other riders are following behind.

On the brief journey from saddle to ground, it’s a natural instinct to extend an arm in an effort to break the fall. Often it’s the arm or wrist that gets broken as it takes the weight of the body, along with additional forces.

“I’ve been catapulted off horses more times than I care to remember,” says Mandy Parker, a former point-to-point champion. “Instinctively I put my arm out, but always tried to relax it the moment my hand touched the ground.”

Tami Castagnoli of Colorado, who teaches children and adults, says, “I always tell students to resist the urge of reaching out with their hands. My suggestion is to let the shock be absorbed over as much of your body as possible, as opposed to breaking the fall with your hands.”

In top-level three-day eventing and show jumping, it’s common to see fallers not letting go of the reins. The general consensus, however, is that it is wrong to hold on to the reins during a fall, as this carries a high risk of injury. On landing, you may actually pull the rapidly moving horse toward your body, and that could mean being trampled by iron-clad hooves.

Time is often a vital factor in big competitions, so riders may take the risk of holding onto the horse, since swiftly remounting could put them in the prize money. Remember, too, that most are highly experienced riders who have that sixth sense of knowing when to hold on and when not to. Pattie Roberts’ advice to her students is, “If you are going to fall, let go of the horse and all equipment.”

Not all falls are of the “one moment in the saddle, the next on the ground” variety. Slow ones — where you become partially unseated and try to hang on — are another hazard. You might make it back into the saddle, but all too often the horse will make a sudden movement as you’re almost there, and off you go. In such cases, it’s often wiser to roll off at the start or resort to the emergency dismount. With all the chaos going on as you reach for the saddle, the horse may spook or panic, and there’s an added risk of becoming entangled in the horse’s legs.

The key ingredient to self-preservation will always be a generous measure of common sense. Thinking ahead, being aware of what’s going on around you, and vigilance to the possible dangers are not only vital to riding, but life in general. This all stems from the human brain—a part of the body that’s extremely vulnerable when a rider suddenly parts company with the horse.

Loose Horse
Photo by rayand on flickr/CC BY 2.0

Keeping Your Head

In Great Britain, anyone who rides without an approved helmet is considered very foolhardy by his or her peers. Even the Queen has not been spared. When newspaper photographs showed Her Majesty hacking out with only a silk scarf on her head, numerous riders wrote in and accused their monarch of failing to set a good example. Here in the United States, such attitudes can be quite the reverse, as Craig Bradley from Alabama knows only too well. He always wears a helmet when riding his Tennessee Walking Horse or Appaloosa on group trail rides, but it does cause some strange reactions.

“Some people literally think I’m a bit ‘off’ and avoid me because I have a helmet on,” Bradley says, then adds, “usually three or four people are sure to ask me about it.” He reckons only about one in 500 riders wear a helmet in his region.

Bradley is asked countless times if his helmet is hot or uncomfortable. He gives a standard reply: “I don’t even know it’s there, unless I hit a branch.”

Of course, we’ve all heard the popular excuses for riding without a helmet, “It’s my head, so it’s up to me whether I wear one or not,” or “My horse is well-behaved; he never spooks at anything,” plus numerous others in similar vein. But what if that good old horse is suddenly threatened by a galloping runaway? He’s either going to shoot out of the way fast or run the risk of a collision if he just stands there. In either situation, would you really want to be on board without any head protection?

The American Medical Equestrian Association reviewed state medical examiners’ data from 27 states, documenting 205 riding fatalities for a 10-year period. Sixty percent of those deaths were from head injuries.

When buying a helmet, there are two things to consider. It should meet American Society For Testing Materials (ASTM) standards and be certified by the Safety Equipment Institute (SEI). It must also fit snugly without any pressure points, and the safety harness or chin strap should be correctly adjusted.

Other parts of the body are as vulnerable as the head but not so easily protected. A long-sleeved shirt will help reduce arm abrasions, while jackets or weatherproof garments offer additional padding. Avoid stuffing the pockets with hard objects. On one occasion, a large bunch of keys “‘cushioned” the impact between my thigh and the ground and caused severe bruising — my only injury.

Eventers and an increasing number of riders in other sports wear body-protector vests, which look like an equestrian version of the flak jacket. They provide upper-body and shoulder protection, and can be worn under a sweater or jacket. However, outer garments may need to be a size larger to accommodate it.

It pays to be fussy about the fit of a vest. What feels comfortable when you’re standing up can often be quite the opposite in the saddle. One problem area is the length of the section that reaches down from the lower back to the buttocks. It can sometimes catch on the cantle or press into the saddle seat, making it difficult and uncomfortable to sit correctly. Always try to sit on a saddle in the tack store to be sure the protector is not too long.

Body protectors are not without their critics. Some claim they are useless and in reality do little for the rider. That opinion may have been formed by expecting too much of them. They’re not a guarantee against injury any more than a helmet is, but the padding and protection can still be beneficial. If proof is needed, look at British jockey Willy Carson. As he was mounting for a race, his frisky filly wheeled round and kicked him forcibly in the chest. The five-time champion jockey was hurled 15 yards, suffering internal bleeding and kidney damage. Doctors said that the body protector worn under his racing silks probably saved his life.

10 Tips to Minimize Fall Injuries

  1. Always wear an approved safety helmet.
  2. Never ride a horse beyond your capabilities.
  3. Make sure your arms are covered, and wear boots with a heel.
  4. Never take any horse for granted. Even the quietest can be spooked or unsettled by the unfamiliar.
  5. If a horse starts to act up, try to stay calm. Use a soothing voice and pats on the neck to reassure him. Don’t scream or shout; it could make matters worse.
  6. Always tighten the girth before mounting, and check it again a few minutes later.
  7. Share trail rides with a friend so that if you do fall help is at hand.
  8. Don’t jump obstacles when the ground is very hard or slippery.
  9. If you do leave the saddle, try to relax and roll up into a ball to absorb the impact. Don’t extend an arm to try to save yourself.
  10. Let go of the reins, otherwise you might pull the horse onto yourself.

How Falls Happen

Many amateur riders also end up in the dirt while mounting, usually because they forgot to tighten the girth. It’s such a basic mistake you wonder how anyone can make it. But it happens all too often.

Similar saddle slippages occur on trail rides and in the schooling arena as a result of not checking the girth once the horse has been warmed up. Always check it five minutes after mounting, and do it religiously until it becomes a habit.

The most effective way to minimize falls is by constantly improving your riding skills. A secure seat and good balance will help enormously when a horse shies or becomes fractious. It also makes the rider feel more confident about dealing with awkward situations, since fear of falling can be almost as bad as the fall itself.

There’s nothing weird about weighing up the dangers of falling off or protecting yourself against it. In fact, one might claim that it is our responsibility to do so. Falls can also have a secondary effect on our loved ones and fellow riders.

There are basic safety rules we follow instinctively when using a knife, crossing the street or driving an automobile. Why should riding a horse be any different?

Barn Renovation

0

Power Wash
Dust, dirt, cobwebs and sun damage can combine to make your barn’s exterior look shabby and dull. What a difference a good scrubbing can make! Power washers make short work of what would otherwise be an impossibly time-consuming job. They are standard equipment for most house painters, who can easily finish the job in less than half a day. Or you can rent the unit yourself for the weekend and have a “barn washing” party!

Landscaping
If your barn wasn’t designed by Frank Lloyd Wright and doesn’t quite meet your aesthetic standards, try softening/obscuring the look with some strategic landscaping. Fire resistant shrubs and strips of green lawn can be accented with flowers, to add a little character as well as extra safety insurance. Shade trees also help create a sense of place around the barn while keeping the area cool in the summer, but avoid fire-prone species such as eucalyptus and pine.

Summer Fun
A quick way to create a new look is to temporarily replace your stall doors with colorful “racing webs” or stall screens for the summer. If your stall doors can be easily removed and stored out of the way, these easy to install replacements improve air circulation while they brighten up the décor. They can be customized to match your tack trunks or farm colors, or coordinated with any outdoor event such as a wedding or Fourth of July party.

Smile in the Isle
If your barn isle is simply compacted dirt, consider covering it with interlocking rubber tiles. They provide superior traction, cut down on mud and dust, and create a new look almost instantly. What’s more, they are easy to install, and much more manageable than heavy stall mats.

Mud Be Gone
For stalls with outdoor runs that turn to swamps in the winter, an engineered subsurface designed to drain water away from the barn will keep the area useable all year, and improve the overall health of your horse. A licensed contractor can excavate the area, and replace the native soil with a system of compacted gravel and sand to improve drainage and reduce erosion.

The author is a freelance writer and endurance rider based in Northern California.

Preventing Ticks

13

Bay horse grazing

Itchy ticks and tick lesions cause pastured horses to ferociously rub trees, fences and shelter walls, abrading throats, necks and hindquarters and destroying their manes and tails. Severe infestations produce anemia, loss of appetite and depression. Ticks can infect any horse—or horse owner—with Lyme disease, ehrlichiosis, Rocky Mountain spotted fever and tick-bite paralysis. Standard insect solutions rarely phase these rugged pests.

How to Prevent Ticks

  • Treat horses with tick-repellent products made specifically for horses found at your local pet store, tack and supply retailer, or farm and feed store.
  • If you prefer to hand-pick ticks, wear gloves. To remove a tick, grasp it as close to its host’s skin as possible using fingers or forceps. Don’t squeeze. Apply slow, steady, upward pressure until the tick comes away intact. Drop detached ticks into a jar of soapy water, then dispose of tick-laden liquid by burying it or flushing it down the toilet.
  • Keep a flock of Guinea fowl or free-range chickens. Feathered barnyard marauders consider ticks the pinnacle of haute cuisine–and you can dine on their eggs!

The author is a freelance writer based in Arkansas.

0FansLike
0SubscribersSubscribe
We use cookies to help personalize content, tailor and measure ads, and provide a safer experience. By navigating the site, you agree to the use of cookies to collect information. Read our Cookie Policy.
OK