Enter our 12 Days of Christmas Giveaways here!
0 ITEMS
  • My Account
  • Holiday Gift Guide
  • Podcast
  • Webinar
Subscribe Combo
Enable cache13
Home Blog Page 1065

Feeding Bran to Horses

17

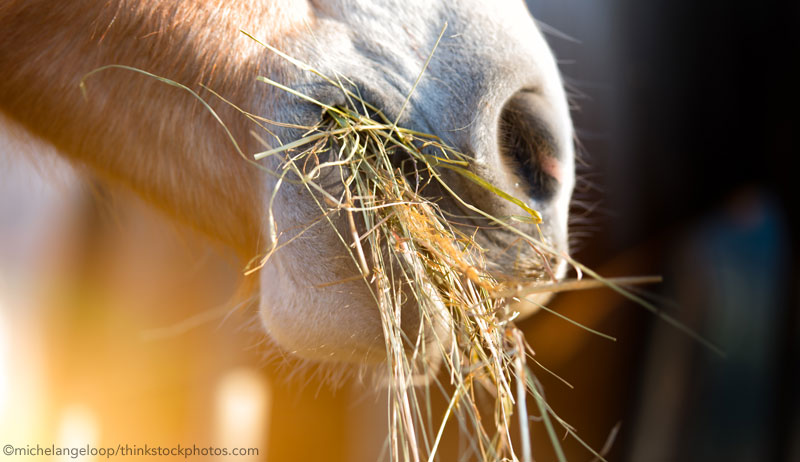
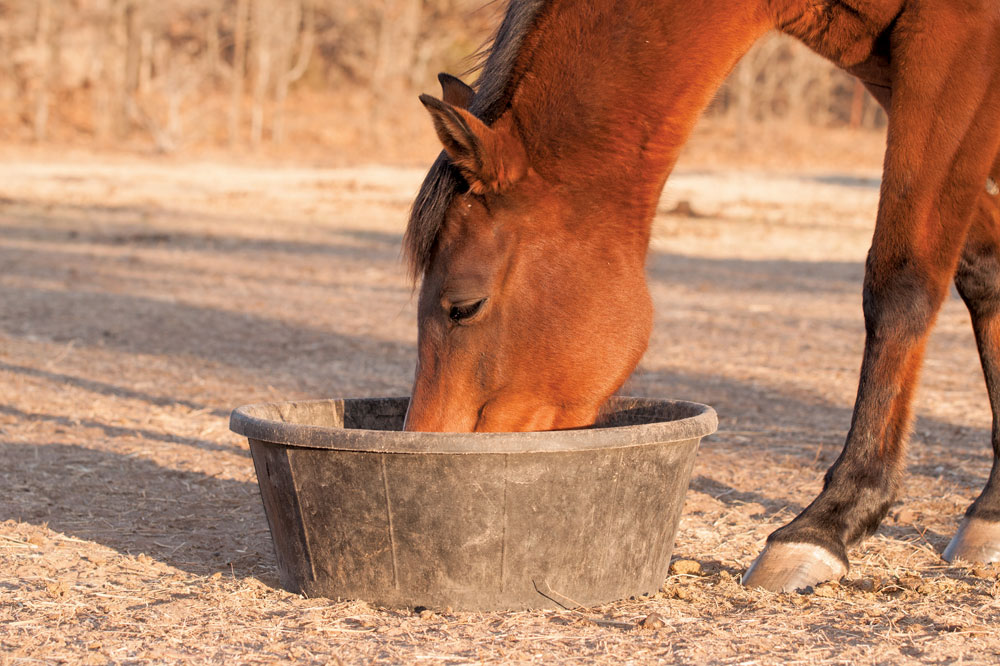
When Laura arrived at the barn bearing hot bran mashes, the horses started nickering and smacking their lips. All of them, that is, except her Morgan gelding Justin.

Justin turned and refused to even sniff his mash. The gelding’s behavior puzzled Laura as she watched the other horses dive in greedily. Her annoyance grew as the mash she prepared with such care got colder and colder. Laura decided to go ahead and give the other horses their evening grain but to withhold Justin’s feeding until his mash was gone. “No dessert until you eat your vegetables,” she thought.

Feeding bran mashes is an equestrian tradition that has been passed down through multiple generations. Horse owners believe they are doing something positive for their horses when they feed them bran mashes. Offering hot mashes laced with carrots, molasses or other sweets gives horse owners a particularly warm fuzzy feeling in winter. Some people can be quite dogmatic about the proper way to mix and “cook” a mash, and recipes abound to provide our equine companions with a gastronomic variety.

Evaluating the tradition of mashes in the wisdom of modern nutritional knowledge, however, may offer an explanation of why Justin turned up his nose at Laura’s lovingly prepared equine cuisine.

Horse eating from a grain dish

Why We Feed Bran

Many ingredients have found their way into livestock diets because manufacturers were searching for a profitable use for the byproducts of the milling process. In the case of bran, the process was milling wheat and the byproduct was the large reddish-brown flakes of the grain’s outer husk, which were removed before grinding the soft, inner kernel into flour.

Horses, people discovered, liked the taste of bran. And millers were more than delighted to sell bran cheaply to local farmers who fed it to their horses. There was only one problem with this turn-of-the-century feeding practice. Horses fed large amounts of bran over long periods of time developed a serious skeletal problem known as “big head.”

Bran has an extremely lopsided calcium-to-phosphorous ratio of 1-to-12. The ideal ratio of calcium to phosphorous in a horse’s diet is 1-to-1 or 1-to-2. With the ratio so badly out of balance, horses fed large quantities of bran stole calcium from their bones to achieve the right metabolic balance between the two minerals. Soft connective tissue replaced bone and created the enlarged, lumpish skulls that gave the nutritional disease its name.

Modern nutritionists eventually unlocked the secrets about mineral interactions and explained the cause of big head. Now, however, nutritional science is questioning the practice of occasional mashes for reasons that have nothing to do with mineral imbalances. Like those farmers who inadvertently overfed bran and caused big-head disease, modern horsemen may unknowingly be causing their horses distress when they feed bran sporadically as a weekly mash or as a constipation preventative just prior to traveling.

Not a Change for the Better

It is well known among veterinarians, nutritionists and experienced equestrians that a sudden change in diet causes digestive disorders in horses. At the least, the horse may experience mild intestinal discomfort that makes him cranky, anxious or sluggish. Diarrhea, excess gas, colic or laminitis are other possible consequences.

Sudden means that the change is made all at once, rather than gradually in small stages. A change in feed can be anything from switching to a new load of hay, substituting a different grain mix for one you’ve been feeding or turning a horse wintered on hay out on a lush spring pasture.

When a new feed or any other dietary change is gradually made over a period of days or even weeks, the horse’s various gut microbes, which are essential for good digestion, vitamin synthesis and overall health, have time to adjust the size of their respective populations to the shifting ratios of carbohydrates, fats, protein and fiber they must process. But when a sudden change is made, it shocks the microbe population, destroys its balance and results in the death of a proportion of these beneficial and essential microorganisms. The dying microbes are not only unable to assist in proper digestion, but they also give off toxins that can be absorbed through the intestinal walls and into the horse’s bloodstream to the detriment of the animal’s well being.

If the sudden change is a relatively small one, the horse may experience abdominal distress and discomfort, such as mild gas or diarrhea, but not life-threatening consequences, such as colic or laminitis. Researchers now suspect that is what happens when horses get a weekly or occasional bran mash. Justin may be smart enough to have connected a queasy feeling in his hind gut with the bran mash he ate just before it started. Or perhaps his gut is more sensitive to changes than those of his barn buddies. Either way, he was trying to send Laura a message.

All Brans Are Not Created Equal

Rice bran is one of the newer feedstuffs to be marketed as an equine supplement and to find its way into commercial grain mixes. Like wheat bran, rice bran is the flaked outer coating of a grain.

Rice bran is high in fiber, protein and calories. Also like wheat bran, rice bran has a significantly lopsided calcium-to-phosphorous ratio. Unlike wheat bran, however, a higher percentage of rice bran’s calories come from fats rather than carbohydrates. And that makes a big difference in how it fits into equine rations.

Rice bran contains 20 percent fat, a higher fat level than any other feedstuff commonly fed to horses, except animal or vegetable fats. A pound of rice bran contains 3.5 ounces of fat, nearly the same amount as a ½ cup of vegetable oil. That fat content also makes it a denser, heavier feed than fluffy, high-volume wheat bran. Rice bran is a coarse, buff-colored powder, while wheat bran is composed of large, flat, reddish or blonde flakes.

The combination of high fat and high fiber makes rice bran an ideal addition to the diet of hardworking performance horses. The fat provides extra energy without the hyperactivity and the risk of gastrointestinal ailments that are a risk when feeding high-starch grain diets.

Fats are metabolically efficient energy sources because they produce lower internal temperatures from digestion than carbohydrate-rich grains, and horses can easily convert the fat they digest into energy. When it comes to adding water, however, rice bran turns more to mush than mash. Because of its higher fat content and small particle size, rice bran does not absorb water like wheat bran.

If your purpose in feeding mashes has been to get more water into your horse’s digestive tract, wheat bran is more suitable.

Why Do We Do It?

If occasional bran mashes are not good for horses, why do horse owners feed them? Many firmly held beliefs about mashes are based on nothing more scientific than old horsemen’s observations as they guessed at causes and effects. Although nutritional common sense now debunks the mythology, horse owners still share it as gospel and are loathe to let go of the wisdom of ages. The reasons they give for feeding mashes include:

Myth 1. A hot bran mash warms a horse in winter. How long are you trying to warm the horse? The warming effects of the water used to make the mash may last five to 10 minutes after the horse eats it, less time that it probably took you to make the mash. A better way to warm a horse in the winter is to increase the amount of hay he eats. The heat of digestion from just 5 pounds of extra hay will raise the horse’s internal core temperature 1.2 degrees Fahrenheit for nearly four hours.

Myth 2. A bran mash is a good way to get more water into a horse in the winter. How much bran are you feeding? A typical mash only uses about a quart or two of water, more or less depending on how soupy you decide to make it. Compared to the 5 gallons or more of water the horse needs daily, that’s not a big deal.

A better way to get more water into the horse in the winter is to make sure water buckets stay thawed and water is accessible. Finding a way to warm the water to approximately 40 degrees Fahrenheit in winter will keep horses drinking sufficient amounts and make the small amount in that mash insignificant. In summer, keep water palatable and free of algae or other contaminants by changing water frequently and scrubbing buckets and troughs regularly.

Myth 3. A bran mash is a good laxative to give a horse before a long trailer ride to prevent constipation. What do you mean by a laxative? By definition, a laxative is something that increases the water content of feces. Cornell University researchers studied the laxative effect of bran at various levels in the diet, with some horses being fed up to 50 percent hay and 50 percent bran. They found that there were only slight variations in water content of feces at various feeding levels, not enough to pronounce bran a laxative.

Another study compared the stools of horses fed a ration of 10 percent bran and 90 percent chopped hay to those fed 100 percent chopped hay. No difference in the water content of the feces was found. So why do horses produce watery stool when they eat a bran mash? First, high-fiber bran increases the volume of the horse’s feces. Second, since feeding bran mash only occasionally or even weekly represents a sudden change in diet as the gut microbes see it, they start to die off. That causes the diarrhea or watery stool that horse owners erroneously assume is a laxative effect.

If you are convinced bran is a must in the diet of a traveling horse or a mare about to foal, a better way to incorporate it into their rations is to gradually add a little bran to the horse’s regular rations 10 to 14 days before the event, and keep it at a constant level. Make sure the traveling horse drinks plenty of water on the journey by getting him accustomed to drinking water flavored with a hard peppermint candy or lemon drop, a powdered drink mix, a cola drink or any other tempting taste at home. As the water changes taste from place to place on the journey, adding the familiar flavoring can help keep the horse drinking sufficient water to help avoid constipation.

What Good Is Bran?

Since horses like the taste so much, bran can encourage picky eaters to clean up their feed. Bran can be fed in amounts up to 5 to 7 percent of the horse’s total daily ration without causing harm. Balance out bran’s phosphorous content by feeding it with alfalfa or other legume hays or, if feeding grass hay, by adding 2 ounces of feed-grade limestone to the horse’s daily grain ration. Dry bran tends to be fluffy, and horses blow it around with their noses. Although it is perfectly fine to feed dry bran, moistening it keeps it from irritating the horse’s respiratory tract.

Bran’s biggest claim to fame is its high fiber content. Bran’s fiber is mostly indigestible cell-wall lignin, cellulose and hemicellulose. These undigested bits are what bulk up the feces when bran is fed on a regular basis. The key word is regular. For example, if your horse eats 20 pounds of feed daily and you have decided to make bran 5 percent of his total ration, gradually add a quarter-pound of bran every three or four days until your horse is eating a pound of bran daily. Feeding bran as a regular portion of the horse’s daily diet, rather than just as an occasional mash, will keep your horse’s gut microbes happy and forestall constipation without causing diarrhea. On a program like this, Justin may be able to face his feed once again with gusto.

– Bonnie Kreitler and Ginger Rich, Ph.D.

Match Feed With Need

4

Before you dump that extra pound of grain into your horse’s feed bucket, think about what you are giving him. Does he really need it? Sure, you rode for an extra hour today, but does that warrant the added calories? Possibly not.

Just because you are putting in some additional time on your horse doesn’t mean he needs a feed increase. It could be that he is finally working at a level high enough to burn off all those extra calories you are giving him. So rather than giving him what you think he needs, take some time to evaluate your horse’s lifestyle so that you know what his needs are.

Once a horse has finished growing, his work level will dictate his feeding program. When feed matches need, the horse has sufficient nutrients for maintenance and to perform his work without becoming either too fat or too thin. The horse owner’s first step in deciding how to feed his or her horse is to properly define the horse’s work level so the animal is neither underfed nor overfed.

Closeup of horse eating hay

The Idle Horse

A horse that is worked less than three hours a week is considered an “idle” horse. An idle horse needs between 1.5 and 2 percent of his body weight daily in feed, with about 10 percent overall protein in the diet. High-quality pasture of hay can provide 100 percent of this basic maintenance diet. When forage quality is less than ideal, 2 to 3 pounds of a grain mix fortified to complement the hay or pasture conditions in your region can help keep vitamins and minerals at sufficient levels for a typical 1,200-pound horse.

For horses on primarily pasture diets, keep in mind that grasses can be 70 percent (or more) water. Therefore, horses maintained solely on pasture need sufficient grazing time to take in the amount of grass they need on a daily basis. Depending on the growing stage of the grass, the grazing horse must harvest about 3 to 4 pounds of grass to get the same number of calories as he could get from eating a pound of hay. Weather, soil conditions, the types of grasses or legumes planted and many other factors can affect grazing.

Feeding grain to a horse

Pleasure Horses

Many pleasure horses are overfed because their owners think they are working very hard. However, nutritionists would actually classify their workload as light. Even the horse that earns a living as an equitation horse or as a western-pleasure mount that is ridden one or two hours a day, five or six days a week is doing “light” work. These horses aren’t breaking a sweat the same way a cutting, reining or barrel horse does. The work level of one of these western performance horses would be considered “moderate,” and the amount of calories they need in their diet should increase accordingly. Most horses doing jumping or dressage at higher levels would also fall into the “moderate” work category.

When equine nutritionists refer to grains and commercial grain mixes as “concentrates” they mean they are sources of concentrated energy or calories for the horse. Concentrates are generally lower in fiber and higher in starch than forages. Some grain mixes contain added fat to boost their calorie content, which lowers the amount of starch (grains) that the horse must eat to meet his needs. The horse takes in more calories per mouthful of concentrates than he does when eating pasture grass or hay.

Nature’s plan for the equine digestive tract did not include concentrated feeds. Horses didn’t need concentrated forms of energy in their diets until man put them to work and limited the hours they could graze on pasture or hay. Feeding grains became necessary so that working horses could consume sufficient calories in the time they had available to eat. Whether or not a modern horse needs concentrates depends on his workload.

The horse doing light to moderate work needs about 1.5 to 2.5 percent of his body weight daily in feed, with about 10 percent of that from protein. Like the idle horse, good-quality forage should still be the cornerstone of the diet. Depending on the workload, the typical 1,200-pound horse doing light to moderate work may need from 3 to 10 pounds of a 10- to 12-percent crude-protein grain mix fortified with vitamins and minerals that complement the type of forage fed.

A horse may move back and forth between “light” work and “moderate” work as competitive seasons and training schedules change. Make gradual adjustments in the horse’s calorie levels to match the animal’s workload as it changes.

Closeup on an eventing horse's head

Intense Work

Horses in sports that call for intense levels of training and fitness, such as racing, upper-level eventing, polo or endurance racing, have high calorie needs. These horses need from 2 to 3 percent of their body weight daily in feed, with a 10- to 12-percent protein level in the total diet. In order to consume sufficient calories, horses engaging in intense work may need as much as 50 percent of their daily feed intake, by weight, in concentrates.

Making sure that a horse consumes sufficient feed daily at this work level sometimes becomes a challenge. The time demands of training and the schedule changes dictated by travel and competition often disrupt both normal feeding times and the horse’s appetite. Providing top-quality, highly palatable feeds is essential to making sure the horse eats enough to take care of his daily needs.

Premium commercial feed mixes aimed at this market often have added fat to make them more calorie-dense and because research has shown some positive links between fat metabolism and energy availability. When fat is increased and starched is decreased, there is a lower risk of metabolic and digestive disorders, such as colic, founder and tying-up. Horses doing intense work need a well-fortified grain mix that provides slightly higher levels of vitamins and minerals. They may also need added salt and other electrolytes during periods of physical exertion, especially in hot weather.

Balancing Needs

When the calories the horse takes in do not roughly match the calories the horse needs for maintenance plus work, the horse becomes either fat or thin. The horse that is too thin has no energy reserves or stamina, while the fat horse has unnecessary stress put on his heart, other internal organs, and his joints. An overly fat or overly thin horse can also present breeding problems.

Dr. D.R. Henneke and his colleagues at Texas A & M University developed a scoring system that has become the industry standard for evaluating a horse’s body fat. It ranks animals on a scale of 1 (extremely thin) to 9 (extremely fat) by looking at the fat deposits (or lack of them) along the back, the horse’s ribs, the neck, the shoulders, the withers and at the top of the tail.

While a hard-muscled, athletic horse might actually score on the thin side of the Henneke scale because of extreme fitness, the typical horse doing light or moderate work should score about 5 or 6. That means ribs can be felt but not easily seen, a thin layer of fat blends the neck and shoulder together smoothly, withers are smoothly rounded, there is barely a crease or no crease at all down the horse’s back, and a moderate layer of fat smoothly blends the back and hindquarters at the top of the tail.

Changing a horse’s workload without changing his feed intake is an obvious reason for weight gain or loss. Many other factors can also affect a horse’s calorie needs and intake. In cold weather, a horse may need extra calories to burn in order to stay warm. During fly season, pastured horses may seek shelter and reduce their grazing time, thereby reducing the amount of feed they are taking in. A new load of hay may not be as nutritious and calorie dense as the previous load. Parasites may be interfering with efficient digestion. Genetic programming alone can cause some horses to be hard-keepers, while others on a similar diet can be easy-keepers.

Gray horse grazing in a field

The Aged Horse

Age is one of the factors that can shift the horse’s nutritional needs. The older horse’s digestive tract may not be as efficient as it once was because of a lifetime of fighting parasites or simply from wear and tear. Absorption of vitamins, minerals and energy, and the synthesis of proteins and certain vitamins within the horse’s body simply may not be what they used to be. Hormonal changes may affect coat condition and other bodily functions.

Older horses with dental problems may have trouble taking in enough calories to maintain good condition, since worn teeth make it harder to chew grains and even stemmy hay. Sometimes just taking extra care to select fine-stemmed, leafy hay is enough to help these veterans. Chopped hay, forage pellets or cubes, or alternative forages, such as beet pulp, often benefit the older horse that can no longer efficiently process long-stem hay. Cracked, crimped or steamed and flaked grain may also aid digestion and absorption.

Gradually introducing from ½-cup up to 2 cups of vegetable oil daily into the older horse’s feed is a good way to add extra calories without increasing the volume of feed the horse must eat. Pay close attention to vitamin and mineral levels in the horse’s overall diet, especially vitamins A, D, C, and the B vitamins, such as niacin and riboflavin, since the horse’s ability to store and synthesize these vitamins may be compromised by age.

Many manufacturers have developed feeds formulated especially for senior horses. These products combine forage and concentrates into a pelleted or extruded complete feed that can be easily chewed by teeth that have lost their grinding surfaces over the years. Added fats boost the calorie content and higher levels of vitamins and minerals help horses with an inefficient digestive tract achieve more balanced nutrition.

Monitoring Change

It is a good idea to learn how to use a weight tape, then measure your horse every other week, or at least monthly. By doing this, you note subtle changes in your horse’s condition before they require major changes in your feeding program.

To maintain a consistent feeding program, feed your horse by weight, not by volume, of feed, and know the protein and nutrient content of the feeds. Volume measurements such as scoops and flakes are an imprecise way to feed a horse. A scoop of plump, top-grade oats can weigh 25 percent more than a poor grade of thin oats with a higher ratio of fibrous hulls to starchy kernels. A scoop of corn may have twice the calories of a scoop of oats. Most feed stores stock inexpensive hanging scales for measuring feeds or a flake of hay. Once you know what a particular volume of your horse’s feed weighs, you can go back to eyeballing volume if that simplifies feed time. If you get in a new load of hay or switch to a different grain mix, however, get the scale out again, check weights and evaluate the difference in quality between the old and new feedstuffs.

Reining: Fun, Fast and Challenging

4

“I don’t just do it for the money,” chuckles Mike Flarida, a top National Reining Horse Association competitor. Flarida says that the money is nice, but it’s just the icing on the cake. “I truly enjoy riding the horses.”


Jordan Larson and ARC Gunnabeabigstar competing in reining at the FEI World Equestrian Games Tryon 2018

Red-Hot Sport

Why is reining so hot? And what type of rider is drawn to the sport?

First, reining competition dispenses with some of the artificial aspects of other types of horse show events. Although reiners are committed to professional turn-out and well-groomed horses, there’s no need for extravagant silver tack or custom-tailored, designer clothing.

Second, reining combines the elements of speed, riding skill and expert horse training, which in turn beckons to a certain type of competitor. In general, those drawn to reining are dedicated horsemen and women who are looking for another avenue of competition after being successful in some other style of riding.

“A lot of people who come to reining have a history or background in horses,” Mike Flarida explains. “They either rode hunter-jumpers or cutting horses, something where they learned a high level of horsemanship. I think the majority of people drawn to reining have already mastered the ability to ride.”

In Competition

In reining shows there are 10 different patterns that the NRHA has approved. Riders are notified before the competition which pattern they will have to perform. All patterns include small slow circles, larger circles done at speed, flying changes of lead, roll-back turns, complete spins to both the left and right, and the sliding stop. Competition is presented inside a show arena or pen.

According to the NRHA, each required movement receives a score from the judge, and horses are evaluated on smoothness, finesse, attitude, quickness and authority as they complete each maneuver. To exemplify that reining is a team effort between a “highly educated horse and an extremely skilled rider,” the NRHA handbook describes the goal of reining competition: “To rein a horse is not only to guide him, but also to control his every movement.” To English riders this description may ring familiar. “Reining is almost western dressage,” says Flarida.

The Reining Horse

Not every horse is suitable to be a reining prospect, however. Although Quarter Horses definitely dominate the sport, Flarida believes that’s partly because it’s the breed that most people associate with any western-style competition, and is the breed those riders coming from stock seat backgrounds are most comfortable with.

But Flarida was able to name Arabian and Morgan horses who’ve made their mark in national reining standings over the years. However, it’s more than just physical characteristics, such as correct conformation and athletic ability, that help make a top reining prospect. Flarida believes that a horse’s temperament is of paramount importance.

As a professional, he likes best to work with a horse that’s a happy horse — a horse that’s really willing to learn and accept training.

“They also have to accept the social responsibility of showing, such as traveling and being around other horses,” he says. He also looks for a horse with average intelligence. “A horse that’s too smart soon learns to anticipate everything. I become ‘old hat’ to them and they don’t listen anymore. A horse that’s too dumb doesn’t retain anything. The best horses are the ones of average intelligence that I can motivate.”

In general, reining horses are started during their 2-year-old year in a simple snaffle bit and taught to be responsive, all-around saddle horses. They learn the basics of a reining foundation: to lope quietly on a circle, gallop straight lines, halt and stand relaxed, step around in a turn and back willingly. The young horse must never be rushed in his training, or smoothness will suffer later.

It is the lucrative NRHA futurity that most reiners aim for in theirhorse’s 3-year-old season. Through regional competitions, the field is narrowed down to just 35 horses for the finals, which was held last year in Oklahoma City and was won by Mike Flarida on Whizard Jac.

Freestyle Reining

In 1986, another style of reining was added to the NRHA. Freestyle reining was introduced, and its popularity has soared with both riders and spectators. Freestyle reining is similar to freestyle dressage in that riders are allowed to create their own patterns (incorporating some required movements) and choreograph them to music. Freestyle reiners are also encouraged to wear appropriate costumes.

Kathy Copus of Santa Barbara, California, is a freestyle reining competition. Fitting the typical description, Copus came from a background in horses, having been a successful huntseat rider as a junior and amateur rider. She then turned to riding in western pleasure and trail events, but wasn’t much interested in reining until her husband, a reining competitor, had back surgery. That left his 9-year-old gelding, Skeeto Command, available. Copus began having fun riding the fully trained Quarter Horse, and watched her trainer, Roberta McCarty, finish in the ribbons on Skeeto Command in open freestyle.

“You gotta do this!” she told Copus.

Copus found herself focused on a new goal. The first step was to choose a song that fit her horse. She settled on “Tan Shoes with Pink Shoelaces,” an oldies standard with an upbeat, quick tempo that matched her horse’s rather short strides at the gallop. Next came the costume.

“The song gave us ideas for the costume, because in the song is the description of the main character: ‘he wears tan shoes with pink shoelaces,’ plus a Panama hat and a polka dot vest. And we were able to make all of this, but we had to try out the Panama hat.”

Skeeto obliged Copus by accepting the hat around his ears. As part of her own costume, she also donned a polka dot vest, but hers was sleeveless and a little more low-cut than she had anticipated. “I had to put up with a few hoots from the audience, but it was fun!”

Her horse seemed to enjoy the freestyle, too. “He’s a very well-trained reining horse,” she says. Being able to practice her routine only a few times worked to her benefit. “He’s the type of horse that as soon as you begin any of the regular (NRHA) patterns, he immediately knows what comes next.” So the novelty of her freestyle performance kept him listening and focused on her.

“I think spectators enjoy watching the freestyle so much because it’s not the same horse doing the same pattern over and over again. Each performance is different,” Copus says, “and there’s a lot of creativity involved.”

Yet there are some purists among reiners who feel that the freestyle events detract from the time-honored horsemanship skills required in open competition. Flarida, who has also dabbled successfully in freestyle, offers both sides of the debate.

“Freestyle has been very good for the reining industry. It’s been great for the general public.” For example, Flarida cites his own performance in a freestyle exhibition he gave at Equitana horse fair in Louisville, Kentucky, where the crowd went wild. “Freestyle can be very artistic. But riding in costumes is not what reining is really all about. Some reiners feel that freestyle can strip away the dignity we’ve worked so hard to gain.”

Yet Flarida firmly believes that freestyle will continue, and over time, like every equestrian sport, there will be those riders who take the event to a higher level. Participants like Kathy Copus and thousands of appreciative fans wholeheartedly agree.

Show-Ring Turnout

19

You ride into the arena and look around you, taking in all the beautiful western pleasure horses groomed and saddled to perfection. Suddenly, you see yourself in the reflection of the arena windows. You are sitting on your beautiful bay American Quarter Horse gelding, resplendent in his Roy Rogers parade saddle complete with tapaderos and Mexican-silver conchos. His hooves shimmer with bright, glittery paint, and roses braided into his long, flowing mane match a bright-pink bow tied into his forelock…

Wait a minute! Fear strikes your heart as you realize that you don’t look like any of the other riders — not a tapadero or rosebud in sight. The judge beckons to two men standing by the in-gate and then gestures at you. The audience begins to laugh as the men escort you from the ring. Yes, it’s the fashion police. You’ve committed a terrible crime and now you are going to pay…

Suddenly you wake in the middle of the night, drenched in a cold sweat. You turn on the light, look around your room and see the brand-new woven-wool saddle pad draped over your closet door and the beautiful double-eared bridle with its silver conchos hanging on the doorknob. You fall back to sleep, relieved that this fashion faux-pas was merely a horrible dream.

Who hasn’t had this dreadful dream the night before a big show, or any show for that matter? Every good show rider knows that it’s important to present a polished, well-turned-out show horse to the judge, and not a fashion victim living in the past. And even though beautiful tack does not replace good training and riding, it can be that one final touch that puts you in front of a horse and rider that are equally as good.

Saddle Seat
The saddle seat horse encompasses many breeds, including the Arabian, American Saddlebred, National Show Horse and Morgan. While this section focuses primarily on Saddlebred fashions, the trends are basically the same for all breeds, with Arabian owners preferring flashier colors.

Lance Bennet, owner of Bennet Saddlery and Bennet Riding Academy in Carlsbad, California, describes the properly turned-out saddle seat horse. The Whitman’s Campbell cutback saddle is the most popular saddle, he says. The smooth bridle leather that covers the seat and flaps is preferred over the stamped or pigskin-printed leather. It gives a bit more stability to the rider. Havana brown has always been the preferred color. “Nothing much changes with saddle seat horses; styles basically stay the same. The girth is white, made of plastic fiber with a patent-leather look, and no saddle pad is used,” Bennet says.

The only thing that does change with saddle seat horses, as far as tack goes, is the cavesson set — the noseband and browband. Bennet says that these come in a variety of colors to complement the horse’s coat and the rider’s apparel. While there are no rules about which colors are acceptable, shades of red and burgundy are most common. The headstall is Havana brown to match the saddle. “What’s popular this year is a ½-inch, laced equitation snaffle rein instead of the smooth rein,” adds Bennet. “These are getting used more by amateur riders outside of equitation classes. Some riders have a tendency to pull up on the curb too much with the smooth rein — you get a better feel with the laced rein — and it’s easier to tell the difference between the curb and the snaffle.”

As for grooming, braiding depends on the division for Saddlebreds, but basically long manes and tails are required. Tails are left natural and unbanged, and hopefully drag the ground. If braiding is required, a ribbon is plaited into the forelock and into a single long braid in the mane. “Most riders take the forelock off and make a fake braid. It’s really difficult to get the braid centered properly, and it has to last all day. A really good braid job shows no hair sticking up at all. It’s much easier to just attach a false one,” Bennet says. Morgans, Arabians and National Show Horses

Approximately four inches of mane is clipped to make a bridle path. Saddlebreds in the three-gaited performance classes are required to have roached manes. Natural manes and tails (not set) are required for pleasure horses. Morgans, Arabians and National Show Horses in saddle seat classes are shown with long, natural manes and tails and are never braided.

The hooves are sanded, polished and lacquered to match the natural color of the feet.

The Hunter
Nancy Reed, an AHSA R judge and trainer of hunters in Bonita, California, describes how this traditional sporthorse should be turned out. “The trend in saddles is going back to the French style, meaning deeper seats and more knee rolls,” she says. “Today, courses are more technical, and the rider is finding the need for more support. The preferred colors are either Havana brown or the London tan, which can be stained a specific color preference.” Miley Baird of Dominion Saddlery, located at the Los Angeles Equestrian Center, says the hottest thing right now is the Devoucoux, a French saddle that can be custom fit to the rider’s specifications. “Every one of these saddles is beautiful and well made,” he says. Being custom made, they cost about $3,700. On a more affordable note, “the Crosby Centennial is the biggest seller because it fits a lot of horses and has a deeper seat and more knee rolls,” says Baird. Saddle pads are shaped white fleece with a small amount of white showing.

The bridles are no longer thin, but slightly raised, square and with a simple, understated browband. However, the bridle style depends on the horse’s head. Gold browbands and heavy stitching are no longer used, although small fancy stitching is popular. The reins are braided or laced, sometimes square-raised halfway up the rein. “The Edgewood bridle or the Jimmy’s 21st Century are the best sellers,” says Baird. “Also, every hunter has a matching standing martingale for jumping. You can buy one piece at a time and oil everything to match if you can’t afford to buy everything at once.” The large D-ring snaffle bits are the most popular.

“Riders braid only at A-rated shows and even reserve braiding the tails for the bigger shows,” Reed says. Baird agrees: “People stopped braiding at the smaller shows years ago; it’s very rare to see braiding outside of large shows. When people do braid, they use a professional braider who charges about $30 for a mane and about the same for a tail.” Guidelines for braiding are 22 to 35 button braids for hunters, braided on the right side only and tied with matching yarn. Tails are not banged, but left natural, then perhaps French braided and finished with a pinwheel. Hooves are oiled.

The Dressage Horse
Jane Weatherwax, an R-rated dressage judge and trainer in Escondido, California, has observed the tack trends in this aspect of the show world for more than 15 years. “Sophisticated and conservative are the names of the game in dressage,” she says. However, some things are fading out, such as the white-lined bridle. Solid bridles are becoming more popular, with perhaps a browband with some metal decoration. Pretty browbands are the thing for a pretty head. I’m also noticing more brown tack.”

Sandy Hill from Tack in the Box, a leading supplier of dressage tack and equipment in Salem, Oregon, agrees. While black was the dominant color for decades, brown tack is on the upswing because of Michelle Gibson and Peron, as well as other members of the 1996 Olympic team, choosing brown tack over black, she says.

Hill says that Passier bridles and saddles are flying out the door and replacing the Neidersuess in popularity. Although Neidersuess is an excellent saddle and is used by the Spanish Riding School of Vienna, many people are finding less need for the support of the Neidersuess seats. “The leather quality of Passier is also very good,” Hill adds. But don’t go shopping just based on trends. It is important to choose the saddle that fits you and your horse best, and not choose one just because it is popular.

Saddle pads are white with black trim or solidblack, and are normally square. The shaped pad, however, which follows the line of the saddle, is making a comeback. If you like to be on the cutting edge, the swallowtail saddle pad may be for you. It’s basically a square pad, but with a section in the back cut out to resemble a swallowtail. The benefit of this pad is that the whip contacts the side of the horse better, allow for a gentler tap.

Europeans tend to prefer the more decorative browbands, but these have yet to catch on in the United States. “We are selling more solid leather bridles with conservative browbands,” says Hill. “But the trend is leaning toward buckles instead of hook ends, usually silver buckles, with brass being reserved for double bridles.”

Grooming of the dressage horse is also very traditional. Manes are pulled, not cut. Standard hunter braids are acceptable, and are braided to the left or the right side of the crest with color-coordinated yarn. Dressage horses generally sport fewer braids than hunters — 17 to 22 braids total. You can line the braids with white tape is you wish although taping is less common these days. Keep in mind that your horse should have a nice shape to his neck if you choose to tape. The tail is unbraided but banged — cut flat across on the bottom. Some people choose to shave or pull the hairs alongside the top of the tail, which accentuates the hindquarters of the horse. “Although there is no rule regarding braiding, it is a sign of respect for the sport,” says Weatherwax. “I don’t mind seeing a bad braid job, because I know that the person at least tried. Braiding also shows an overall appearance of neatness and preparedness by the rider.” Hooves are oiled rather than sanded and polished.

Western Pleasure
Western pleasure is definitely the showiest way, apart from costume classes, to exhibit your horse. The choices of beautiful leather and silver saddles give the rider a chance to show his or her originality and personality. Simple headstalls adorning a pretty head or a colored saddle pad that brings out the highlights in a coat make this class a favorite among many. Alex Ross of Greensboro, North Carolina, is an expert in this area, with 27 years of experience in showing and training western pleasure horses. He is also a judge and director for the AQHA and National Snaffle Bit Association.

“A tooled, light-oiled leather saddle with silver conchos and plates on the cantle and swells is popular,” says Ross. “The trend in silver leans toward corners — conchos are more square-shaped, and the saddle conchos match the bridle. Stirrups are usually basic, no oxbows. Dark Saddles are not a detriment; we like to think that our judges judge on the merits of the horse and not the equipment.” Silver styles can be changed on saddles.

Saddle pads are an important part of the whole western pleasure picture. “Lots of riders go with colors that match their outfits, mainly solid, not a Navajo,” Ross says. “Some have leather on the bottom edge of the pad with some tooling or conchos.” The cinch is still usually made of neoprene or leather, but string girths are starting to make a little bit of a comeback.

Bridles can show a bit more personality. Two-eared or one-eared bridles without browbands are popular, although snaffle or hackamore horses should have a two-eared headstall or one with a browband for stability. “The reins are basic leather; nothing’s really changed there,” says Ross.

Donna Campuzzano of Mary’s Tack and Feed in Del Mar, California, adds, “Horsehair tassels on the side of the bridle, braided rawhide with silver and gold detail, and square conchos on the cheekpieces of the bridle are very popular, although it varies between breeds. However, anything goes more now than in the past. The new is blending with the old.”

The grooming of the western pleasure horse is basically the same for most breeds, although there are some small variations. Arabian horses,for example, are shown with a longer bridle path and unpulled manes. The bridle paths for other breeds are clipped 4 inches from the ears, and manes are pulled short or cut. “The mane is banded in small sections with rubber bands to lay the mane down closer to the neck,” says Ross. “This streamlines the neck and makes the hair stay put. The tail is long, not dragging the ground but close, and the tail is natural on the end. The hooves are sanded and polished with black lacquer or oiled with hoof dressing. We also highlight the eyes and muzzle with a clear lotion,” he adds.

Whatever discipline you choose, dress to impress, but remember that hard work, preparation and good horsemanship are the keys to success. Clothes are not the only things that make the horse. Pretty tack is just the icing on the cake.

Discover Your Horse’s Personality Type

There will never be another horse exactly like yours. You know better than anybody that he’s an individual with a distinctive personality and characteristics with little quirks and endearing habits. He’s the product of a unique combination of influences: heredity, upbringing, training and living environment. And these differ for each horse, making our equine friends diverse and our relationships with them personal and special.

Tow Thoroughbreds


Still, you can generalize about horse temperaments and use these generalizations to strengthen your relationship with your horse. Once you develop a better understanding of your horse’s basic nature—the good and the not-so-good—you can tailor his training to best meet his needs. Perhaps even more importantly, you can develop realistic expectations for him. You can recognize and eliminate goals that are too lofty, freeing both you and your horse from the stresses of unattainable expectations. It’s a win/win situation.

The six basic temperament types for horses are defined as quiet, interested, nervous, extremely nervous, stubborn and treacherous.

According to J. Warren Evans in the popular animal science textbook Horses: A Guide to Selection, Care and Employment, there are six basic temperament types. He defines them as quiet, interested, nervous, extremely nervous, stubborn and treacherous. While I agree with Dr. Evans that these are the general personality types into which most horses fall, I believe most horses actually fall into more than one category due to their individuality, and that this can vary with the situation and even change over time due to differences in human handling and environmental stimulation.

Do you already have a sense of which category or combination your horse fits into at this point in his life? Here’s a rundown on the temperament types and how each is best handled:

Quiet.

This horse is commonly referred to as bomb-proof by owners and a packer by riding instructors for his unreactive nature. He will tolerate almost anything, from a fluttering flag to an uncoordinated rider with inexperienced hands. This type can generally be trusted to behave safely and to build the confidence of beginner riders, while a more advanced rider might consider him too dull.

Mr. Lazy Slowpoke Horse

When I was a college student in an equine program, most of the horses we rode were young, inexperienced and unpredictable. Once in a while, something would happen to shake the confidence of a student. That’s when the unflappable Quarter Horse, Royal, would be called upon to do his stuff. This steady fellow would carry the shaken rider back to her former level of confidence. He would passably plod through any dressage test and quietly take any low fence no matter how he was brought to it. Royal was not dazzling by any stretch of the imagination, but the program director would not sell him for any price. Horses like Royal have an important role to play in developing riders, but they don’t come along often. Lack of reactivity is simply not typical of the species.

Interested

Interested horses are great for riders with a little training and experience. In well-trained hands, these horses pay attention to the rider’s aids but aren’t upset by them. While they are aware of their environment and respond to things going on around them, it’s unusual for them to react with fight-or-flight behavior. As long as this horse is handled with consideration and sensitivity, riders will seldom go wrong with this sort. Many of the horses you see collecting ribbons at local horse shows fit into this category, as they are both animated and dependable.

Nervous

Nervous is the personality type truest to equine nature, and consequently many horses fit into this category. The flight response in nervous horses is well-developed. They spook easily, perhaps even bolting to escape from perceived dangers all around. They tend to carry their heads high, looking for trouble and ready to react. For a quiet and experienced rider, this horse can eventually make a very nicemount. For a tentative rider, he can be a wreck waiting to happen. Most can eventually develop some trust and a sense of security from confident yet sympathetic riders who allow them to progress in training. They require extreme patience and confident handling from the rider. You cannot rush the trust they require before they can progress.

If you can learn to work with the challenge, these horses can be worth it and wonderful to show as they tend to possess an extra brilliance in spirit and movement.

Extremely Nervous

Extremely nervous horses are so reactive that virtually anything can set them off, and even changes in footing or shadows on the ground could cause fearful explosions at any time. Calm, consistent handling while slowly expanding their comfort zones will ultimately benefit them, but the road will be long and often dangerous. You must stay especially alert at all times. These horses are best left to professionals or to individuals with loads of experience and a solid foundation in equine behavior principles.

Stubborn

Stubborn horses tend to resent work and try to find a way out of it. When pushed, they often become irritable and balky, sometimes even exploding in temper. Trainers often encounter behavior that sets back training, requiring repetitions of lessons already learned. These horses also require riders with a lot of patience, but while the nervous horse requires a quiet hand, stubborn horses need a tactful yet firm approach.

Treacherous

Treacherous horses, with the notable exception of a few naturally aggressive stallions, are nearly always either a product of bad handling or benign neglect. They either haven’t learned to respect humans or have learned to actively resent them. Such horses may unexpectedly attack humans by kicking, biting or stomping on them. Horses who simply lack an understanding of their place below humans on the dominance hierarchy may sometimes be reformed by the most experienced of handlers. Sadly, euthanasia is sometimes the only safe solution for savage horses. Fortunately, such horses are rare.

Horse biting in a herd
Photo: Kwadrat/Shutterstock

Many horses seem to fluctuate daily between types. My mare Duchess oscillates between the interested, nervous and stubborn personality types. Consequently, there are days when she’s brilliant and very responsive. Then there are days when she seems to resent her work, prancing or grinding her teeth. I can’t force her compliance, but must develop it from her willingly. Each day is another chance to bring out her best. It requires me to use my creativity and to be a gentle and tactful teacher. But this is what makes each ride unique and each day a lesson.

Liked this article? Here are others you’ll enjoy:
Connecting with Your Horse
Working with Your Horse’s Horsenality

Cavalletti for Dressage and Jumping

8

Jenny knew she was pretty lucky to be able to school her young chestnut gelding during the winter months in a warm covered arena. “Good thing, too,” she muttered to Finnegan as she swung into her well-broken-in close-contact saddle. “We’ve got to work on our jumping form. I just know you have the talent to sweep our hunter division this year, but you’re just a little too green over fences. I wish I knew some way I could help you work more off your hind end and balance before the jumps, your eye — and mine — would seriously improve. We could kick butt.”

What Jenny doesn’t realize is that there is an easy way to help improve a horse’s gaits, suspension and balance; a way that helps a horse engage his hindquarters and frees up his shoulders to move with rhythm and tempo. Plus, it’s beneficial for not only hunters, but also jumpers and dressage horses. Sounds like some modern training breakthrough? It’s not. It’s cavalletti work.

Cavalletti

If you’ve never ridden cavalletti before, you would be interested to know that problems encountered during jumping or dressage can be overcome by incorporating them into your workouts. For dressage horses, cavalletti work is great for improving the walk, the trot and the balance; it benefits the action of a horse’s motion, and increases suspension and self-carriage. Hunters and jumpers also learn balance, but more importantly, cavalletti teaches these horses how to jump without stressing joints over actual fences. For all types of horses, cavalletti is beneficial for overall rideability, control and fitness. It’s just as helpful for the rider, too. The jumper rider learns to find that all-important distance from jump to jump, and the dressage rider gets a better understanding of balance and feel. But most of all, cavalletti is a lot of fun for riders of all disciplines since the patterns of the obstacles offer a pleasant change from the usual routine.

To help you learn more about cavalletti, Judy Martin, grand prix jumper trainer, and FEI-level dressage trainer Kathy Beal have offered their favorite exercises to help teach you the proper way to ride cavalletti. We’ve also provided you with some safety dos and don’ts, instructions on how to outfit your horse correctly, how to set up your cavalletti patterns, and exercises to help with specific problems or challenge areas.

Cavalletti Preparation

Safety Gear: Judy Martin is adamant about the use of safety helmets. “Don’t even look at a horse unless you have a helmet on,” she says. “Make it part of your riding apparel, just as you would your riding breeches and boots. There are too many dangerous aspects to riding to allow yourself to forgo your helmet. Your horse should wear protective boots, polo wraps or other legwear, both on front and back legs. A horse new to cavalletti may hit or scrape his legs until he becomes more educated, so protect him thoroughly.

Cavalletti Placement: Cavalletti can be dangerous if placed incorrectly, as uneven spacing can cause the horse to trip or step on the poles. Before beginning each workout, check the distance of your poles. Judy says, “If you have fixed cavalletti, keep in mind that these are quite stable and need to be placed carefully. The fixed X-style cavalletti can be turned to varying heights so be aware of how you’re setting these. The closer together they are, the lower they should be. However, the maximum height of the X-style is fine for canter cavalletti.” Distance between each cavalletti should be anywhere from 3 to 4 feet apart for trot work and 9 to 12 feet apart for canter work, depending upon the exercise and your horse’s stride length.

Execution: Cavalletti can be ridden at all three gaits and in jumping position, posting and sitting trot. “One of the best things to do is to start walking through your pattern first,” says Judy. This way your horse will have a chance to get his bearings over the poles. “Whatever position you choose to use to ride through the cavalletti just depends on what you’re trying to accomplish that day. You can choose the sitting trot if you want to use the poles for transition work. For instance, sit the trot and walk just before a single pole. Use the pole to help your horse think about the transition.” Aim to ride in the center of the poles and keep your eyes straight ahead,” she adds.

Take caution when introducing a horse to ground poles or cavalletti. If he’s only worked with ground poles, but has never trotted raised cavalletti, introduce one raised pole at a time, increasing the line as he becomes accustomed to the exercise. Have him go into the pattern straight, keep contact with his mouth light and leave him free to use his body correctly. Always urge him to go forward so that he learns to develop rhythm and tempo through the exercise.

Hunters & Jumpers

Judy Martin, who teaches and clinics in the Southern California area, has been a permanent fixture on the hunter/jumper circuit for years. Described by her students as a “trainer’s trainer,” Judy’s philosophy on horses and riding is well respected in the jumping community. She considers cavalletti a valuable tool to help further a horse and rider’s education. Here are some sample patterns and exercises.

Trot Rails. This exercise teaches a horse to raise his shoulders as he trots through the poles, and helps the horse keep his head and neck in a steady position. Trot poles will also help loosen and stretch him through his back and make him more elastic.

Set up this exercise by using the X-style cavalletti placed on the lowest turn, or use poles on the ground or set in low block holders. Use three to six poles set 3 feet apart. To add to this exercise, just add a small jump 9 to 12 feet away.

Simply approach the poles at a trot and continue through the pattern. If your horse hesitates, keep an active leg on him and steady contact to help his rhythm and activity.

Canter Poles. This canter pattern works to educate the horse on his leads, particularly the lead he doesn’t prefer. You can work the pattern by making your turns and bends on the difficult lead. For example, pick up the left lead, canter through the grid, over the pole on the far side, turn left and reenter the grid on the short side, exiting over the last pole. Use the X-style set on any length, or poles on the ground or in holders. The long side of the pattern is set four to five strides apart, and the short side is set three to four strides apart.

When performing this cloverleaf pattern, focus on his rhythm and balance, and don’t let him rush through the grid or leave strides out.

Gridwork With Jumps. Riding through this grid teaches a horse to jump quietly while learning to manage his balance and stride. You will start to add small jumps in this exercise. Set the distance between the pole and the crossrail to 9 feet. Set a small vertical jump 18 feet out. After your horse gets the hang of the three obstacles, place a small bounce (two jumps set 12 feet apart), four strides away. Your grid will also help you improve your own eye for distances as well as your jumping balance.

Oxers. This exercise is good for horses that rush their fences, because the horse must take his time to approach the second fence correctly. To get your horse to slow down, back off his fences and use his body more carefully while jumping, place two X-style cavalletti together, turned to the highest setting, to form a small oxer. Set an identical oxer two strides away. If your horse rushes this exercise, sit back immediately after clearing the first oxer and give a strong half-halt.

Dressage

Kathy Beal is an FEI-level dressage rider who has had great success training not only her own horses, but several client’s horses with cavalletti. “I work a horse in cavalletti each timeI ride them. I have my poles set up on one end of my arena and I incorporate them into my daily workout.” Here are some sample patterns and exercises for the dressage horse.

Longeing. This is a great way to introduce a green horse to cavalletti. Place X-style poles on the lowest setting, or use ground poles. Place three to seven poles in a fan shape. Longe your horse over at the trot, with you 4 feet away at the center.

20 Meter Figure 8. This exercise to help your horse increase his impulsion while staying rhythmic at the trot, improves suppleness, obedience and transitions. It also teaches the rider and the horse to think of transitions in advance. Place four poles or X-style cavalletti in a fan shape, about 4 feet apart. Trot through the poles in one direction, then change rein and circle 20 meters outside the poles and do trot/canter transitions.

Improving Impulsion and Thrust. Place five to seven poles or X-style cavalletti in a row 4 to 5 feet apart. Trot over the poles and pick up a canter immediately when you exit the row of poles. This helps prepare the horse and rider for transitions. Riders learn to keep the horse in front of the leg and responding to aids. Horses learn not to run into their canter transition.

Adjusting Stride Length. To help lengthen the horse’s stride, place five cavalletti 5 feet apart. Trot through, encouraging the horse to take a bigger stride by driving more with your leg. After exiting the pattern, circle 20 meters. Directly across from the cavalletti grid, make a 10-meter circle in collected sitting trot. Proceed on the 20-meter circle and lengthen stride in the trot through the cavalletti grid once more.

Canter Cavalletti. Cavalletti can also be used to help the horse use his back muscles. As the horse canters over the X-style cavalletti (can be raised to its maximum height), he pushes into the bit contact and stretches his neck. Pair two cavalletti to make an oxer. Place another cavalletti pair 18 feet out. Canter over the first oxer, then transition to the trot, then canter over the second oxer. This exercise encourages the horse to relax, slow down and listen to subtle seat aids.

Saddle Fit

12
Western Saddle

Remember the last time you were out walking and got a small pebble in your shoe, or wore a new pair of hiking boots only to find they were pinching your toes or rubbing a heel the wrong way? If you could not stop immediately to remedy the problem, you quickly found a way of walking that minimized the discomfort until you could. You may also have become very vocal about your pain until companions slowed down to help you find a solution.

Since horses cannot talk, they must find nonverbal ways to communicate with their riders when something bothers them. When a saddle pinches, rubs or digs, the stoic horse may simply grunt and bear it. Most horses, however, will try to send a message to their riders. Do any of the following scenarios sound familiar?

  1. Mounting your horse is a nightmare. It makes no difference if you mount from the ground, use a mounting block, face him into a corner or have a helper. The fidgeting and prancing make you dread the start of every ride.
  2. Circling to the right, your horse bends smoothly from nose to tail and stays relaxed. Change directions, however, and you have a changed horse. He cranks his tail, chews his bit and fights to tip his nose to the outside. Why, you fret, does he have to be so contrary in one direction?
  3. Your horse moves quietly on a loose rein. But ask for a bit of collection, and he begins to grind his teeth and stiffen. You faithfully follow the routine your trainer advised for putting him on the bit each time you ride, but he is not getting any better.
  4. You gave your horse the winter off and he put on a few pounds. Now that you are back in the saddle, you find your high-headed horse is carrying himself higher than ever and tossing his head to boot, particularly at the beginning of a ride. You’ve always used a tie-down, but the head tossing is so violent you’re beginning to worry the equipment might break.
  5. A friend arrives for a trail ride, puts her own favorite saddle on your mare and mounts up. You watch with horror as your old, reliable pussycat pins her ears, gets a hump in her back and threatens to toss your friend before the ride even begins.

If these horses were children, we could say they were acting out. What we need to do is look at their behaviors as communication. While there are no magic tricks in horse training, and there can often be more than one reason for particular behaviors, each of these horses may be telling the rider that the saddle is hurting his back.

Why Is Fit Important?

If we only rode bareback, our horses would soon become sore where our seatbones continually dig into their back muscles. We, too, would become sore from sitting on the same anatomical points without relief and from the continual muscle tension needed to maintain our balance as the horse’s muscles and skeleton wiggle and bend beneath us. Putting aside fantasies about flying through flower-strewn meadows with manes and hair blowing in the wind, there are some very practical reasons why saddles were invented.

Saddles serve two functions. They protect a horse from the drilling pressure of the rider’s seatbones by spreading that pressure out over a wider load-bearing surface, and they provide riders with a comfortable seating surface on a stable platform, which helps them maintain correct posture for long periods of time. The tree also provides a place to hang stirrups, which help a rider distribute weight along an anatomical continuum from the seat, to the thighs, to the knees, to the balls of the feet. This not only gives greater security, but also more comfort on longer rides.

The saddle’s rigid tree is the key element that provides both of these benefits. If the tree doesn’t fit, neither will the saddle. Fitting a rigid platform to a curvaceous back with angles that constantly change as the animal moves has been the saddle maker’s challenge over the centuries.

A western saddle’s tree, not its leather skirts, is what supports and spreads the rider’s weight over the horse’s back. The tree’s fork must have the correct width and flare to fit the horse’s withers without rubbing them and fit the shoulders without pinching or constricting. The fork and the cantle are joined by curved sides, or bars. If the bars do not contact the horse’s back smoothly from fork to cantle, the tree will either rock or bridge (sit on its four “corners”) creating pressure points.

Although an English tree is shaped differently, the head or pommel must also fit the horse’s withers and shoulders without rubbing or pinching. However, the side pieces connecting the head to the cantle are narrow and set much higher up than those of a western saddle. They form the basis of a seat for the rider, but are not intended to conform to the horse’s back.

Instead, panels stuffed with wool flocking, synthetic flocking, natural or synthetic felt, or various kinds of foam sit between the horse’s back and this rigid seat to spread the rider’s weight over a larger area. If the stuffing is not in the right shape to fit a particular horse’s anatomy, the result can be pressure points or a bearing surface that’s too small to spread the rider’s weight adequately.

English Saddle

Checking for Fit

A properly fitted saddle sits securely in place without touching the horse’s spine. It has no tendency to rock from side to side or front to back. Most importantly, it provides a broad load-bearing surface that fits flush along the horse’s back muscles on either side of the spine. Follow these steps to check the fit of your saddle:

  1. Place the saddle on the horse without a pad or girth, making sure it is in the right spot on his back. Try rocking it from side to side and front to back. It should feel like it is seated firmly, with no tendency to move around easily on the horse’s back.
  2. Check that the saddle clears the horse’s withers and spine. Two to three fingers held vertically should fit between the pommel or fork and the horse’s withers. Depending on the size of your fingers, that much space may be unnecessary, but look for at least an inch of clearance. Sight down the saddle from the rear to the front for daylight, to make sure the middle of the saddle is not touching the spine. If your hands are small, you may be able to reach in from the front of the saddle to check for spine clearance.
  3. Lift a western saddle’s stirrup or an English saddle’s flap, and try to work your hand between the horse’s side and the saddle. This should be difficult to do if the saddle fits snugly and securely along the length of the back. If a western saddle is bridging, you may find a slight gap here that makes it easier to slide your fingers under the bars. Examine an English saddle to see if the stuffed panels make even contact from front to rear. Many saddle panels make good contact only about two-thirds of the way back, while the rear portion of the panels rides uselessly up in the air.
  4. If everything checks out so far, add a pad and the girth, and continue your examination. Recheck to be sure the saddle is firmly seated and that there is adequate clearance at the withers.

    Padding narrows the tree; how much will depend on the thickness and rigidity of the pad. Observe from the side whether adding the pad has narrowed the tree so much that the saddle now tips backward and the seat is no longer level.

  5. Run your hand between the saddle and the horse’s shoulder from the top of the fork or pommel past the front edge of the tree. The fit should be snug but not pinching. You should not have to struggle to slide your hand down. If you are doubtful, leave your hand between the horse’s shoulder and the front edge of the tree as a friend leads the horse forward. The horse’s shoulder blade should slide freely back and forth under the edge of the tree, or the points of the English saddle tree’s pommel. If things are still looking good, put a rider in the saddle. Weight in the saddle may change fit dramatically.
  6. Recheck wither and spine clearance.
  7. Run your hand between the horse’s shoulder and the front edge of the tree again. If there is any question about whether or not the tree is digging into the horse’s shoulders, keep your hand under the front edge of the tree, or the point pockets on an English saddle, while a friend leads your horse forward and into turns. If your fingers feel crushed as the shoulder blade slides under the edge of the tree, you can bet the horse’s shoulder muscles feel that way, too.

Fitting Both of You

Many riders spend hours sitting in saddles at tack shops to find the model that fits them best. Then they head home, throw it on their horse and never stop to think that the saddle has to fit the horse as well. Finding a saddle that fits you both can be a frustrating search. If you have to compromise, however, make it on your side of the saddle. Why? Because pain from a poorly fitting saddle will cause negative horse behaviors, ranging from annoying to unsafe. Until you remove that source of pain, you won’t solve those behaviors with gadgets like tie-downs or piles of pads.

The combination of horse plus saddle plus rider is not static. It constantly moves and shifts at every stride. And what fits today may not fit the same way tomorrow if horse or rider gains or loses weight or muscle. A young animal’s back may change dramatically until he is about 5 years old. The out-of-shape adult horse that finally gets back in shape will have different musculature at the end of his conditioning program than he did at the start. The senior horse’s back is likely to change with age. Repeat your saddle-fitting check periodically to make sure your saddle is still comfortable for your horse and you will be rewarded with a happier horse that can concentrate on the day’s lessons instead of the pain in his back.

Read on for more on tack fit.

The Bond Between Mare and Foal

10


Mare and Foal
There is nothing on Earth quite so wondrous as the miracle of birth. How awe-inspiring and somehow humbling it is to be present as a new life makes its way into the world. To bear witness to life’s grand event is truly an experience like no other, from the tempest of the actual delivery to the gentle moments of recognition and bonding between mother and newborn that follow. No matter how many times I see it, it never fails to thrill and amaze me, and I am certain these feelings are familiar to nearly everyone who has shared this.

I was an intern in a college equine program the first time I saw the birth of a foal. As I went about the business of mucking stalls early one winter morning, I was interrupted by a teacher’s assistant who eagerly led me to a box stall where three other students clustered in absolute silence. We watched as unobtrusively as possible as the beautiful Arabian mare, Angel Eyes, paced from one end of the stall to the other, drenched in sweat. Her chorioallantoic placental membranes had ruptured moments before I arrived, releasing allantoic fluid and alerting us to the impending delivery. As we watched, she dropped to the ground and rolled. When she stood up again, one tiny hoof was protruding from her vulva. She dropped back down again and continued to strain, and little by little, more of her foal was revealed. I glanced at my friend Kelly standing beside me and saw the tears welling up in her eyes. The birth of this filly was an emotional encounter for everyone present, but for myself, the fledgling animal behaviorist in the group, the fascination went far beyond the delivery. I was glued to the spot as the mare started nuzzling and licking her foal, stimulating the filly to stand and seek nourishment. I took notice of the protective posture she assumed whenever anyone came between her and her foal.

Later, as this filly grew, I wondered how she recognized her mother in a pasture full of mares and what motivated her mother to want to care for her at all. I was intrigued by the intricacies of their instincts and the communication going on between them and the world they lived in.

Forming the Bond

The delivery and postpartum period are governed by a complex blend of hormonal signals, behavior learned from prior experience and sensory stimuli, such as sights, sounds and smells, that stimulate particular behavioral responses. Progesterone is the main hormone that supports pregnancy in the horse. On the day before foaling, progesterone levels decline, and the change in the ratio of estrogen to progesterone results in physiological changes that stimulate labor to begin. Other hormones have important roles in labor as well, such as relaxin, which is thought to relax the cervix and birth canal during parturition, and oxytocin, which is thought to initiate the presentation of the placenta, resulting in the breaking of the water before delivery. One study indicates that mares appear to have some means of controlling oxytocin release (this would explain how most mares manage to delay parturition until nighttime). Preparturient fluctuation in some of these hormones have been found to induce maternal behavior in sheep and likely function similarly in the horse. After delivery, a variety of physical stimuli, such as the smell of fetal fluids, the appearance of the foal and the sounds the foal makes, all help attract the mare to her foal. If the mare has had other foals, her prior experience with motherhood also helps her to identify and begin mothering her foal. This interaction of hormonal influences, sensory cues and learned experience is the bonding process we see when we observe a mare sniffing, licking and nickering to her foal after parturition.

The mare’s attraction to the fetal fluids on the foal serves another important purpose. The vigorous licking and nudging of the fluid-covered foal stimulate it to try to stand and move away from the activity. In the wild, it is important for the foal to learn to stand and control its gangly limbs as swiftly as possible. The foal must be strong enough to leave the birthing site with its dam before dangerous predators are attracted by the afterbirth (or by the foal itself). It is certainly adaptive behavior for this species that mares tend to deliver their foals at night and that normal foals are able to stand and move about almost immediately after delivery.

Once the immediate safety needs of the newborn have been met, the next priority is to seek nourishment. Normal animals are born with the suckling reflex intact and do not need to learn this behavior. In fact, I have felt attempts of mature fetuses to suckle my fingertips in utero during rectal palpation examinations. As anyone who has watched newborn foals attempt to suckle everything in sight already knows, finding the nipple for the first time is largely a trial-and-error process, but attraction to the mammary gland is enhanced by olfactory (odor) cues. Good sanitary practices are important in minimizing a foal’s exposure to infectious agents during foaling, but if cleansing of the mare’s udder is overdone, the odor of mammary secretions, which helps the newborn locate the udder, may be removed. Driven by hunger and the urge to suckle, most foals will stumble around in pursuit of the elusive udder until they locate it.

The Role of Nursing

Owners should refrain from intervening to assist the foal so that the natural bonding process is not interrupted. At the same time, it is important to realize that foals are born without natural immunity. They must drink their dam’s first milk, called colostrum, within several hours of birth to gain protection against disease for the first few months of life while their own immune systems develop. As a rule, if successful nursing does not occur within two hours of birth, it is advisable to assist the foal in locating the udder. If the foal still has not succeeded three hours after birth, contact your veterinarian for assistance.

When the foal finally succeeds in nursing, the suckling stimulation of the nerve endings in the teats causes the release of oxytocin from the hypothalmus in the brain. Oxytocin in turn stimulates cells in the mammary gland to contract and release more milk into the large mammary ducts. In this way, the suckling activity stimulates more milk to be released. Mares learn to stand for suckling because the activity provides relief from the discomfort of udder distention. Some maiden mares or mares with sensitive, swollen udders may move away or try to kick when the foal first attempts to suckle. This should not be confused with foal rejection altogether. Most resistant mares learn to appreciate the relief from distention that suckling provides if they are gently restrained with one front leg held off the ground during the foal’s first attempts at nursing.

Mare and foal
The stimuli by which the mare and foal learn to recognize each other during the bonding process include visual, auditory and olfactory cues. A 1972 study of wild ponies considered that foals learn the specific nicker of their dams, and that this sound helps foals locate their dams while in close proximity. Another study determined that mares and foals take longer to find each other after separation when either sight or smell is impaired, and longer still when both of these senses are masked at the same time. It is during the critical hours after birth that the mare learns to identify her foal using these senses. This is why it is important not to interfere with the mare and foal during this time. (The foal is still susceptible to imprinting several hours after the birth process. In my opinion, the window of time has not been missed if it gets done somewhere in the first day of life.) In rare cases, a mare might not learn to recognize the foal as her own and may try to escape from it or even attack it. These situations are generally regarded as foal rejection. If the mare tries to avoid her foal, stimulating maternal protective behavior by bringing another horse into the mix might help her learn to mother her foal, as might simply allowing the mare and foal ample space to get comfortable around each other from a distance. If the mare actively attacks her foal, Dr. Houpt of Cornell University recommends placing a pole across a box stall so that the mare is restrained from moving. Although there is still some danger to the foal, it can generally learn to suckle without sustaining serious injury. Most of these mares will eventually tolerate their foals without restraint, but they are prone to resuming aggressive behavior in the future. There appears to be a heritable component to this behavior, so it may be unwise to continue breeding a foal-aggressive mare.

Perhaps you’ve heard about mares that become uncharacteristically aggressive toward other horses or human handlers when a foal arrives on the scene. Mares with strong maternal drives will often behave aggressively to protect their foals from anything they perceive as a potential threat, but this behavior also occurs because foals may need several days to learn to recognize their dams. During this time of uncertainty, foals will follow just about anything that moves. Mares are driven to protect their foals from following other animals, including humans, that may try to “steal” their foals away. If a mare is not vigilant during this time, a phenomenon known as mismothering might occur in which another animal successfully adopts and attempts to raise her foal.

Mares and foals are typically in close proximity to each other during the first days and weeks of life. Horses are considered a follower species, which like to keep their neonates nearby at all times, in contract to animals such as deer, which are part of a hider species that tends to stash their young in hiding places and leave them there during grazing.

Once foals are 1 or 2 months old, they begin to engage in play and mutual grooming with other foals. These activities teach foals her social structure, as fillies tend to bond with and groom other foals, while colts tend to do less mutual grooming. Foals also appear to learn their position within the herd from their mothers. In a 1980 study, foals of dominant mares were found to have high dominance ranks themselves, while in earlier studies, orphan foals were not found to have the similar dominance ranks as their mothers.

Many questions remain about the complex behavioral events called maternal behavior. Which traits are heritable? Which are learned? How can we avoid behavioral disasters in foaling and mothering? Many important questions are being investigated and new information is on the horizon. In the meantime, take time this foaling season to see and ponder for yourself these mesmerizing events in all their beauty and complexity.

Liked this article? Here are others on mares and foals:
Feeding Broodmares and Foals
Orphan Foal Critical Care

American Saddlebred Gaits

15

They are among the flashiest horses in the flashiest classes — the American Saddlebred horses in the three- and five-gaited events. Like barely controlled dynamos, they charge around the ring with high knee action, willowy necks and proudly held heads. Even casual observers unfamiliar with the breed tune into the excitement and the drama that these creatures create when they strut their stuff.

Five-Gaited American Saddlebred
Some American Saddlebreds are genetically predisposed to performing a rack, a four-beat gait in which one foot is on the ground at a time. The gait is refined through training. Photo: Leslie Potter

Although the Saddlebred’s conformation lends itself to these classes, it takes art, experience and a lot of hard work to transform this raw talent into championship material. The team of Ellen S. Beard and James L. Nichols understands this well. Nichols has been involved with the horse industry for 25 years as a world-champion trainer, competitor and judge. Beard, who is also a recognized judge, grew up working for a large Indiana Saddlebred farm. For 21 years she’s made a career out of instructing and training Saddlebred horses and riders. The two specialize in bringing along horse-and-rider combinations for amateur and juvenile divisions: Nichols works primarily with the horses, Beard with the riders. Since joining forces in 1991, they’ve created several national and world champions in the performance and equitation divisions.

Classy Matches

When putting a green horse into three-gaited or five-gaited training, the first consideration is recognizing the class for which the horse shows the most natural potential: A horse seldom does well in both disciplines. “The horses themselves help us decide which class by the stride of their gait,” explains Nichols. “The three-gaited horse has a more elegant look, and is much more refined up through the neck, ears and head. They do a park trot, which is a slow and animated trot, and have a lot of action off both ends.”

In contrast, the five-gaited horse is a little bolder with a more powerful, muscular look, and trots more quickly. “With the slow gait and rack, the horse only has one foot on the ground at a time, which is pretty strenuous,” says Beard. “That’s why a bigger, stronger horse is usually selected for five-gaited training.”

This decision is not always made just by simply analyzing conformation and way of going: Many horses need to undergo basic training — ground work, walk and trot — before a trainer can see which class the horse is best suited for.

Basic Training

Nichols begins training young horses in the fall of their first year. “We begin handling them in most every way we can,” he says. “Getting them used to being indoors, being around people, handling their feet, cross-tying, grooming, et cetera.” Next, Nichols works on ground driving, teaching the youngster to turn, stop, stand, back up and go forward. The horse is tacked up in a back pad, surcingle, martingale, bridle and sometimes a soft rubber bit. In the very beginning, Nichols runs the lines down along the side of the horse, right above the hocks. “You can help maneuver his whole body when you pull him to the right or the left with your line around him,” he explains. “We teach him to connect to the ‘cluck’ in getting him to move, the basics of what the rider is going to be asking him to do, and trying to get him to relate to the rider. We start him at the walk, and as he learns guiding and maneuvering a little bit and going in a circle, we ask him to step up to the trot.”

After two or three weeks, the young horse is usually ready to move on to mounted work. “We put a saddle on his back and lead him around a little bit to get used to the different equipment,” says Nichols. “When he’s settled with that, we’ll ease somebody on his back, then lead him around for about five minutes or so, taking this process really slow to make him understand that nothing is going to hurt him. If everything seems to be going okay, we’ll turn him loose and start working on the guiding and signals that the rider will be giving him.” Once the horse is comfortable with a rider, he’s ready to move into three- or five-gaited training.

Teaching the Triple

Training the three-gait begins with simultaneously teaching the trot under saddle and with a cart. “Jogging in the cart teaches your horse to go forward in a straight line because he’s between the shafts of the cart,” says Beard. “Going forward is the most important thing you can do with a horse.” Working in a cart also gives the horse a break from mounted training, keeping the young mind fresh, and it provides good conditioning without stress.

To accustom the horse to the cart, assistants at the horse’s head lead him around while others follow the cart to keep it from twisting and scaring the young horse.

Once the horse is comfortable pulling the cart, Nichols asks for a trot by clucking, gives a little bit of line and lightly slaps the line on the horse’s back. Helpers at the head encourage the horse to move into a trot and discourage him from breaking into a run.

From the saddle, Nichols asks the horse for a trot by similar means: clucking, lightening up on the mouth, sometimes tapping a rein on his back and applying pressure evenly with both legs. Other aids include “whoa” plus taking back to stop; “whoop” in tandem with lightly taking a hold of the reins or lines to slow; and “cluck” coupled with lightening the mouth, applying a little leg and a tap on the side with legs or lines to quicken.

Three-Gaited American Saddlebred
The high-stepping trot is the signature gait of a three-gaited American Saddlebred. Photo: Leslie Potter

When the horse understands his trotting aids, Nichols begins working on head carriage. To set the head, Nichols starts him on a long line or under saddle with a snaffle bit, but no overcheck or check bit. “When the colt is guiding and seems pretty happy about everything, I’ll add a check bit to help keep the horse’s head up,” Nichols says. “It can either be a sidecheck, which runs up to the side of the bridle, or an overcheck, which runs up over the horse’s face, up between his ears and hooks to the back pad. We start with it pretty loose, just to keep him from really rooting his head way down. As time goes on and he gets more settled with it, we keep tightening it up a bit, and that’s where we get a lot of the elevation.”

After the horse is trotting reliably, usually within three months, Nichols begins teaching him to canter under saddle. By clucking and thumping the sides, the horse tends to break into a canter. The first few times, the young horse may canter quickly, but with time, he settles down into a more manageable gait.

Although the cart is not used initially to teach cantering, it is used to correct cantering problems, such as twisting, cantering too quickly or not following his head. “We never canter a horse to the cart that was not already cantering pretty well to start with,” says Nichols. “He learns his canter really well under saddle or in the lines first.”

Cantering three- and five-gaited Saddlebreds differs somewhat from other disciplines. “As you collect the horse, you take your rail heel and tap him with it, and then the horse should step up into the canter,” says Beard. “You start the horse parallel to the wall, then push his hips away from the rail with your rail leg for about one step. This puts his stepping foot first. Because of the collection and high-headedness that we’re after, we want our horses to step up into the canter; if they pull themselves into the canter, they’ll usually start with their head a little low.”

This contrasts with hunters, which have rounded backs, lower heads and move in a horizontalplane, and with Quarter Horses, which appear to pull themselves into the canter from their front ends. “You want Saddlebreds to step into it from the back end,” emphasizes Beard, “because if they don’t, they’ll lose their elevation.” Horses generally learn cantering under saddle in about a week. “From there we start putting the finish on the gait,” Nichols says. “I begin stressing the proper way to start as far as leg position, the correct speed he needs to be going, stopping and things like that.” Nichols also works on transitions — canter-walk and canter-walk-trot — to help the horse fully understand and respond to signals.

Next, Nichols begins moving the horse from a snaffle bit up to the Weymouth bridle, which is a full bridle consisting of a curb bit and snaffle bit. This bridle is required for showing. “I usually use a martingale the first few times, putting both reins through the martingale, and a soft, mild curb bit,” says Nichols. “After I get him riding with this pretty well, we’ll begin using a bitting rig.”

Nichols takes his time with this step. “This is pretty crucial because the horse has to do this throughout his life,” Nichols points out. “We want him to learn the proper way of doing it and how to respond to it; we don’t want him fighting the bridle at all.” Some horses may take up to six months to adapt to the full bridle. It generally takes about a year to finish a horse for three-gaited classes.

The Fantastic Five

When training the five-gaited horse, the early stages — basics, walk and trot — are the same as for the three-gaited horse. After the horse learns the trot, the next step is teaching him to slow gait and rack with a snaffle bit. The two gaits are learned under saddle. Although there’s a lot of special shoeing for five-gaited horses, horses are started barefoot. “To teach a horse to slow gait and rack, you have to get him ambling, shuffling, a little bit,” says Nichols. “We can usually do this with nothing on his feet.”

To put the youngster into a slow gait, Nichols starts him at a walk, elevates his head by lifting the horse’s mouth, subtly wriggles the bit in a slight back-and-forth motion, clucks and pushes him forward with his legs. “This gets the horse a little off balance, so he’ll start ambling a little bit, which is the start of slow gaiting and racking,” Nichols reports. Working where there’s a bit of a downhill grade also helps put the horse off balance and into an amble.

Teaching the slow gait, which is a man-made gait, is a pretty slow process, often taking about 45 days. “I don’t work on speed too much at first,” Nichols says. “I like him to learn a real, true, slow gait and to get real balanced in his gait, paying attention to the signals I’m giving him in his mouth and with my legs.”

As the horse becomes consistent at the slow gait, Nichols moves him up into the rack. He starts with the slow gait, then clucks, wiggles the bit and presses with his legs to ask the horse to step up a little faster, producing the rack.

When the horse understands how to move into the rack, the next stage is perfecting the speed and consistency of the slow gait and rack. Nichols often works outside where there is room to move in a straight line.

“I won’t attempt to get them around a turn at this point,” he says. “I let them learn to go in a straight line, then I’ll start making diagonal lines, teaching him to follow my lead of where I’m telling him to go. As he gets pretty solid in his guiding, I start teaching him to get around the turn.” Nichols says it takes about 10 to 12 months to finish the rack.

After the horse learns to slow gait and rack, Nichols teaches the horse to canter, using the same methods as he did for three-gaited horses. “When we first start training,” Nichols says, “I’ll canter him a time or two just so he’ll have that thought pattern in his mind a little bit. But I don’t spend much time cantering, because when I go to slow gait and rack him, I don’t want him to break to a canter.” To produce a five-gaited show horse from a green horse generally takes from 12 to 18 months.

Slow Going on Gaits

A year or more of training may sound like a long time, but as tempting as it may be to rush a horse through training, the effect won’t be the same if the horse is pushed for faster results.

The high leg action of the three-gaited horse and the two man-made gaits of the five-gaited horse make these two disciplines more difficult and time consuming for a horse to learn than more traditional gaits. Even when he is working with 3-year-olds, Nichols says he limits the horses’ workouts to 15 to 30 minutes. He also continues to include a lot of walking and perfecting of very basic elements in their training.

Allowing a horse to grasp what he’s being taught and to become comfortable with a new command before tasking him with another new command will pay off in long-term dividends. “I want to teach them as quickly as they’ll let me,” Nichols admits, “but I don’t want to blow them out by overdoing it.”

Further Reading
Saddle Seat Myths and Misconceptions
Training a Saddle Seat Horse at Home
Saddle Seat Equitation: Form to Function

Body Clipping

25

Your mind blissfully pictures your horse with a new image — one of a sheared equine sporting a full-body clip. Imagine, no more deep rubbing with a towel as you frantically try to soak up gallons of sweat from his coat before he catches a major cold. Think of it — a velvety-soft coat requiring little grooming. Yep, this is indeed the year — even if you have to hire a professional groom to do the job.

But before you shell out any hard-earned money, hold on: You can do it yourself. All you need is a little patience and a few tools. It doesn’t really matter if you make mistakes, unless you clip him right before a big show. The only difference between a bad clip job and a good coat is a couple weeks of growth.

To Clip or Not
Horses grow thick winter coats for warmth, but it isn’t the drop in temperature that triggers the hair to grow, as you might think. It’s the decreased daylight of shorter days that stimulates the coat. That’s why your horse will begin fluffing up even when it’s still warm. That is also why some owners keep a lamp burning in their horses’ stalls long after darkness to “trick” their systems into believing it’s still summer. Since body clipping is frowned on with some breeds, such as the Quarter Horse, using lamps can help minimize shaggy coats.

However, using lamps can be more labor intensive: If you’re boarding at someone else’s barn, they may not want you to leave the barn lights on all night. You’ll have to set up a safe lighting system in your horse’s stall, then faithfully turn it on and off daily, or attach a timer — and you’ll still need to blanket your horse. And of course, if your horse is in a pasture, night lighting is not an economical option. Body clipping, on thc other hand, only needs to be done once or twice to last all season, and it’s easy to do whether the horse is at your home, in a pasture or at a boarding stable. But before you grab those clippers, review the following points to determine if a body trim is right for your horsekeeping setup.

First, you must realize that once you clip your horse, you are responsible for making sure he is blanketed according to the weather. This means going out to the barn at least once every day to check on him, or twice a day if you live in a region that warms up during the day, and your horse only needs blanketing at night. If your equine partner is just a trail buddy that won’t do much strenuous, sweat-producing work each winter, you may find it less work to leave him au natural.

On the other hand, if you show your horse in the fall and winter months, you’ll probably decide to body clip. Condition and muscles are more evident with a shorter coat and sweat will evaporate more quickly, so your horse will maintain his neat appearance after a warm-up. Plus, a heavy coat looks unkempt in the show-ring. Performance horses keep better condition with a clipped winter coat, and if you’re an evening rider, you’ll find that the clipped horse is easier to maintain, since you must get the moisture from sweating and baths out of your horse’s coat before you put him up for the night. This is much easier to do with a short coat than a shaggy sponge. A wet coat doesn’t insulate effectively, so your horse will be miserable and may even get sick. A clipped horse dries quickly and easily when toweled off, immediately ready for blanketing.

California and Florida are more temperate places for people and horses, but since winter-coat growth is governed by daylight, your horse will still grow a thicker coat when the days get shorter. People living in these warmer climates tend to favor body clipping, since a dense winter coat is not needed as much as in a colder climate. If you live in one of these regions, however, you still have to blanket your clipped horse when the temperature drops, such as at night and on windy, rainy days.

Top-Trim Tricks
The ideal months to clip your horse are between October and January. If you clip in September you may need to do it a second time, as his coat will grow in. On the flip side, clipping him too late, such as in April (when horses begin to shed), may interfere with his new coat growth. Remember, trimming does not help a horse shed his winter coat more quickly.

You want to make the haircut experience a pleasant one for your horse, so pick a sunny, calm day. Gusting winds will not only make your horse more nervous, but also will make a normally messy job unbearable. Avoid wet days as well; dragging extension cords through puddles of rain invites disaster. If you have to clip on a cold day, make sure you have a cooler or rug available to cover up the newly shorn areas as you go.

One secret of the experts is to have your clippers professionally sharpened before every body clip. Sharp clippers cut down on clipper tracks and help prevent the dreaded “corduroy horse.” Another trick to a nice clip job is to give your horse a bath the night before. Dirt inside his coat will catch in the clipper teeth and cause the blades to drag and cut unevenly. Also, the dirt will dull the clippers more quickly, possibly requiring you to interrupt the job to sharpen your blades. If the weather precludes a bath, you may have to make do with a thorough grooming.

If you’re unsure of how your horse will react to the clippers, take time to get him used to them. Have a helper hold your horse. Turn the clippers on and hold them, blades facing away, against the back of your hand, and then place your hand on your horse’s body. Your horse will feel the vibration. If he is relaxed, you can start clipping. If he is nervous about the noise and vibration, you may need to work with him until he accepts this procedure, and spread your clipping job out over a few days.

Once your horse is clipped, you will need at least three blankets to care for him: a light day sheet for mild days, an anti-sweat sheet or cooler for after workouts and a heavy blanket for cold days and nights. You may also want to purchase a Lycra undergarment designed to prevent chafing (or you can sprinkle baby powder or spray a coat polish around his chest and neck to keep his coat from becoming rubbed raw by his blanket). Clipped horses in colder climates may require hoods, extra blankets, quarter sheets or liners. Imagine what you would wear for various weather conditions, and dress your horse likewise. For instance, if you need a sweatshirt for the day, put a day sheet on him. If you need a heavy winter coat, put his heavy blanket on him. No matter what blanket he wears, a body-clipped horse should always be kept away from drafts and rain.

What You’ll Need
For full-body clipping, you’ll need large shearing clippers as well as small clippers. The small ones are for the face, ears and small spaces; however, trying to use these on the whole body will wear out the smaller motor. Also, the shearing clippers can clear a larger area, cutting down the time it’ll take to finish the job. You’ll also need clipper lubricant to keep the blades running smoothly and keep the clippers cool; a small brush or an old toothbrush to clean out hair and dirt from the blade teeth and small parts of the clippers; and clipper oil to protect the motor and teeth of the blades.

For best results, you’ll also need: a blanket or cooler to keep the draft off newly clipped areas, white chalk for marking guidelines, a tail wrap, a body brush, clean rags, baby oil for the horse’s body rinse water after the clip, a step stool and a heavy-duty extension cord.

Before you start, check your clipper instructions for guidelines on oiling and lubricating. Most large clippers have a small hole in the front to drop oil into. (Use a small dropper tube of oil for this purpose.) Apply a thin ribbon of oil onto the top of your clipper teeth and let the machine run for a few seconds. As you dip, repeat this procedure every 20 minutes or so.

Adjust the tension on your clippers by releasing the tension lever two rotations and then tightening it until you feel a slight resistance. Then rotate the lever one and a half more times. The tension mechanism holds the two blades together to allow the clippers to clip tightly and cleanly. As you clip your horse, brush your dipper teeth every 5 minutes or so and spray them with the lubricant (not the oil).

Further Reading
HorseChannel’s Guide to Clipping Your Horse

0FansLike
0SubscribersSubscribe
We use cookies to help personalize content, tailor and measure ads, and provide a safer experience. By navigating the site, you agree to the use of cookies to collect information. Read our Cookie Policy.
OK