Enter our 12 Days of Christmas Giveaways here!
0 ITEMS
  • My Account
  • Holiday Gift Guide
  • Podcast
  • Webinar
Subscribe Combo
Enable cache13
Home Blog Page 1066

The Equine Apprentice

14

Admit it. You have an undying thirst for learning anything related to horses. You know what I’m talking about. Don’t you start mentally salivating at the beginning of each month, waiting impatiently for your favorite horse magazines? Can you claim your bookshelf isn’t filled with equine care and riding texts? And aren’t you just as guilty as we are of wondering how in the world they actually get horses on film to perform those hair-raising stunts? Admit it!

Of course, some of us are thirstier than others. If you’re like me, your quest for knowledge has driven you to volunteer for nasty duties just to be able to soak up nuggets of horsey wisdom from professionals you respect. Yes, like so many others, I started my path to an equine profession by becoming an apprentice — someone who volunteers for hard labor (read: slave) in exchange for priceless knowledge, and if lucky, a small stipend.

People leading horses at a horse farm

My personal experience as a working student for top trainers is something I look back on fondly and affectionately—from a distance. I also feel a bit weak in the knees as I recall those days, because at the time, it felt like an equine version of boot camp. As a trainer’s apprentice, I woke every day at dark-thirty to present myself for another round of torture at the barn. You might think I’m exaggerating, perhaps—but only to make a point. Many would-be apprentices have rose-colored views of the jobs they think they want and are shocked once they smell the manure, so to speak. If you’re considering travelling the apprenticeship path, expect hard work and no free meals. Apprenticeships aren’t like paying for lessons.

However, there’s nothing like the rewards of such a position: You’ll get a firsthand understanding of whether you’re suited for your chosen profession, gain experience and knowledge that will help you succeed in your field, and develop mentors and contacts along the way. At the same time, you’ll pick up a lifetime of good habits albeit those beaten into you!

Apprenticing isn’t limited to horse trainers. You can swap work for knowledge with farriers, farm managers, veterinarians and so on. You can trade a few hours grooming and cleaning up tack for lessons with your local instructor, or set your sights as far away as apprenticing overseas. We’ll give you some tips on where to find apprentice positions, what to expect once you get there and how to survive the experience. Also, we’ll introduce you to a few apprentices and two establishments that offer apprenticeship programs.

Definition of an Apprentice

The very word apprentice conjures up visions of Mickey Mouse in “The Sorcerer’s Apprentice,” enlisting the help of brooms to carry water for cleaning. Like Mickey, a non-cartoon apprentice has several different responsibilities, and what these are will depend on the type of profession they are learning, their goals and the amount of time they have committed to their employers. For example, Laura Forrester, a 19-year-old architecture student at Cal Poly University, spends her summers and vacations exchanging work for riding lessons. A cash-poor student, she found that the working-student position was the only viable way to continue her equine education during her college years.

“My responsibilities can be summed up as a sort of ‘right hand man,'” says Laura. “Basically I pick up the loose ends. I tack horses, longe them, put them away, groom at shows and offer moral support whenever needed. I also help my trainer on the ground while she’s riding. An extra pair of trained eyes is really important in dressage.” In exchange for her work, Laura gets several lessons per week and the opportunity to ride well-trained horses.

Barbara Werbach, a former small-animal vet technician was burned out on her profession when she decided to give it up and go to work full-time for her dressage trainer Kathleen Lockhart, of Dallas. “My main responsibilities are to have the horses ready when Kathleen is ready to ride and then cool them out and bathe them,” says Barbara. “I receive a lesson each day.”

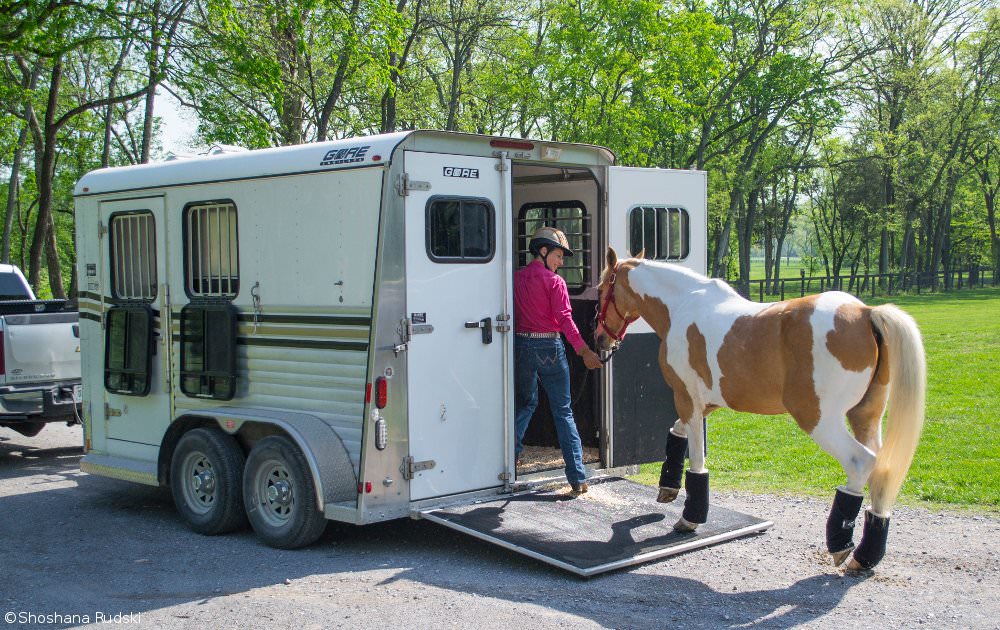
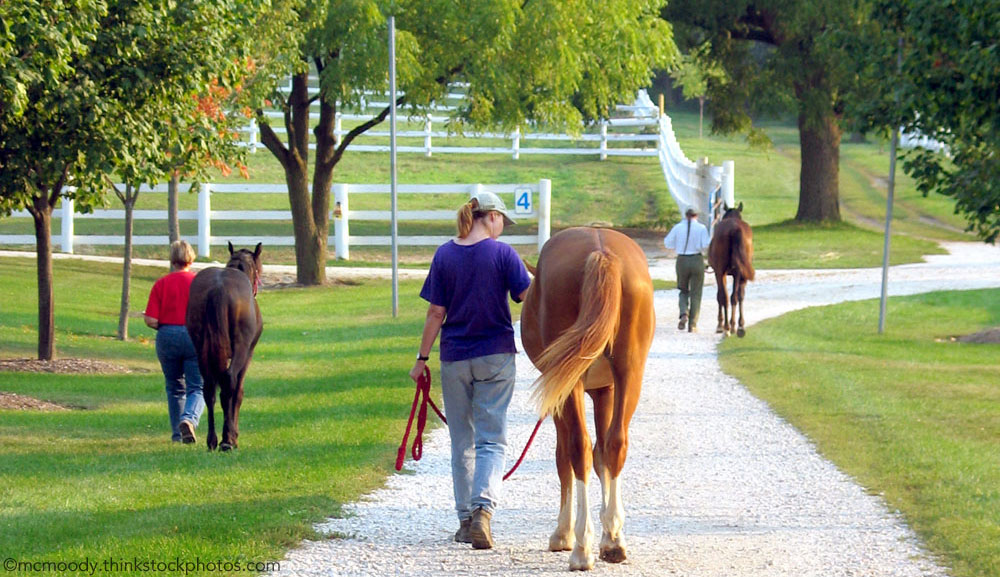
Tammy Watson had a lifetime of experience with horses, but was never sure she could turn her love of horses into a career. The apprenticeship program at Al-Marah Arabians, a large operation that offers 2-year positions, seemed a good way to find out. The only spot open was in the breeding barn. After just a month in the program, Tammy had found her niche, and in fact, she now holds the position of assistant breed manager. Tammy’s program taught her how to handle stallions, deliver foals, collect stallion semen and artificially inseminate mares.

“In the breeding barn, our duties are varied depending on the time of the year,” says Tammy. “During the spring, we are breeding horses all day and delivering foals all night, in addition to our regular chores. In the fall we do a lot of basic training with the foals. We also may be doing vaccinations, deworming, treating sick or injured horses, or having a weekly riding lesson. I maintain health records, breeding and foaling records and records of horses that come and go.” Sound like a lot of work? It is, and Tammy’s days are long. But to her the gains are immeasurable.

What’s in It for Me

Hands-on experience is irreplaceable. Some things just can’t be taught in school or in a 1-hour weekly lesson. Tammy explains, “With the many horses we have at Al-Marah you see it all. Colds, stitches, belly aches and the occasional foaling problem. All of this adds to your level of confidence when you leave. But the short-termrewards are also a big part of the job: It gives you a great feeling to take a mare and newborn foal outside for the first time and watch them run together.”

Consider the fact that you’ll have a mentor, someone to go to for advice. Summer Griffin, who rides along on rounds with veterinarian Craig Chandler, tells us, “He has given me tons of tips to help me along the way, such as urging me to keep a log book of my volunteer hours, a requirement for vet school.” You’ll also get to ask loads of questions, learn professionalism and find out how a successful business is run.

Barbara found that “the most valuable experience is being able to work with and ride a lot of different horses. Each horse can teach you something different.” Laura Forrester agrees, “To become a confident, responsible rider you must be able to ride experienced horses. It’s difficult and nearly impossible to be able to have horses like this at your disposal as a recreation rider, but you’ll find lots of well-trained horses at professionals’ stables.”

Being an apprentice will give you a foot in the industry door. When you emerge as a hopeful new professional, not only will you have your boss’s name attached to your resume, but you’ll also have met people throughout the horseworld who can help you make contacts later. Networking isn’t just for Corporate America.

A Reality Check

Imagine if you thought you wanted to be a veterinarian or farrier and then, after spending tons of money, you realized it wasn’t your cup of tea. Apprenticeships can offer you a chance to test the waters of a would-be career and confirm your choice—or turn you away before you waste years and money on education and training.

Summer Griffin was thinking of becoming a veterinarian and wanted to make sure the choice was a good one for her. She wanted to watch the day-to-day goings-on and see what kind of obstacles a vet faces. She signed up with equine practitioner Craig Chandler as a ride-along helper. “I mainly went out on vaccine and teeth-floating clinics. As I became familiar with the instruments he used, I would get them ready. I also would help out by cleaning up and filling out invoices. But mostly I was there to observe.”

Like many other apprentices, Summer helps with cleanup and similar chores. She doesn’t actually perform any veterinary procedures; what she learns comes from observing her mentor as he handles his work. This may not seem like much, but Dr. Chandler says, “One of the best ways to improve your chances of getting admitted into vet school is to explore as many facets of the profession as possible by observing vets in action.”

In addition, Summer can see firsthand what her life as a vet will be like. Summer’s experience cemented her decision to become a vet, and she’s currently enrolled in preparatory animal science courses at her local college.

Pat Britt, a former Oakland A’s catcher, longed to go back to work out of doors. His second career as a pharmaceutical representative wasn’t quite all he’d hoped, so a friend introduced him to farrier Mike Henry. After asking Mike a few questions, Pat was interested in shoeing, but not ready to dive headfirst again into another profession. Instead, he signed up with Mike as an unpaid apprentice working on the weekends.

Pat worked with Mike for several months before giving up his pharmaceutical job and heading off to the Oklahoma Horseshoeing school. “Mike really allowed me to be flexible. I got to ride along with him whenever I wanted; this fit perfectly into my [work] schedule. My responsibilities were to pull shoes and clinch the nails. I got to ask plenty of questions and observe Mike handling different types of horses and their shoeing needs.”

The knowledge gained from his apprenticeship program also enabled Pat to have a better understanding at school, giving him a leg-up on the education at farrier’s school.

Finding Apprenticeship Opportunities

How can you find professionals who might take you on as an apprentice? Here are some tips to get you started, but be creative and assertive. Laura Forrester says, “If I were to start an apprenticeship again I’d walk up to a trainer and ask to help in any way, pulling manes, longeing, helping on their days off, whatever. Even if the trainer didn’t need help with riding right away or didn’t have time for a nonpaying student, I’d at least get my foot in the door and eventually get to ride.” Be patient, however, and don’t expect to instantly be handed the reins to top mounts: You have to earn people’s respect and trust first, and that might mean mucking out for a few months before they’ll let you sit in the saddle, or holding tools and heating up iron before touching a hoof.

If becoming an instructor is your interest and you already are taking lessons, ask your current trainer if he or she’d be interested in swapping a bit of work for lessons and information. Offer to help do the work he least likes—and do your best job at it. If shoeing is your goal, ask your horse’s farrier if you could watch her work for awhile and help out. If she’s willing and you get along well for the day, ask if she’d be agreeable to showing you the ropes in exchange for work.

You can find other local equine professionals by looking in your local feed and tack stores, stable bulletin boards and the yellow pages for phone numbers of stables and local equine organizations. Then call them up and let them know you’re interested in learning from them and set up an appointment to meet when it’s convenient for them. You might wish to ask about apprenticing only after they’ve had a chance to see you face to face—it’s much easier to convince someone in person. However, this could also backfire on you if they feel manipulated. Use your best judgment, and realize you re asking them to spend their time with you, something they probably have little to waste. Your goal should be to show them how such an arrangement can benefit them.

If your initial search for trainers doesn’t yield any openings, start attending local shows and approach trainers and instructors there. You’ll be able to see how they interact with their customers—an indication of what kind of instruction you’ll receive—and they may be more willing to let you help when they’re running around with a million things to do.

Shows are also good places to find potential work with barn managers, who are trying to fulfill everyone’s needs and might be grateful for a “gofer” willing to do grunt work. You’ll want to wait until after the show to approach them with an apprenticeship request, however, since they won’t need any additional decisions thrust on them.

Offering to scribe at shows using this system can get you contacts with trainers and judges who can steer you to potential apprentice positions, and which can be a great education in itself.

If your would-be mentor doesn’t want or need any equine-related help, offer to help plant his garden, detail her truck or anything else in exchange for sharing his or her expertise with you.

For more formal-type programs, check in national magazines or trade journals; these groups usually advertise in the classified section.

National breed and show associations can be gold mines of opportunities for such programs, and are generally willing to give out names of breed establishments and trainers in your area.

Finally, place an ad listing your skills in trade journals and magazines, requesting an apprentice position.

Look Before Leaping

Once you’ve found a willing victim—I mean mentor—don’t assume the hard part is over. One of the biggest mistakes new apprentices make is believing they’ve signed up for a fun job working around horses. If you think a working-student position is exactly like playing around the stable with your horse on your day off—leisurely riding through the woods and spending hours brushing his tail—you are sadly mistaken. Most apprentices work their rear ends off—long hours every day, 6 days a week or more, doing the unglamorous chores. But don’t bother complaining, because guess what? These types of days will look pretty familiar when you finally become a professional. If you look around, you’ll probably find your mentor IS working just as long and hard. So consider it good training.

Working Student Survival Tips

While the rewards of apprentice positions are generally worth the effort, the work can be rough. Here the apprentices we talked to offer you some tips to toughing it out.

1. “Keep the lines of communication open with your trainer. Listen and observe as much as possible while others are taking lessons and the trainer is working different horses. Ask questions and have things clarified if you do not understand. Be flexible. Expect to be an improved rider with a better understanding of horses. Sometimes the hours are long and the weather isn’t the best, but think of your long-term goals.” — Barbara Werbach

2. “Make the long hours and lack of salary bearable by focusing on being able to ride experienced and upper-level horses. Be honest, reliable and responsible. Once you’ve earned the professional’s trust you’ll get to do more.” — Laura Forrester

3. “In order to become a good farrier you are going to have to pay a price — hard work, that’s not a whole lot of fun. Take advantage of every opportunity. Don’t be lazy about your position. The most important thing is learning as much as you can.” — Pat Britt

4. “It’s important to have two traits — the ability to work very hard and patience. You have to be willing, after a long day, to scrap any plans you have made in order to help a sick or injured horse. You can’t scream at a foal because he won’t lead after one lesson. Look at every day as a learning experience; every time you handle a stallion or a newborn you are gaining valuable experience and knowledge.” — Tammy Watson

5. “At first stand back so you don’t get in the way, then get involved in any way you can. Work together with your mentor.” — Summer Griffin

Protect Your Horse From Theft

19

Being prepared for a theft and taking steps to minimize it and maximize recovery will go a long way toward protecting your horse and getting it back.

Employ the following precautions:

  1. Permanently identify your horse with a tattoo, brand or microchip. This proves ownership, aids in a horse’s recovery and, if visible, discourages thieves. 
  2. Take color photos of your horse, including head and full body shots (from both sides). Get photos with summer and winter coats, noting any distinguishing marks. “If the animal has just one little piece of white on his coronet band, make sure the photo is large enough to see it,” says Robin Lohnes, executive director of the American Horse Protection Association. Choose 5-by-7-inch photos, with the horse filling up about 75 percent of the photo.
  3. Keep photos, bills of sale, veterinary records, breed registration papers, and other documents together in an easily accessible notebook or folder.
  4. Know what auctions operate within a 500- to 600-mile radius of your area, their addresses, their phone and fax numbers, and when they hold sales. Says Lohnes, “You can usually find this information through the state department of agriculture or through the state veterinarian’s office.”
  5. Compile a list of regional USDA-inspected slaughterhouses with addresses, phone and fax numbers.
  6. Have available how-to publications on recovering stolen horses, such as Amelita Donald’s The Equine Recovery Handbook. Donald’s book covers what to do if a horse is stolen; a list of contacts by state, including Mexico and Canada; how to locate additional references; a list of equine slaughterhouses; sources for permanent horse identification; and prevention tips.
  7. Remove halters from pastured horses. It is recommended that you don’t leave them hanging near stall doors, but this is your choice to make. Many horse owners prefer to leave a halter by the horse’s stall in case of emergency, and will argue that most horse thieves come prepared with rope or halters anyway.
  8. Check your horse regularly, but vary your routine. “Professional thieves will watch a farm before they go onto a property,” says Lohnes.
  9. Install lighting with photo sensors or motion detectors around the barn or property gates, or street lights by pastures along the road.
  10. If possible, replace wire fencing with board fencing. “Wire fencing is easily cut. With board fencing, thieves have to find a gate,” Lohnes says.
  11. Keep wire fencing in good repair and as sturdy as possible.
  12. Use good gates, heavy chains and padlocks.
  13. Use thoughtful landscaping. Plant trees and shrubs between the pasture and road to block visibility of the horses from the road, but keep bushes trimmed or absent around gates and barn doors.
  14. Post “No Trespassing” and warning signs.
  15. Consider an alarm system.
  16. Keep dogs or loud animals around to make noise when something is amiss.
  17. Set up a neighborhood crime watch program.
  18. Observe the movements and behaviors of unfamiliar people. If they seem suspicious, report their actions to law enforcement authorities.
  19. If possible, videotape or photograph strangers who arrive at your barn, and record the license plates and types of vehicles. Warns Donald, “Many people casing your property may come out looking like a happy-go-lucky family with a male, female and a child or two. They may come in an old vehicle, but not necessarily a pickup, in the guise of wanting to pet or feed the pretty ponies. If you have a recorded image or license plate number, and shortly thereafter something is missing, you have a lead to provide law enforcement.

Read more horse theft prevention tips >>

The Birds and the Bees, the Stallions and the Mares

10

Mare and foalThe first months of spring mark the beginning of an important time in your horse’s life—the start of the breeding season. This is the time of year when pheromones fly and everyone’s in the mood for love. Horses are seasonal breeders, and engage in their mating activities during the longer days of the year so that their foals born 340 days later can take advantage of the season’s milder temperatures and lush forages. Horses of both sexes are affected by changes on their hormone levels, which tell them it is time to mate. Longer days stimulate the development of ovarian follicles (cells and fluid surrounding an ovum, or egg) in the mare that secrete estrogen as they grow, bringing the mare into periods of “heat” behavior known as estrus. In the stallion, increasing day length brings about higher blood levels of testosterone, the primary sex hormone responsible for initiating sperm production and stimulating the increase in sexually driven behavior known as libido.

It is helpful to observe the mating behavior of free-living horses to gain an understanding of the courtship and breeding rituals of horses. Herd stallions are seldom interested in mating with their own female offspring and seldom tolerate those females mating with other stallions, so it is often necessary for both females and subordinate males to leave the herd after leaving sexual maturity. Young males usually roam about together in loosely knit “bachelor bands,” looking for stray mares, mares to steal from other herd stallions or, if the young stallion is very bold, herd stallions to challenge for possession of an existing band of mares. Compatible stallions and mares finally find each other and form long-term bonds, with sexual activity as part of the foundation. Because horses are social creatures that also find greater safety in numbers, additional compatible “stray” mares work their way into the band, and the same bonds are formed between each of them and the stallion. Mares that are not compatible with the stallion typically leave the herd. The mares that do stay form social attachments with each other and with the stallion, providing a stable and secure existence for all.

Horse sexual behavior develops a bit differently for colts and fillies. In the first few weeks of life, both colts and fillies can be seen playfully mounting their dams, initially all over the mare’s body but progressively moving toward the haunches. Fillies tend to move past this stage of sexual play after a few weeks and usually do not display further sexually oriented behavior until puberty. Colts continue to engage in playful mounting behavior, mounting their peers as well as their mothers. Colts also start to have occasional penile erections prior to puberty, but their erections are not usually associated with mounting behavior. It is not until horses hit puberty (sometime between their first and second birthdays) that true sexual behavior is initiated.

Beginning with their very first estrus, free-living fillies can be seen assuming the classic breeding posture in front of other horses, particularly stallions. If mature stallions show interest in these young fillies, the fillies often begin to show fear, which overrides the desire to stand for breeding. Pubescent colts, however, may try to mate with fillies in estrus, but are often not yet capable of inseminating them. Sexual behavior is expressed by these post pubertal juveniles, but it is uncommon for breeding to be successful until 2 or 3 years of age.

During the long-daylight period of the year, a typical mature mare will have a five- or six-day period of estrus once every three weeks wherein she may raise her tail, squat, urinate and “wink” her vulva in the presence of other horses, particularly stallions. If she succeeds in finding a mate, the process of courtship begins, which includes all the rituals of smelling, nuzzling, nipping and nickering that mares and stallions engage in prior to breeding. Mares will typically assume a rigid, wide-based stance and will urinate and wink the vulva as the stallion nips and nuzzles the mare, beginning with nose-to-nose contact and working toward the hindquarters. The stallion will usually exhibit the flehmen response, in which he raises his head and curls his upper lip as he sniffs the mare’s urine. By doing this, the stallion is believed to be testing the scents of the mare for readiness to breed by drawing them into his vomeronasal organ, which lies beneath the floor of the nasal cavity. This courtship behavior stimulates both partners by increasing the mare’s secretions to prepare her for breeding while simultaneously enabling the stallion to gain a full erection. The stallion will normally attempt to mount a few times before successfully breeding the mare, which takes less than a minute once intromission has occurred. Following breeding, the stallion will usually rest on the mare’s back for a few seconds, then dismount as the mare moves away. The pair will graze within sight of each other and will periodically repeat courtship and breeding while he mare remains in estrus.

Many geldings are known to engage in stallion-like behavior around mares in estrus, especially if they were gelded after puberty. Since there are both hormonal and instinctual components to this behavior, colts intact at puberty once had normal male sexual responses, even if never allowed to breed. An example of this is Denver Deuce, a horse my mother acquired as a 2-year-old stallion and promptly had gelded. Denver had never been turned out with fillies and had never been used for breeding in his life. Several years later, he was moved to a pasture to live with three mares, one of which was my Appaloosa mare Canela. Every spring, Denver could be seen desperately trying to mount Canela, often with a full erection, and I remember one occasion where I observed him achieve intromission. Denver was extremely possessive of Canela, herding her around the pasture and behaving protectively toward her much the same way a stallion might do with a favorite mare. I have observed other geldings behave similarly when housed with mares. Obviously, testosterone is very important for libido, but some horses are capable of exhibiting sexual behavior in its absence.

How important are sensory cues in courtship? Olfaction appears to be of primary importance for the stallion. Chemical signals in urine help horses to communicate important messages about their readiness for breeding. When the urine of mares in estrus is smeared onto geldings or mares not in estrus, previously uninterested stallions will attempt to breed with these animals. Urinary secretions from mares in estrus are spread onto man-made “mares” to help train stallions to mount a dummy and have semen collected for breeding by artificial insemination.

For mares, tactile and auditory stimulation in addition to olfactory and possibly visual cues appear to be of great importance. The sniffing of the stallion’s muzzle, along with the nuzzling, nipping, licking and nickering done by the stallion all serve to enhance the mare’s receptivity. One study showed that mares displayed estrus in response to taped recordings of stallion vocalizations and/or in response to manual manipulations of their genitalia even in the absence of an actual stallion. (It’s worth noting, however, that similar studies have not duplicated this result.)

As the days get longer, don’t be surprised if your horse acts a bit peculiar. Your mare or stallion may seem distracted and edgy, but this is normal. Try to remember this behavior is to a certain extent beyond your horse’s control. It’s the time of the year when equine reproductive hormones are calling, and your horse is just answering the call of the wild.

Further Reading
Stallion Behavior
Breeding Age for Mares

Milk Alternatives for Foals

6

Foal
Eleven months have crawled agonizingly by, but the long wait is finally over. You have joyfully witnessed the birth of a beautiful colt at dawn following a sleepless all-night vigil. All appears to be well, and you settle down in the straw to watch the new arrival’s efforts to gain his feet, eagerly waiting to catch a glimpse of him nursing. His efforts to rise are comical, but it’s well past your breakfast time and you’re anxious to see him safely on his feet before you return to the house.

After the trying ordeal of birth and the energy expended struggling to his uncertain feet, the first thing your foal needs is fuel in the form of his first meal. Eagerly, he begins searching everywhere for it. His exploration takes him across his mother’s chest, behind her elbows, around the belly and in her flank, nuzzling and sucking everything. It seems like an eternity before he gleefully discovers his mother’s equine “bottle.” If he’s lucky, he’ll find sweet life-giving milk to reward him for his efforts. But what if after his laborious search, he were rewarded with the equivalent of an empty glass?

Milk-flow failure may not be foremost in your mind as you watch the birth and first moments of your young champion’s life. Most breeders, if they even think of it, are more worried about complications from excessive milk production rather than no milk. But the complete failure of milk flow following foaling, known as agalactia, affects as many as 1,200 to 1,500 mares annually. Although comparatively rare, the outcome can be devastating to your foal.

Agalactia can occur for a number of reasons. Your mare may have a problem actually producing the milk, suffering from a breakdown of the milk production enzyme. The most likely cause of this is a hormonal deficiency from grazing on fungi-infected fescue grass. This depresses the levels of milk-producing hormones thyroxine and prolactin, and may also produce the chemical chanoclavine, which inhibits mammary development. However, the causes of MPF aren’t limited to fescue poisoning. Diseases can also lead to this problem: Acute metritis and mastitis are two of the most common.

Even if adequate milk is being produced, a mare stressed or frightened during or shortly after parturition may have plenty of milk but fail to eject. Milk ejection failure can be caused by release of the “fight or flight” hormone epinephrine, which inhibits the “milk let down” hormone, oxytocin.

The good news is that if your mare only suffers from milk ejection failure, repeated nursing attempts by the foal often will be enough to stimulate milk flow, and if not, an injection of oxytocin and warm compresses to the udder should correct the problem. Unfortunately, however, when agalactia is caused by the failure of the mammary gland to produce milk, treatment often is futile. Injecting thyroid-releasing hormone twice a day for 5 days following foaling has had fairly good results, but if treatment is discontinued before the full 5 days, milk flow will cease. Eighty percent of all mares undergoing this treatment will lactate within 48 to 72 hours of the initial injection, but due to the delay in milk production, the foals won’t receive the colostrum within that critical time needed for antibody protection.

Fortunately, there are other alternatives if milk flow is not initiated within a few short hours of foaling. Milking several ounces of colostrum from another foaling mare or several mares in the same area can be an acceptable substitute. Many breeding farms routinely milk a small amount of colostrum from their mares and freeze it for future emergency use. Your vet may know of such breeders or owners who would be willing to help you out. If you have access to a veterinary hospital of school, they may have also saved colostrum. If you’re unable to obtain any colostrum, your newborn will require serum transfusions and vigilant care.

While there’s no perfect substitute for mother’s milk, foals can survive and even thrive on artificial preparations. Once your foal has received some form of passive immune transfer, your next concern is to supply a diet his immature gut can handle. The presence of the foal and his attempts to nurse will often stimulate milk production in the mare. If not, however, a nursemare is one option — although this may involve complications since it’s important to leave a foal with his dam if they’ve bonded, even though she isn’t providing sustenance.

Of your mare stays dry and a nursemare isn’t available, raw goat’s milk or a commercial milk replacer formulated for foals can be good substitutes. Be prepared to bottle feed these hourly around the clock for the first 10 days. Feedings can be cut back to every 3 to 4 hours by the third week (day 20) with the introduction of solid foods in the form of commercial foal pellets.

Hopefully, your foal will never experience a “dry tap,” and his mother will have plenty of rich milk for the taking. But if not, your prompt awareness of the problem and appropriate action can make the difference between life and death.

Further Reading
Feeding Broodmares and Foals

Round Pen Training

8

Wouldn’t it be nice to find a single tool that would get your horse’s attention, lengthen and shorten his stride, increase his balance, tune up his cadence, fix his rollbacks, teach him to drive and allow him to blow off some steam without hurting anyone? Eureka! There is such a tool: the round pen.

No matter what your training goals are, the first step with any horse is getting his attention. Round pens create a training environment where this becomes easy. Their small diameters limit the horse’s ability to flee or evade the trainer, and their shape limits his activity options. But not only do they offer great potential for opening good communication lines between you and your horse, they can also be used to help the horse focus on specific tasks.

Horse at Work


Of course, like many other training tools, they also offer potential for abuse, so it’s important to know how to use them — and how not to. Read on to find out how you can use a round pen to further your horsemanship goals and safely enhance the relationship between you and your horse.

Hello, Can You Hear Me?
Much of the publicity surrounding round pens in recent years relates to their use as a way to develop good communication and an appropriate “herd” hierarchy between horse and trainer. This is the most basic use of a round pen, and the theory is fairly straightforward. The confines of the round pen help focus the horse’s attention on the trainer. Once the trainer has the horse’s attention and is close enough to readily direct his actions, the trainer begins putting pressures on the horse. Body language is the first level of pressure, reinforced by artificial aids such as a longe whip or a rope if necessary. Practicing the theory takes finesse and good judgment.

Your goal as trainer is to establish yourself as the lead mare in the training environment — the boss in your herd of two. But you want to accomplish this without creating fear: The goal is communication, not domination. The horse should think of you as a safe, reliable and consistent leader. Handlers who chase horses against the walls of a round pen just to prove they can make them move are proving their domination, but the only thing they are communicating to the horse is that they are a predator. They are missing out on an opportunity to teach the horse something useful while they have his attention in that confined space.

The communication between horse and trainer must be clear to both. The trainer’s request to the horse (pressure) must be distinct and deliberate. The horse’s reaction to the pressure should be prompt but relaxed. The trainer’s removal of the pressure when the horse responds correctly should be just as prompt so that the horse is rewarded for choosing the correct reaction.

Basic round pen work consists of teaching the horse to walk, trot, canter and stop in both directions and to change directions in response to changes in the trainer’s body language. Once the horse has learned these basic lessons, trainers can use round pens in a multitude of ways to school horses at every level for just about any discipline.

Body English
The key to good round pen work is understanding body language — both yours and that of the horse. Robert and Carolyn Johnson of Quarry Town Stables in Portland, Connecticut, train Quarter Horses for a variety of disciplines from western pleasure to hunters, driving, horsemanship and reining. Round pen work is part of every horse’s program in their stable. Robert advises round pen beginners to work along an imaginary line roughly parallel to the horse and about 12 to 15 feet away from the animal. This keeps you out of the horse’s potential “kick zone” at all times. Then use your body position to indicate to the horse how you want him to move. Here’s a “dictionary” to help you translate:

  • Neutral: Standing quietly, at the point of your horse’s shoulders, with your shoulders parallel to his body is a “neutral” position. Begin at a point about 12 to 15 feet into the circle from the horse’s shoulder.
  • Move Forward: Turn your shoulders slightly so you are facing the direction in which you want the horse to move. If the horse does not move off right away, step sideways and in, toward the horse’s hip, with your shoulders still turned in the desired direction, to encourage him to move forward. Dropping back slightly behind the line of the hip drives the horse forward even more aggressively for an increase in gait.
  • Slow Down: Stepping sideways so you’re in front of the shoulder line asks the horse to slow down. If he doesn’t respond, you can take a step in, toward his head.
  • Stop: Stepping toward the horse’s head a step or two farther says “stop,” although if he’s fresh or nervous he may turn instead. In this case, go directly across the circle’s diameter and turn him there, and continue until he realizes he can’t run away left or right. If you stay calm, he’ll stop.
  • Turn: Turn your shoulders parallel to the horse, take a step sideways so you’re in front of the horse’ s head, then step in as you turn your shoulders in the opposite direction from the horse’s direction of travel. As the horse turns toward the wall, stay aware of that kick zone.

Robert uses a longe whip in his “outside” hand to reinforce body language cues and to help him to stay out of the kick zone. To turn a horse, he might switch whip hands at the same time he uses his body to indicate a turn. Pointing the whip toward the horse’s shoulder encourages the horse to move sideways away from him toward the wall. He encourages the horse to move forward by pointing the whip at his hocks. If that does not create sufficient pressure, he flips the whip behind the horse. With a really lazy horse Robert may even twirl the whip in the air, and as a last resort, he’ll snap the whip and touch the horse with it. When the horse is responding correctly, the whip is held quietly, pointing downward and completely inactive, and Robert’s body is in “neutral.”

Robert notes that a worried horse may either try to come in to you or try to leave by flying around the perimeter of the pen. Enforce your space with the horse that comes in by pointing your whip at his shoulder or even tapping him with its butt until he yields your space. Don’t snap the whip at his face — you’ll make him more nervous. The horse that wants to evade by fleeing may need to be kept on a longe line to give him some reassurance. Keep him a little closer to you until he settles.

As he works his horses, Robert adds sound cues to his body language and whip aids. He uses a cluck to mean “move off,” a kissing sound to mean “trot” and whoa, of course, to mean “stop.”

Using your body language to get a response from the horse is the first part of the round pen dance. The second step, removing the pressure when the horse responds, requires good understanding and observation of horse body language by the trainer. The mere flick of an ear may be one horse’s way of saying “uncle” while another horse may offer a different sign. Horses offer multiple communication cues, which you must constantly interpret. Get to know your horse’s signs. Check out changes in the following:

  • breathing: he may even hold his breath
  • eyes: focus and tension
  • muzzle: tension and shape of the nostrils
  • ears: direction pointing/how tightly held
  • muscle: tension, especially in neck/back
  • head carriage: stiff and high or relaxed and low
  • tail carriage: relaxed, lifted, wringing
  • gait rhythm: choppy, uneven or cadenced
  • pace or speed: increasing/decreasing
  • impulsion: moving off his hocks or on his forehand

If you’re not observant of the horse’s body language and miss the cues that indicate the horse is ready to change his choice or is frightened, confused, belligerent or angry, you’ll risk destroying the communication you’re trying to build.

Multi-Purpose Pen
“There’s always a line for our round pen,” says Robert. At Quarry Town, horses from long yearlings through seasoned campaigners get round pen work. Robert starts the babies on a longe line to prevent them from trying to jump out over gates or from wandering and bumping the walls too much. The lessons are short, but even the young horses can start learning to walk, trot and whoa in response to body language, voice and whip cues, says Robert. Learning “whoa” at a young age is their most important lesson.

Young green horses may be kept on the longe or turned loose depending on their temperament. The round pen work helps them develop rhythm, consistency and balance before they even carry a rider. Working with the horse from the ground allows Robert to watch the horse moving. He can observe the horse’s cadence, head carriage, use of the back and hindquarters, as well as other nuances. This helps develop a mental picture of what the horse looks like underneath when he begins riding him.

As the horses advance in their work, the round pen lessons increase in complexity depending on the discipline the horse is being trained for. Adding logs or ground poles helps develop focus and teaches the horses to shorten and lengthen their stride. Free jumping in the round pen helps young horses learn how to use their backs, use their hocks, judge their distances and find their balance without any rider interference. Carolyn finds free jumping particularly useful for horses that worry about “spooky” jumps. She can add color, height or width to help the horse use his brain and learn to solve the problem naturally on his own.

Robert uses the arena to help teach young horses how to rollback before a rider ever asks them for the maneuver by turning them back and forth at increasing speeds. An older horse that has started trotting out of his rollbacks can be retrained to lope out of them properly in the round pen.

Carolyn starts driving prospects on long lines in the round pen where she can keep their attention fully, and she even takes older horses back to long lining lessons to tune up their rhythm or remind them how to use their back and hocks.

It’s very hard for amateur riders to concentrate and ride their horses consistently workout after workout, says Robert. When the western pleasure horses begin to get sloppy because of rider mistakes, a round pen refresher course helps remind them about rhythm, cadence and head-set without having to deal with riders’ confusing rein aids or unbalanced seats.

Robert sometimes likes to give riders a little round pen work, too. He’ll work a horse and his blindfolded rider in the round pen to help the rider feel and reconnect with the horse’s motion. A rider whose confidence needs a boost might ride a bridleless horse in the round pen. And the round pen helps those with concentration problems focus on the trainer in the same way it helps young horses.

Last but not least, the round pen is a good place to allow a fresh horse to safely blow off steam and get the bucks out in a confined area before being asked to do under-saddle work.

Pen Is Mightier
The round pen can be both an intense mental and physical workout, the Johnsons point out. You have to be careful to match the type of work and its duration to the horse’s age, experience and physical condition. Young horses are doing a great deal of mental work compared to the old campaigner back for a little fine-tuning. Circle work can put a lot of stress on legs and flabby muscles. A horse that is overweight or one that is coming back into work after a long lay-up or injury will become physically stressed more quickly than a fit horse.

Remember, says Carolyn, it takes at least 2 weeks for any level of physical conditioning to build. Watch the horse’s respiration rate and how quickly he recovers normal breathing as one guide. Keep round pen sessions short, about 10 minutes for a horse just starting into work, up to 20 minutes for the conditioned horse with plenty of round pen time under his girth. Beyond these guidelines you risk turning the training tool into a torture chamber.

Circle of Life
As with every training tool or technique, round pens need to be used with a large dollop of common sense. A round pen, in and of itself, cannot teach a horse anything. It is neither cause nor effect. You, as your horse’s trainer, are solving an equation that is the sum of this training tool, your experience and training skills, and the horse’s temperament and athletic abilities. These factors, taken together, should add up to a reasonable expectation of a safe learning experience.

A skilled trainer working with a green youngster may be able to form that initial communication bond with an animal after just a day of round pen work, while a less experienced trainer may take several days or even weeks as she and the horse learn together. A 6-foot-high round pen constructed of pipe panels may be a fine place to tune up a steady, older horse but a potential disaster for a flighty, fearful youngster likely to try climbing or jumping out of the pen. Inexperienced amateur trainers may find themselves outsmarted in any kind of round pen by a wily older horse that has gotten away with being rude or defiant for years.

Before you take a horse to a round pen to refine your relationship, think through all possible reactions that the horse might have, given his temperament and current training level. Is a confining round pen going to be a safe environment for this horse? Is your knowledge sufficient to get the reactions you want from the horse without overly stressing the horse or confusing him?

Given this horse’s typical reactions to pressures, are you putting yourself in danger working with him loose in a round pen? If you can’t answer these questions affirmatively before you head to the round pen, don’t go there.

Further Reading
Round Pen Results

Longe Away Tension

4

Stiffness in the saddle is one of the biggest hidden handicaps to good riding — not the obvious stiffness that shows itself through muscular pains in the neck, arms or legs, but rather an underlying tension that often goes unrecognized. Webster’s dictionary defines stiff as “lacking in suppleness and responsiveness.” That’s a perfect description for our purposes. If the rider’s body is not supple enough to communicate properly with the horse, then it can lead to a reduction in performance. Think you’re exempt? Many regular riders are blissfully unaware of this situation. After all, their horses seem to do all they ask of them, and when they dismount their muscles don’t ache all over — so where’s the stiffness?

One of the best ways to find out if you have any hidden stiffness is by doing some simple exercises on the longe line. Plus, this longeing work will start to fix any problems that show up. Even beginner riders should be able to cope with most of these exercises at the walk, but as confidence builds, try to do more of them at the trot. This will emphasize weaknesses, so it is a good way to check your progress.

Before starting, it’s wise to remove the stirrups and tie a knot in the reins near the withers, or twist them around each other under the horse’s neck so they cannot become entangled. If side-reins are being used, you can just remove the regular reins altogether.

Less experienced riders, and others who welcome a little added security, might like to use a neck strap. You can easily make one from a spare stirrup leather by simply buckling it around the horse’s neck near the withers. Use a thick rubber band to keep the loose end in place. Another alternative to the neck strap is to place a couple of fingers under the front arch of the saddle’s pommel whenever your balance feels threatened.

Also, when working on the longe, always be sure to make regular changes of direction. When things are going well it is very easy to get stuck on one rein, but the aim should be to change direction every 10 minutes. Otherwise you and your horse could develop the muscles more on one side than on the other and become off balance.

Before trying these exercises read these tips >>

Exercise One

Take your horse to a small enclosed area, such as a round pen, to work. As your helper has the horse walk around on the longeing circle, just let your body relax in the saddle without collapsing it, and think “loose.” Shrug your shoulders, arms dangling down at your sides, and pretend your legs are dead, so they just hang limp with the toes pointing downward. If you haven’t done this before, it will feel strange and totally opposite to all you’ve been taught about riding correctly. But don’t let this inhibit you; it is merely a means to an end.

After you’re completely nice and loose at the walk, try a circuit or two at the trot. If a moment of doubt comes along or you start to lose your balance, grab the neck strap or put two fingers under the pommel, but try not to tense your body. Don’t rush; if you can’t relax at the trot, go back to a walk until you feel more secure.

Exercise Two

A lot of body tension can come from the neck. You’ll see people riding with a rigid chin, and it may even be pointing forward. When that’s the case it’s almost certain the rest of the body will be stiff and lacking in flexibility.

To free the neck area, start by raising the shoulders right up toward the ears and letting them flop down. Do this a few times, then rotate the shoulders forward and backward, letting them hang loose again afterward. Keeping your upper body square and your head up, slowly turn your chin toward one shoulder. Don’t force it; just go until you feel resistance, then slowly turn your chin back toward the other shoulder. Do this four or five times, then bring your head back to the central position and rotate it clockwise and counterclockwise, imagining that the chin is drawing a slow circle.

At this stage, if you’re starting to feel more soft and relaxed in comparison to your riding off the longe, it’s a sure sign you’ve found some stiffness. With practice you can reduce it even further, and in the long run, eliminate it.

Before doing the next set of exercises, you should return to the normal riding position. That doesn’t mean tensing up and losing that lovely feeling you’ve now acquired. It does mean sitting deep in the saddle and keeping your upper body and arms relaxed, but this time disregarding the legs as being “dead.” Raise your toes as if the stirrups were in place, keeping the legs long and the ankle joints flexible.

Exercise Three

Simple arm movements are some of the easiest exercises to do on the longe and they are also great in helping novice riders build confidence. Raise one arm straight up, then rotate it backward in one fluid movement so the fingers describe a big circle. When the arm is upright and about to come down, try not to stick it out sideways too far or turn the body off a square axis. It’s not easy and the arm will have to wander off-track a bit on the down stroke, but do your best. As the arm comes down toward your waist, think of sitting deep in the saddle without making any conscious effort to press the seat down. After three or four rotations, change arms and repeat the exercise. If you’re feeling secure in the saddle, you may like to get a little more ambitious and rotate both arms together. This can really loosen up tight shoulders.

Exercise Four

Another alternative is to put your fingertips on the end of your shoulder with the elbow sticking out sideways. Now pretend a piece of chalk is fixed onto the elbow, and draw an imaginary circle by rotating the elbow clockwise a few times, then counterclockwise. Like the previous exercise, try one arm at a time and then both together.

Exercise Five

This one is particularly beneficial to the waist and torso. Raise your arms and hold them outward like airplane wings. Keep your arms out to the sides and turn your body from the waist so one arm eventually points to the horse’s head and the other to the tail. Then steadily turn your body 180 degrees in the opposite direction until the hand that was pointing toward the tail is now pointing toward the head. While the torso is rotating, the pelvis and seat should stay in the riding position, keeping square with the horse. If that’s too easy and you want something more demanding, try the next exercise.

Exercise Six

Assuming the horse is traveling on the left rein (counterclockwise), push your left arm out in front with the fingers extended and without tipping forward, and then bring your arm down to lightly rest the hand on the horse’s mane. Now in one steady movement, keeping your eyes on that hand, raise the arm up and bring it to the side and around, so the hand ends up on the croup just above the horse’s tail. Don’t worry if your waist doesn’t keep quite square in the saddle — it’s a long way around. You’re almost guaranteed to find some muscles in your waist and neck you didn’t know about. Now try it the opposite way. When you get good at doing this, aim to go even further around, so your hand rests on the top of your mount’s opposite hindquarter rather than his croup.

Exercise Seven

These next exercises are good for freeing muscle tension in the pelvis and legs. Try bringing each leg, one at a time, outward about 6 inches from the saddle, holding it straight there for a moment, then drawing it back so it’s almost vertical from the hip. This can also be beneficial for everyday riding straight after mounting, especially if the previous hours have been spent driving or sitting at a desk. Just take your feet out of the stirrups and do it a few times.

Exercise Eight

Bring one knee up to the pommel, like a jockey, and keeping it high, move it outward and then back down to the correct leg position. Again, make this movement steady and unhurried — and alternate the legs. Then try it with both legs at the same time. Don’t lean forward and hunch up like jockeys do — keep your upper body vertical and balanced. When both knees are held out to the side, the only contact with the saddle should be your seat bones. If you avoid swaying or tipping forward, you have a good seat and balance.

Horses hate stiff riders, and here’s an easy way to see it. Toward the end of your longe session, when your body is feeling really loose and relaxed, suddenly tense it up and watch the horse’s reaction. Just damp your buttocks together, stiffen your legs, and make your upper body and neck rigid as you walk or trot around.

You’ll probably find that within a few strides the horse will slow down and maybe even halt, but he’ll certainly lose the lovely fluid stride he had moments before. Whatever happens, he’s sure to wonder what on earth is going on. Many riders who’ve tried this little experiment have been amazed at their horse’s reaction. They never realized how their own body stiffness could make such an impact on their horses. However, once they were aware of the problem, and more importantly, did something about it, their performance improved dramatically. To ride a supple and well-balanced horse is one of life’s great pleasures, but never forget there are two sides to a partnership. For the horse, one of life’s great pleasures is carrying a supple and well-balanced rider.


Read more on longeing gear >>

Read more on safe longeing >>

Selecting Saddle Pads

1

When shopping for riding clothes, you know that what you buy needs to be sturdy, easy to wash and comfortable. Choosing the right saddle pad begins the same way — by looking at the practical details of fit and intended use. What kind of riding will you be doing? Specialty saddle pads are made for every way you can ride a horse. What kind of fit do you need? Does your horse have a conformation problem or old injury that needs special protection? What kind of environment will you be riding in? Horses working in tropical heat and humidity may be more comfortable with a different type of saddle pad than those in the northern mountains. Do you like natural fabrics, such as wool and cotton, or do you place your trust in the latest technology and the newest synthetic materials?

English Saddle Pad

Saddle Fit Is Paramount

Even the most sophisticated pad can’t correct for a poorly fitting saddle. People who think they’re using up a horse’s extra energy by “riding the horse down” may be riding until the pressure from an ill-fitting saddle is felt through the pad, causing enough irritation that the horse slows or hinders his motion to avoid the pain.

“So many horses’ hearts are bigger than their hurt that you may not realize the saddle doesn’t fit,” says Ron Wade of Fabri-Tech Inc., designer of the Cush-N-Air pad. And saddle fit can change with the horse’s seasonal shifts in weight and conditioning, so don’t assume a saddle/pad combination that fit at one time always will, cautions Wendy Murdoch, senior Centered Riding instructor and practitioner of the Linda Tellington-Jones Equine Awareness Method. ”A pad isn’t a one-time fix,” says Murdoch. “Horses change.”

Typically, a horse will move much better with a new saddle pad, because the pressure is taken off irritated areas. “If your saddle doesn’t fit well, two weeks to six months after adding a new pad, pressure points will show up again in new locations,” says Murdoch. “It just takes a while for the horse to become sore enough to show you.”

Depending on the movement of horse and rider, saddle-created pressure can alter blood flow in the horse’s back. “Muscles naturally respond to point pressure by tensing, thus inhibiting spine flexibility,” says Mary Bromiley, a physiotherapist who works with Tipperary Manufacturing Inc., maker of the Air-Ride pad. Equalizing weight allows for maximum power and length of stride, she says.

According to one study, horses can sustain the intensity of tourniquet-like pressures for up to two hours before signs of damage appear in tissues. “I’ve seen significant damage and significant performance problems created by much less pressure over much shorter periods,” says Joyce Harman, D.V.M. of Harmany Equine Clinic in Washington, Virginia. Hunters ridden only 20 minutes a day can have severe tissue damage from a poorly fitting saddle, says Dr. Harman. Studies on humans show that 3/4 pound of pressure per square inch for two hours can cause bedsores, which indicates significant tissue damage. We are probably looking at pressures similar to that for horses, she says. Early signs of damage include white hairs, heat spots, hair loss and uneven sweat patterns that you may notice after removing the saddle.

Too Much or Too Little

Ideally, a pad should add cushioning rather than change a saddle’s balance or pressure. If the saddle tree is too narrow, any pad can make the fit worse by simply shifting the location of the pressure. Adding more padding under a saddle that doesn’t fit right is like putting more socks inside a tight shoe. Too much padding can put pressure directly on the horse’s spine and the nerves that lie along it.


If you’re trying to fix a chronic problem with a pad, first check to ensure the saddle is wide enough, places no pressure on the withers or spine, doesn’t interfere with shoulder movement, fits the contours of the horse’s back and distributes weight evenly along the long back muscles. Ideally, there should be at least 2 inches of clearance in the saddle gullet, and preferably 3 inches. “It’s hard to find that much width,” says Murdoch. Many close-contact saddles have an extremely narrow gullet, leaving the panels sitting directly on the horse’s spine.

If the saddle pad is too thick behind, it will raise the back of the saddle, putting pressure on the withers and the point of the tree, pinching the withers and shoulder. Too much padding can make the saddle feel unstable to the rider. Riders may compensate by overtightening the girth, causing both physical and behavioral problems in the horse.

Thicker saddle pads can be helpful for older or out-of-condition horses that lack muscling. Padding essentially creates artificial muscle that can be adjusted with a thicker or thinner pad as the horse’s body shape changes. “But a horse can’t develop muscling where there is a pressure point,” Murdoch says. Pads that are the same thickness throughout may not allow enough room for the horse’s withers. On a thin horse with poor muscling, a pad with the same thickness throughout may put pressure on the spine where you can’t see it. “To distribute the saddle’s pressure as evenly as possible, western pads should fill in the middle as opposed to making a bridge between the front and back of the saddle,” Murdoch says.

Some pads fold over the withers for extra cushioning. Adding that second layer may still allow the saddle to sit level, but it can pinch the shoulders and create a bridge between the back and shoulders. Folding or layering several pads can create other problems. Adding a half pad that is shorter than the saddle may create a pressure line or distribute the saddle’s weight over a smaller area. The same thing happens if a single pad isn’t big enough for the saddle. Additional pads may press up into the gullet and functionally narrow it, adding rather than removing pressure.

Western saddles are designed to be used with extra padding to support the rigid tree. Using partial or multiple pads under a western saddle also risks bunching, pressure lines and narrowing the gullet, which will put pressure on the spine. The more padding, the more potential for rocking and rolling, Murdoch says.

Western Saddle Pad

Selecting the right amount of padding depends on your horse’s conformation and saddle fit. A horse with low withers and good muscling doesn’t need a thick pad. Horses with high withers, such as hunters, which are typically large, high-withered animals, need a thicker pad that will allow the saddle to sit level, although adding extra padding will not correct an ill-fitting saddle. Saddle-pad fit isn’t something you check once and forget. Carefully monitor your saddle and pad arrangement as your horse’s health and conditioning changes.

Natural Fiber and Synthetic Material Pads

Many riders like the idea of putting a natural fiber, such as wool or cotton, next to their horses’ skin.

Wool is a strong protein fiber that in a crimped, wavy form provides elasticity and resilience. Wool felt and wool/synthetic-combined materials conform well to shape, which enhances stability between the horse, tack and rider. Because it fits to the horse’s form, wool felt pads don’t shift, and the felting or fiber grinding process increases the shock absorbency of the wool fibers.

Cotton is the most commonly used fiber for saddle pads, and fleece and quilted show pads are popular on many circuits. When combined with synthetic fibers, cotton pads can be made with contouring, heat-reducing and shock-absorbing benefits and still have a natural-fiber outer shell.

Some of the latest advances in tack have come not in saddle making, but in saddle-pad technology. New synthetic materials are being used to make advanced pads for specific needs.

Special Inserts

Specialty pads can be helpful in adjusting a saddle on a horsewith conformation problems or injuries, as well as ensure the saddle sits level. Shaped or partial pads fit into or under regular saddle pads. Wither pads provide flared front protection for withers and shoulders, running the full length of the saddle to minimize pad movement. Wither pads lift the saddle front on a horse with low withers or fill in if your horse has very narrow shoulders. Keyhole pads, which are shaped like a banjo, and riser pads can help balance saddle fit on a horse with high withers. Using keyhole or riser pads for added lift to the back of the saddle helps riders balance more comfortably, so they aren’t sloping backward in the saddle.


If you use a keyhole pad, make sure that it doesn’t bunch up and actually put pressure on the spine by filling in the gullet area, Wendy Murdoch warns. “Remember that anytime you raise the back of the saddle, you tighten the front of the saddle down on the withers, so make sure the front isn’t too tight if you add riser pads,” she cautions.

Some people use keyhole and riser pads because the saddle doesn’t fit as well as it should. These pads can be a solution for a horse that is incredibly swaybacked or has exceptionally high withers. But riders who put saddles too far forward are always going to need a riser pad, says Dr. Harman. If the saddle is in the correct place, there isn’t a need for a riser pad. Using insert pads to raise the front or back of the saddle requires careful thought as to what the problem is and what is really needed to correct it. When using specialty pads, be sure that you do not create a bridge or pressure edges.

Wearability

Whether you select an Olympic-tested saddle pad or one recommended by your favorite instructor, understand that the pad will eventually wear out. Each time you remove the saddle, look for white hairs and run your hand over your horse’s back, feeling for uneven hot or dry spots. As you wash the pad, check for wear spots or bunching. If you find irregularities in either the pad or horse’s back, it will be time to shop again, and, as quickly as saddle-pad technology is advancing, you will find many more styles to choose from.

Careers in the Equine Industry: Entrepreneurial Excellence

2

For some, a foray into the horse industry involves starting a company from the ground floor. Two women have done this, literally, by developing riding boots that have revolutionized equestrian footwear. Elizabeth Cross and Pamela Parker, co-founders of Ariat International Inc., located in the San Francisco Bay area, have made their company’s name synonymous with quality and technology.

Unlike some small businesses that never get off the ground due to lack of planning and vision, Ariat is solid in both departments. This is due to its two well-educated, savvy businesswomen who, being equestrians themselves, know their market.

“We both have horses in our backgrounds,” says Cross. “Pam has been riding since she was 10 and currently keeps her horse locally on the Peninsula. I grew up on a Thoroughbred farm in Pennsylvania, where my father raised racehorses. Plus, I did all the 4-H stuff, so we both have a real love and familiarity with horses.”

Parker and Cross met while studying for their MBAs at Stanford’s Business School. After graduation, they joined a large strategy analysis firm working on Reebok athletic shoes. While analyzing different markets for athletic footwear, they informed their client of a category of interest: equestrian footwear.

Reebok was overloaded with new niche markets, so Parker and Cross were able to take the idea and run with it. “We left the firm and did two things: started developing product with engineers and designers from the athletic shoe business, and writing our business plan,” says Cross.

Through careful management of the product manufacturing overseas, the strategic marketing domestically, and the advertising campaign nationally, the company began shipping product in December 1992. It took off like a shot, and Ariat has since turned equestrian footwear around.

“We want to be known as the company that designs boots for athletic performance,” Parker says. “Most athletic shoe companies don’t believe that riding is a sport, and most boot manufacturers choose to think that riding is a lifestyle. But we feel that it is quite a demanding sport, and what we manufacture is athletic equipment that enhances your ride.”

Their line has expanded to include men’s and winter footwear, a half-chap/boot riding system, and most recently, a tall field boot. The company has grown in size as well. The majority of employees at Ariat are women, and a good deal of them are riders. “We have the great fortune to have access to incredibly committed, motivated and productive employees,” says Cross. “Because we sell to a customer base of enthusiasts and hobbyists, we also hire people like that. It really helps us create great stuff. People are able to work in their position, be it marketing or finance or product development, and they also get to work in the industry they love, which is horses.”

Parker reminds people interested in working in an equestrian profession not to overlook a solid horse-industry company. “So often, it happens that people who are really passionate about horses think that the only opportunities are in training or instructing,” she says. Equestrians should try to think about a career differently, and become affiliated with a horse organization or company.

“Working for a horse company is not just a job,” she adds. “Employees here truly believe that they’re doing work that is changing the industry.”

Ariat has seen success reflected in many ways. Cross says, “The biggest reward, first, is building a great environment and a great culture. The second thing is making great product, and really revolutionizing equestrian footwear, so that equestrians can come to us for the latest in technology. Having a leadership role like that is incredibly exciting. Those two things, the product and our team, are highly rewarding, and I don’t know which would be more important.”

Read about other unique equestrian careers.

Stolen Horse!

14

Each year, about 55,000 horses are stolen by bands of thieves who often work one area or state. Experts say the actions you take in the first 24 to 48 hours are crucial if you hope to recover your stolen animal. Robin Lohnes, executive director of the American Horse Protection Association, and Amelita F. Donald, president and founder of International Equine Recovery Net, have the vital information you need to help in the event your horse goes missing.

Steps to Take

Act Swiftly. “In a missing livestock incident, the more time that goes by after the first 24 hours, the less likely your chances are of ever seeing that animal again,” says Donald. Part of knowing how quickly to move is knowing what to do beforehand. You should have documents, photographs and contact numbers up-to-date and readily available.

Escaped, Stolen or Mixed Up? Evidence of theft includes forced entry, fresh tire tracks, cut or broken fencing, missing halters or tack, open barn doors or gates, illuminated lights, missing trailers, or anything unusual in the barn or on the grounds. If your horse has escaped on its own, you may see bite, scrape or kick marks on its stall door, or spilled feed or grain.

Work With the Law. Report the theft immediately to local authorities such as the city police or the sheriff’s department. Insist that authorities take a case report, even if only over the phone, including a description of your horse, noting any brands, freezemarks, scars or other markings. You may need the report later for insurance purposes, court cases, or to document to other agencies that a theft transpired. Also, get out your bill of sale, veterinary records, breed registration papers, other documentation and color photographs that will help identify your horse.

Distribute Flyers. Create flyers containing a clear photo and a description of your horse, and your day and evening phone numbers. Fax, express mail or hand deliver your flyers to slaughterhouses, rendering facilities, livestock sales and auctions, racetrack and rodeo managers, and middleman horse traders within a 500- to 600-mile radius. Also send flyers to the State Department of Agriculture (Division of Animal Services), the state veterinarian, state cattleman’s association, breed association, state horse council, equine veterinarians, neighbors, and local farm or area equine newsletters. Post flyers at your local feed store and tack shop as well.

Visit Local Livestock Auctions. “Compile a list of local auction houses, especially the ones that meat buyers attend,” advises Lohnes. Writes Donald in The Equine Recovery Handbook, “Check the parking-lot sales. Look in all trailers and holding pens. ‘Hot’ horses show up in the auction yards seconds before the actual sale begins.”

Call Slaughterhouses. “Check in daily with the foreman,” advises Donald, although she warns that a slaughter facility is more apt to look for an animal that carries identification. “If it has no identification, there is no way you can prove that any horse is your horse,” she says.

Advertise. Place ads in local or regional equine papers. Sometimes leads may turn up.

Seek Professional Assistance. The International Equine Recovery Net (IERN) can spring into action as soon as they verify that a police or sheriff’s report was made.

Explains Donald, “We fax broadcast to packers and auctions and, depending on their situation, to the individuals who are most likely to help with the recovery of a missing horse. We call the slaughterhouses every day. We work with the horse owner on the phone, advising them what they need to do within a 50-mile radius of their property.”

Locating Your Horse. If you find your horse, inconspicuously keep it under surveillance, as the situation could be dangerous. Summon law enforcement authorities right away, and let them take care of the recovery.

Read more horse theft prevention tips >>

Trailer Training Psychology

As the days get longer and the weather warms up, our thoughts start to turn to the myriad activities we hope to enjoy with our horses this year. To make the most of the seasons, enterprising horse owners endeavor to fill free time with events such as horse shows, lessons, clinics, trail rides and camping trips.

Our plans may seem innocuous as we imagine them now, but how they actually play out in reality may be an entirely different matter. Looming just beyond our daydreams is a stark necessity that is often a formidable obstacle to the enjoyment of equestrian activities away from home. Somehow we have to load our horses into a trailer and transport them without incident to the event site. If we contemplate the conflict between the horse’s basic nature and what is expected of him for trailering, it’s no surprise that problems frequently occur.

Loading a horse on the trailer

A few years back, an acquaintance at my barn and I made plans to haul our two young horses to a local peninsula to enjoy a day’s outing on picturesque seaside bridle paths. My mare had some experience loading and hauling to local shows, and Darla’s horse Shadow had recently been trained to load into her trainer’s two-horse trailer.

We carefully wrapped Shadow’s legs, attached a rubber head protector to her halter crownpiece and gently asked her to move forward into the trailer. She stepped in with confidence and began eating hay while we attached the trailer tie to her halter. Just to be on the safe side, Darla and I decided to take Shadow on a short ride around the stable grounds before loading my mare into the other stall and setting off on our journey. Everything seemed to be proceeding without any trouble as we started rolling. We had gone about halfway around a row of pipe corrals when we heard a restless clattering from behind us, quickly followed by an abrupt lurching motion.

Darla walked back to see what happened and discovered her mare had panicked and jumped into the feed manger with her front legs, causing her head to be pulled into a dangerously unnatural position by the trailer tie.

We urgently set about trying to free the horse. Darla opened the back doors of the trailers while I entered the front through an emergency escape door and cut the tie strap. Shadow’s head immediately slammed into the roof of the trailer with enough force to split the rubber head protector. She then managed to force her head out of the trailer’s narrow emergency door as she struggled to free herself from the tight space she was wedged into.

With the assistance of a few other boarders, we forced Shadow’s head back into the trailer and secured the emergency escape door. The boarders went in search of strong ropes with which to “pull” Shadow out of the manger while Darla ran to call the vet. In the interim, Shadow continued to thrash and flail, and in the course of her struggles managed to extricate herself from the manger and roll out of the trailer.

Fortunately, Shadow’s injuries had missed her vital areas and she escaped from the ordeal with only 22 stitches above her right eye. For Darla and me, the experience served as a frightening lesson about how quickly everything can go completely wrong during even a well-planned horse-trailering experience. While Shadow (who has since recovered from the incident) had been taught to load into a trailer, she had never been in a moving trailer before.

To minimize the possibility of potentially disastrous trailering problems such as the one just described, it makes sense to try to understand the trailering experience from the horse’s point of view.

The types of problems people tend to have while trailering horses can be broken down into two general categories: loading or unloading problems and hauling problems. At the root of most loading problems is one common explanation, which is simply that horses are born with a natural wariness of confinement. This isn’t hard to understand when we consider that horses have evolved as prey animals whose primary defense mechanism is to flee from danger. The horses that manage to survive in the wild are those that avoid any situation where they might find themselves trapped without and escape route.

In this respect, our domestic horses aren’t very different from their feral cousins. Although selective breeding has had positive effects on temperament and tractability, most horses still have the potentially adaptive genetic “hard-wiring” of their prey species.

Bearing this in mind, let’s try to consider the interior of a typical two-horse trailer from a horse’s viewpoint. The horse is being asked to move from the relative safety of open space into a dead-end space that isn’t much bigger than his body—a space where he stands alone and vulnerable, removed from the comfort and safety that comes from being around other horses. To the horse, a trailer is a dark, enclosed space to which his vision and other senses must adjust, and a potential trap from which no escape route is evident. If you were a horse, would you willingly walk into a place like this?

Recognizing the underlying behavior in most loading problems as fear of confinement gives us the understanding we need to solve them. We must work to alleviate our horse’s fear of trailer confinement or resign ourselves to lifelong battles at loading time. The most important part of this training is to do it well in advance of the actual event, on days when you literally have all day to spend on it. This cannot be rushed, because the horse must set the pace of these lessons. If the horse is pushed, he will not have the chance to relax enough to realize there’s nothing to fear about trailers.

There are many good books and videotapes on trailer-loading training. Two that I have found particularly informative are the video Trailer Loading & Hauling Tips by Jimmy Williams, and the section on successful trailer loading in the book Lyons on Horses, by John Lyons. I have incorporated many of the elements of these training methods in my own training approach.

I like to begin by leading the horse at his shoulder toward the trailer. At whatever point the horse stops moving toward the trailer, I stop with him and leave a little slack in the lead line, waiting as long as necessary for him to relax. The signals that he is relaxing are when he drops his head back down to its normal below-withers position and also loses the rigidity in his posture. This is when I ask him to move forward again. If he balks, I begin lightly tapping his hindquarters with a rigid, 4-foot “pole”—a piece of ½-inch PVC tubing or the blunt end of a firm whip will do—and I steadily increase the intensity of the taps until I get at least a few steps of forward movement. If the horse stops again at this point, I stop with him and again wait for signs of relaxation before asking for any more forward progress, at which time the process repeats.

We continue this slow and steady cycle of relaxation, followed by asking for a little more forward movement right up to and eventually into the trailer, always allowing the horse the opportunity to relax before asking for more.

It often takes many patient hours to teach a horse to load calmly, but this approach gives the horse the chance to relax and realize there’s nothing to fear about trailers. Pulling him in against his will, on the other hand, reinforces the fear. Once the horse is in the trailer for the first time, I allow him to back out whenever he’s ready, and then ask him to load right back in again.

I repeat the loading in and out of the trailer several more times. At the lesson’s conclusion I feed the horse his evening ration in the trailer, further reinforcing the message that the trailer is a pleasant place where good things happen. This lesson is repeated daily until I am certain that the horse is relaxed and happily eating his meals inside the trailer. At this time I will take my calm pupil for a short, slow drive around the stable grounds and perhaps around the block. I gradually increase the length of the trips in the trailer during successive lessons.

On the day of the horse’s first actual event away from home, rather than risk undoing all of this work, I plan to load and haul a few hours earlier than I ordinarily would. This assures me that my approach will be patient and pleasant for the horse. Finally, if the horse’s behavior indicates that previous lessons may need repeating, it’s usually worth it in the long run to skip the planned event and spend more time reinforcing those earlier lessons correctly.

In contrast to the innate anxiety which is at the root of most loading problems, the vast majority of hauling problems are learned behaviors resulting from aversive prior hauling experiences. While it’s true that some horses react to any trailer movement by panicking, as Shadow had, we should recognize that many hauling problems are preventable.

A horse that has had one or two frightening trips being jostled about in a speeding trailer may develop behavior problems such as climbing divider walls (especially on turns as he loses his balance), kicking the rear panels and jumping into the feed manger. Sometimes the anxiety carries over into loading problems as the horse associates being loaded into the trailer with the trip to come.

If your horse behaves dangerously during handling, it is advisable to discuss the problem with your veterinarian, as the horse may require tranquilization to reduce the risk of injury during retraining.

Many conscientious owners don’t realize how rough the ride in a horse trailer is for their horses. I encourage every horse owner to take a short ride around his or her property while standing in the horse trailer (don’t do this on public streets, as it is illegal in some states). When I tried this, I was very surprised to find out how noisy, bumpy and awkward it was riding in the trailer in contrast to the comfortable ride I’d always enjoyed in the towing vehicle. This experience helped me to understand how horses can develop hauling behavior problems resulting from driving that seems quite reasonable to us.

To help prevent dangerous hauling behaviors from showing up in your horse, imagine that your horse trailer is a great, brimming tub of water that you’re pulling around behind you. Try to make all your stops and turns so smooth that not a single drop of water spills out. If you endeavor to haul your horses with this degree of gentleness, your efforts will most likely be rewarded with problem-free trailering.

Read more about safe trailering.
Get some tips on safely unloading your horse.
Before you hit the road, consult our trailering checklist.

0FansLike
0SubscribersSubscribe
We use cookies to help personalize content, tailor and measure ads, and provide a safer experience. By navigating the site, you agree to the use of cookies to collect information. Read our Cookie Policy.
OK